Explore the User Interface
Learning Objectives
After completing this unit, you’ll be able to:
- Explore your visits and sync status in the User Cockpit.
- Access the 360° view of a store and visit-related information in the Retail Store Cockpit.
Get to Know the User Cockpit
In the previous unit, Chantelle installed the offline mobile app to her device. In this unit she explores the UI, which is based around two cockpits: the User Cockpit and the Retail Store Cockpit.
First things first. When Chantelle logs on to the installed app, automatic synchronization begins. Once the sync is complete, the app opens the default landing page, the User Cockpit. Also called Your Day, the User Cockpit is where she can access all her information in one place. Chantelle can review information about her visits and sync status in this cockpit.

The User Cockpit organizes the information into the following cards.
-
Summary: Displays user information such as the photo or avatar of the field rep, name and greeting, day and date, and number of open visits. To change the displayed date, simply tap the arrows. The number of open visits changes according to the selected date. To set the date to the current date, tap Today.
-
Visits for today: Displays the list of visits scheduled for the day that you selected on the Summary card. The list displays only planned and in-progress visits. From this card, you can execute, complete, or reschedule a visit; view the details of the visit; and navigate to the store. To see a weekly view of visits, tap SHOW VISIT CALENDAR on the card.
-
Sync Status: Displays sync status information such as the date and time of the last download and upload of data and the details of the data to be uploaded. To initiate a sync from this card, tap
 . Field reps can also view sync statuses of objects.
-
Map: Displays the map for the current visit. To see the route to the next visit, tap Navigate. To see a list of all the visits scheduled for the day, tap DAILY VIEW.
Review Visits in the Calendar
Chantelle wants to see a list of her visits for the week. From the Visits for today card, she navigates to the Visit Calendar page by tapping SHOW VISIT CALENDAR.
By default, the Visit Calendar page shows a weekly view. Administrators can set up either a 7-day-week view or a 5-day-working-week view in User Settings.
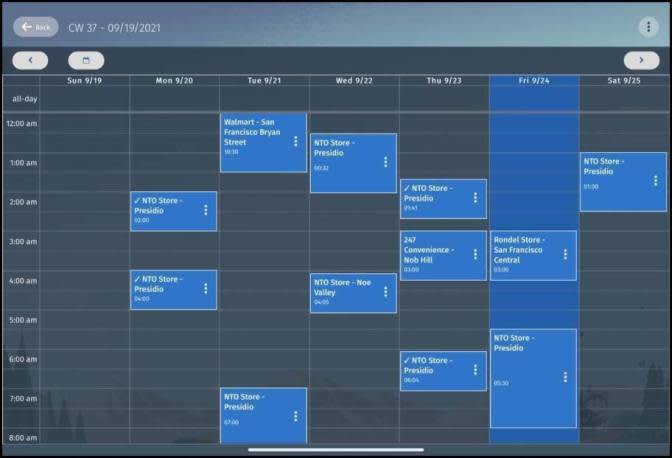
Chantelle is excited to see that she can perform a number of activities on the Visit Calendar page. Here’s what she can do.
- Tap
 to select another date (week).
- From
 :
:
- Tap All Visits to see the visits scheduled for the week.
- Tap Only open visits to see the visits that are in progress or haven’t started.
- Tap Daily View to see the visits that are scheduled for the day. When you select the daily view, visits are sequenced based on the optimized route and planned visit timing.
- Tap a visit to:
- Complete the visit.
- Reschedule the visit.
- Execute the visit. Tapping execute takes you to the Retail Store Cockpit (more on that later).
- Navigate to the store.
- Get more details of the visit.
- Drag a visit onto a different date or time to reschedule the visit.
Plan Daily Visit Route
Next, Chantelle wants to review her daily visit route on the map. She taps DAILY VIEW on the Map card, and navigates to the DAILY VIEW page.

Here, Chantelle notices that her visits for the day are arranged in an ordered list on the left pane and marked on the map.
She can see the entire daily route on the map along with traffic information and the recommended routes between two stores. She can also postpone or execute a visit.
Get to Know the Retail Store Cockpit
Chantelle is eager to check out the Retail Store Cockpit next. This is where she can see a 360° view of a store, get visit-related information with in-store live reporting, and access all her visit tasks in one place.
To go to the Retail Store Cockpit, Chantelle taps a visit in the Visits for today card in the User Cockpit.

She sees the following cards on the Retail Store Cockpit page.
-
Retail Store Info: Displays store information such as store name, address, store image, and badges based on customer priority. The card also shows store contact information such as image and phone numbers of the store manager.
- To call a store manager, tap the phone icon.
- To send an email to a store manager, tap SEND EMAIL.
- To view detailed store information, tap SHOW DETAILS.
-
Visit Details: Displays details such as visit duration, planned visit time, actual start time, priority, and status of the visit.
- To edit visit information, tap EDIT.
-
Tasks: Displays the open tasks that are assigned to the visit. The app supports Inventory Check and other custom tasks.

Chantelle can start or end a visit on the Retail Store Cockpit page and capture pictures for various visit tasks. She’s now excited to use the app and record the details of her visit. Let’s find out how she fares in the next unit.
Resources