Connect to Technologies and Select Your Listing Type
Learning Objectives
After completing this unit, you’ll be able to:
- Describe the differences between solution and consultant listings.
- Discuss the prerequisites to listing your solution on AppExchange.
- Explain different listing types and package types.
- Describe different types of technology that you can connect to the Partner Console and your listing.
Determine Your Listing Type
Your AppExchange listing is your primary marketing tool to promote your solution. In your listing, describe your solution, pricing, support, and other details so that customers can determine if your offering is right for them. Upload videos, white papers, and other content to help customers understand what your solution delivers.
Before you create your AppExchange listing, determine your listing type. You’ll gather different types of materials if you’re listing a solution than if you’re creating a consultant listing.

Solutions
Leung is creating a solution listing—an app as a managed package—so she grabs her listing plan.
At minimum, to submit your solution for listing approval you must enter some basic information about your listing including its title, description, required Salesforce Products, and your pricing plans. Sit tight, and we’ll show you where to enter that info in the Listing Builder.
Consultants
As a consultant, you’re a Salesforce expert. While there isn't a strict set of requirements about what to include in your consultant listing, it's important to share information that showcases your business.
-
Expertise: Consider your certifications and your partner navigator, industry, and Salesforce achievements.
-
Supporting documentation: You want to add links to info your potential customers can read, like whitepapers and data sheets.
-
Company info: Write up a snappy description about your company, and don’t forget the basics: where you’re located, what regions you support, and how to contact you.
-
Visuals: A picture is worth a thousand words, so be sure to include attractive visuals that convey what your consulting business is all about.
Connect Your Technology
In the Partner Console, you can work on many tasks in parallel. For example, you can connect a solution to the console and start its security review while you also work on your AppExchange listing. Leung decides to connect her solution and her trial template first, then she’ll get started on her new listing while her solution’s in security review.
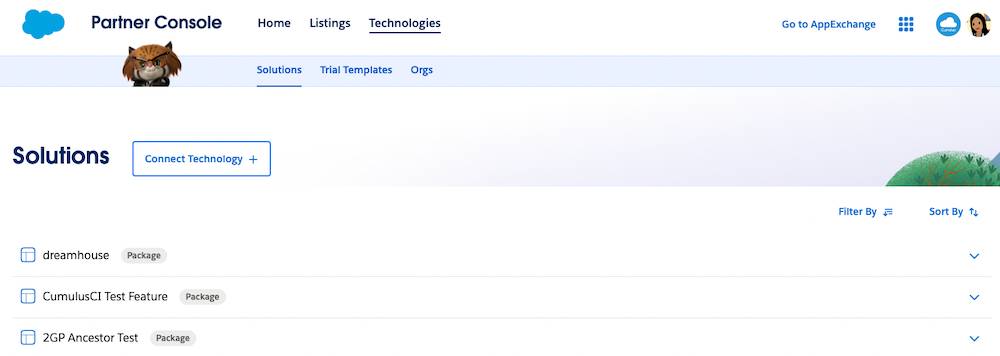
The Technologies tab contains three sections: Solutions, Trial Templates, and Orgs. In Technologies you can do the following tasks.
Task |
Technologies Section |
Required or Optional |
|---|---|---|
Start the AppExchange publishing process by adding package and API solutions to the Partner Console. |
Solutions |
|
Start and manage the AppExchange security review process. |
Solutions |
|
Register managed packages with the License Management App (LMA) in your Partner Business Org (PBO). |
Solutions |
|
Connect to trial templates. |
Trial Templates |
|
View your connected org names, org IDs, and dates you connected them. |
Orgs |
|
Leung is listing a managed package. Based on her solution and pricing plan, Leung does the following steps.
- Connects the org containing her managed package to the Partner Console
- Starts and finishes the AppExchange security review
- Registers her managed package with the LMA
- Connects the org containing her trial template to the Partner Console
Let’s review the steps Leung took in the Partner Console to accomplish these tasks.
Connect to Your Solution
On the Technologies tab, if any of your colleagues are working on AppExchange listings, you see the solutions that your colleagues have connected. To connect your own solution, walk through the following steps.
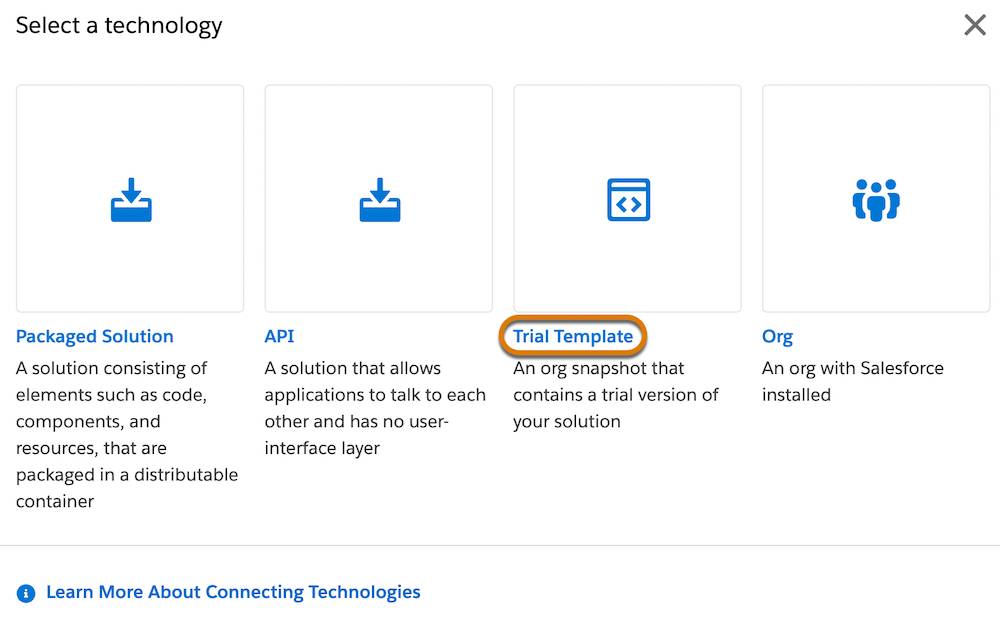
- On the Technologies home page, click Connect Technology +.

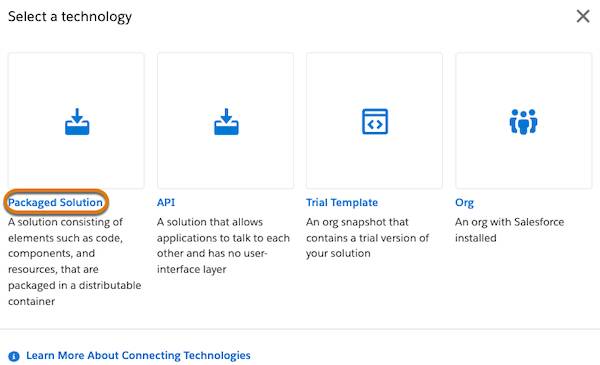
- Click Packaged Solution.
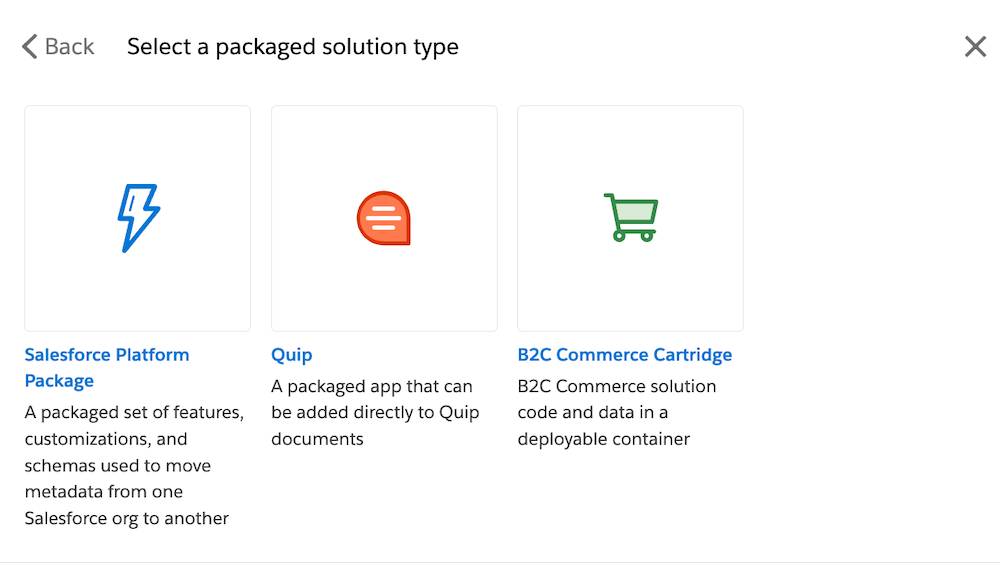
- Click your solution type.
Leung connects to a Salesforce Platform package solution. To connect to a B2C Commerce solution, you select Packaged Solution, but provide different details.Solution Type
Details
Salesforce Platform Package
Org to connect to
Quip
Name of and URL for your Quip app
B2C Commerce Cartridge
Name of and URL for your cartridge
-
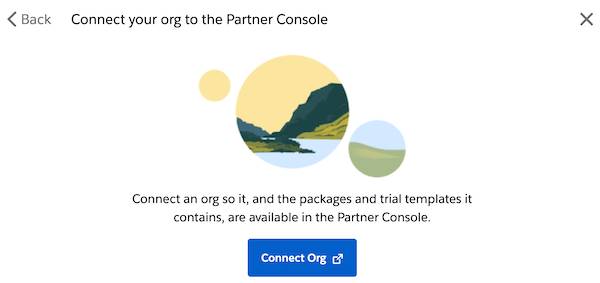
- Click Connect Org.
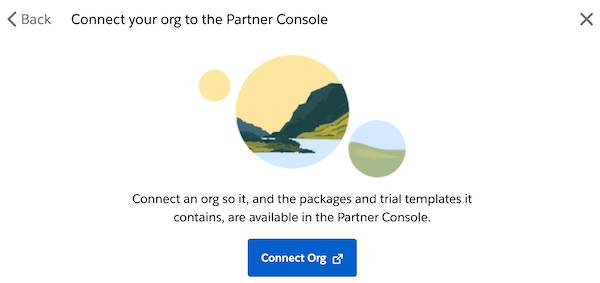
- Log in to your Salesforce org.
- In the Allow Access window, click Allow.
Your solution now appears in the list of solutions on the Solutions tab. Similarly, when you connect an org with a trial template, it appears on the Trial Templates tab, and the orgs you’ve connected appear on the Orgs tab.
Start and Manage the AppExchange Security Review Process
Next, if you’re listing a Salesforce Platform package, Marketing Cloud Engagement API solution, or Salesforce Platform API solution, start the security review.
On the Solutions tab:
- Click your solution.
- Click Start Review.
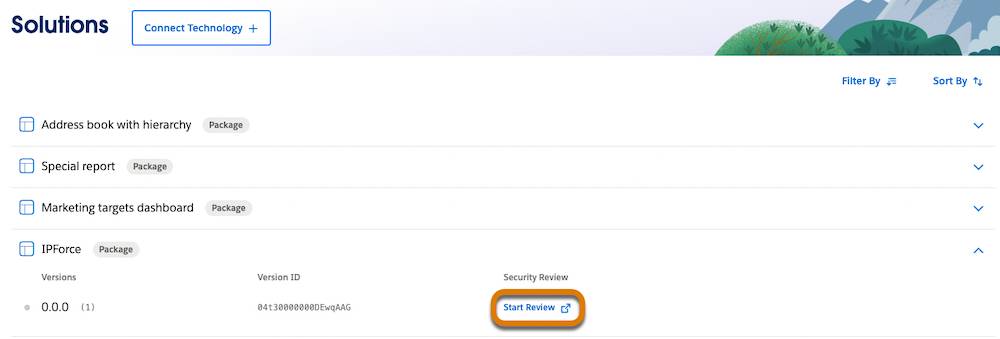
- Follow the security review wizard steps.
Register Solutions with the License Management App (LMA)
Use the License Management App (LMA) to manage licenses for your managed packages. To get started with the LMA, register your managed package.
On the Solutions tab:
- Click your solution.
- Click Register Package.
- Enter the username and password for an org that contains the LMA, such as your Partner Business Org (PBO).
- Click Log in.
Your package is registered with these default license configurations: active and site-wide. To change the default, modify your package’s license status and license type. The default behavior is applied when the package is installed by your customers.
For more on using the LMA, read Managing Licenses in the ISVforce Guide.
Connect to Your Trial Template
If you have a trial template, connect it next.
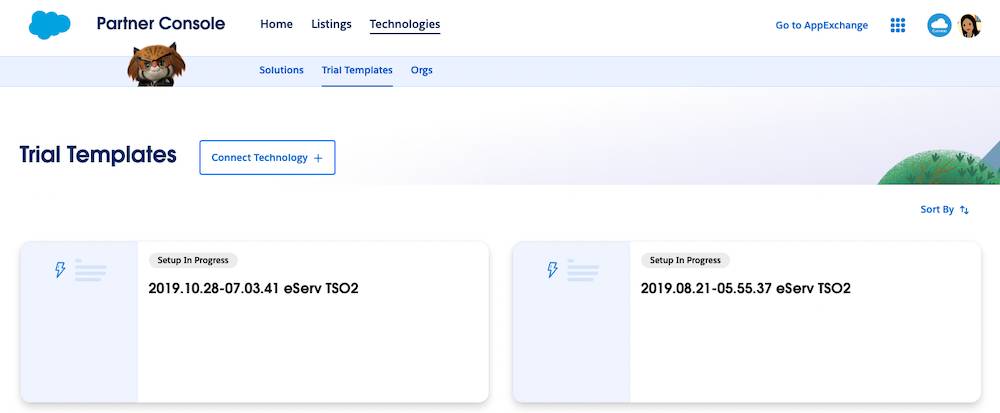
On the Trial Templates subtab:
- Click Connect Technology +.
- Click Trial Template.
- Click Connect Org.
- In the Allow Access window, click Allow.
Your trial template org now appears in the list of trial templates on the Trial Templates subtab. Awesome!
Start Your New Listing
Leung can publish her listing once the Cloudy Health security review is complete. But until Leung receives approval, she has plenty to do: she can work on her whole listing.
From the Partner Console home page, Leung clicks Listings.
- Click New Listing +.

- Select your listing type. Leung clicks Packaged Solution.
-
Packaged Solution: Choose Packaged Solution to list solutions bundled as managed Salesforce Platform packages that your customers install in their Salesforce orgs, or to list B2C Commerce cartridges.
-
API: Select API to list your distributable pieces of code that callout to an API, such as the Salesforce Platform API, Marketing Cloud Engagement API, or Mulesoft.
-
Consultant: Choose this pathway to create your consultant listing and add your expertise, accolades, and links to attract the best-fit customers.
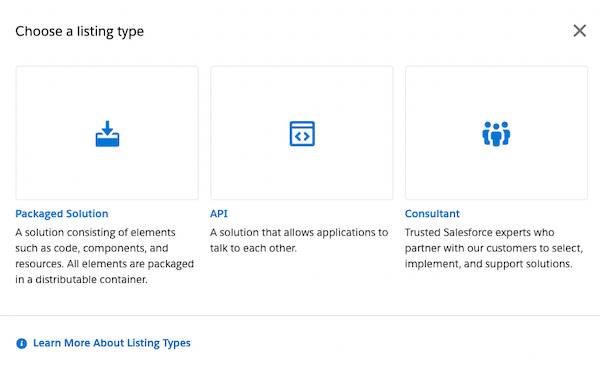
- For packages, select your package type. Leung clicks Salesforce Platform Package.
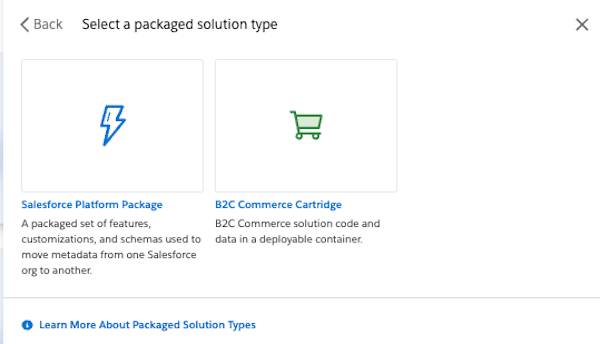
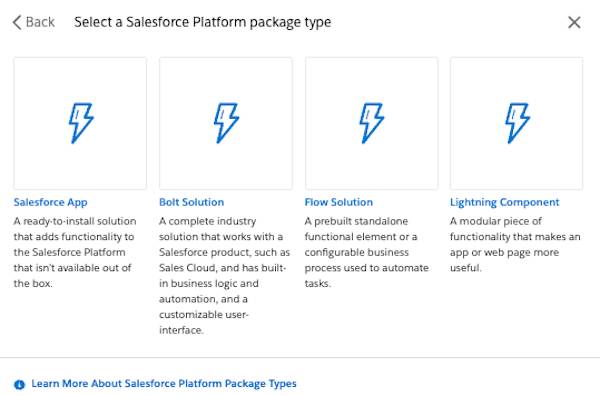
- Select which Salesforce Platform package type matches your solution. Leung clicks Salesforce App.
-
Salesforce App: Apps contain custom components and features bundled into easy-to-install managed packages.
-
Bolt Solution: Bolts are industry solutions that work with a Salesforce product, such as Sales Cloud. They have built-in business logic and automation and a customizable user-interface.
-
Flow Solution: Flows are prebuilt, standalone functional elements or are configurable business processes that are used to automate tasks.
-
Lightning Component: Lightning components help customers build apps and customize pages in Lightning Experience in an easy, no-code way.
- Select the primary language for your listing. Leung clicks English.
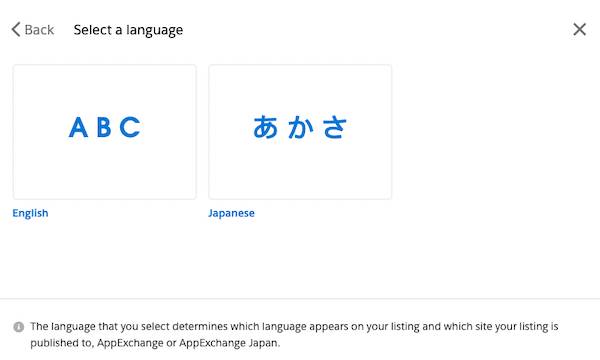
- English: Select English to publish your listing on AppExchange.
- Japanese: Select Japanese to publish your listing on AppExchange Japan.
Fantastic! After Leung chooses her listing type, the Listing Builder launches. The first thing Leung notices is the nifty listing steps tracker. Listing Builder is where you start new listings and manage all of your existing listings.
In order to save her new listing, the minimum info that Leung has to enter is a Listing Title.
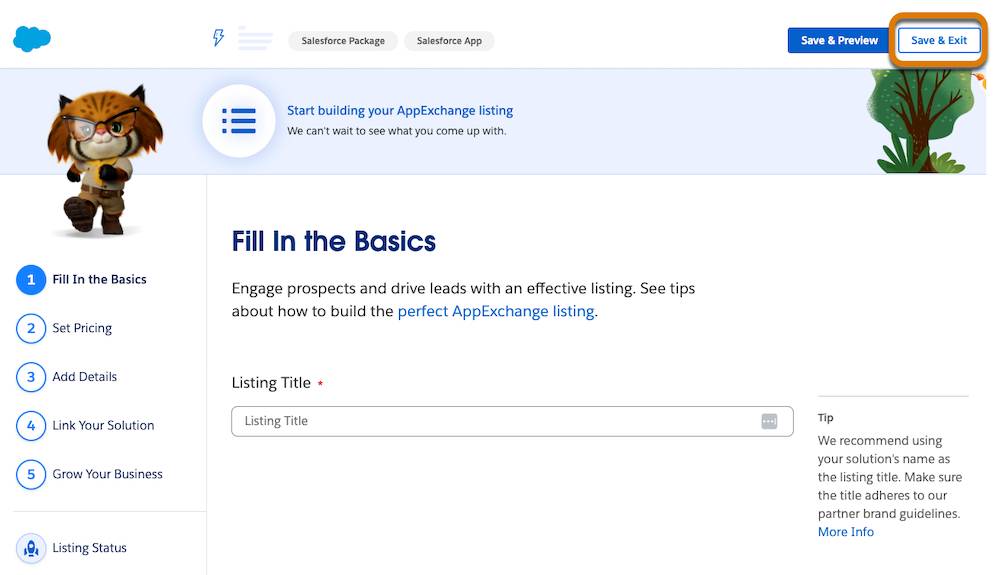
- In Fill in the Basics, add your Listing Title.
- Click Save & Exit.
Take a Break
Leung has toured the Partner Console and understands the magic of the Technologies tab. She started and saved her brand new listing. She also learned that the Listing Builder has five steps to create new and manage existing listings. Now it’s time for a well-deserved coffee break. Grab your favorite beverage, and then follow Leung to learn more about the Listing Builder in the next unit.
Resources
- Salesforce Help: Salesforce Editions
- Trailhead: AppExchange Pricing Strategy for Partners
- Trailhead: AppExchange Security Review
- ISVforce Guide: AppExchange Security Review
- ISVforce Guide: Publish Your Solution on AppExchange
- ISVforce Guide: Managing Licenses
