Complete Your AppExchange Listing with Listing Builder
Learning Objectives
After completing this unit, you’ll be able to:
- Describe the Listing Builder steps to create an AppExchange listing.
- Discuss the details of an AppExchange listing that help your solution stand out.
- Explain how to create pricing tiers in an AppExchange listing.
Steps to Create Your New Listing
Now that Leung’s technology is connected and she’s started her new listing, she grabs her solution’s pricing plan. She also chats with her sales and marketing teams to gather her solution’s details. Ready, set, go!

From the Partner Console home page, Leung clicks her listing.

Leung first looks at the Listing Builder steps tracker. It tracks what steps have been completed and what is left to do.
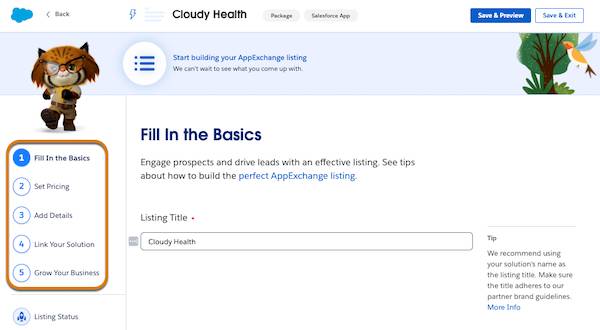
Leung sees five steps to create her listing.
-
Fill in the Basics. Input the basics about your listing, from your listing name to the Salesforce editions your solution supports.
-
Set Pricing. Add your pricing plan details, and get your plan approved.
-
Add Details. Build out your go-to-market plan.
-
Link Your Solution. Add your solution to your listing and choose the installation method.
-
Grow Your Business. Set up free trials, test drives, and lead collection to connect with your potential customers.
As you complete these five steps, you review all of your prework, and then you’re ready to publish your listing!
Fill in the Basics
Leung gathers her content and marketing materials before she starts. She needs her Listing Title, Terms & Conditions, her detailed solution description, and so on.
Leung skims Fill in the Basics to make sure she has everything required.

Leung jots down this handy table:
Basics |
Things to Consider |
Cloudy Health Inputs |
|---|---|---|
Listing Title |
Ensure that your listing name is descriptive, and attractive to customers. |
Cloudy Health |
Brief Description |
Provide enough detail about your solution to entice potential customers to try it out. |
Cloudy Health helps companies efficiently track environmental issues, projects, and employee assignments using the most accurate data from different sources. |
|
Solution Specifications
| ||
Required Salesforce Products |
What products must your customer have installed to use your solution? |
Service Cloud |
Compatible Salesforce Products |
Are there optional products that allow your customers to use additional features, such as custom objects or reports? |
Experience Cloud |
Supported Salesforce Editions |
What is the minimum edition your solution works with? Does it work with additional editions? |
Enterprise, Unlimited |
Supported Features |
Does your solution work with Lightning Web Components? Salesforce Shield and Mobile? Be sure to select all of your supported features. |
Lightning Experience, Multiple Currencies |
Supported Industries |
Is your solution designed to meet industry-specific challenges? Select all that applies. |
Manufacturing; Engineering, Public Sector |
Target User Persona |
Your solution solves the business challenges for which types of users? |
Administrator, Developer |
Supported Languages |
Supporting users in their native languages can be immensely useful and attractive. Be sure to select all languages your solution supports. |
English, Japanese |
Business Needs |
Business Needs are categories that help your customers find your solution based on their jobs to be done. |
Analytics Project Management |
Impact |
Highlight how your business drives social change by selecting if your business is Diverse-owned and Accessible, and if you’re a Pledge 1% participant. |
Diverse-owned Business Accessible Solution Pledge 1% participant |
Additional Requirements |
Sometimes a solution has other requirements, such as browsers, operating systems, or devices. If yours does, add that info here. |
N/A |
Business Contact |
Who should your customers talk to about subscriptions? |
leung.chan@getcloudyconsulting.com |
Leung can always return to this section and edit her work by using the tracker or by clicking the Back button.
Leung is satisfied with her work so she clicks Next.


Set Pricing
From the Partner Console Leung clicks her listing.

Leung clicks Set Pricing and sees pricing model options.

There’s a lot to learn about AppExchange pricing models. Luckily Leung already completed the AppExchange Pricing Strategy for Partners Trailhead module and created her pricing strategy.
The Cloudy Health solution uses a freemium model: Cloudy Health is free to use, up to specific feature-based limits. With the freemium model, she’s required to use the Channel Order App (COA) to track her solution’s orders and her own payment system to collect Cloudy Health's functionality-based tiered pricing payments.
Leung clicks Freemium.
She now sees a Payment Management section that includes a reminder to use the Channel Order App (COA) to report customer orders back to Salesforce.

Leung uses Get Cloudy’s own payment system, and pays Salesforce per her Partner Application Distribution Agreement (PADA).
In Solution Pricing, Leung clicks Add Pricing Plan + and fills out a table of her pricing plans.

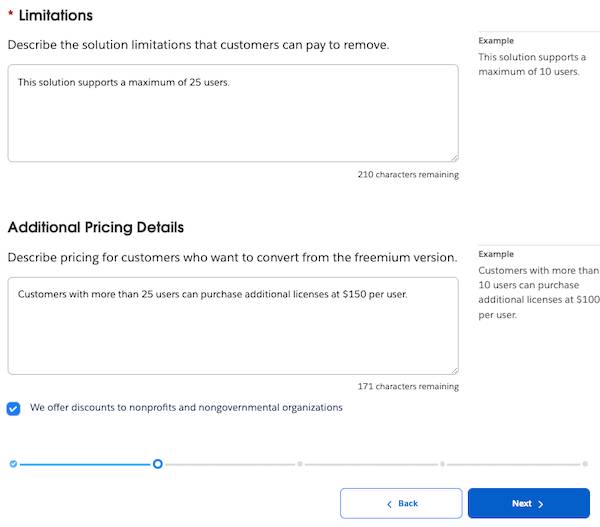
Leung adds limitations and additional details. She also ticks the box to offer discounts to nonprofits and nongovernmental organizations. When she’s done, Leung clicks Next.
Listing Approval
Remember what Leung learned earlier about the requirements for a listing to be approved? Because she’s completed the basics and set pricing, she can now submit her listing for approval.

Leung clicks Submit.

Leung’s practical. She clicks Cancel to take a few minutes to review her work.
When she’s verified everything is correct, she returns to the Listing Approval section, clicks Submit again, then Save & Submit
Woohoo! Leung’s listing is now in review.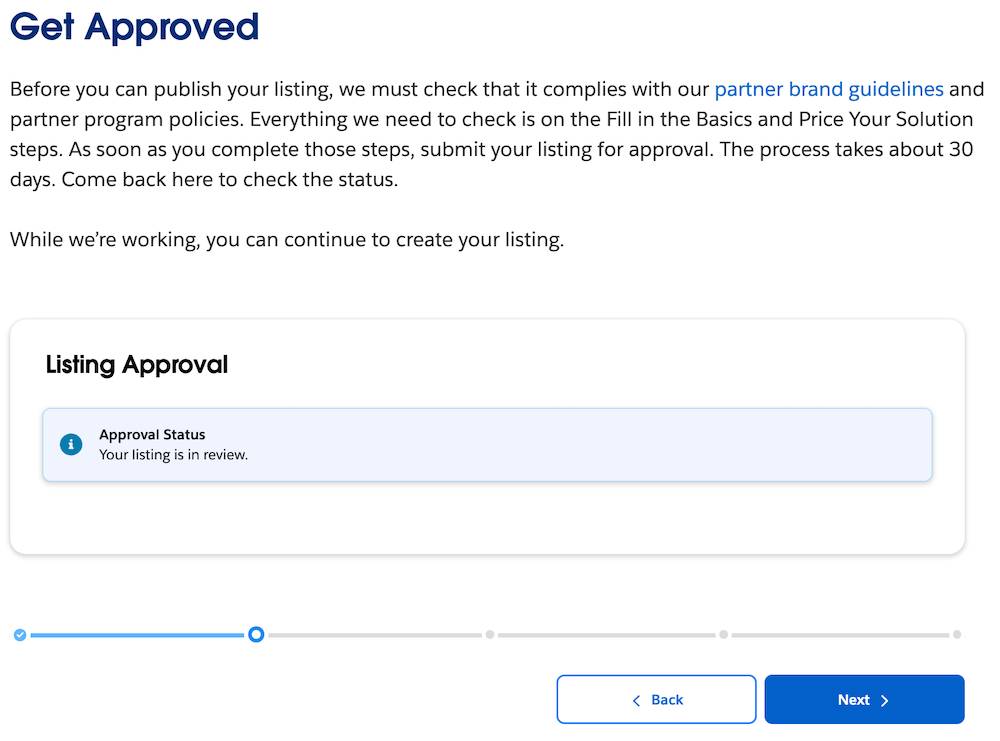
Add Details
It’s time for Leung to get creative in Add Details, so she takes a minute to review the Improve Your AppExchange Listing Performance in the Partner Field Guide for inspiration.

Describe Your Solution
Leung uses her solution name as the listing title, and she builds out deeper descriptions for the listing’s Search Engine Optimization (SEO) to make sure Cloudy Health appears at the top of internet searches.
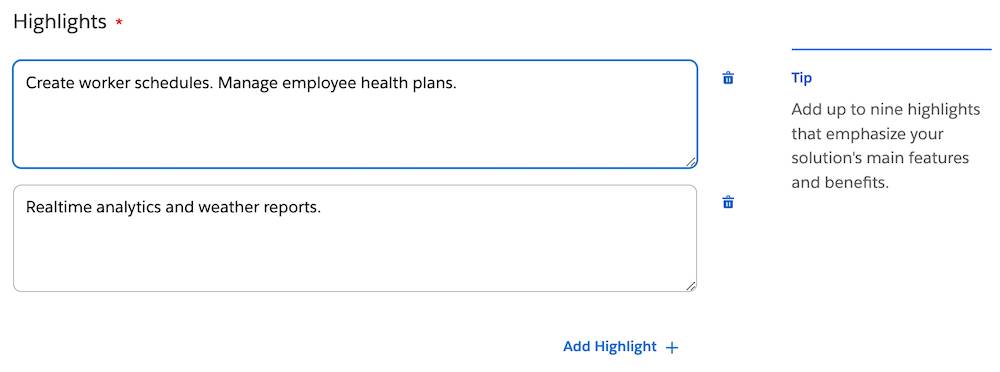
She drafts a crisp, one-line tagline to catch the eyes of her customers and adds a description. Leung emphasizes the main features of her solution by adding Highlights.
Finally, Leung adds any terms and conditions that customers must agree to. Then she clicks Next.
Include Visuals
Leung’s excited to add images and videos to her listings in Include Visuals.

Leung uploads screenshots, a small logo, marketing videos, and demo video.
When Leung is happy with her work, she clicks Next.
Link Your Solution
Checking the Listing Builder steps, Leung has arrived at Link Your Solution and her listing is 60% complete. That’s real progress!

Remember the managed package that Leung connected to the Partner Console in Technologies? That managed package is what Cloudy Health’s customers install in their Salesforce orgs. Now Leung connects that package to her listing.
- Enter and select your solution’s name.

- Enter and select your solution’s version.
- Confirm compliance with Salesforce security requirements.
- Choose your solution’s installation method.
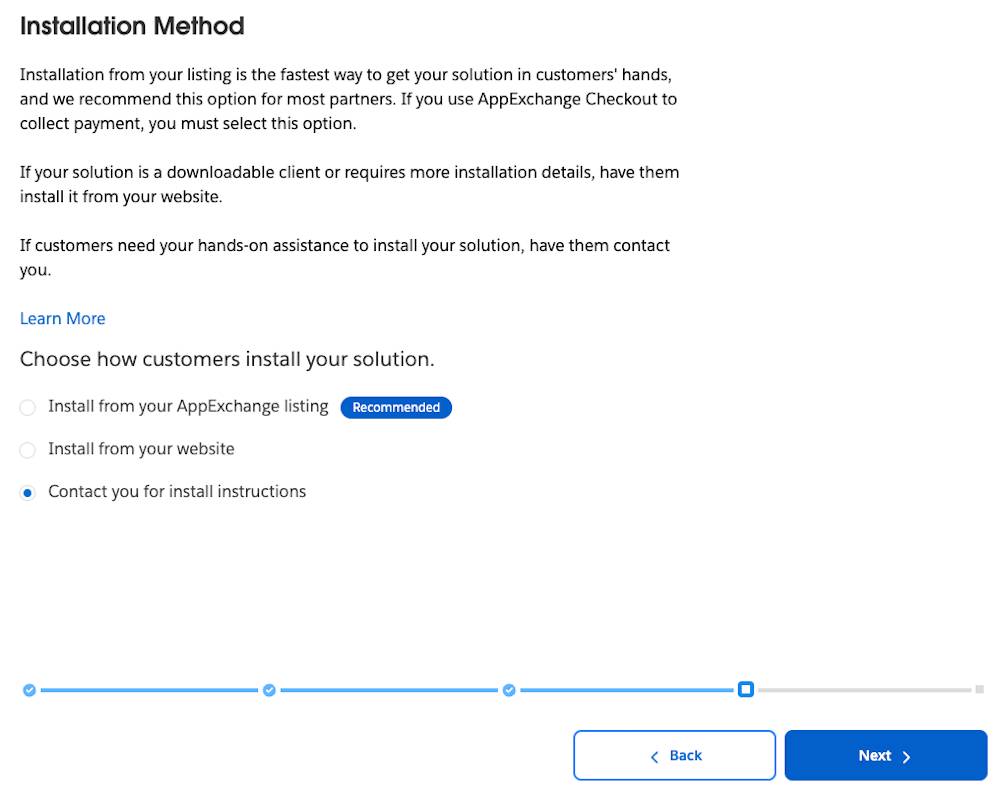 How your customers install your solution affects their experience with your solution. It’s also dependent on how complex your solution is.
Installation Method
Considerations
Install from your AppExchange listing.
Recommended. Required, if you use AppExchange Checkout to collect payment.
Install from your website.
For downloadable clients or solutions that require more installation details.
Contact you for install instructions.
For complex solutions that require your hands-on assistance to install.
-
Leung’s Cloudy Health app isn’t using AppExchange Checkout for payments. And Leung likes following the AppExchange recommendations for maximum success. She selects Install from your AppExchange listing.
- Click Next.
Grow Your Business
Exciting: the Cloudy Health listing is now 80% complete! All Leung has left is to finish the marketing-side of her solution’s listing.

In Grow Your Business, Leung:
- Adds test drives and free trials to help customers try the solution before they buy
- Sets up leads to collect useful info about potential customers
Leung selects the trial template she previously connected in Technologies. She also adds the Org ID, Username, and Password to enable a test drive.
Next, Leung sets up leads so she can track who completed the following activities.
- Interacted with her demo video
- Tried the free trial that she configured
- Clicked Get it Now to download and install her solution
Leads provide Leung with valuable feedback to improve her listing, and also let her interact with her prospective customers.
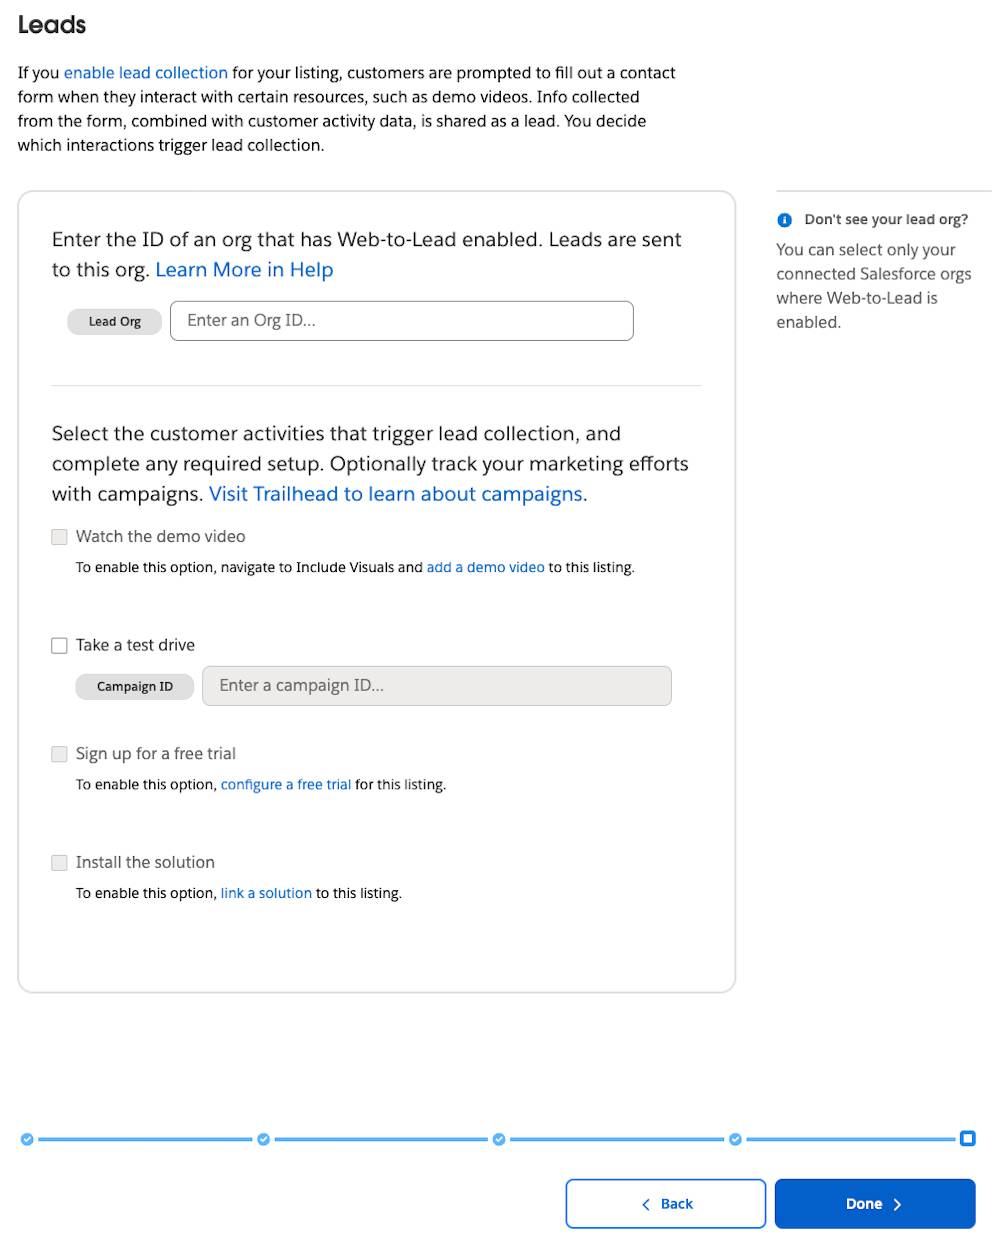
Leung has set her Partner Business Org to capture leads by enabling its Web-to-Lead functionality. She enters this Lead Org ID, then she clicks Done.
Measure Twice, Cut Once
Amazing work!

While the AppExchange Listing Builder validates the listing, Leung grabs her favorite afternoon healthy brain snack. Get your fave, and keep learning along with Leung in the next unit. We cover listing checks, then Leung publishes her listing.
Resources
- Salesforce Help: Salesforce Editions
- Trailhead: AppExchange Pricing Strategy for Partners
- Salesforce AppExchange Guide: Improve Your AppExchange Listing Performance
- ISVforce Guide: Trialforce
- ISVforce Guide: Publish Your Solution on AppExchange
- ISVforce Guide: Collect AppExchange Leads
