Explore the Visualforce to LWC Sample App
Using the App
There are a couple of ways you can use this app. Because you cloned the visualforce-to-lwc repository, you could simply open that folder in Visual Studio Code and dig into the source code. But you also just installed a shiny new app in your Trailhead Playground, so let's dive into that!
In this project, we explore five examples of key patterns.
- View a record with data from a parent record.
- List records with a link to open each record.
- List records with data from parent records.
- Display records in a paginated list with page navigation controls.
- Click one button to create two records of different types.
We’re not going to delve deeply into the code for each of these patterns. Instead, we're going to tour the app and explain how functionality you’re familiar with in Visualforce is implemented in our Lightning web component examples.
Let’s get started.
Single Records
- Click the Single Records tab.
- Click Take me there!
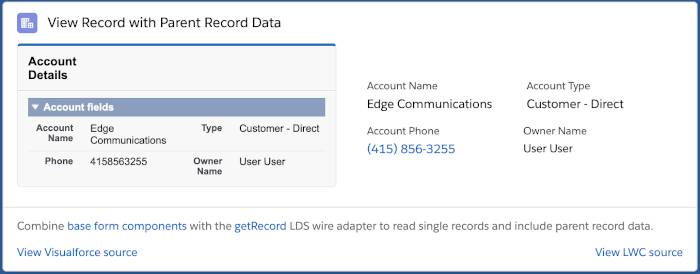
- Look at the View Record with Parent Record Data card.
This card shows how to display an account record with parent record data (the account owner), both in Visualforce and in a Lightning web component.
- Click View Visualforce source and review the code.
In Visualforce, we useapex:formand standard controller fields to show the record details. - Click View LWC source and review the code.
In the Lightning web component, we combine thelightning-record-view-formbase component with thegetRecordwire adapter (powered by Lightning Data Service) to retrieve the records and their fields. This way, we get all the caching and synchronization benefits of Lightning Data Service for both the record and its parent.
Record Lists
- Click the Record Lists tab.
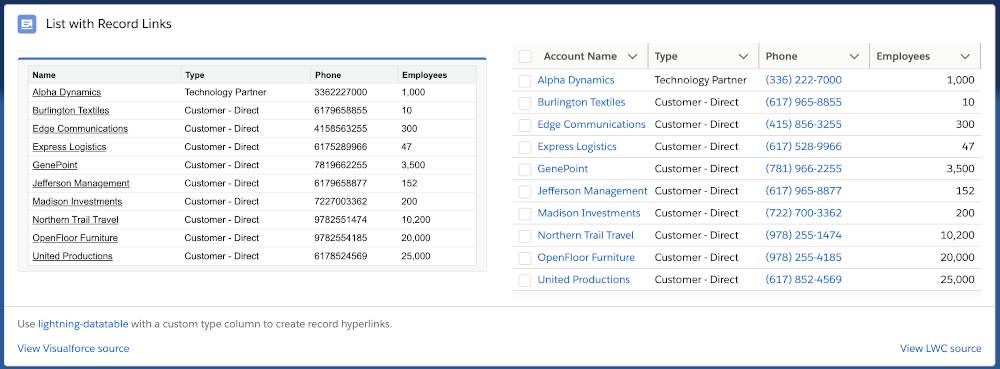
- Look at the List with Record Links card.
In the list of accounts, the account name is a hyperlink to the account detail page. (In this app, we’ve replaced the standard account details page with examples. If you use this component in another org, the link opens the expected account details page.)
- Click View LWC source.
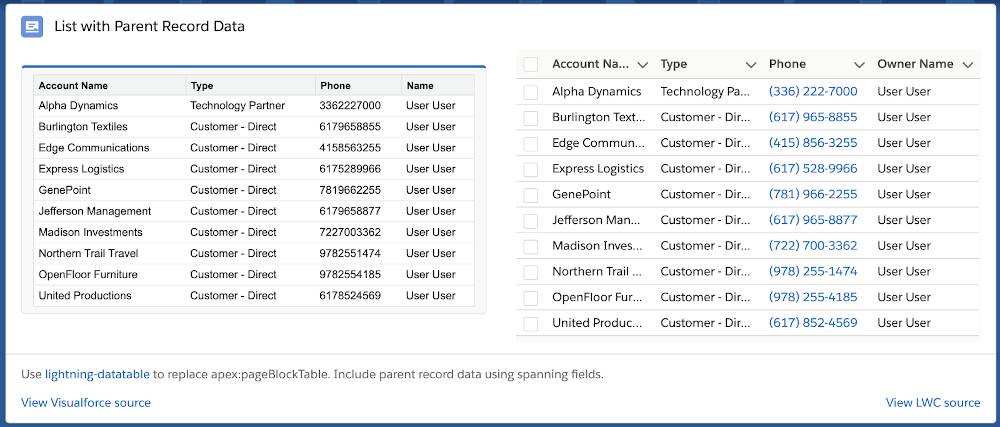
In the example, we populate alightning-datatableby calling acacheableApex method with@wire. The interesting part of this example is that we use a custom cell renderer inlightning-datatableto show the record links. - Shift your attention to the List with Parent Record Data card.
This example retrieves a list of accounts, including parent record data (the account owner’s name).
- Click View LWC source.
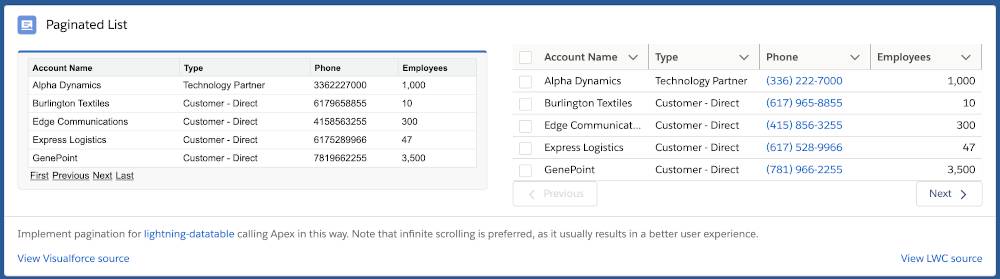
As we did in the List with Record Links example, we feed the table by calling acacheableApex method with@wire. However, becauselightning-datatableis independent of the data source, we must transform the data to match the format that thelightning-datatablecomponent expects. In this example, we give you a method that performs a recursive transformation to any level in the queried related records. - Now look at the Paginated List card.
This example displays records in a paginated list. Although infinite scrolling is the preferred user experience, you may still want to use pagination in some cases. That’s why we included this example.
- Click View LWC source.
Like the previous examples we explored, this example calls Apex with@wire. In this case, however, the adapter retrieves only the first five records for the first page. It doesn’t retrieve records 6–10 for page 2 until you go to page 2.
Mixed Records
- Click the Mixed Records tab.
- Review the Create Mixed Records via LDS Functions card.
This example uses JavaScript to create two records of different types: a contact and an opportunity.

- For the new contact, keep the default values:
Yan Khang. - For the opportunity, keep the default value:
Possible deal. - Click the Create Contact and Opportunity button.
Two success messages should be displayed. - Click View LWC Source.
To create the records, we performed two independent calls to thecreateRecordLDS function. Note that each method call runs on its own transaction and the created records are unrelated.
Next Steps
In this project, you learned how to install and use the Visualforce to LWC sample app. We recommend that you continue examining the code for the app’s examples.
Additionally, we strongly recommend that you look at the Lightning Web Components for Visualforce Developers Trailhead module, which describes the Lightning Web Components concepts from a Visualforce developer’s perspective. It also provides some context for the examples in the Visualforce to LWC sample app.