Customize Opportunity Stages
Follow Along with Trail Together
Want to follow along with an expert as you work through this step? Take a look at this video, part of the Trail Together series.
(This clip starts at the 8:31 minute mark, in case you want to rewind and watch the beginning of the step again.)
Introduction
The next leg of your journey to sales path creation involves customizing qualification stages. Here you’re able to provide guidance for success content. Like helpful signs pointing travelers in the right direction, this can include anything from tips, policy reminders, and best practices to links, Chatter posts, and videos—any material that helps sales reps close their deals quickly.
Set the Path
- Click the Home tab within Setup.

- Enter
Path Settingsin the Quick Find box, then select Path Settings. - Click Enable, then click New Path and fill in these values:
Field
Value
Path Name
North American Sales Path
API Reference Name
[this field auto-completes]
Object
Opportunity
Record Type
B2B Opportunities
Picklist
Stage
- Click Next.
- Click the Prospecting tab.
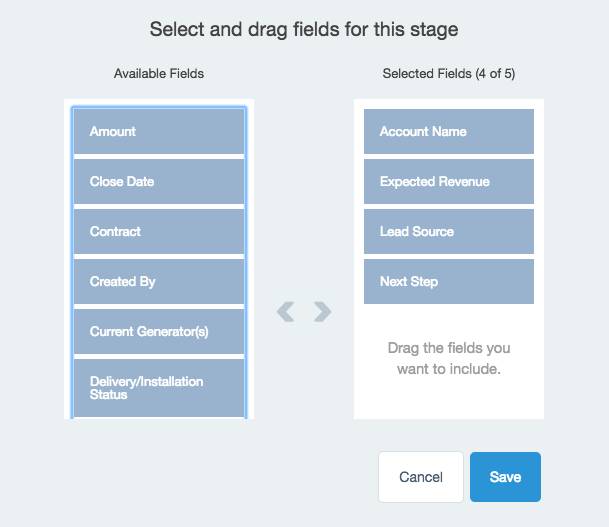
- Click Add/Update Fields under Fields.
- Drag and drop the following fields from Available Fields to Selected Fields:
- Account Name
- Expected Revenue
- Lead Source
- Next Step

- Click Save.
- Under Guidance for Success, enter the following text:
Learn how to make the most of Salesforce, and make your sales move more quickly and efficiently, by completing the trail Optimize Sales Features for Lightning Experience:

https://trailhead.salesforce.com/trails/sales_admin
- Click the Qualification tab.
- Click Add/Update Fields under Fields.
- Drag the following fields from Available Fields to Selected Fields:
- Close Date
- Amount
- Click Save.
- In the text box under Guidance for Success, enter the following text:
Qualify the opportunity and confirm budget:

What problems are they trying to solve?
How does solving these problems help them?
What is their budget?
- Click the Need Analysis tab.
- Click Add/Update Fields under Fields.
- Drag and drop the following fields from Available Fields to Selected Fields:
- Expected Revenue
- Forecast Category
- Main Competitors
- Click Save.
- In the text box under Guidance for Success, enter the following text:
Check out this helpful Salesforce video, 3 Steps to Reduce Time to Close:

https://www.youtube.com/watch?v=6KgdZZ5wOzM
- Click Next.
- Toggle Activate Your Path to the ON position.
- Toggle Enable Celebrations to the ON position.
- Select Closed Won from the Available list and click the arrow to add to the Selected for Celebration list.
- Click Always from the Celebration Frequency list.
- Click Finish.
Throw the (Virtual) Confetti!
You just enabled the virtual confetti feature to trigger when a specific Stage is selected. Let's see the confetti in action when your reps follow the path to the summit (successfully close a deal).
- Click the App Launcher
 and select Sales.
 - Click the Opportunities tab.
- From the Opportunities list view, select My Opportunities.
- Click United Oil Office Portable Generators. Note that none of these stages have guidance to success added as this opportunity is not the record type with guidance added.
- Click the arrow next to the action buttons.

- Select Change Record Type from the dropdown menu.
- Ensure B2B Opportunities is selected and click Next.
- Click Save. Note: Now that the opportunity is the correct record type, your guidance for success is viewable for the applicable stages. Feel free to adjust this opportunity's stage to see your adjustments in action. Be sure to adjust the stage back to Negotiation/Review before progressing.
- Click the Mark Stage as Complete button.

- Select Closed Won from the picklist and click Save.
- Enjoy the celebration of a won opportunity!
There’s still a little ways to go. Head to the final step, where you have the opportunity to take in the view (the Kanban view, that is).
