Update the Button Text (Guided Project Light)
Step Three: Update the Button Text
You've now successfully set the button to change the background color of the view, but the title of the button text remains the same regardless of whether the light is on or off. For now, you can’t reference your newly created button in code.
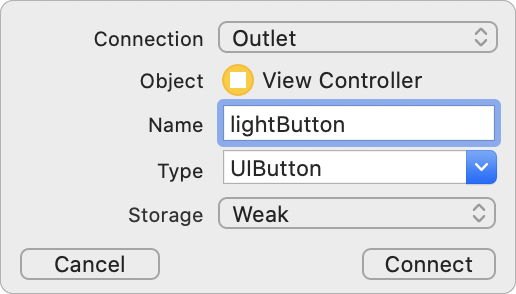
Create an outlet connection from the button to a new lightButton property in your view controller by control-dragging the pointer from the button to the top of your view controller source.
The new outlet connection should be configured as shown.
Take a moment to see how the button responds to user interaction.
1. Add a breakpoint to the first line of the buttonPressed(_:) method.
2. Build and run your app.
When you tap the button to change the color, the corresponding action, buttonPressed(_:), executes. But because you added a breakpoint, the code pauses before executing the line with the breakpoint.

3. Click the Step over button
 to run the first line.
Your app pauses before running the updateUI() method.
4. Click the Step into button
 .
.
Your app pauses before executing the first line of updateUI.
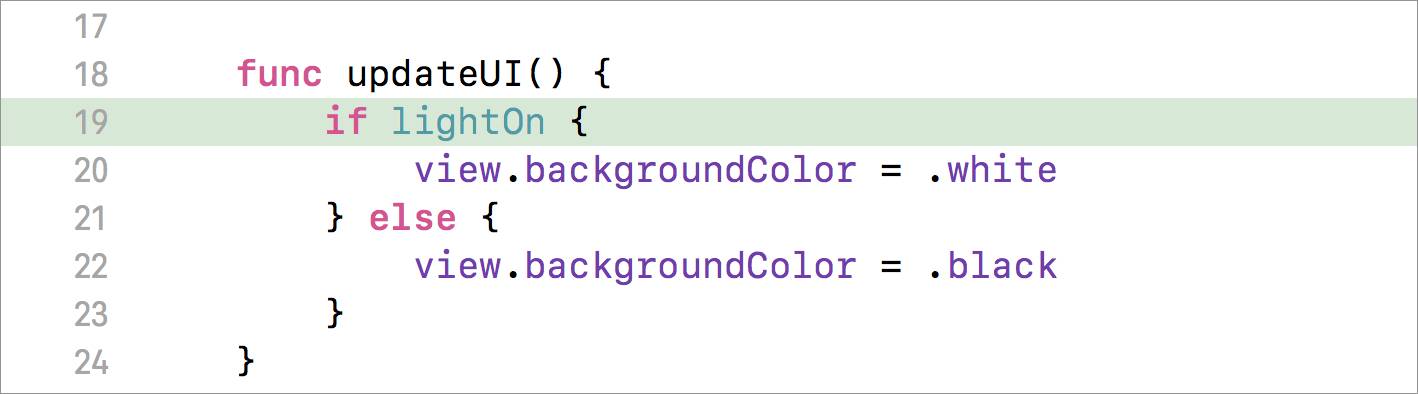
Stop to read the body of the updateUI() method. Because Swift is a very readable programming language, you can probably interpret the lines to mean, "If the light is on, the view's background color should be white. Otherwise, the view's
background color should be black." Consider how to determine the button's title. If the light is on, the button's title should display Off. If the light is off, the button's title should display On.
You have a reasonable place to update the title in the updateUI() method.
To learn how to change the title of the button, refer to the Xcode Developer Documentation:
- Access the documentation using Window > Developer Documentation in the Xcode menu bar.
- Search for
UIButton. - Find the section titled Configuring the Button Title and read about the
setTitle(_:for:)method. - Remove the breakpoints that you added earlier.
Use your new knowledge of UIButton to change the button title:
1. Update the method:
func updateUI() {
 if lightOn {
  view.backgroundColor = .white
  lightButton.setTitle("Off", for: .normal)
} else {
  view.backgroundColor = .black
  lightButton.setTitle("On", for: .normal)
}
}
2. Build and run your app.
Tapping the button should now change both the background color and the button text.
But the code has a bug: Before you tap the button, the text still says Button, not On or Off. How can you update the code to resolve this issue?
Your project already has code that ensures the button's text matches the on or off state of the light: updateUI(). But that code doesn't execute before the view displays for the first time. The function viewDidLoad() function
is a useful place to add setup code.
1. Call updateUI() from within this method as shown:
override func viewDidLoad() {
  super.viewDidLoad()
  updateUI()
}
2. Build and run your app again.
On launch, the text of the button should now display Off.
Check the Solution if You Need It
Here is the entire Light project. You can compare it to how you updated the button text. Review your methods.