Put Conditions on Rules
Learning Objectives
After completing this unit, you’ll be able to:
- Describe the role of error condition records in product rules.
- Create a product rule record for a validation-type rule.
- Create an error condition that tests a field for a value.
- Explain how to bring non-CPQ data into the quote for testing error conditions.
- Construct an advanced condition using and/or logic.
Under the Right Conditions
Product rules are meant to help sales reps create accurate quotes. One way rules do that is by preventing mistakes. For example, imagine that AW Computing sells a product named Cloud Storage. (You might remember AW Computing from other CPQ badges on Trailhead.) The AW Computing reps are NOT allowed to sell Cloud Storage to any account in the healthcare industry because it is not HIPAA compliant. If the sales reps try to break this rule, they should get an error message when they click Save on the Quote Line Editor.

If the account isn’t in the healthcare industry, or Cloud Storage isn’t on the quote, then the error shouldn’t appear. In other words, if the conditions aren’t right, the rule doesn’t run. So how exactly does CPQ know when conditions are right? Simple, by looking at the error conditions.
An error condition is basically a test, the pass/fail kind of test. It looks at some data (like a quote line’s product code) and compares it to other data (like the string “CLOUDSTORAGE”). In this example, it checks if they’re equal. If so, the test passes and the rule is one step closer to running.
Some product rules, like the one in our healthcare example, may need to check more than one error condition to determine if they should run. That’s fine, you can make as many as you need. However, if you have more than one error condition, you have to tell CPQ how many need to pass in order for the rule to run. For some rules, passing any of the tests means they should run. For other rules, all tests need to pass.
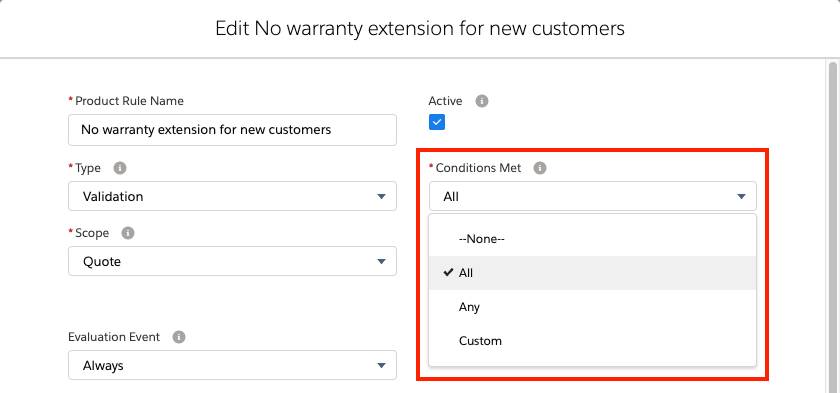
You tell CPQ if “any” or “all” tests need to pass by setting the Conditions Met field, found on the product rule record.
Use the Custom value of this field when you need more complex logic. You learn how to use advanced conditions at the end of this unit.
For now, let’s create the first of three records necessary for the healthcare rule: the product rule record.
- If you don’t already have your CPQ-enabled org open, scroll down to the Challenge section and click Launch to open it.
- In your org, click the App Launcher (
 ), and click the Salesforce CPQ tile.
 - In the navigation bar, click Product Rules.
- Click New.
- For Product Rule Name, enter
No cloud storage for healthcare industry. - For Type, choose Validation.
- For Evaluation Event, choose Always.
In the next unit we discuss the significance of the Evaluation Event, but for now, just trust us. - Check Active.
- For Conditions Met, choose All.
- For Message, enter
Cloud Storage may not be sold to accounts in the healthcare industry. - Click Save.
Great, you’re now just a few error condition records away from finishing your rule.
Create Your First Error Condition
Error conditions are all about comparing two pieces of data. When you create your first error condition, you need to tell CPQ what data to look at, and how to compare it. For this exercise, you need to look at the quote line’s product code and compare it to the text CLOUDSTORAGE to see if they’re equal.
- In the Error Conditions related list, click New.
- For Tested Object, choose Quote Line.
- For Tested Field, choose SBQQ__ProductCode__c.
By choosing a tested object and field combination, you’ve pointed CPQ at the source of one piece of data. It’s normal to see API names as values in the Tested Field picklist. An API name is the best way to identify a field since it’s unlikely to change, even if the label does. - For Operator, choose equals.
The operator tells CPQ how to compare the two pieces of data. - For Filter Type, choose Value.
This field tells CPQ what kind of data you intend to compare Product Code to. “Value” means you want to compare it to a static value, while “Variable” means you need to reference a Summary Variable. - For Filter Value, enter
CLOUDSTORAGE.
As you can imagine, it’s critical to type the value carefully! If you misspell the product code, the rule won’t fire correctly. - Click Save.
One error condition down, one to go.
Pulling Data into a Testable Object
The second error condition needs to check if the customer’s industry is “Healthcare.” This data is on the Account record. But Account isn’t one of the six objects you can choose from in the Tested Object picklist:
- Quote
- Quote Line
- Quote Line Group
- Product Option
- Configuration Attributes
- Upgraded Asset
Any data you want to test must live on one of those objects. So what can you do? The workaround for this example is to create a formula field on the Quote object that pulls the industry value from the Account and outputs it as text. To save time, Team Trailhead has already created this custom field in your CPQ-enabled org and set the API name to AccountIndustry__c.
We also put the API name of the new custom field into the Tested Field picklist, so it’s already there when you create your second error condition.

Be aware that Tested Field is a dependent picklist. The values you see in it depend on what you choose for its controlling field, Tested Object. For example, you only see AccountIndustry__c when you set Tested Object to Quote. When you add custom fields to Tested Field, remember to also update field dependencies on Tested Object.
OK, let’s create the second error condition.
- In the Error Conditions related list, click New.
- For Tested Object, choose Quote.
- For Tested Field, choose AccountIndustry__c.
- For Operator, choose equals.
- For Filter Type, choose Value.
- For Filter Value, enter
Healthcare. - Click Save.
Congratulations, you’ve finished your first product rule. Time to test it on a pre-made quote for one of AW Computing’s healthcare customers.
- From the navigation bar, click Quotes, then choose the All list view.
- Click Q-00038.
Notice that the Account Industry field has a value of Healthcare. - Click Edit Lines.
The first time the page loads, it can take a few minutes. Subsequent page loads are faster. - Click Add Products.
- Check Cloud Storage 1GB.
- Click Select.
- Click Save.
It’s at this point CPQ should stop you with an error message, since both conditions have been met for your rule. If this were real life, you’d want to make sure you can save when the quote doesn’t have Cloud Storage on it, or if your customer isn’t in the healthcare industry. “Negative testing” is the responsible thing to do, but we won’t make you do it here.
Advanced Conditions
Your product rule is meant to stop AW Computing sales reps from selling Cloud Storage to healthcare industries. What if you wanted to stop reps from selling it to banking industries too? That would make three tests to consider.
- Product = Cloud Storage
- Industry = Healthcare
- Industry = Banking
But this time, not every test has to pass. Industry can be Healthcare OR Banking.
CPQ can handle this scenario easily with advanced conditions. Let’s see what it takes to enhance your product rule to meet this new requirement. You start by updating the existing error conditions with index values that allow you to identify them later.
- In the navigation bar, click Product Rules.
- Click No cloud storage for healthcare industry.
- In the Error Conditions related list, click Edit in the dropdown menu for the first condition.
- For Index, enter
10.
The number you enter here is like a serial number for your “Product = Cloud Storage” condition. It can be any number, as long as it’s unique among the other error conditions related to this rule. - Click Save.
- In the Error Conditions related list, click Edit in the dropdown menu for the second condition.
- For Index, enter
20. - Click Save.
Great, now the “Industry = Healthcare” condition has an index of 20. Finally, you create a new condition that checks if Industry is “Banking.” - In the Error Conditions related list, click New.
- For Index, enter
30. - For Tested Object, choose Quote.
- For Tested Field, choose AccountIndustry__c.
- For Operator, choose, equals.
- For Filter Type, choose Value.
- For Filter Value, enter
Banking. - Click Save.
Almost done. You now have three error conditions with index values of 10, 20, and 30. Now let’s tell CPQ how to use them.
- While on the Product Rule record, click Edit.
- For Conditions Met, choose Custom.
Choosing Custom means you must put something into the Advanced Condition field. - For Advanced Condition, enter
10 AND (20 OR 30).
This means that the cloud storage test, which has an index of 10, must always pass in order for the rule to fire. It also means that passing either of the industry-specific tests within the parenthesis is good enough to fire the rule. - Click Save.
Your rule now prevents reps from selling Cloud Storage to two different industries. Nice work! If this were real life, you’d want to update the name of the rule and the message too, but we won’t make you do that here.
Using ANDs, ORs, and parentheses in advanced conditions allows you to do some pretty sophisticated tests to ensure your rules run only when they’re supposed to. In the next unit you learn how to set up rules so they only check conditions at certain times.