Handle Events in Lightning Web Components
Learning Objectives
After completing this unit, you'll be able to:
- Create an app that includes multiple components.
- Describe the file structure of a complex component.
- Handle events.
Follow an Event's Journey
You've built a component and pushed it to an org. Let's start adding some interactivity with event handling. We follow an event's journey through several components for sophisticated event handling in an application. This application is a product selector for a bicycle shop. Users click a bike name and image to see more detail.
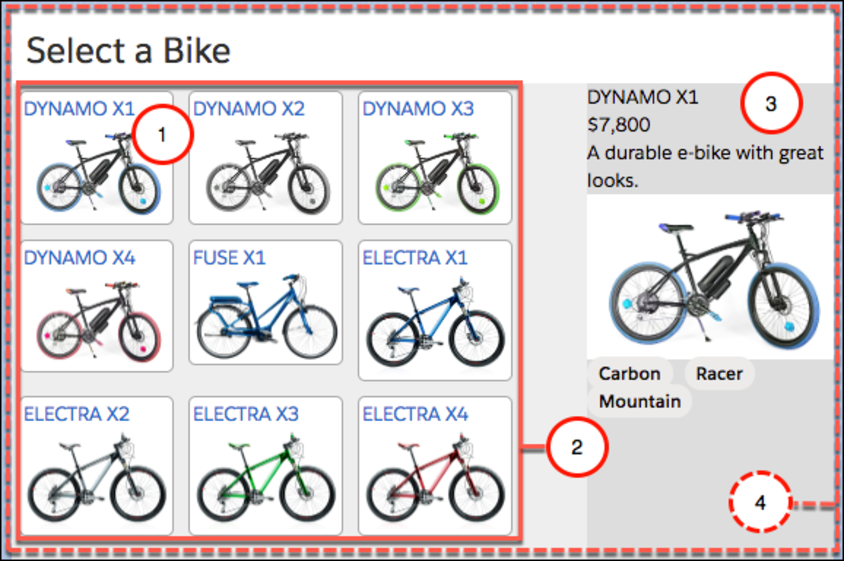
This app has four components working together.
-
tile: displays an individual item.
-
list: arranges the tiles.
-
detail: displays item details when a tile is clicked (similar to the bikeCard you just created).
-
selector: contains the whole set of components. A container component isn't required, but we're using one here to help with event handling.
For now, the application uses a data file to load static data for testing. In the next unit, you learn how to pull dynamic data from an org.
Component Composition
Let's add some files to our project that we can deploy to an org.
- Download the files for this app here: Bike Selector App for Trailhead.
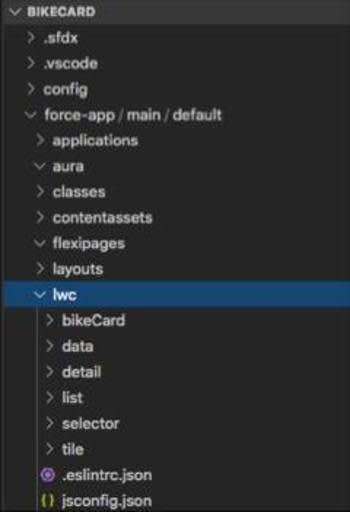
- Unzip the files into the force-app/main/default/lwc folder of the bikeCard project.
Component Relationships
In this app, multiple components work together; some components are nested inside other components. Just as you nest HTML elements inside each other, Lightning web components—which are custom HTML elements—can be nested inside other Lightning web components.
In our file system, the components' folders don't really give insight into the relationships between them.
Let's look at how the components nested at the UI level in a diagram.

By looking at the files you can see the selector component lays out the page and renders the list(c-list) and detail(c-detail) components.
<template>

  <div class="wrapper">

    <header class="header">Select a Bike</header>

    <section class="content">

      <div class="columns">

        <main class="main" >

          <c-list onproductselected={handleProductSelected}></c-list>

        </main>

        <aside class="sidebar-second">

          <c-detail product-id={selectedProductId}></c-detail>

        </aside>

      </div>

    </section>

  </div>

</template>
Update detail.html with the following:
<template>
  <template lwc:if={product}>
    <div class="container">

      <div>{product.fields.Name.value}</div>

      <div class="price">{product.fields.MSRP__c.displayValue}</div>

      <div class="description">{product.fields.Description__c.value}</div>

      <img class="product-img" src={product.fields.Picture_URL__c.value}></img>

      <p>

        <lightning-badge label={product.fields.Material__c.value}></lightning-badge>

        <lightning-badge label={product.fields.Level__c.value}></lightning-badge>

      </p>

      <p>

        <lightning-badge label={product.fields.Category__c.value}></lightning-badge>

      </p>

    </div>

  </template>

  <template lwc:else>

    <div>Select a bike</div>

  </template>

</template>
Looking in detail.html, you see conditional rendering(lwc:if={product} and lwc:else). If nothing has been chosen from the list, then what's displayed is a message asking the user to choose something. If something is chosen, it displays the bike information.
The list component renders several tile(c-tile) components, one for each bike in the data. This nesting is achieved in the HTML for each parent component. For example, the list component has the following HTML, including the tile component as c-tile.
<template>

  <div class="container">

    <template for:each={bikes} for:item="bike">

      <c-tile key={bike.fields.Id.value} product={bike} ontileclick={handleTileClick}></c-tile>

    </template>

  </div>

</template>
Notice how each iteration of the bike item spawns a new tile component. Simply including the c-tile component tag makes each tile component its child. The div class definition “container” is used for styling, so you can control the arrangement of tiles. If you look at list.css, you see that it wraps the content.
.container { display: flex; flex-direction: row; flex-wrap: wrap; }
The parent/child relationship is important, not only for the design of the app, but also for event handling.
Let's dig a little deeper into the event handling.
Events Up, Properties Down
In a complex component (one that contains several parent and child components), the components can communicate up and down.

- The c-todo-item child component dispatches an event to the parent c-todo-app component. For example, the child can pass an event object to the parent when a user clicks a button so the parent can handle the event and change the current page.
- The c-todo-app parent component passes a property or invokes a method in the child component. For example, the parent can set a text value in a child component, or invoke a method in the child component.
Let's look at how this communication works.
Passing Information Up
Information can be passed up using events and event listeners.
The child component dispatches the event and the parent component listens for it. Dispatching the event includes creating an event object the child can pass to the parent component. The parent has a handler to respond to the event.
For example (don't create these components), a child component like this one contains a nextHandler() method that creates a simple event object using CustomEvent() and dispatches the event type 'next' when the user clicks a Next button.
// todoItem.js

import { LightningElement } from 'lwc';

  ...

  nextHandler() {

    this.dispatchEvent(new CustomEvent('next'));

  }

}

The parent component listens for the event with the inline event handler prefixed with 'on'(onnext).
<!-- todoApp.html -->

<template>

  <c-todo-item onnext={nextHandler}></c-todo-item>

</template>
And passes the event object to an event handler.
// todoApp.js

import { LightningElement } from 'lwc';

export default class TodoApp extends LightningElement {

  ...

  nextHandler(){

    this.page = this.page + 1;

  }

}
Passing Information Down
Information can be passed down using public properties and public methods.
You can make a component property public by prefacing it with the @api decorator. Then, set the public property by an external component.
For example (don't create these components), if the c-todo-item child component has the following:
// todoItem.js

import { LightningElement, api } from 'lwc';

export default class TodoItem extends LightningElement {

  @api itemName;

}
Set the value from the parent with the following:
<!-- todoApp.html -->

<template>

  <c-todo-item item-name="Milk"></c-todo-item>

</template>
Notice that the itemName variable gets set using the kebab case attribute item-name. Property names in JavaScript are in camel case while HTML attribute names are in kebab case (dash-separated) to match HTML standards. The item-name attribute in markup maps to the itemName JavaScript property.
Public properties are great solutions for passing down primitive values, simple objects, and arrays.
Also, you can use getters & setters to execute some logic when properties are get or set. And remember, annotate them with the @api decorator to make them public for other components.
Similarly, you can create public methods that are callable from a parent component. Create a public method in the child component by defining it with the @api decorator, then call it from the parent component.
Let's say that we have a child component like this one (don't create these components).
// videoPlayer.js

import { LightningElement, api } from 'lwc';

export default class VideoPlayer extends LightningElement {

  @api play() {

    // Play music!

  }

}
When the c-video-player component is included in a parent component, we can invoke the method from the parent component like this:
// methodCaller.js

import { LightningElement } from 'lwc';

export default class MethodCaller extends LightningElement {

  handlePlay() {

    this.template.querySelector('c-video-player').play();

  }

}
We defined a method handlePlay() that fires the event. Then we use the querySelector() DOM method to search for a DOM element called c-video-player and invoke its public method.
Handling Events in HTML
So our selector app needs to handle one type of event—the user clicking a tile. When this happens, the detail component should re-render with the information from the related tile. You can handle events in HTML (add an event listener in the template) or JavaScript (write an event listener function). We recommend using the HTML approach, as follows.
Each tile component listens for the user click because the tile component's HTML (tile.html) contains an onclick event listener.
<template>

  <div class="container">

    <a onclick={tileClick}>

      <div class="title">{product.fields.Name.value}</div>

      <img class="product-img" src={product.fields.Picture_URL__c.value}></img>

    </a>

  </div>

</template>
When a user clicks one of the tile instances in the UI, the onclick listener calls the handler function tileClick in the tile.js JavaScript file.
import { LightningElement, api } from 'lwc';

export default class Tile extends LightningElement {

  @api product; tileClick() {

    const event = new CustomEvent('tileclick', {

      // detail contains only primitives detail: this.product.fields.Id.value

    });

    // Fire the event from c-tile this.dispatchEvent(event);

  }

}
Selector App Event Pattern
In our product selector app, we use a complex component (one that contains several parent and child components). We recommend that you propagate the event up through the component hierarchy, so parent components can respond to child events. If you have other child components (not the one firing the event), you can pass a property down to those children in response to the event.
The pattern looks like this:

To do this, we need to chain event listeners and handlers up the hierarchy to the ebikes component. Then pass a property down to the detail component.
In our files, you see the following.
- tile.html has the
onclickevent listener that calls thetileClickhandler.
- tile.js has the
tileClickmethod that creates a newCustomEventwith event typetileclickand an object containing adetailvalue (this.product.fields.Id.value).
- list.html has the
ontileclicklistener that calls thehandleTileClickhandler.
- list.js has the
handleTileClickmethod that passes in the event(evt) to create anotherCustomEvent(productselected) with an object also containing adetailvalueevt.detail. And it dispatches the event in JavaScript:// Fire the event from c-list this.dispatchEvent(event);
- selector.html has the
onproductselectedevent listener that calls thehandleProductSelectedhandler.
- selector.js has the
handleProductSelectedmethod setselectedProductIdto theevt.detailvalue that was passed into it. The variable "selectedProductId" is passed from the selector component to the detail component in selector.html:product-id={selectedProductId}.
- detail.html has a conditional directive (remember those from Unit 2?) waiting for a product value:
<template lwc:if={product}>
- detail.js brings the pieces together. It creates a private variable
_productIdto track the state of theproductIdvalue. Then it uses a get/set pattern to get the value and set it to a variableproductwhich lets detail.html load the conditional content.
Getters and setters are a common JavaScript construction. They allow you to add logic and conditions to property assignments.
import { LightningElement, api } from 'lwc';

import { bikes } from 'c/data';

export default class Detail extends LightningElement {

  Product;

  // Private var to track @api productId

  _productId = undefined;

  // Use set and get to process the value every time it's

  // requested while switching between products

  set productId(value) {

    this._productId = value;

    this.product = bikes.find(bike => bike.fields.Id.value === value);

  }

  // getter for productId

  @api get productId(){

    return this._productId;

  }

}
Each time you click a tile, this process repeats itself.
Deploy Your Files to Your Org
Let's deploy these new bikeCard project files to your org to see how it works. Using the same steps you performed in the last unit, deploy your new files, open the org, and create a page in Lightning App Builder with this app.
- In the VS Code bikeCard project, right-click on the force-app/main/default folder and select SFDX: Deploy Source to Org.
- From the Command Palette in VS Code, use SFDX: Open Default Org to open your org.
- Create a one region page using the selector component.
- Give it the label
Your Bike Selection.
- Drag your selector component to the top of the page layout.
- Save and Activate for all users.
- Open it and see your component working in the UI.
You've got a fully interactive page composed of several components working together. Next, we experiment with styling and getting live data from an org.
Resources
-
Lightning Web Components Developer Guide: Shadow DOM
-
Lightning Web Components Developer Guide: Communicate with Events
-
Lightning Web Components Developer Guide: Create Getters and Setters