Get Started with Entitlements
Learning Objectives
- Explain the value of using entitlements.
- Explain how to use entitlement templates.
- Create an entitlement for a customer.
Accessibility
This unit requires some additional instructions for screen reader users. To access a detailed screen reader version of this unit, click the link below.Open Trailhead screen reader instructions.
Introduction
As Ursa Major Solar grows its solar panel empire, it wants to keep its reputation for top-notch, personalized service. Roberto Alvarez, COO and cofounder of Ursa Major, has heard some complaints lately. Customers aren’t getting what they expect from their service level agreements (SLAs)—the contracts that spell out the level of service that Ursa Major is promising to customers. He decides that they need a better solution for tracking SLAs, so he turns to entitlement management in Salesforce.
Roberto learns that entitlements are units of customer support in Salesforce, such as phone support or web support. These entitlements are stated in each customer’s SLA. Some customers are entitled to daily phone calls with the support team, while other customers are more hands-off.
Benefits of Salesforce Entitlements
| Benefit | Description |
|---|---|
| Saves time for agents | Instead of manually looking up a customer’s entitlement, agents can see what type of support the customer is entitled to, right on the account page. |
| Automates routine tasks | By using entitlements with Apex triggers, agents can skip some of the rote tasks and spend their time doing impactful work for customers. |
| Defines support process | Instead of leaving the support process up to chance, define what steps agents should take, and when. This is great for agents who are still coming up to speed. |
| Offers better customer service | With all of your customers’ SLA information right up front, agents can give faster, more consistent support to customers. |
To keep things simple, Maria decides to link entitlements to accounts in Salesforce. Here’s what her approach looks like.
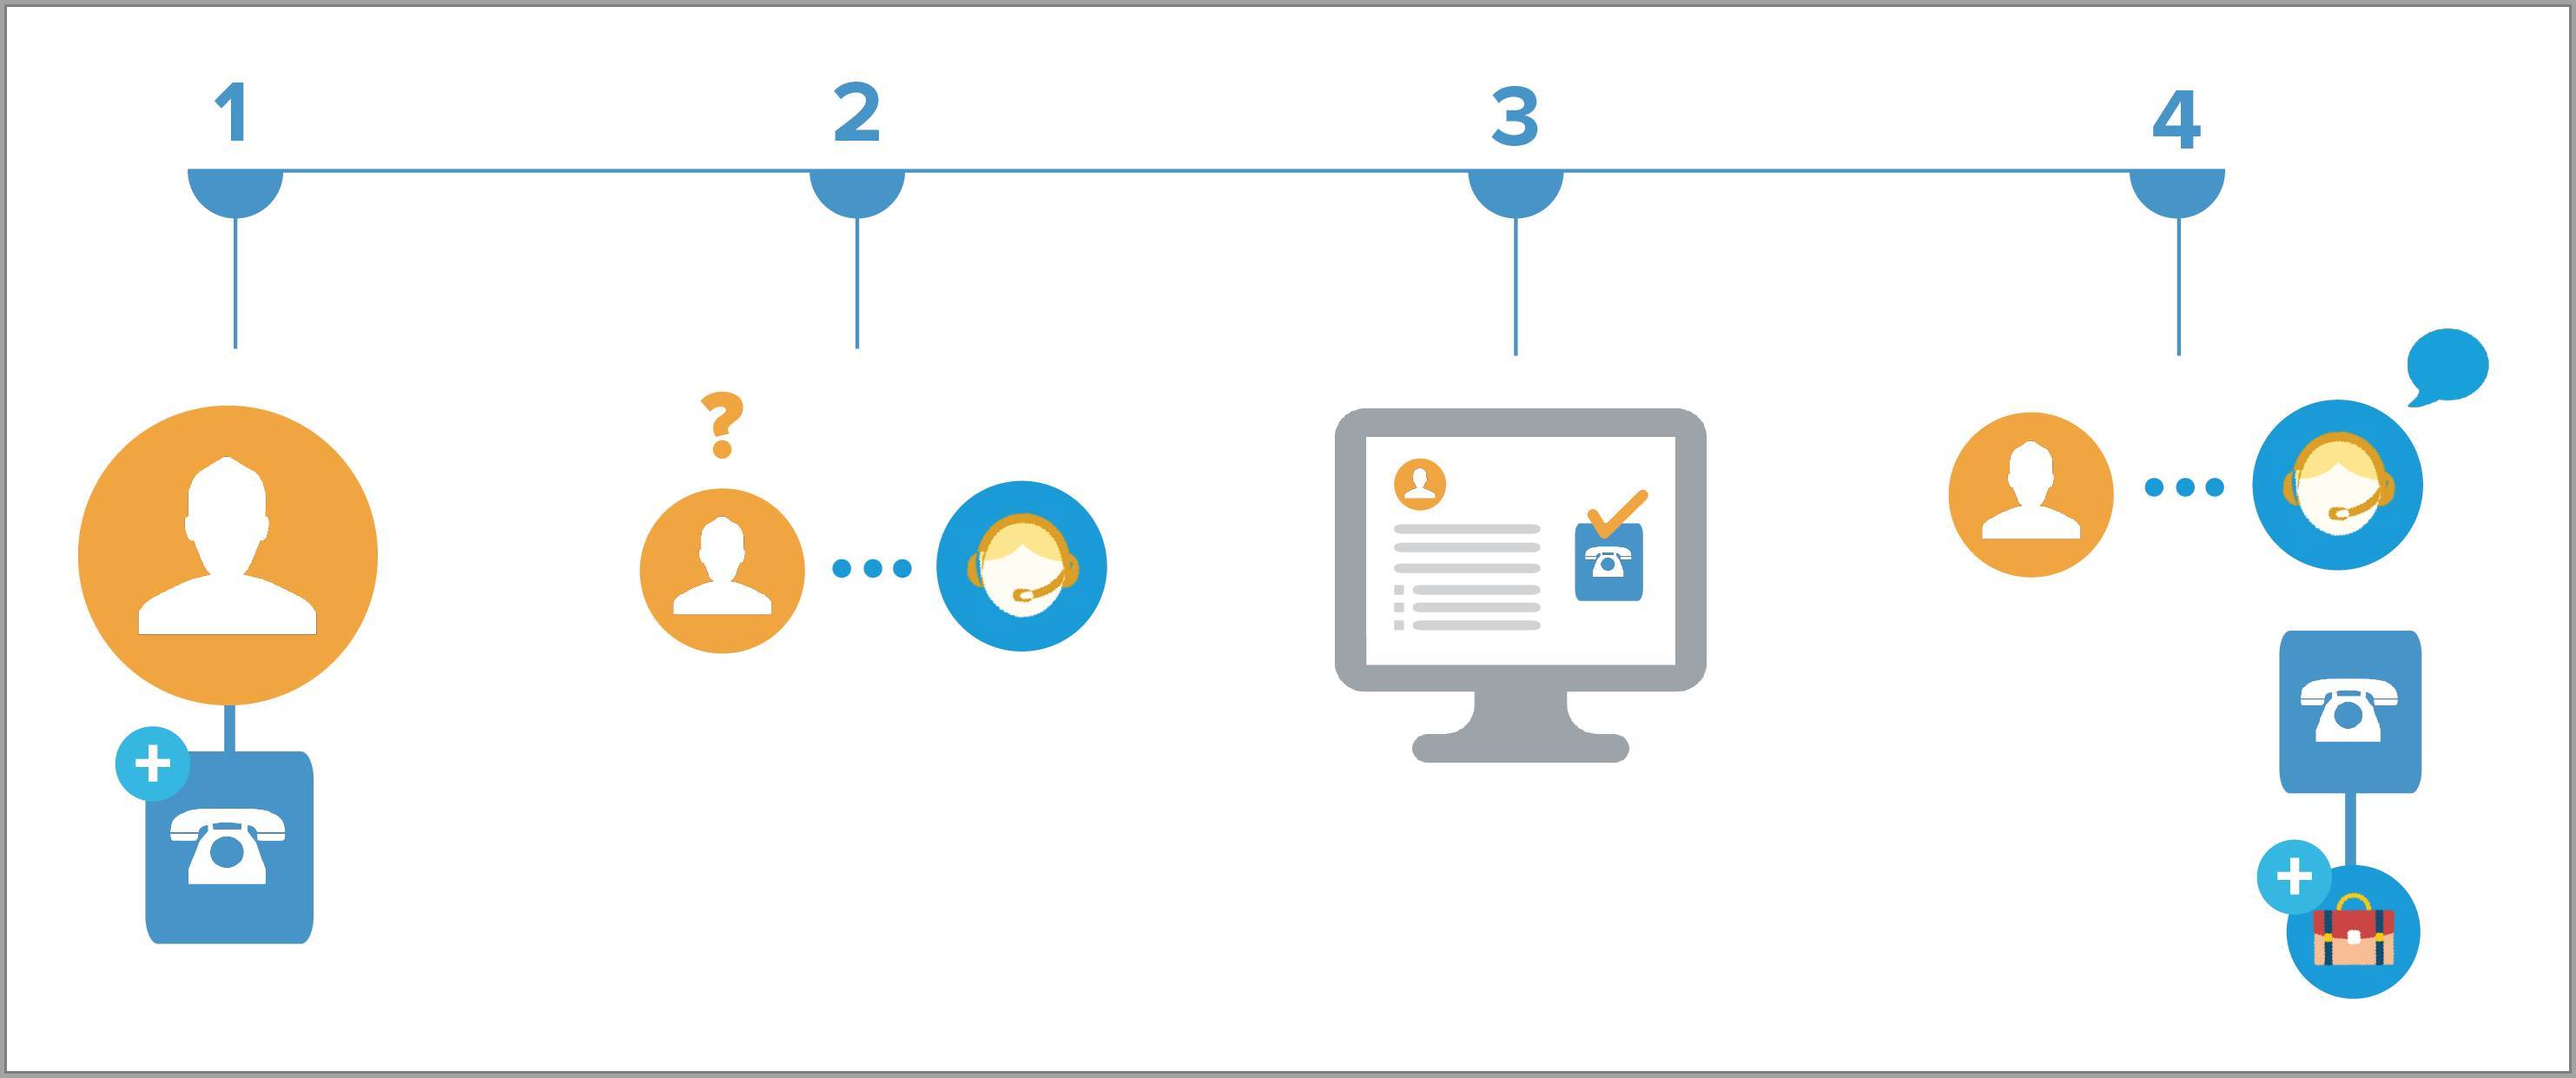
- Maria creates an entitlement that entitles a particular account to phone support.
- A contact from that account calls Ursa Major’s support line with a question.
- The support agent looks up the account and sees it has an active phone support entitlement.
- The agent answers the question and, if needed, creates a case from the entitlement.
Before You Set Up Entitlements

- Enable entitlement management.
- From Setup in Lightning Experience, enter
Entitlement Settingsin the Quick Find box, then click Entitlement Settings. - Select Enable Entitlement Management, and click Save.
- From Setup in Lightning Experience, enter
- Set field-level security for the Entitlement Name field on cases so you can view and edit it.
- From Setup, enter
Field Accessibilityin the Quick Find box, then click Field Accessibility | Case | View by Fields. - Select Entitlement Name in the dropdown menu, and click Hidden next to the System Administrator profile to display the accessibility options.
- Under Field-Level Security, select Visible, and under Page Layout, select Visible, and click Save.
- From Setup, enter
- Add the Entitlement Templates related list to the product page layout.
- From the Object Manager, enter
Productin the Quick Find box, then click Product | Page Layouts | Product Layout. - Select Related Lists from the menu.
- Drag the Entitlement Templates related list into the Related Lists section.

- Click Save. If you’re asked whether you want to overwrite users’ related list customizations, click Yes.
- From the Object Manager, enter
- Add the Entitlements related list to the account and asset page layouts.
- From the Object Manager, enter
Accountin the Quick Find box, then select Account | Page Layouts | Account Layout. - Select Related Lists from the menu at the top of the page.
- Drag the Entitlements related list into the Related Lists section, and click Save.
- From the Object Manager, enter
Assetin the Quick Find box, then select Asset | Page Layouts | Asset Layout. - Drag the Entitlements related list into the Related Lists section, and click Save.
- From the Object Manager, enter
Now that Maria has all that set up, it’s time to create her first entitlement.
Create an Entitlement
As we noted previously, a customer’s entitlement tells support agents what kind of support the customer is entitled to. One of Ursa Major’s top customers, DreamHouse Realty, has an SLA that entitles them to phone support for one year. Maria creates an entitlement that reflects the terms of the company’s SLA.
- In the App Launcher, enter
Entitlementsin the search bar, then select Entitlements. - Click New.
- Enter the following details:
- Entitlement Name:
Standard Phone Support - Type: Phone Support
- Account Name: DreamHouse Realty (You might have to create a new account—if you do, enter
DreamHouse Realtyas the name and leave the rest of the fields empty.) - Start date: Today’s date
- End date: 1 year from today
- Entitlement Name:
- Leave the rest of the fields blank, and click Save.

The DreamHouse Realty account now has its own entitlement that tells agents what support level its contacts are entitled to. Awesome! We’ll come back to DreamHouse Realty in a bit. But for now, let’s explore one way to create entitlements automatically in Salesforce.
Using Entitlement Templates
Solar panels are Ursa Major’s most popular product, so Maria decides to start there. Here’s how she uses an entitlement template to quickly entitle all solar panel owners to phone support.
- Create an entitlement template.
- From Setup, enter
Entitlement Templatesin the Quick Find box, then select Entitlement Templates. - Click New Template.
- Name the template
Phone Supportand use a term length of365days. - For now, leave the Entitlement Process field blank. (You can always add a process to your template after you create one.)
- Leave the rest of the fields blank, and click Save.
- From Setup, enter
- Create the solar panel product.
- From the App Launcher, enter
Productsin the search bar, and select Products. - Click New.
- For Product Name, enter
Solar Panel. - For Product Code, enter
9876. - Select Active.
- Leave the rest of the fields blank, and click Save.
- From the App Launcher, enter
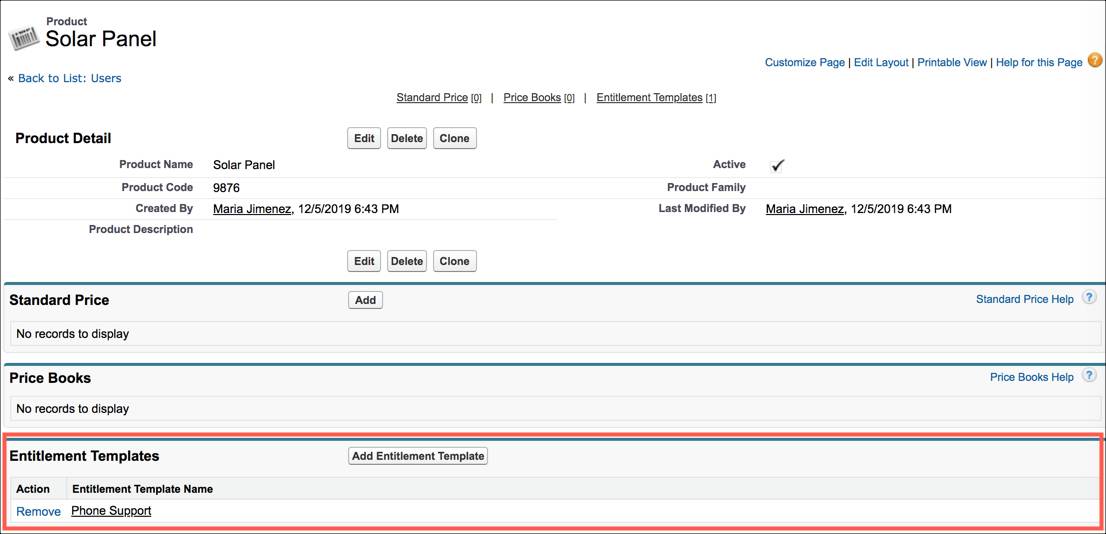
- Apply the entitlement template to the product.
- Switch to Salesforce Classic.
- Navigate to the Solar Panel product page you just created. You can find it under Recent Items in the left-hand panel.
- Click Add Entitlement Template.
- Select the Phone Support template you created.
- Click Insert Selected.
- Click Done. Your template is now linked to your product!
- Switch back to Lightning Experience.
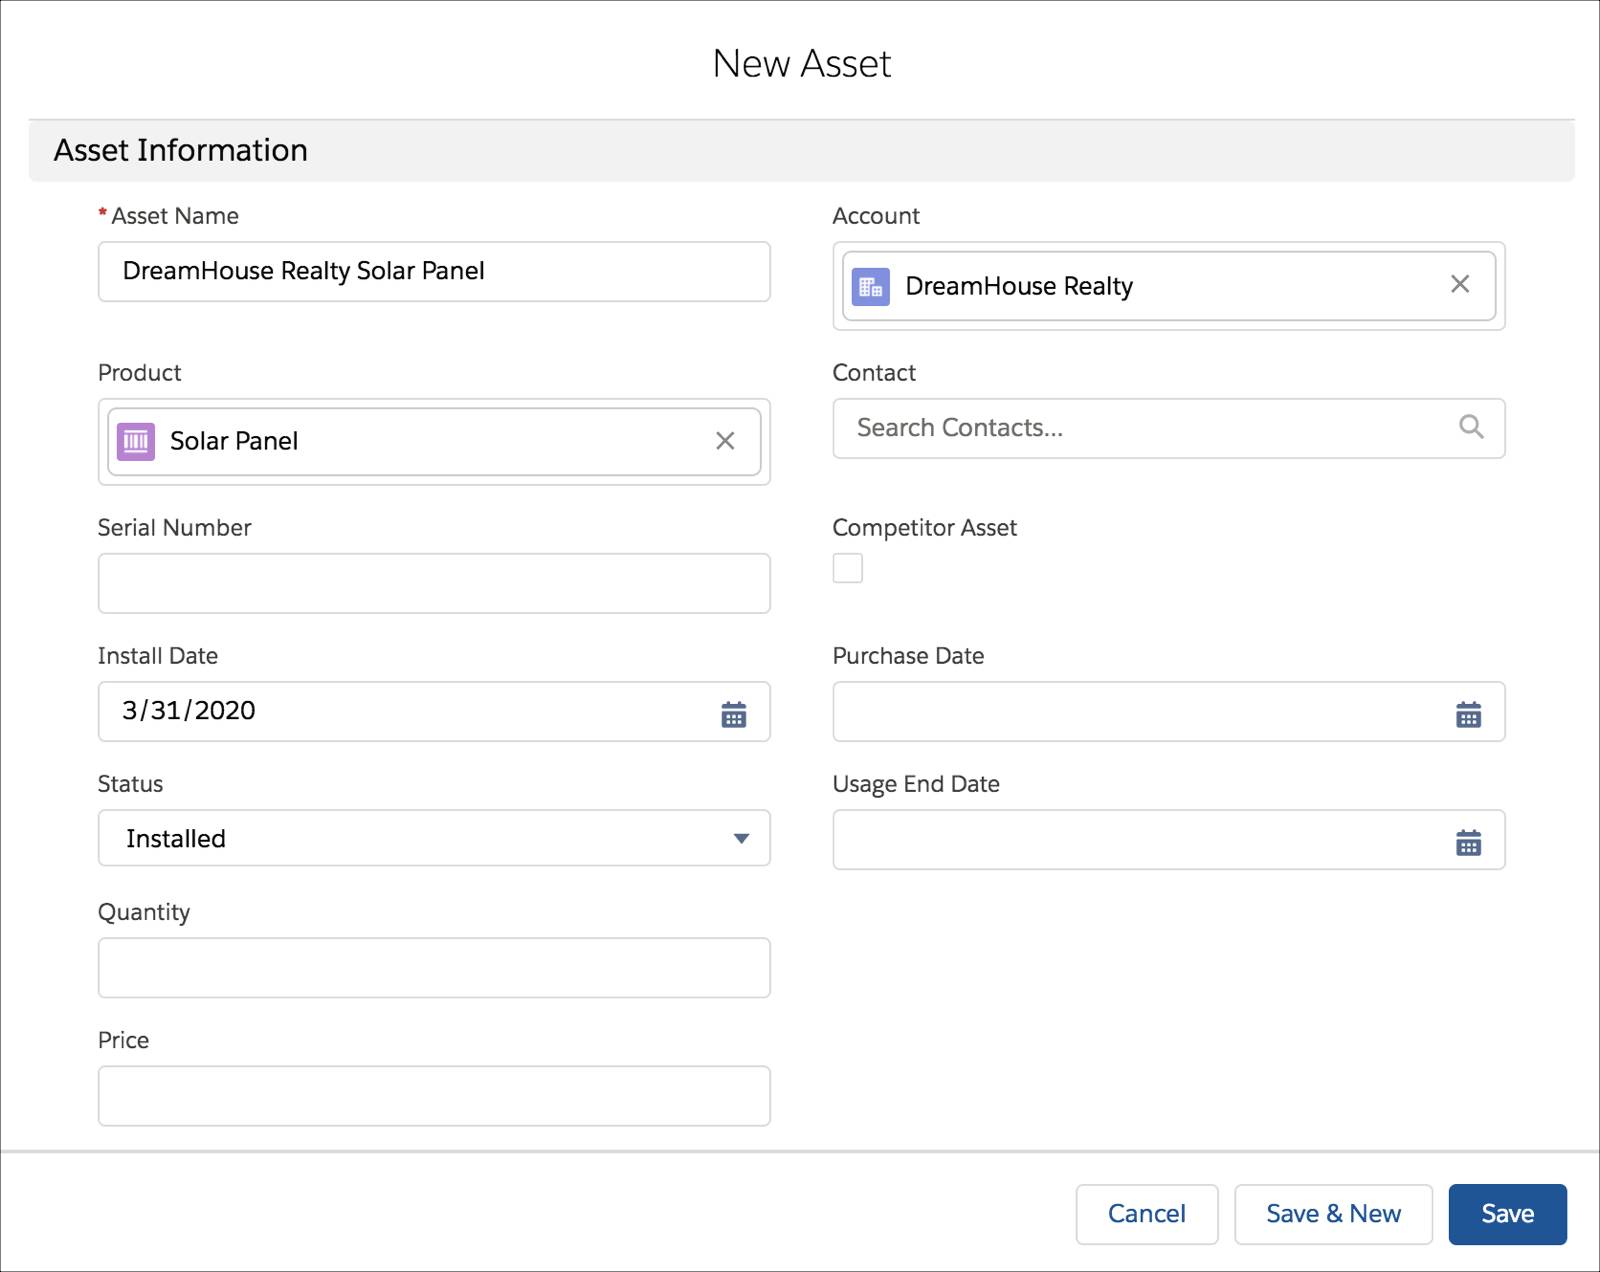
Whenever someone purchases solar panels from Ursa Major, an asset record is created from the Solar Panel product record. (Assets in Salesforce represent specific purchased products—for instance, “the solar panels purchased by DreamHouse Realty”). Because the product record now includes an entitlement template, a Phone Support with the same settings as the template is automatically added to the newly created asset. The entitlement appears in the Entitlements related list on the asset.
- In the App Launcher, search for
Assetsand select Assets. - Click New.
- Enter the following information:
- Asset Name:
DreamHouse Realty Solar Panel - Account:
DreamHouse Realty - Product:
Solar Panel - Install date: Today’s date
- Status: Installed
- Asset Name:
- Leave the rest of the fields blank and click Save.
- Let’s say DreamHouse Realty receives a faulty solar panel, and the company calls Ursa Major’s support line in a panic. The support agent quickly looks up DreamHouse Realty in Salesforce and finds the asset record for that solar panel. The agent sees from the Phone Support entitlement on the asset that DreamHouse Realty is entitled to phone support, and is able to order a replacement solar panel over the phone. Because of Maria, Ursa Major is able to stay true to its reputation for top-notch service.
