Navigate Data Cloud Segmentation
Learning Objectives
After completing this unit, you’ll be able to:
- Define key terms such as segment, publish, and activate.
- Create an activation target for Marketing Cloud Engagement.
- Navigate the segment canvas interface.
Data Cloud for Marketing
Marketers, are you ready to create meaningful segments with Data Cloud? Then this module is for you! Get ready to explore Salesforce Data Cloud for Marketing, create activation targets, build filters using the segment canvas, and publish and activate segments.
Before You Begin
If you’re new to Data Cloud, check out the Data Cloud for Marketing Basics badge first. And if you are new to Salesforce Lightning, consider reviewing the Lightning Experience for Salesforce Classic Users module. Also, be sure your account admin has configured your Data Cloud account and provided you with your user login credentials. Finally, if your data model hasn’t been set up yet, you won’t be able to create segments. Don’t worry—you can follow along in preparation and then come back for a refresher when your account has been fully setup.
Data Cloud Overview
Now that you’re up to speed, we can show you how to use your data to create segments that power personalized and engaging marketing communications for your customers. Let’s start at the beginning, navigating the Data Cloud home page. Data Cloud should look familiar to Salesforce Lightning users, but it may look less familiar to Marketing Cloud Engagement users. So let’s take a look around together.
The Data Streams, Data Lake Objects, and Data Model (1) tabs provide insight into your selected data model and connected data sources that are created by the user with the data aware specialist permission set. Data Explorer and Profile Explorer (2) are data-viewing tools, allowing you to view your ingested and unified profile data, respectively. Identity Resolutions (3) is where your team creates match and reconciliation rules to unify individual records. Calculated Insights (4) are predefined and calculated metrics that can help you build segments. As a marketer, the Segments (5) tab is where you create your filtered audience segments. Activation Targets and Activations (6) are used to manage where segments get exported, for example Marketing Cloud Engagement. Finally, the Setup (7) gear is where admins manage account settings. Tip: You can customize the order of these tabs!

Segment, Publish, and Activate
As a marketer, the Segments and Activation tabs are going to be your most used. So let’s focus on those areas and the concepts that drive segmentation. To get you from raw data to a usable audience segment for a marketing campaign, you must: Segment, publish, and activate.
| Segment | Publish | Activate |
|---|---|---|
|
Filter your data to create useful segments to understand, target, and analyze your customers. |
Publish is the process of searching and building a segment based on the filter criteria. You can publish your segments on a chosen schedule or as needed. |
Activation is the process of moving audience segments to an activation target. For example, during activation an audience segment is created in a shared data extension that can be used in Marketing Cloud Engagement Journey Builder. |
This is the typical workflow for creating segments in Data Cloud but with a new account there is an exception. New users need to first create an activation target. Why? To quote Stephen Covey, author of 7 Habits of Highly Effective People®, “To begin with the end in mind means to start with a clear understanding of your destination.”
Activation Targets
Before you can publish a segment, you need to identify an activation target, or the location where you want to use your segment. Once created, you can publish your segments and additional attributes to the created activation targets. Follow these steps to create a Marketing Cloud Engagement activation target.
Create a Marketing Cloud Engagement Activation Target
- From Data Cloud, go to the Activation Targets tab.
- Click New Activation Target.
- Select Marketing Cloud Engagement.
- Click Next.
- Enter an easy-to-recognize and unique name.
- Click Next.
- Click the arrows between columns to add or remove which business units receive the published segments.
- Click Save.
Your Marketing Cloud Engagement activation target is now created!
The Segment Canvas Interface
Now that we’ve read the last page of the book, let’s go back to the beginning. With our destination in mind, we can now build segments in Data Cloud. First, we review the key elements of the segment canvas interface. 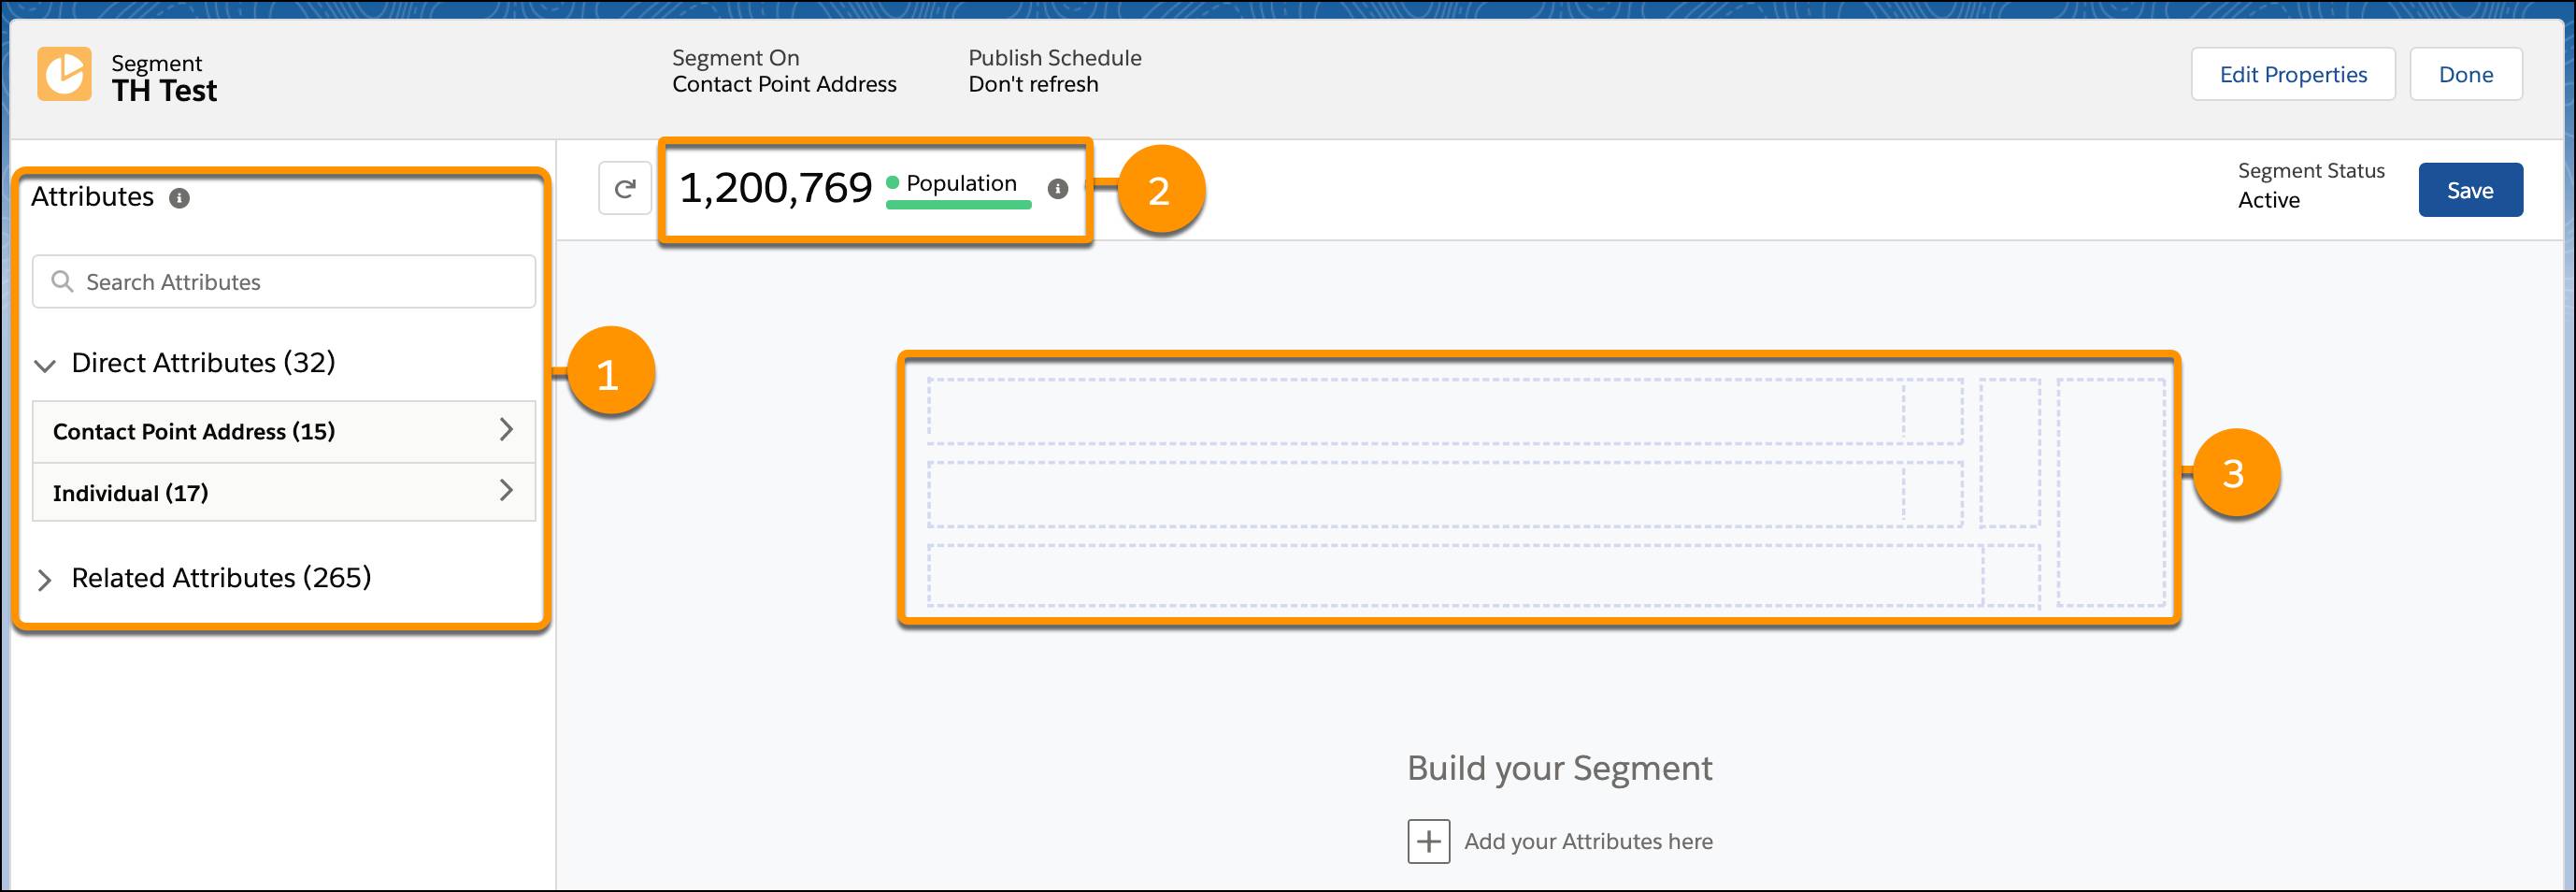
Attribute Library (1)
The attribute library displays attributes associated with a selected segment target that have been mapped in your data model and are marked for use in segmentation. Attributes may be from standard data sources like engagement data from Marketing Cloud Engagement, a custom data object, or system data. Attributes are used to narrow down a segment to your target audiences. There are two types.
- Direct attributes are attributes that have a one-to-one relationship with the segment target. Meaning each segmented entity has only one data point for a profile attribute. So for customer data, they would only have one entry for postal code or for first name.
- Related attributes are attributes that can have multiple data points. So for customer data, related attributes would be data points that one person could have multiple of, like purchases or email opens.
Segment targets determine which attributes you can select, so it’s important to understand your data model. Don’t worry, we cover the concept of Segment On in the next unit.
Population (2)
The population is the number of records within your current segment. This is refreshed after publishing or performing an on-demand count.
Containers (3)
Attributes can be dragged into individual containers to create AND/OR relationship logic between the attributes. Containers provide a way to create relationships between your related attributes and are used to build your filter logic. When attributes are placed in one container, your query engine looks for attributes that relate to one another in this way. Attributes in separate containers aren’t connected.
Container Examples
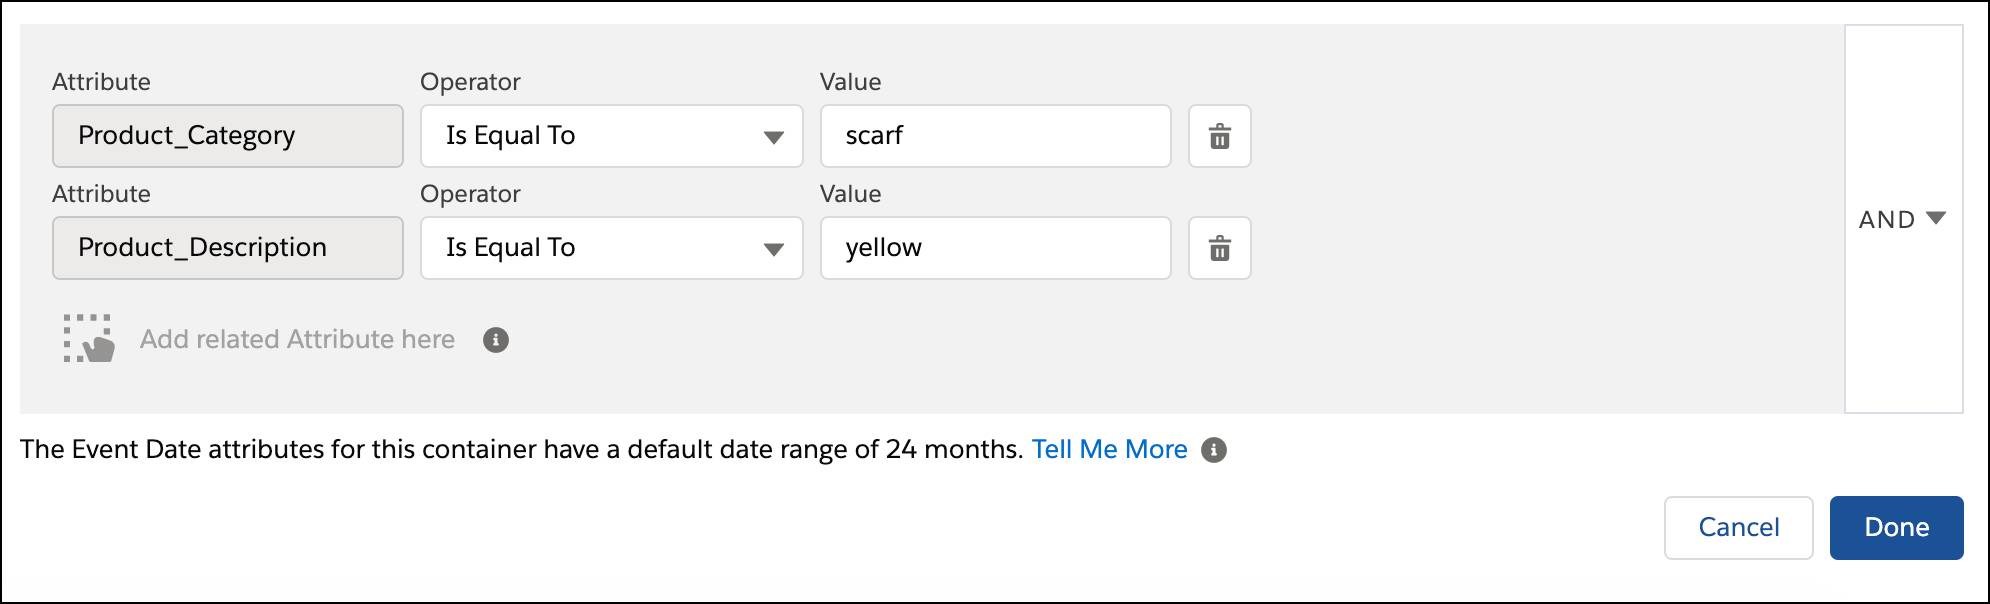
Let’s review an example. If Northern Trail Outfitters (NTO) is looking to send an email to customers who purchased a yellow scarf, they would use one container that includes:
Container 1=
- Related attributes:
- Product_Category is equal to scarf
- Product_Description is equal to yellow
- Logic: AND
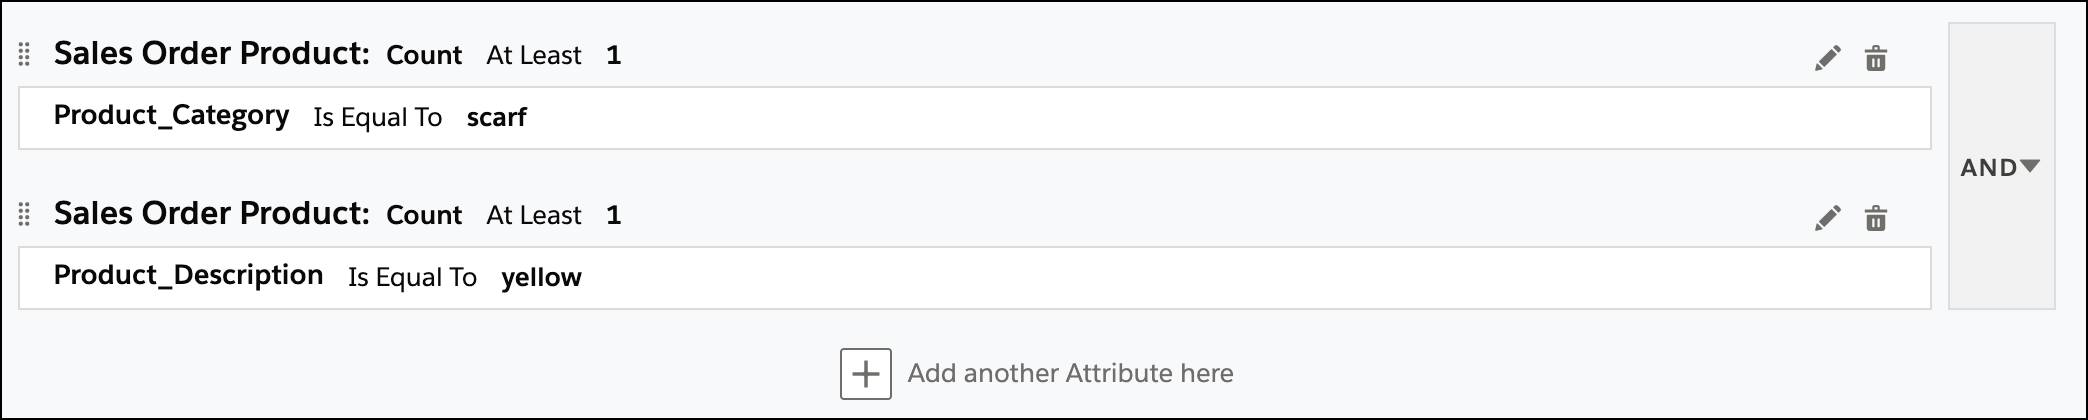
If the NTO team had created 2 containers the query engine looks for customers who purchased any yellow product and also purchased a scarf of any color.
- Container 1=
- Related attributes: Product_Category is equal to scarf
- Container 2=
- Related attribute: Product_Description is equal to yellow
- Logic: AND
Both options work for marketing campaigns, but it is good to know exactly what you are asking for when you start your query. To help you do that, we dive deeper into data and query logic in the next unit.