Use Features to Organize Options
Learning Objectives
After completing this unit, you’ll be able to:
- Create features to organize product options.
- Control selectable option count per feature.
- Determine how options are presented per feature.
- Add help text to features.
Follow Along with Trail Together
Want to follow along with an expert as you work through this step? Take a look at this video, part of the Trail Together series on Trailhead Live.
(This clip starts at the 1:01:15 minute mark, in case you want to rewind and watch the beginning of the step again.)
Introduction
You can add lots of options or just a few to a bundle. Because a single long list of options isn’t very user friendly, you can use the Feature bundling tool to group similar options and limit how many different options the sales rep can choose from a particular group.
Creating Features
Features give structure to bundles by grouping similar options, which then appear in separate sections on the configuration page. Bundles can have any number of features, and features can have any number of options. The Laptop bundle from the beginning of this module has three features: Processor, Memory, and Storage.
Let’s look at how we create a feature for the Laser Printer bundle that puts the regular and high capacity paper trays into their own section, and requires at least one to be selected.
- Click Products in the navigation bar, then choose the All Products list view.
- Click Laser Printer.
- Click the Related tab.
- On the Features related list, click New.
- For Feature Name, enter
Trays.
For this example, we require at least one tray to be selected, so let’s keep Min Options set to 1. If we set Min Options to 0, sales reps can sell a printer without a tray. Because printers can’t print without a tray, that would be bad news for the customer. - For Number, enter
10.
The Number field is used to sort features shown down the page, the lowest numbered feature appearing first. In this case we only have one feature, but if we had another we could number it 20 to make it appear after Trays. - Click Save.
Now we update our tray options to make sure they appear in the feature. - From the Options related list, open the dropdown menu for Printer Paper Tray and click Edit.
- In the Feature field, search for and select Trays.
- Click Save.
- From the Options related list, open the dropdown menu for Printer High Capacity Tray and click Edit.
- In the Feature field, search for and select Trays.
- Click Save.
Awesome work. Now when sales reps add the Laser Printer bundle, they see Trays in a separate section. And sales reps can’t save the bundle if they don’t choose at least one of the trays. You can try it out in your CPQ-enabled org by adding the Laser Printer to Q-00001 on the Printer for Back Office opportunity for Edge Communications. (If there’s already a printer on that quote, that’s OK. We’re just testing and won’t save.)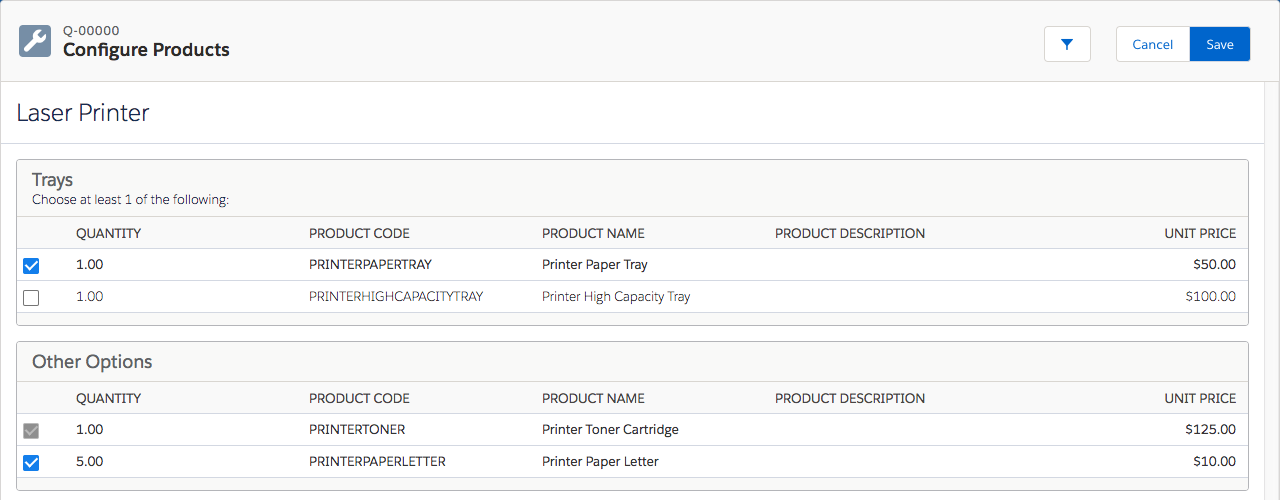
Since none of the remaining options in the Laser Printer bundle have a feature, they’re listed in the Other Options section. This section doesn’t appear if all options have features.
Maximum Options
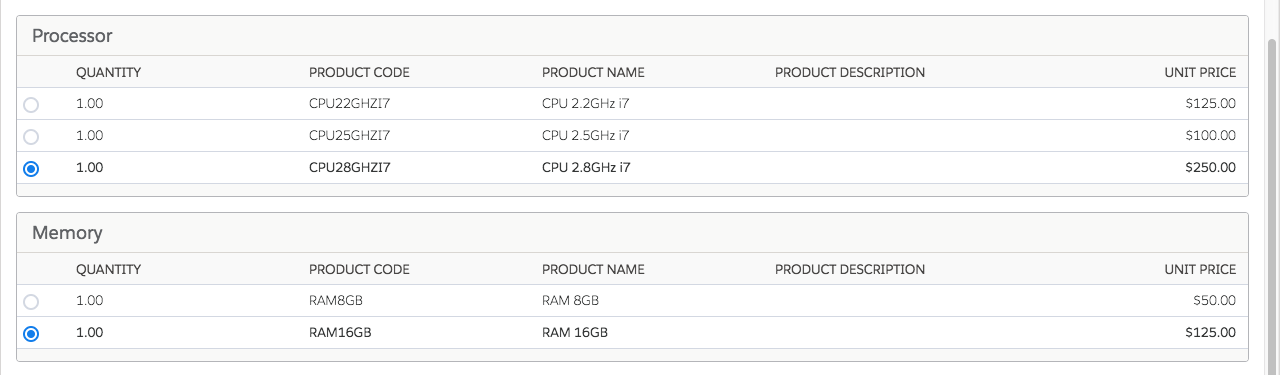
If a feature has a Max Options of 1, meaning your reps can only choose one option for that feature, CPQ is smart enough to show radio buttons instead of checkboxes. This makes it easier to switch between options (one click instead of two), while also giving the sales rep a visual cue about what they’re allowed to choose in the bundle.
Option Selection Method
If you have many features with many options, the configuration page can be long. In that case, consider changing the Option Selection Method on the Feature from Click to Add. The Add setting replaces the list of options with an Add Options link.
When the sales rep clicks the link, a new page opens that shows only the options for that feature.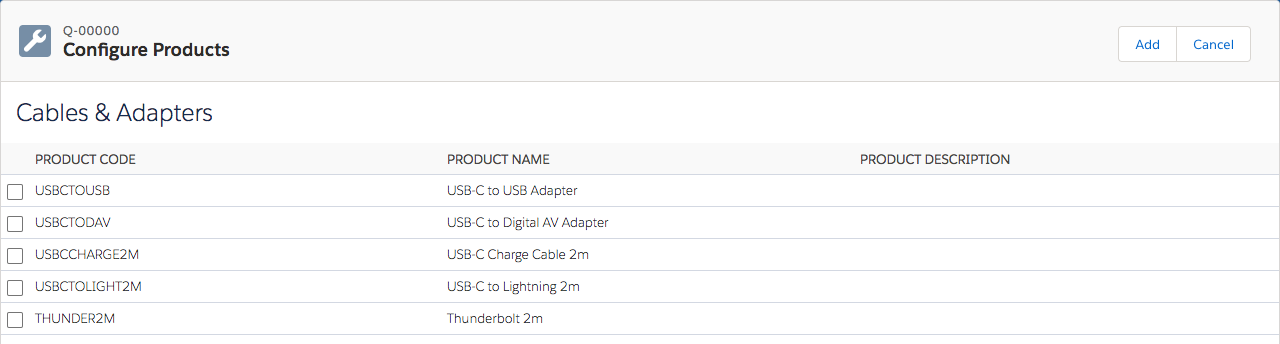
Additional Instructions
Features have a hidden setting that lets admins put text below the feature name. You can use this text to provide guidance to your sales reps about which options are most popular, or what kinds of questions to ask the customer to help in their decision-making.

The hidden setting isn’t available out of the box, but you can add it to your org in just a few steps.
- Click
 and click Setup. The Setup page opens in a new tab.
 - Click Object Manager.
- Click Product Feature.
- Click Fields & Relationships.
- Click New.
- Click Text Area (Long).
- Click Next.
- For both Field Label and Field Name, enter
AdditionalInstructions.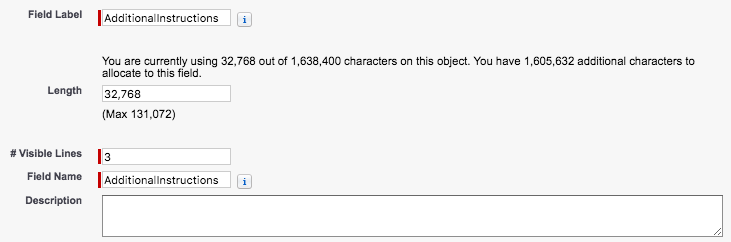
Even though this is a custom field, you must copy and paste AdditionalInstructions as the exact name for field name and label, or else CPQ won’t display the help text. - Click Next.
- Click Next to keep field-level security as is.
- Click Save.
Close the Setup browser tab to return to the Salesforce CPQ app.
Now you can add help text to the AdditionalInstructions field on any feature. For example, we can update the Storage feature on the Laptop to help sales reps choose the appropriate option for their customer.
- Click Products in the navigation bar, then choose the All Products list view.
- Click 15" Laptop.
- Click the Related tab.
- In the Features related list, open the dropdown menu for Storage and click Edit.
- In the AdditionalInstructions field, enter
Customers who do content creation such as photo or video editing typically benefit from the large 512GB hard drive, otherwise the 256GB hard drive will do.
- Click Save.
To test your work, add the bundle to Q-00000 on the Laptop for Front Office opportunity for Edge Communications. (If the quote already has a laptop saved to it, that’s okay. We’re just testing and won’t save again.)
Summary
As you can see, features improve the user experience by organizing options and acting as a convenient place for help text. They can even contribute to accurate quoting by controlling how many options a sales rep may select for a given feature. In the next unit we see ways to change the look and feel of configuration pages.