Organize Assets to Align with Your Content Strategy
Learning Objectives
After completing this unit, you'll be able to:
- Create and organize folders that align with your content strategy.
- Import content into Content Builder.
- Tag content and associate it with campaigns.
- Filter and search for content.
Introduction
You understand the value of content and you've finished your content strategy. You're probably excited to jump into Marketing Cloud Engagement and implement your strategy. Content Builder is a powerful tool for organizing and sharing content with your organization for your marketing and communication campaigns. Content can include images, content blocks, templates, videos, documents, and more. Before you start setting it up, consider how Content Builder works.
Imagine you're opening a library. You've purchased a building, hired staff, and ordered books and supplies. Now it's time to set up the library to ensure library patrons can easily find the books they seek. Your operational plan defines exactly how patrons and staff use the library and who has access to the behind-the-scenes areas. You've organized books into meaningful sections like fiction, nonfiction, and children's books. After all, you want everyone who wants to borrow a book to know where to look.
Content Builder is a lot like a library of content for your Marketing Cloud Engagement account. Use Content Builder to organize your assets, make creating emails efficient, and give access to the appropriate people.
Take a Look at Content Builder
Let's navigate to Content Builder so you can get rolling. You can access Content Builder in a couple ways. In Marketing Cloud Engagement, click Content Builder in the top navigation bar to head straight into Content Builder. If you're already working in Email Studio, you can click Content in Email Studio navigation.

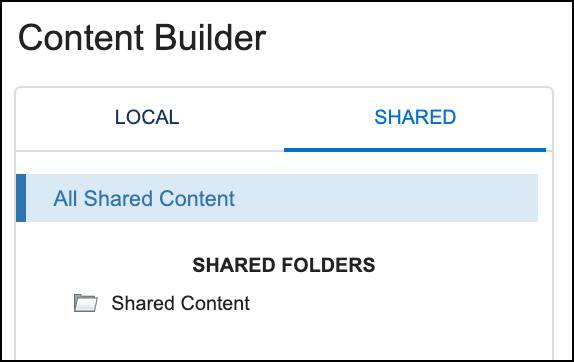
When you're in Content Builder, you can find a list of folders and assets. Use the Local or Shared tabs to navigate between folders that are in your business unit and those that you've shared with others. If you're just starting to add content, you can find a standard Content Builder folder for the local business unit and a standard Shared Content folder for content that is shared across business units. The Content Builder interface also includes options to import classic content, create content, search for specific content, and sort or filter the list of content displayed.
Start with Folders
Back to that library you're opening. You need to define specific areas in the library so that your staff can accomplish tasks such as checking out books to patrons, processing returned books, and sorting new books. Think of Content Builder folders the same way. How is your content used? Organize for that.
Take a look at your content strategy. Are you thinking about your content in terms of channel types, such as email or mobile? Or maybe you organized your strategy by types of campaigns, like welcoming customers and seasonal promotions.
For example, Northern Trail Outfitters (NTO) is an outdoor gear company that markets specific products in seasonal promotions. The NTO team organizes its folder structure in this way for easy access to seasonal campaign content:
- Seasonal campaigns
- Winter
- Luggage
- Spring
- Biking
- Camping
- Summer
- Running
- Training
- Fall
- Climbing
- Hiking
Organize your folders to align with your content strategy. This organization can save you time later when you're searching for specific content. Some more examples of organization:
- Product lines
- Campaigns
- Welcome
- Seasonal
- Abandoned cart
- Membership
- Nonmember
- New member
- Member
- Inactive member
- Customer types
- Men
- Women
- Kids
Ready to create folders? Decide whether you're creating a local folder or a folder for content you are sharing with all business units. Click the Local or Shared tabs to pick the right one.
To create a folder, right-click the existing folder and click Create Folder. Give your folder a name, and you're ready to go. Use this same menu to delete, rename, or move folders in Content Builder.

Upload, Import, and Create Content in Content Builder
You've created your folders, and now you're ready to add content. You have a few options to get content into Content Builder.
Upload Content from Your Computer Desktop
If you have content saved on your hard drive or local server, you can drag and drop files directly into the Content Builder interface. To do this, click Create, then click Upload or hover over Upload to find files on your computer.

The files display in Content Builder. Click Upload and Publish when you're ready to complete the upload.
Import Existing Content from Classic Content
If you're switching from Classic Content, use the Import Assistant to easily bring your content into Content Builder.
In Content Builder, click Import from Classic to get started. Decide whether you're importing content and folders, or if you're importing content only into a new folder structure. We recommend importing content only, so you can take advantage of the unified folder structure and create folders that include all types of content.
After you select a method, decide which folders in Content Builder to move your classic content into. Now you're ready to import.
This video shows how to add and import content with Email Studio and Content Builder.
Once you start the import process, you can't stop it or undo it. The process takes time to complete. You can close the Import Assistant after the import begins. We notify you when it completes. Don't worry—you don't have to import all of your Classic content at once. Move the content you're currently using and import more content later as needed.
A few other things to consider about importing classic content:
- After you import a folder, that content is available in both classic and Content Builder.
- Changes you make to images and documents in one application (classic or Content Builder) update the same asset in the other application.
- Changes you make to content areas (classic) or content blocks (Content Builder) don't update that same asset in the other application.
Create Content
If you don't have content to import, you can create content directly in Content Builder. Click Create and choose a content type, such as email, template, content block, code snippet, or enhanced dynamic content.

Label, Sort, and Search
Remember that library you're opening? Imagine how much time your patrons would waste if your books weren't labeled or organized in meaningful sections. To run an efficient library, you organize books by category, label each book by title or code, and stock them on shelves in alphabetical order.
Content Builder gives you lots of options for classifying and finding your content, increasing your company's efficiency with Marketing Cloud Engagement. Check out these tools to help you get organized.
Tags
In addition to folders, tags are a great way to keep your content organized and easy to find. For example, use product types as content tags, to quickly locate content that relates to a specific product. You can create as many tags as you need, but it doesn't hurt to align them with your content strategy. To add a tag to a piece of content, open that asset. In the Details tab, look for the Tags field. From there, you can select an existing tag or create one.

Campaigns
Your marketing strategy can include specific campaigns, such as a summer clearance sale or a new-member welcome event. You can associate email templates with specific Marketing Cloud Engagement campaigns, making it easy to find the appropriate email content. Click Edit on the dropdown menu for any piece of content to view its properties. Click in the Campaign field to search for the appropriate campaign and save.

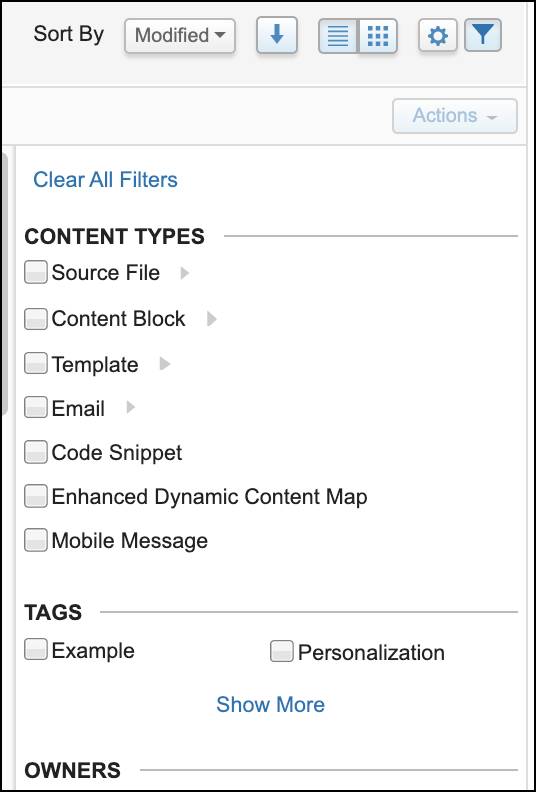
Sort and Filter
Are you looking for a specific piece of content? Content Builder offers multiple ways to sort and filter your content.
Use the Sort By menu and select criteria to reorganize your list of content. For example, select Modified to sort your list by the date the content was last modified. This makes it easy to find the content you edited recently.
Navigate to a folder in Content Builder. Click  to view filter options, including content types, tags, and owners. Select filters to narrow down the content and find what you need.
Search
Content Builder offers a robust search tool that you can access in the main content library. Use the Search field to search everything in that folder, within a specific business unit, or all content. You can also access search while creating an email in Email Studio. In the Content tab, search for local or shared content.
Check out this Marketing Cloud Engagement Basics video on organizing your content:
Resources