Use REST API
Learning Objectives
After completing this unit, you’ll be able to:
- Log in to the Postman app and navigate to the REST folder in the Salesforce API Collection.
- Use the GET SObject Describe resource.
- Create an account using REST API.
- Execute a query using REST API.
REST Resources and Methods
Land ho! We’ve spotted the Isle of REST ahead of the bow, Captain. Before we dock and start using the API, let’s talk about REST resources and methods.
A REST resource is an abstraction of a piece of information or an action, such as a single data record, a collection of records, or a query. Each resource in REST API is identified by a named Uniform Resource Identifier (URI) and is accessed using standard HTTP methods (HEAD, GET, POST, PATCH, DELETE). REST API is based on the usage of resources, their URIs, and the links between them.
You use a resource to interact with your Salesforce org. For example, you can:
- Retrieve summary information about the API versions available to you.
- Obtain detailed information about a Salesforce object, such as Account, User, or a custom object.
- Perform a query or search.
- Update or delete records.
A REST request consists of four components: a resource URI, an HTTP method, request headers, and a request body. Request headers specify metadata for the request. The request body specifies data for the request, when necessary. If there’s no data to specify, the body is omitted from the request.
Before You Go Further
You’re going to use Postman to make some API calls. You can make REST requests from any HTTP sender. And Postman is just one of many tools you can use to interact with your Salesforce org through the API.
The first step is to create a new Trailhead Playground, connect it to the Postman app, set up cross-origin resource sharing, and create a fork to the Salesforce API Collection. You can do this by completing Quick Start: Connect Postman to Salesforce.
You can make REST API calls to your Trailhead playground using the resources in the Postman app Salesforce Collection REST folder just like you would from any other HTTP interface. When you select a resource from the Salesforce API Collection, the URI builds across the top of the main window.
Describe the Account Object
Let's take a look at how this works.
You’ll use the SObject Describe resource. This resource, when combined with the GET method, returns metadata about an object and its fields. Let’s describe the Account object.
- In Collections, select your fork of the Salesforce APIs Collection.
- Click the REST folder.
- Click SObject.
- Click GET SObject Describe.
- In the main panel, open the Params tab.
- Under Path Variables, in the SOBJECT_API_NAME row, VALUE column, enter
Account.

Before you take a look at your query results, let’s take a minute to break down this resource’s URI.
-
GET—The HTTP method used for this API call.
-
{{_endpoint}}—The place where the request will take place. In this case, you added the URL of your Trailhead Playground to the _endpoint field in the variables to connect to Salesforce.
-
/services/data—Specifies that you’re making a REST API request.
-
/v {{version}}—The API version number. The double curly quotes indicate that this can be set as a variable.
-
/sobjects—Specifies that you’re accessing a resource under the sObject grouping.
-
/:SOBJECT_API_Name—The sObject being actioned; in this case, Account.
-
/describe—An action; in this case, a Describe request.
Now click Save, then click Send.
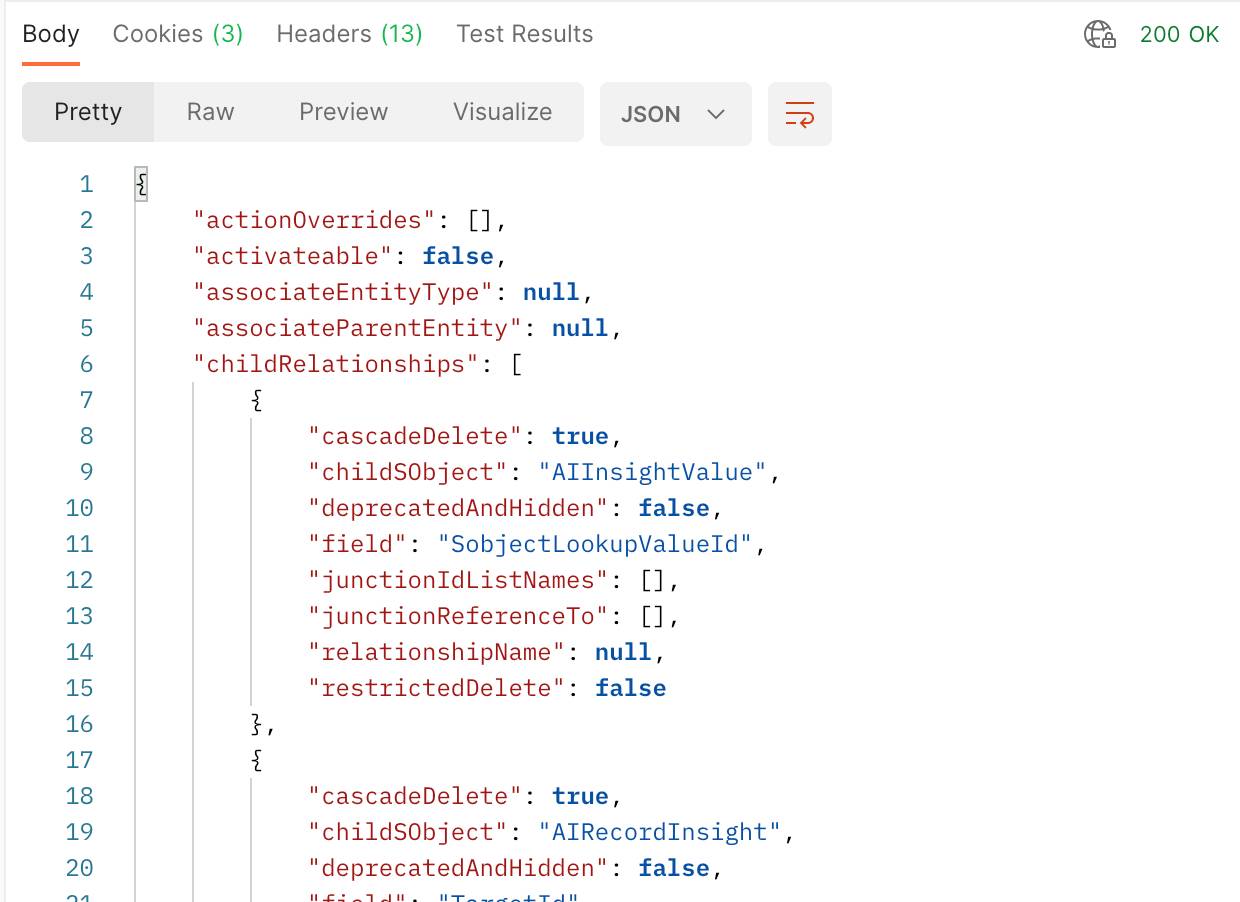
Good work, Captain! The Account metadata appears on the screen, and Postman has nicely formatted the response. To see the raw JSON response, click Raw.
The Account metadata is displayed in JSON. Because REST API supports both JSON and XML, let’s change the request header to specify an XML response.
- In the request window, click Headers.
- Add a new Header with a Key of
Acceptand Value ofapplication/xml.
Your request headers look like this.

3. Click Send.
The raw XML response is returned. Hurrah!
Create an Account
Now let’s create an account using the SObject resource and the POST method.
To create an account:
- Under REST, select SObject, and then select POST SObject Create.
- Open the Params tab.
- Under Path Variables, in the SOBJECT_API_NAME row, VALUE column, enter
Account.
- Open the Body tab.
- Replace the body text with this code:
{
"Name": "Captain Bly’s Finest Treasure Chests",
"ShippingCity": "Lisbon"
}
- Click Save.
- Click Send.

If success: true, the account was created with the returned ID.
Just for kicks, let’s create a second account without specifying an account name.
- Replace the text in the request body with the following text.
{
"ShippingCity" : "Melbourne"
}
- Click Send.
- Uh, oh. Did you get a “Required fields are missing: [Name]”, response?

- Because Name is a required field for creating an account, the server didn’t process the request, and you received an error. Thankfully, all the information you need to fix the request is in the error response. Let’s specify the account name, Pirate Pete’s Parrot Pellets, in the request body.
- Replace the text in the request body with the following text.
{
"Name": "Pirate Pete's Parrot Pellets",
"ShippingCity": "Melbourne"
}- Click Save.
- Click Send.
Success!
Execute a Query
Now let’s imagine that you or another user has created hundreds of accounts. You want to find the names of all the accounts where the shipping city is Melbourne. You can use the Query resource to execute a SOQL query to zero in on the exact records you want, just like a customized treasure map.
- Under REST, select GET Query.
- Open the Params tab.
- Under Query Params, in the q row, VALUE column, paste the following text.
SELECT Name From Account WHERE ShippingCity = 'Melbourne'

- Click Save.
- Click Send.
The query returns the account you just created, Pirate Pete’s Parrot Pellets. Good work, mate!
Take a look at the attributes. Next to “url” is the resource URI of the account that was returned. Your response looks something like this.

When you write an integration, you can grab this URI from the response to access more details about that account.
Node.js and Ruby Samples
Now you have a sweet taste of what’s possible with REST API. Of course, when you move from Postman to writing code, you’ll be interacting with REST API using the programming language of your choice. Luckily, expert Salesforce developers have written wrappers for several languages that simplify the process of consuming REST API. Here are two sample queries written in Node.js and Ruby that use wrappers JSforce and Restforce, respectively.
Node.js Sample Using JSforce
const jsforce = require("jsforce");const conn = new jsforce.Connection({
  // you can change loginUrl to connect to sandbox or prerelease env.
  // loginUrl : "
https://test.salesforce.com
"
});
// Log in with basic SOAP login (see documentation for other auth options)
conn.login(
  process.env.USERNAME,
  process.env.PASSWORD + process.env.SECURITY_TOKEN,
  (err, res) => {
    if (err) {
      return console.error("Failed to log in to Salesforce: ", err);
    }
    console.log("Successfully logged in!");
    // Run a SOQL query
    conn.query("SELECT Id, Name FROM Account LIMIT 5", (err, result) => {
      if (err) {
        return console.error("Failed to run SOQL query: ", err);
      }
      // Display query results
      const { records } = result;
      console.log(`Fetched ${records.length} records:`);
      records.forEach(record => {
        console.log(`- ${record.Name} (${record.Id})`);
      });
    });
  }
);
Ruby Sample Using Restforce
require 'restforce'
# create the connection with the Salesforce connected app
client = Restforce.new :username => ENV['USERNAME'],
  :password       => ENV['PASSWORD'],
  :security_token => ENV['SECURITY_TOKEN'],
  :client_id      => ENV['CLIENT_ID'],
  :client_secret  => ENV['CLIENT_SECRET']
# execute the query
accounts = client.query("select id, name from account limit 5")
# output the account names
accounts.each do |account|
  p account.Name
end
Resources
- Developer Guide: REST API Developer Guide
- External Site: HTML URL Encoding Reference
- External Site: Postman Learning Center