Create the Data Model
Red Rover, Red Rover, Send Messages on Over
If you’ve ever tried conversing with a robot (and honestly, who hasn’t?), then you know it’s all bleeps, bloops, and robot dance moves. However, with the power of Salesforce, we can translate those 1s and 0s into parts of human speech. Which parts? Nouns, adjectives, and verbs, of course.
We start by setting up a simple object model to support our communication with the rover.
Create the Custom Object
Let’s make an object and tab.
- Click the setup gear
 and select Setup.
 - Click the Object Manager tab next to the Home tab.
- Click Create and select Custom Object.
- Update the custom object definition.
- Label:
Communication - Plural Label:
Communications - Object Name:
Communication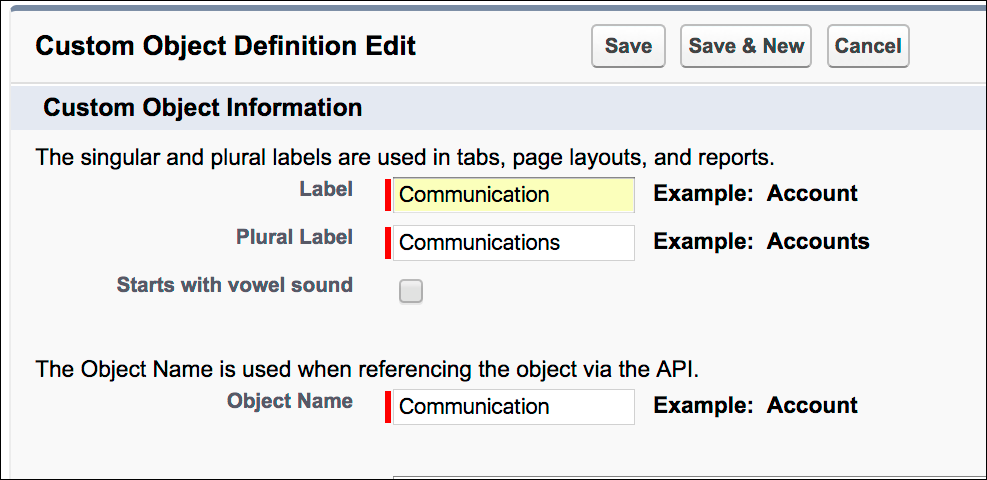
- Label:
- Select Launch New Custom Tab Wizard after saving this custom object.
- Leave the defaults for the remaining fields, and click Save.
Make a Custom Tab
Note: If the tab wizard didn’t automatically launch, that’s OK. Enter Tabs in Quick Find and select Tabs. In the Custom Object Tabs section, click New.
Follow these steps to create a tab for your custom object.
- For Object, select Communication.
- Click Tab Style and choose any image.
- Click Next, Next, and Save.
Create the Custom Fields
Now we create fields on the Communication object. On the left column, click Fields & Relationships.
- Click Fields & Relationships and click New.
- For Data Type, select Picklist, and click Next.
- Fill in the custom field details.
- Field Label:
Adjective - Select Enter values, with each value separated by a new line. Enter the following values for the picklist (one per line).
drydustyfreezinggaseouscosmicmoiststinky
- Select Always require a value in this field in order to save a record.

- Field Label:
- Leave everything else as is, and click Next, Next, and Save & New.
- For Data Type, select Picklist, and click Next.
- Fill in the custom field details.
- Field Label:
Noun - Select Enter values, with each value separated by a new line. Enter the following values for the picklist (one per line).
bananaalienastronautasteroidspacecraftpineapple upside-down cake
- Select Always require a value in this field in order to save a record.
- Field Label:
- Leave everything else as is, and click Next, Next, and Save & New.
- For Data Type, select Picklist, and click Next.
- Fill in the custom field details.
- Field Label:
Verb - Select Enter values, with each value separated by a new line. Enter the following values for the picklist (one per line).
red-dirt rollingshimmy-shammyingwhirlingtwo-steppingmoonwalkingdoing the robot (literally)
- Select Always require a value in this field in order to save a record.
- Field Label:
- Leave everything else as is, and click Next, Next, and Save & New.
- For Data Type, select Picklist, and click Next.
- Fill in the custom field details.
- Field Label:
Proper Noun - Select Enter values, with each value separated by a new line. Enter the following values for the picklist (one per line).
CloudyAstroCodeyEarnieEinsteinBlazeAppyRuthHootie McOwlface
- Select Always require a value in this field in order to save a record.
- Field Label:
- Leave everything else as is, and click Next, Next, and Save & New.
- For Data Type, select Picklist, and click Next.
- Fill in the custom field details.
- Field Label:
Number - Select Enter values, with each value separated by a new line. Enter the following values for the picklist (one per line).
123
- Select Always require a value in this field in order to save a record.
- Field Label:
- Leave everything else as is, and click Next, Next, and Save & New.
- For Data Type, select Picklist, and click Next.
- Fill in the custom field details.
- Field Label:
Direction - Select Enter values, with each value separated by a new line. Enter the following values for the picklist (one per line).
backwardssidewaysnorthin endless circlessouthin big figure eightswiddershins
- Select Always require a value in this field in order to save a record.
- Field Label:
- Leave everything else as is, and click Next, Next, and Save.
And there you have it. Now we’ve got a simple framework for talking with the rover. Up next, we use automation to get the rover talking.