Set Up Rewards
Define the Rewards
From her experience running the Cloud Kicks Inner Circle loyalty program, Mary can vouch for the effectiveness of rewards on customer loyalty. She believes a similar rewards system will motivate LevelUp members to remain engaged with the program. She wants to set up rewards that include exclusive benefits, vouchers, and other promotional offers. While benefits are tied to tiers, promotional offers are related to products. Let’s explore tier benefits first.
As members move to higher tiers, they become eligible for more benefits. These benefits are grouped by benefit type and category. For example, an Extended Return Period is a benefit type that falls under the Orders category. Benefit types can have more than one benefit. For instance, the duration of the return period depends on a member’s tier. Gold tier members get a 30-day return period, while Platinum members have 60 days to return orders. The two benefits are associated with the same benefit type, that is Extended Return Period.
To summarize, Jose must create benefit types, add benefits to them, and finally assign benefits to tiers.
For this project, you only create one benefit type and one benefit. You can create more for practice, but it's optional.
Create a Benefit Type
Here’s how you create a benefit type.

- In the LevelUp program record, click the Experiences tab.
- In the Benefit Types related list, click New.
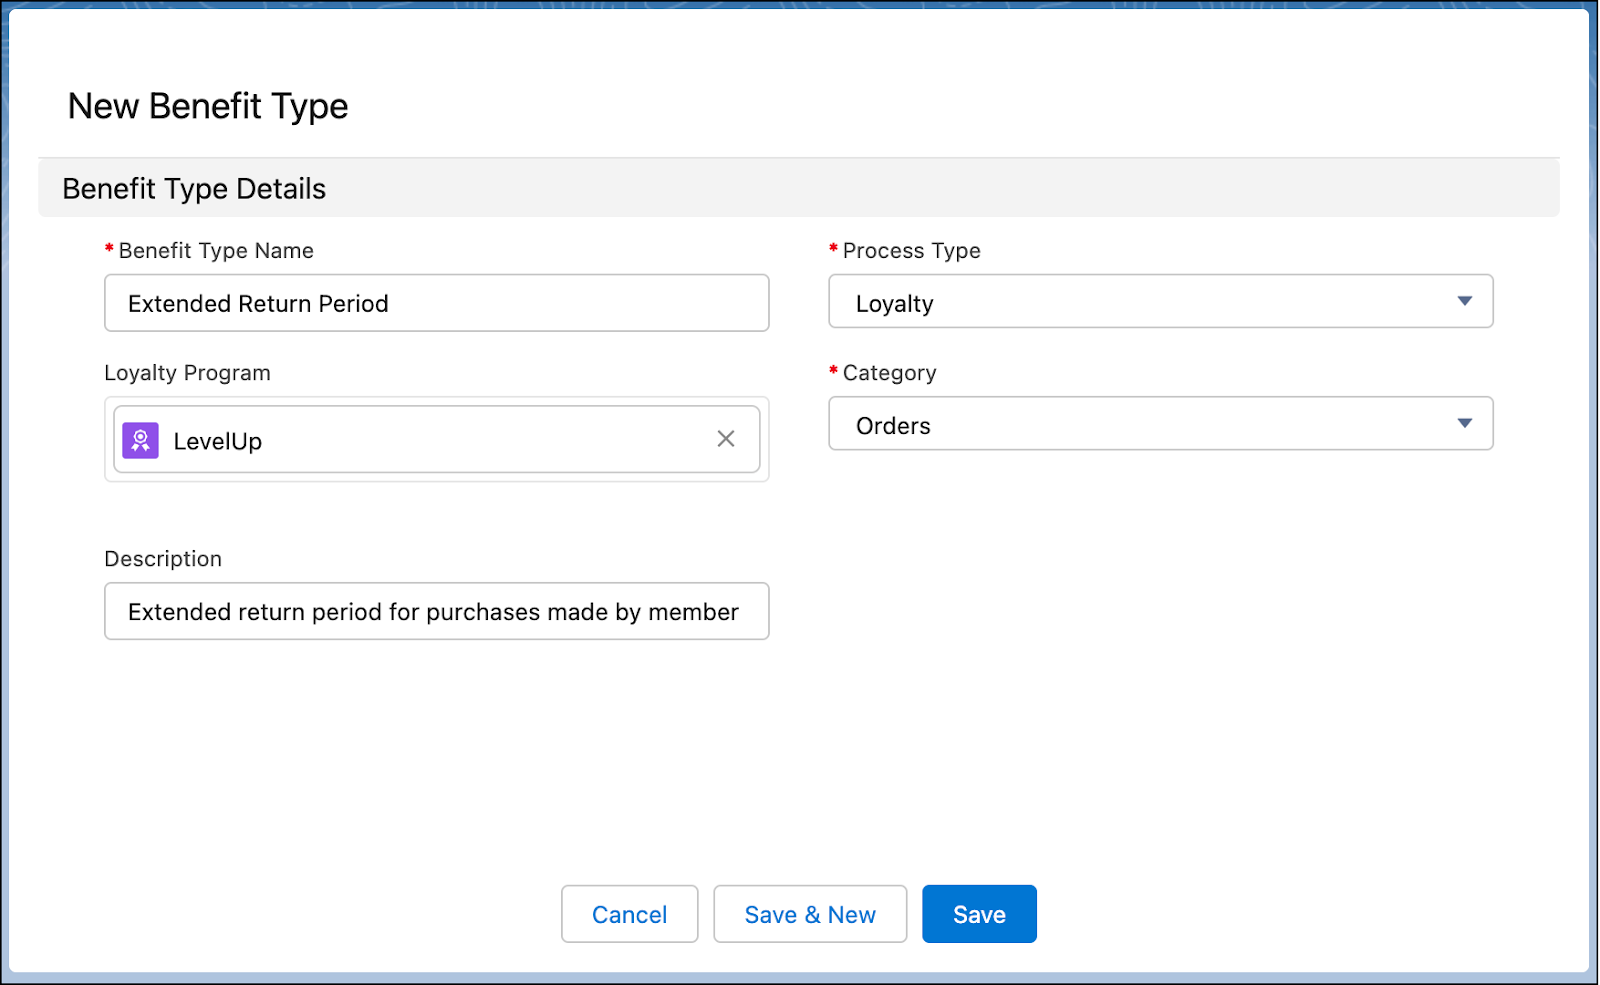
- Add the following details.
- Benefit Type Name:
Extended Return Period - Process Type: Loyalty
- Category: Orders
- Description:
Extended return period for purchases made by members
- Benefit Type Name:
- Click Save.
Here’s an example of several benefit types you could associate with the LevelUp program.
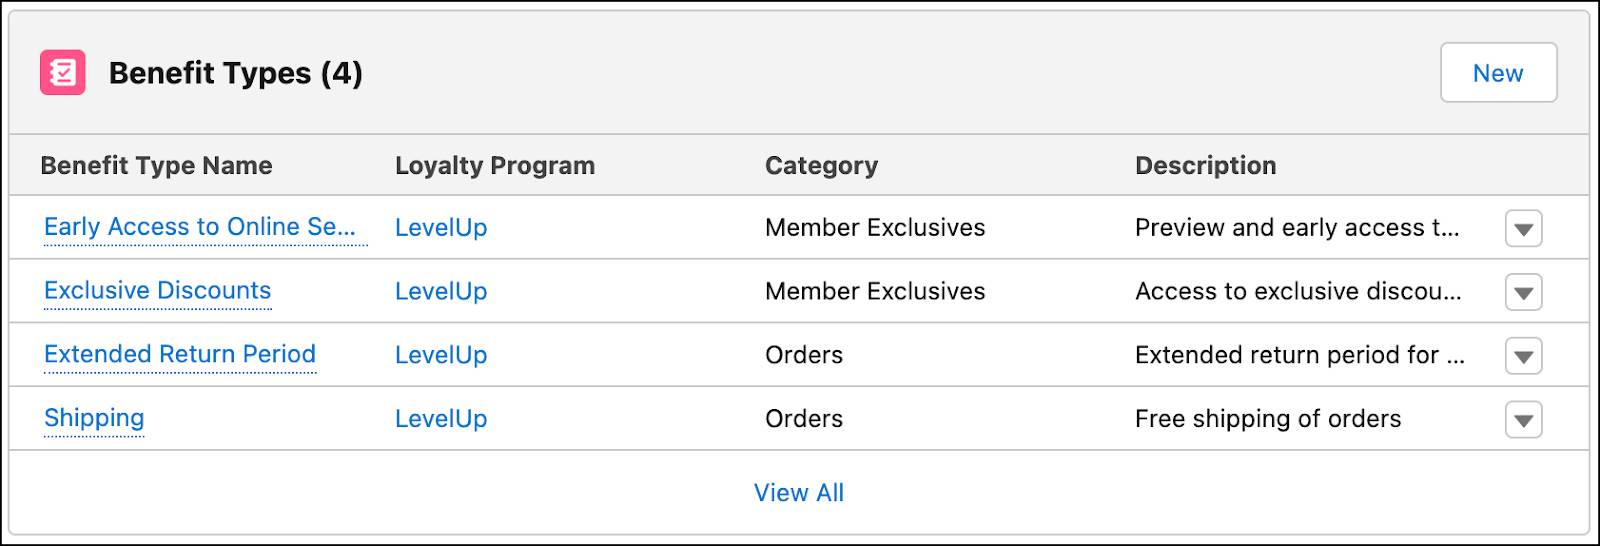
Next, you add a benefit to the benefit type.
Add a Benefit to a Benefit Type
Jose prioritizes some benefits by ranking them. When a benefit type has two or more benefits, the benefit with the higher ranking or Priority Sequence number is assigned to the member.
Take these steps to add a benefit to a benefit type.
- In the LevelUp program record, ensure the Experiences tab is displayed.
- In the Benefit Types related list, click Extended Return Period.
- In the Related tab, under Benefits, click New.
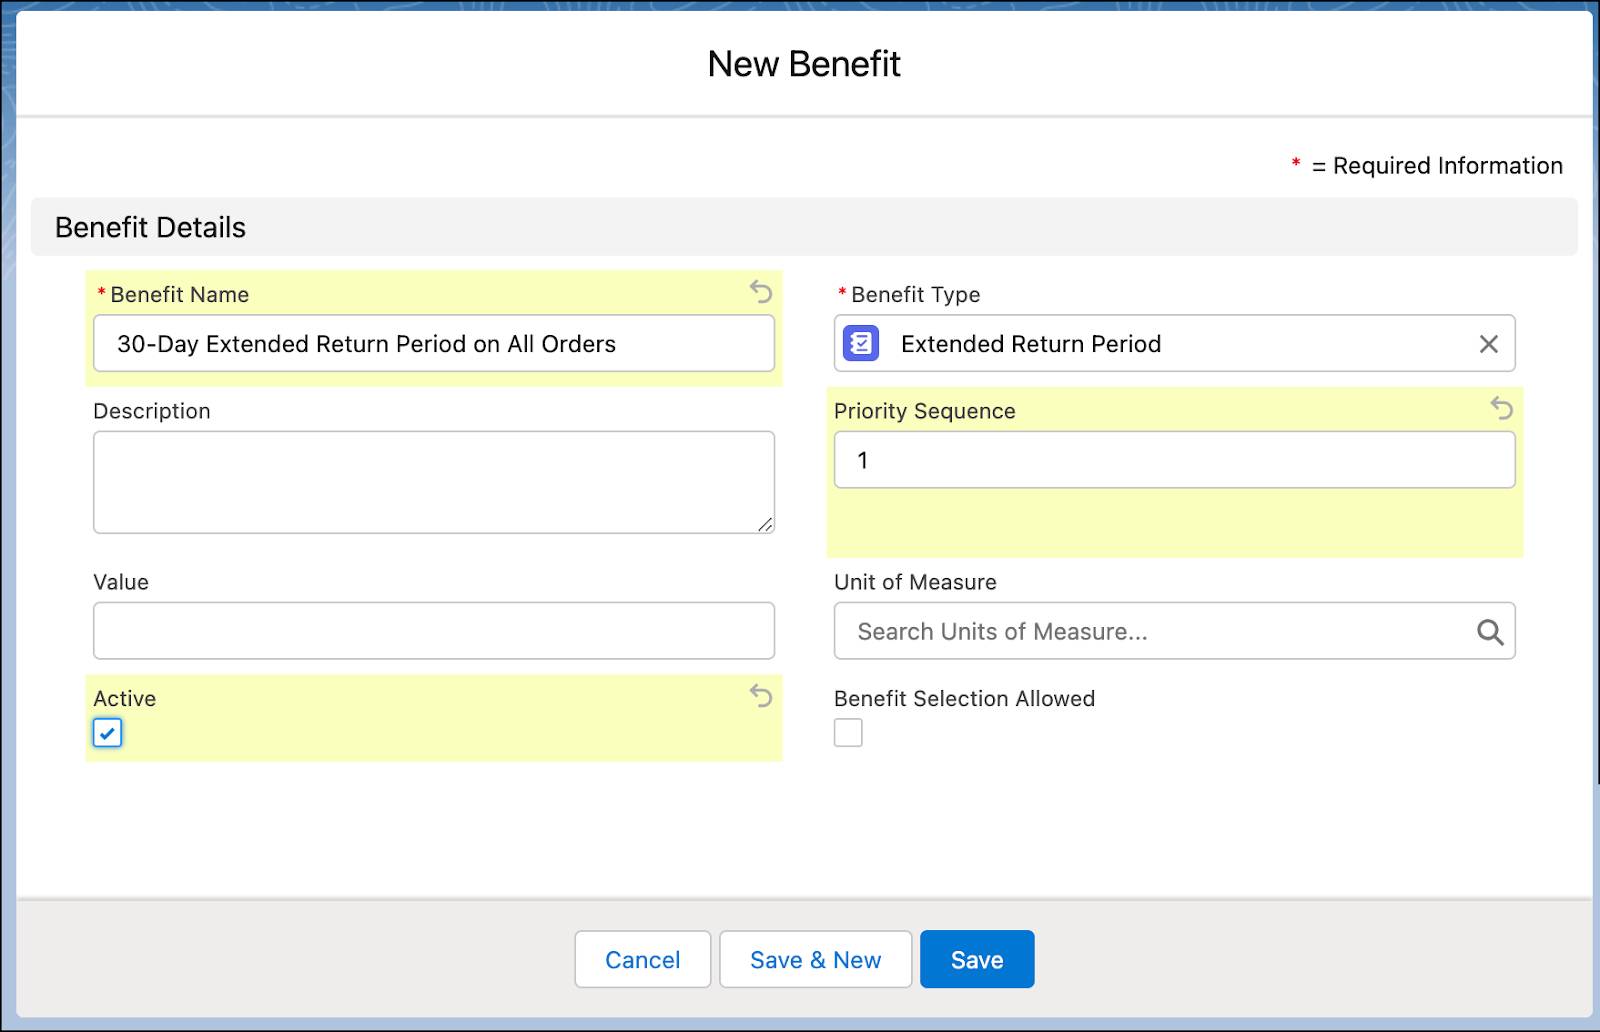
- Add these details.
- Benefit Name:
30-Day Extended Return Period on All Orders - Priority Sequence:
1 - Select Active.
- Benefit Name:
- Click Save.
|
Benefit Name |
Benefit Type |
Priority Sequence |
|---|---|---|
|
One-Day Early Access to Online Seasonal Sales |
Early Access to Seasonal Sales |
– |
|
10% off on certain shoes |
Exclusive Discounts |
1 |
|
20% off on certain shoes |
Exclusive Discounts |
2 |
|
60-Day Extended Return Period on All Orders |
Extended Return Period |
2 |
|
Free Shipping |
Shipping |
– |
Assign a Benefit to a Tier
Jose has created benefit types and the benefits for each type. He consults with Mary to decide the benefits for each tier. Typically, higher tiers are entitled to the most benefits. Mary thinks about it and decides that all members of the Silver tier should enjoy an extended 30-day return period. The Gold and Platinum tiers automatically get the benefits of the Silver tier and more.
Assign the benefits, starting with the Silver tier.
- In the LevelUp program record, ensure the Setup tab is displayed.
- In the Loyalty Tier Groups related list, click LevelUp Tier Group.
- In the Loyalty Tiers related list, click Silver Tier.
- Click the Related tab.
- In the Loyalty Tier Benefits related list, click Add Benefits.
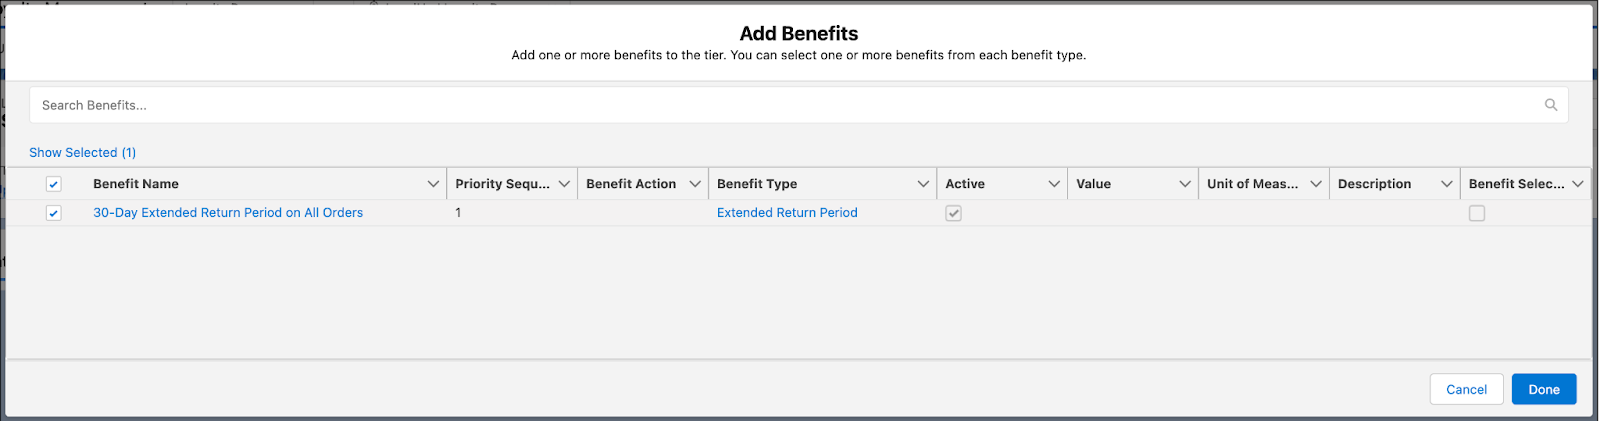
- Select the 30-Day Extended Return Period on All Orders benefit.
- Click Done.
|
Tier Name |
Benefits |
|---|---|
|
Gold |
|
|
Platinum |
|
The benefits are all set up. Next, Jose adds a few more rewards.
Define Vouchers
Think back to Mary’s requirements. She wants to promote En Mode’s flagship product line, the LevelX category of shoes. Anyone who purchases a shoe from the LevelX category receives a 15% discount voucher, which is valid for a month. To set this up, Jose must first create a voucher definition, which he then uses in the promotion.
When you use a voucher, you must enter a code at checkout to receive a discount or other benefits. This code is usually a system-generated unique combination of numbers and letters. Similarly, Loyalty Management generates a voucher code when vouchers are assigned to members. Jose enables the Generate Codes for Vouchers setting in Setup to generate a voucher code automatically.
- Click
 Setup.
 - Enter
Loyalty Management Settingsin the Quick Find box, and select Loyalty Management Settings.
- Ensure that Generate Codes for Vouchers is enabled.
With this setting enabled, the fields for the voucher prefix, suffix, and length become visible in the voucher definition. The setting also generates an alphanumeric value that makes the voucher code unique. The default code length is eight, but you can tweak it to fit your business needs.
Voucher definitions store key voucher information related to the voucher value, duration, associated partner, products, and voucher code.
Now, follow the steps to create a voucher definition.
- In the LevelUp program record, click the Experiences tab.
- In the Voucher Definitions related list, click New.

- Add these details.
- Name:
15% Discount on Purchases - Type: Discount Percentage
- Select Active.
- Expiration Type: Period
- Discount Percentage:
15 - Effective Date: Current date
- Expiration Period:
1 - Expiration Period Unit: Months
- Loyalty Program: LevelUp (This is populated)
- Code Prefix:
LU - Code Suffix:
DSC - Autogenerated Code Length:
10
- Name:
- Click Save.
This voucher is automatically issued to members when their transaction meets the rules of the promotion.
Mary and Jose created and assigned the benefits for each tier. They created a voucher, which Jose will use in a promotion for LevelX shoes. Next, let’s define promotion eligibility.