Use Visual Studio Code for Salesforce Development
Follow Along with Trail Together
Want to follow along with an instructor as you work through this step? Take a look at this video, part of the Trail Together series on Trailhead Live.
(This clip starts at the 19:41 minute mark, in case you want to rewind and watch the beginning of the step again.)
Terminal Versus Command Palette
Like with any good development tool, there is more than one way to do things with Visual Studio Code. The two main ways you can interact with Salesforce CLI are through the integrated terminal or quick open window.
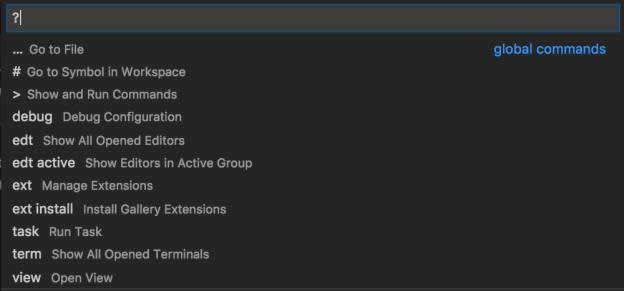
To view the quick open window, press Ctrl+P (Windows) or Cmd+P (macOS). If you type ? you can view the help menu. Through this module we will use the quick open window in command palette mode, which allows us to show and run commands.

Create a Project
- Press Ctrl+Shift+P (Windows) or Cmd+Shift+P (macOS) to make the command palette appear.
- Make sure the new prompt starts with
>.
- Type
SFDX: Create Project.
- Select SFDX: Create Project.
- Select Standard.
- Type the project name
VSCodeQuickstartand press Enter.
- Select your Desktop as the place to create the project in so it is easy to find later on.
- Wait for the new Visual Studio Code window to open. You should see an indication that the extension is preparing your project before populating the file explorer.

Search your Files
- Press Ctrl+P (Windows) or Cmd+P(macOS) to make the search palette appear. This shifts the focus to search files.
- Type
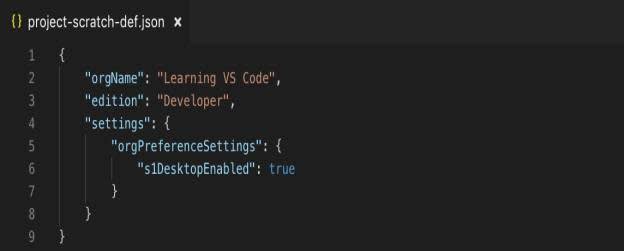
project-scratch-def.jsoninto the field.
- Click the result to open the file.
- Click the Search (
 ) menu.
- Search for
orgName.
- In the first result found in project-scratch-def.json.
- Change the
orgNamevalue (after the : and in between the “”) toLearning VS Code.
- Save the file by pressing Ctrl+S (Windows) or Cmd+S (macOS).

Authenticate to Your Playground
- Press Ctrl+Shift+P (Windows) or Cmd+Shift+P (macOS) to make the command palette appear.
- Type
SFDX: Authorize an Org.
- Select SFDX: Authorize an Org.
- To accept the default login URL, press Enter.
- Enter the alias
VSCodePlayground.
- Notice that your default browser opens a new Salesforce login window. Log in to your playground using your playground username and password retrieved from the last step.
- When you are asked to grant access to the connected app, click Allow.
- Close the browser window.
The command-line terminal window returns a success message when the transaction is complete.
Create an Apex Class
- Click the Explorer (
 ) menu.
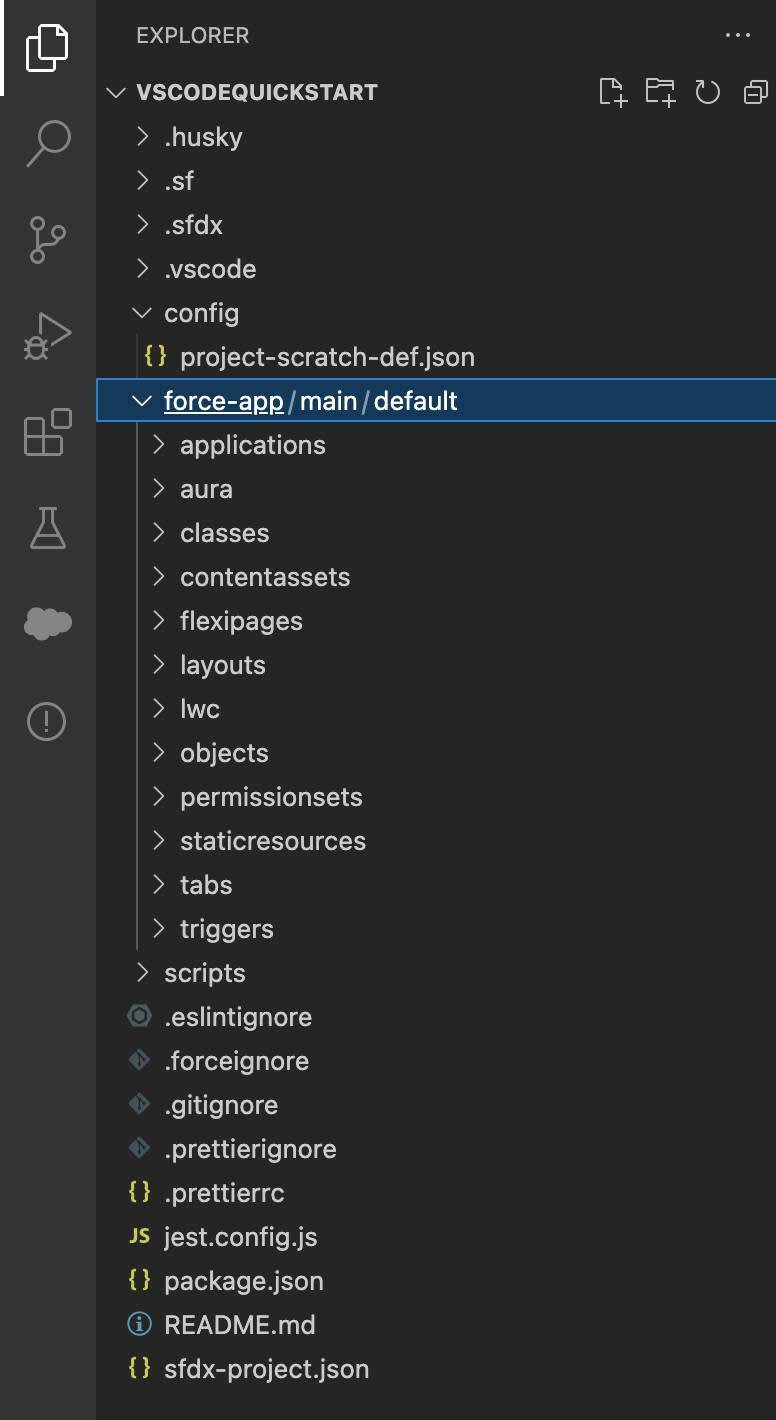
- Under the VSCODEQUICKSTART directory, click force-app to show its folder tree. In the force-app/main/default directory, you find the metadata included within the project such as applications, aura, classes, and more.

- Right click the classes folder.
- Select SFDX: Create Apex Class.
- Enter the name
AccountController.
- If VS Code asks, select force-app/main/default/classes as the directory you wish to add
AccountController.clsto.
- In the newly opened AccountController.cls file, replace the default code with the following:
public with sharing class AccountController { public static List<Account> getAllActiveAccounts() { return [SELECT Id, Name, Active__c FROM Account WHERE Active__c = 'Yes' WITH SECURITY_ENFORCED]; } } - Save your file.
Query
Our new Apex class has a SOQL query in it, but we want to make sure it works as we expect before we deploy it to our org. We use the command palette to run the query against our org.
- In line 3 of the code, highlight the query
SELECT Id,Name,Active__c FROM Account WHERE Active__c = 'Yes'(don't highlight WITH SECURITY_ENFORCED)
- Press Ctrl+Shift+P (Windows) or Cmd+Shift+P (macOS) to make the command palette appear.
- Type
SOQL.
- Select
SFDX:Execute SOQL Query with Currently Selected Text.
- Select REST API and press Enter.
- In the Output tab of the integrated terminal window, review the results of your query. The window should state a summary that says: SFDX: Execute SOQL Query ... displaying the records it found. This means it successfully ran.

Deploy
The last step is to deploy your code to your playground from within Visual Studio Code.
- Right click the classes folder.

- Click SFDX: Deploy This Source to Org.
- In the Output tab of the integrated terminal, view the results of your deployment. You should have also received a notice that states: SFDX: Deploy This Source to Org. This means it successfully ran.
Parting Thoughts
You've learned how to use Visual Studio Code and the Salesforce Extensions. You've seen how the features of an IDE can help maximize your development efficiency. Now you're ready to explore some of the more complex topics, such as debugging with the Apex Replay Debugger, customizing your editor to fit your needs, and running your developer pipelines with Visual Studio Code.