View Your Custom Object
Add the Custom Object to the App
You got things rolling by creating a Custom Object from a simple spreadsheet, but it’s not easily viewable by your sales team yet. Keep moving, and adjust where this object appears.
- From your Trailhead Playground org, click the setup gear
 and select Setup.
- Enter
App Managerin the Quick Find box and select App Manager.
- Click the down arrow
 to the right of the Sales App with the Developer Name LightningSales.
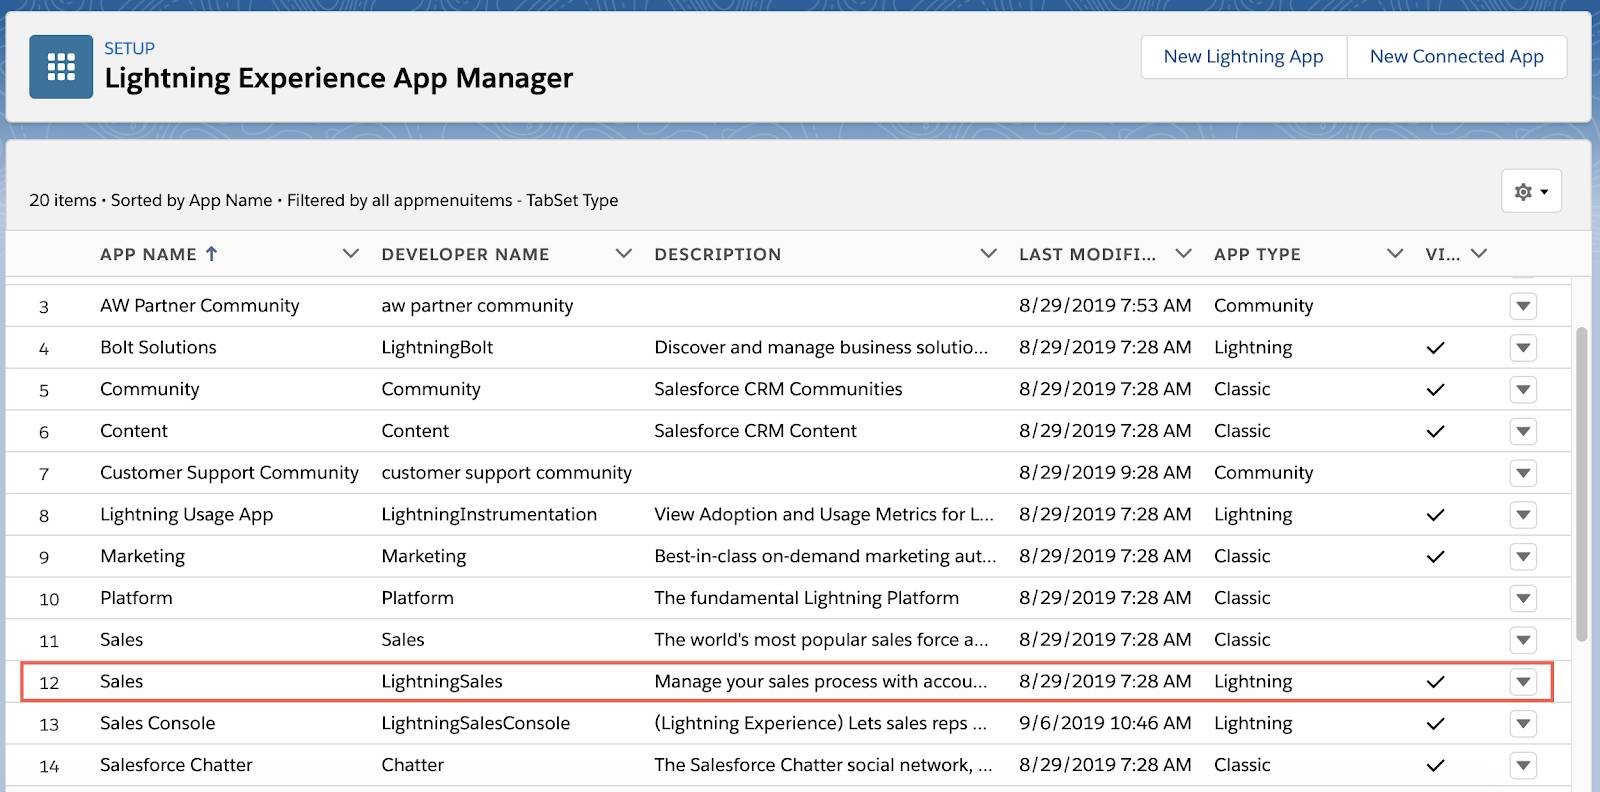
- Select Edit.
- Click Navigation Items from the menu on the left.
- Click Refresh at the top of the Available Items list to ensure your new Custom Object is added to the Available Items list.

- Scroll to the bottom of the Available Items list and select Vehicle Interests.
- Click the right arrow to add Vehicle Interests to the Selected Items list.
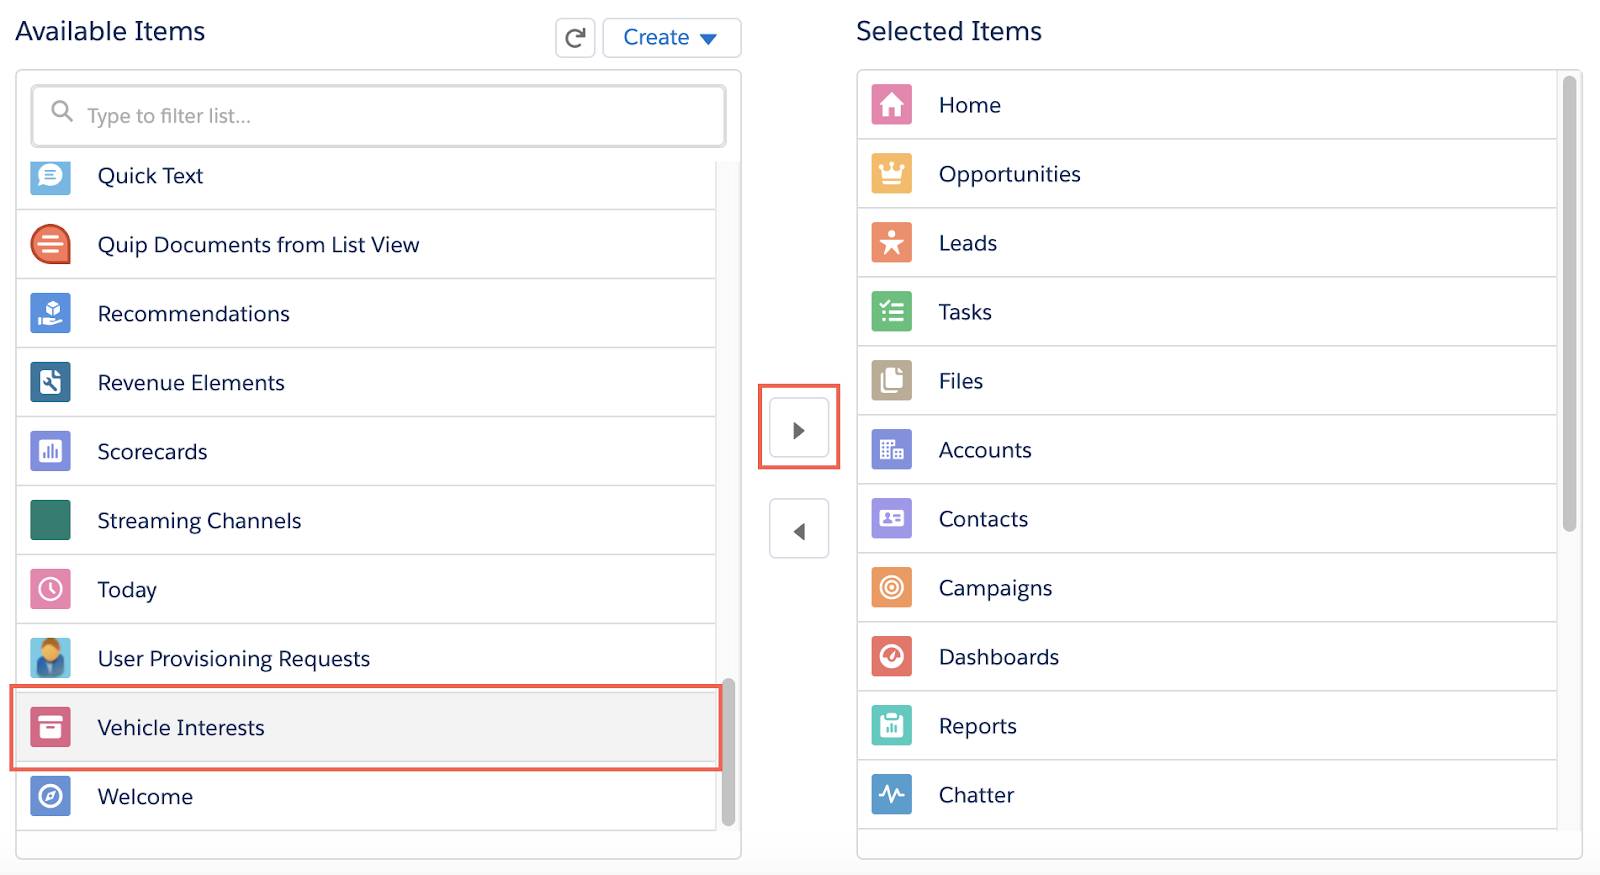
- Click Save.
- Select Vehicle Interests in the Selected Items list and click the up arrow until Vehicle Interests is above the Reports object.

- Click Save.
- Click Back
 in the upper left to exit the Lightning App Builder.
Much like a Standard Object, your new Custom Object can be accessed and edited via the Object Manager.
- From Setup, click the Object Manager tab.
- Scroll down the object list and click on your new custom object Vehicle Interest.
- Within the Details section, click Edit.
- Add the following text to the Description:
Information imported from Customer Visit spreadsheet. - Click Save.
Is That a Custom Object I See?
Now view your shiny new object in the Sales App you customized.
- Click the App Launcher
 and select Sales.
- Click the Vehicle Interest tab.
 Note: If the Vehicle Interest tab does not appear, refresh the page.
- Click Recently Viewed and select the All Records list view.
Note: All of your spreadsheet data is now in Salesforce and is connected to CRM data like search, notes, files, and follow-up activities.
Hope you enjoyed that test drive. You created a populated Custom Object AND added it to an app, all in just a few clicks. This not only saved you time, but now follow-up with Ursa Cloud Motors customers is all the easier. And your new Custom Object can be leveraged in reporting, Chatter, API integration, process automation, and so much more! It’s smooth driving from here on out.