Add Merge Fields Within Your Surveys
Maria wants to create a brand-new two-question survey for customers who contact Ursa Major Solar’s support team, and add merge fields within the survey. Merge fields resolve data that’s already available in your Salesforce org.
Maria wants to use merge fields to resolve with information about:
- The service agent who interacts with the customer.
- The name of the customer.
- An email ID that the customer can write to in case the customer has further queries.
- Name of the company.
Configure Merge Fields
Maria is confident about the merge fields she wants to include within the survey. She plans to include the merge fields within the welcome message and questions. To help format the survey content better, she decides to configure the merge fields first, and then insert the merge fields while entering the content.
- From the App Launcher, find and select Surveys.
- Click New.
- Enter
Post-Chat Feedbackin the New survey window.
- Select Standard Survey and click Continue.
- Click Advanced Settings, and select Merge Field Variables.
- Select the access level as User Context - Enforce all user permissions. This access level ensures that merge fields only resolve to information which the customer has access to.
- Expand Object Variables for Merge Fields.
- In the Associated Object section, complete these fields:
- Variable Name:
CaseDetails - Object: Case
Maria will insert a merge field that selects the name of the service agent from the case record that’s created when the customer starts a chat session.
- Click Save in the Associated Object section.
- In the Participant Objects section, complete these fields:
- Variable Name:
ParticipantDetails - Object: Contact
Maria will insert a merge field that selects the name of the customer from the customer’s contact record.
- Click Save in the Participant Object section.
- Expand Org and Custom Variables.
- Click New Variable.
- Complete these fields:
- Variable Name:
CompanyName - Variable Type: Org
- Variable Value: Name
- Click Save.
- Click New Variable.
- Complete these fields:
- Variable Name:
EmailId - Variable Type: Custom
- Variable Value:
support@example.com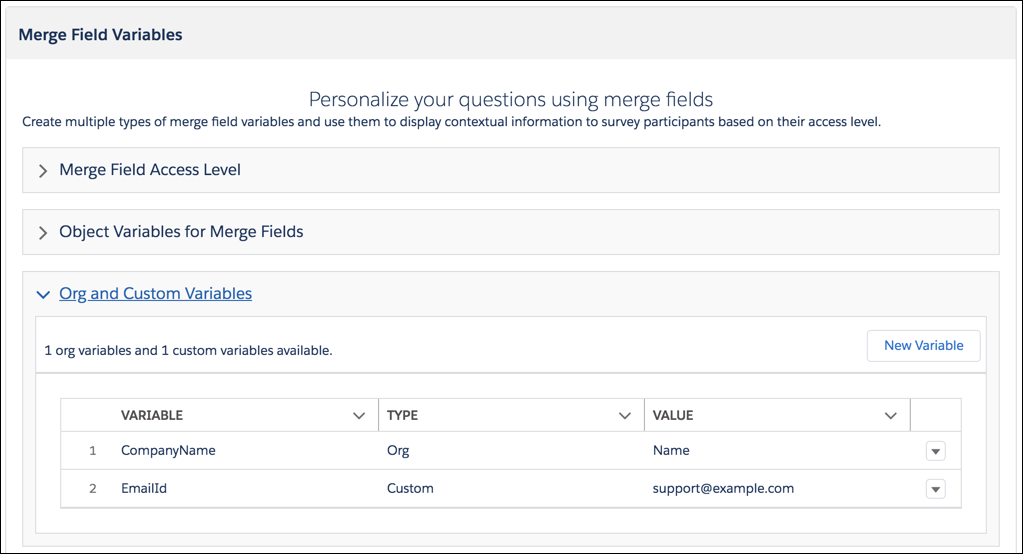
- Click Save.
- Click Back to Builder.
Insert Merge Fields
Maria must now add the content of the survey and insert the merge fields within the context.
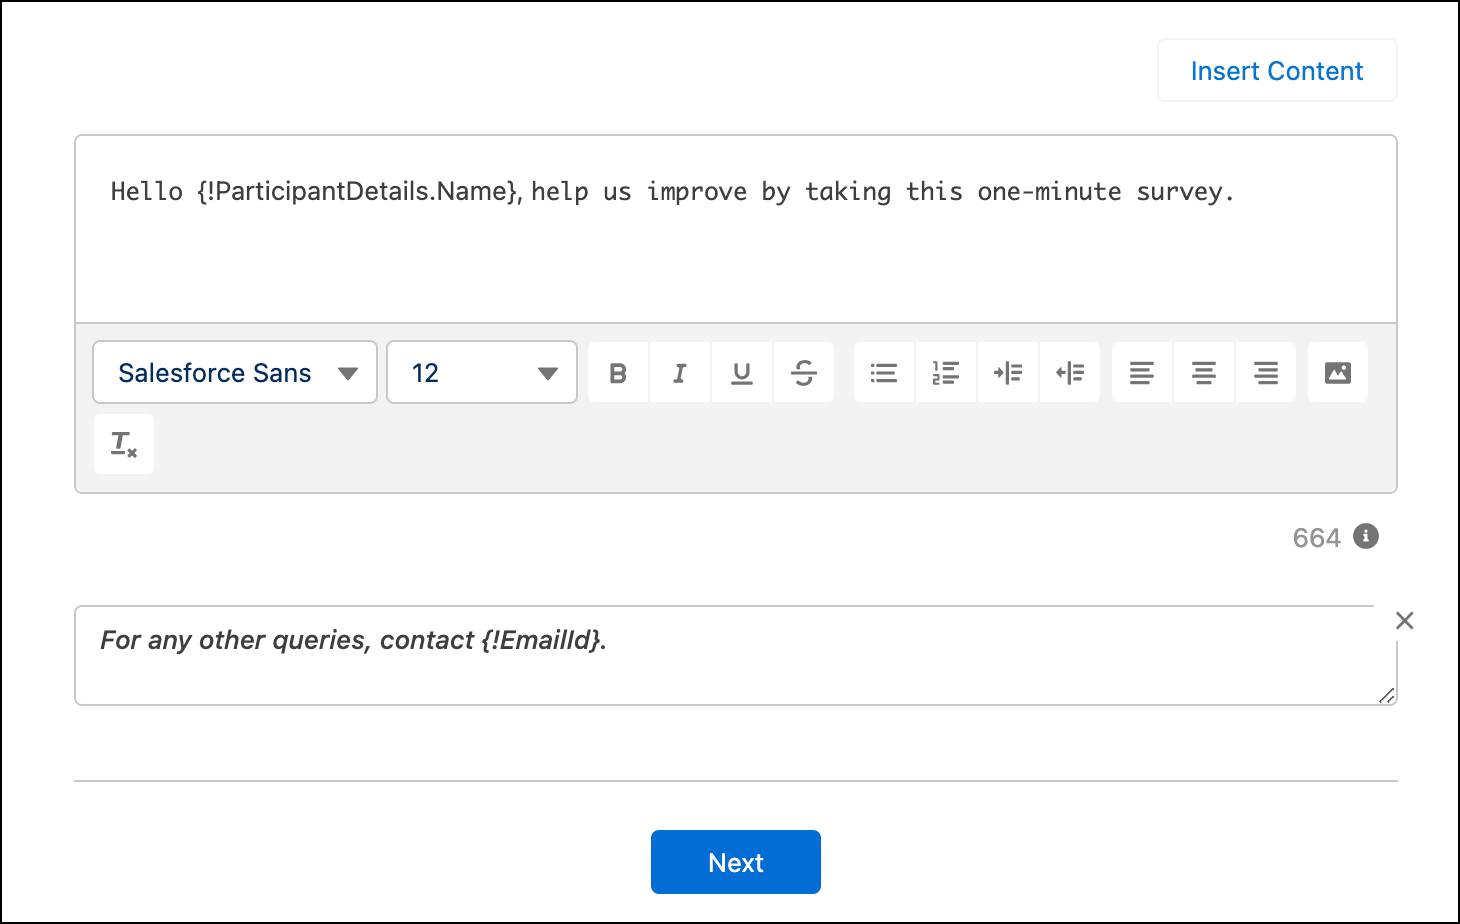
- Within the rich text editor of the Welcome page, enter:
Hello.
- Add a space after Hello, and click Insert Content.
- Select Merge field from a participant record, and click Next.
- In the Participant Variable field, select Full Name.
- Click Insert.
- At the end of the merge field, insert a comma.
- Add a space after the comma, and enter this text, including a period at the end:
help us improve by taking this one-minute survey - Enter a line break, and enter:
For any other queries, contact - Add a space after contact, and click Insert Content.
- Select Merge field from a custom variable, and click Next.
- In the Custom Variable field, select EmailId.
- Click Insert.
- At the end of the merge field, add a period.
- Cut the following text from the rich text editor: For any other queries, contact {!EmailId}.
- Paste the text in the description area. Merge fields can only be inserted within the description or within a question’s answer choice by copying it from the rich text editor or manually entering it.
Next, Maria needs to insert merge fields within the survey questions.
- Click Add Page.
- Click Add Question, and select Rating.
- Enter this text:
How was your experience interacting with our support agent, - Add a space after the comma, and click Insert Content.
- Select Merge field from an associated record, and click Next.
- In the Associated Object Variable field, select Owner ID(User) > First Name.
- Click Insert.
- At the end of the merge field, add a question mark.
- Click Add Question, and select Like or Dislike.
- Enter this text:
Would you like to purchase another product from - Add a space after from, and click Insert Content.
- Select Merge field from an org variable, and click Next.
- In the Org Variable field, select CompanyName.
- Click Insert.
- At the end of the merge field, add a question mark.
- Click Select an icon pair…
- Select Yes or No.
- Click Thank You Page.
- Enter:
Hope we were able to help you today. Thanks for participating! - Click Save.
Preview the Merge Fields
Maria is inserting merge fields in a survey for the first time. She wants to preview how merge fields resolve when customers actually view the survey.

- Click Preview.
- In the Associated Objects section, select a Case record.
- In the Participant Object section, select a Contact record.
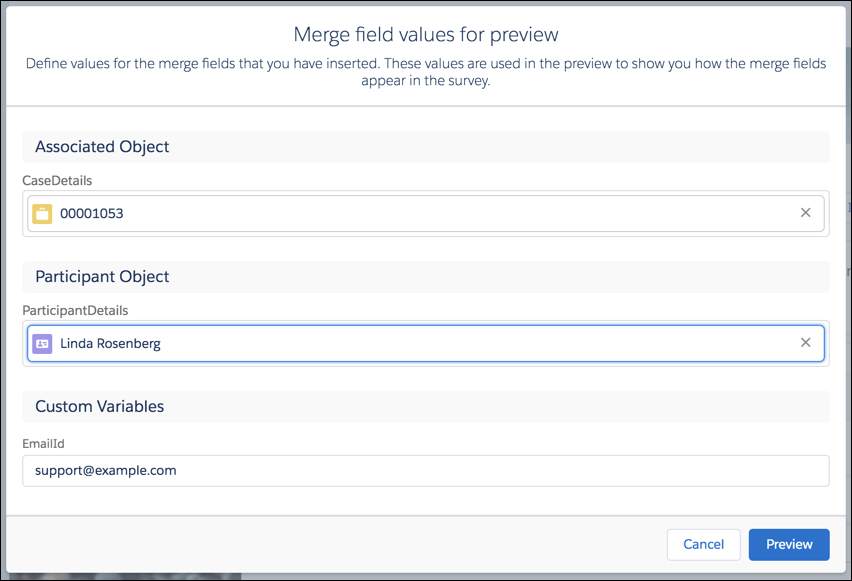
- Click Preview.
Maria previews the survey. On the Welcome page, the merge fields resolve to the contact’s name that Maria selected, and the email Id. On the next page, the merge fields resolve to the support agent’s name and the company’s name. Maria is very happy with the results.
She next moves on to create a survey data map that creates an Opportunity record every time a customer responds with Yes to the questions that check if they want to purchase another product from Ursa Major Solar.
Resources
- Salesforce Help: Select the Access Level for Merge Fields
- Salesforce Help: Configure Variables for Merge Fields
- Salesforce Help: Insert Merge Fields
- Salesforce Help: Preview Surveys to View Merge Field Values