Communicate Between Unrelated Components
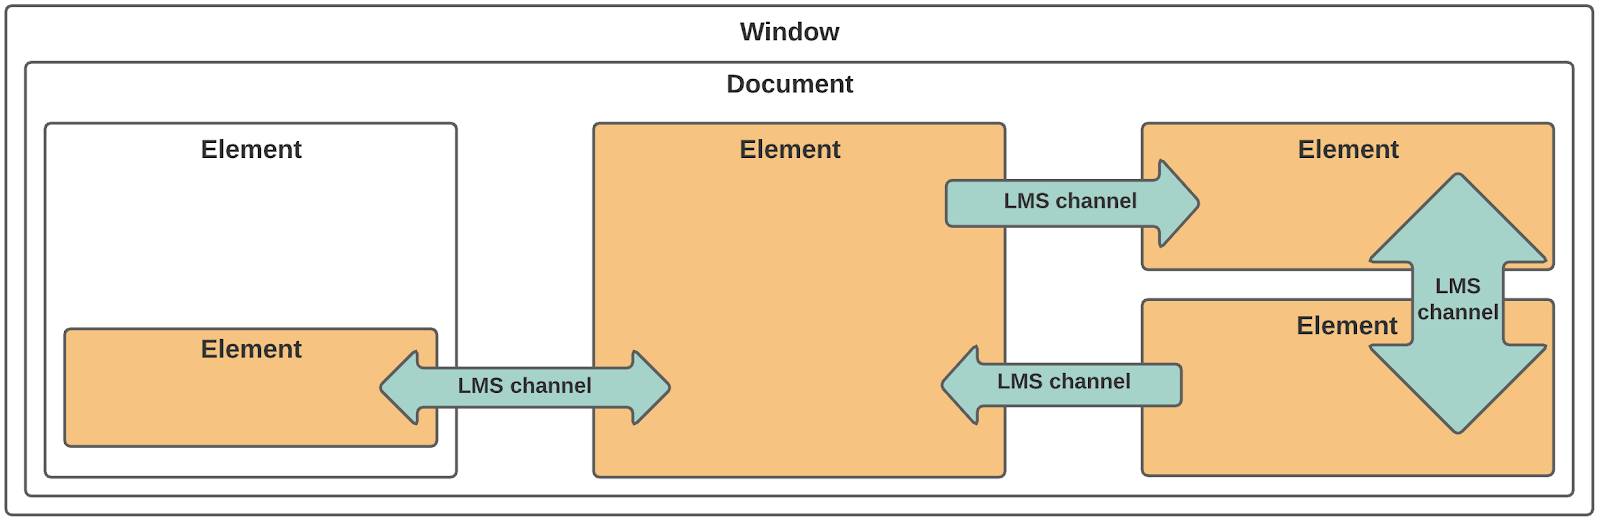
To communicate across the subtrees in the DOM (and under some circumstances between different browser windows logged into the same org), use Lightning message service (LMS). LMS is a publish and subscribe service that facilitates communication between Lightning web components, Aura components, and Visualforce pages.
Use LMS for communication between unrelated components unless you control both components and a common parent. LMS is powerful, effective, and easy to use, but don’t let that tempt you to use it when it’s not necessary. Firing DOM events is much more efficient. When you need to communicate between components with a parent that you can’t control, such as two App Builder slots, Lightning message service is the perfect choice.
A third business unit wants in on the number manipulation project. They need the Prior Count and Count to be together in their own component so they can display them wherever they need to. Let’s start with creating the message channel so it’s ready for the components to use.
Create a Lightning Message Channel
- In Visual Studio Code, in the default folder, create a folder named
messageChannels.
- In the messageChannels folder, create a file named
Count_Updated.messageChannel-meta.xml.
- In Count_Updated.messageChannel-meta.xml, paste this code:
<?xml version="1.0" encoding="UTF-8" ?>
<LightningMessageChannel xmlns="http://soap.sforce.com/2006/04/metadata">
    <masterLabel>CountUpdated</masterLabel>
    <isExposed>true</isExposed>
    <description>Message Channel to pass Count updates</description>
     <lightningMessageFields>
        <fieldName>operator</fieldName>
        <description>This is the operator type of the manipulation</description>
    </lightningMessageFields>
    <lightningMessageFields>
         <fieldName>constant</fieldName>
        <description>This is the number for the manipulation</description>
     </lightningMessageFields>
</LightningMessageChannel>

- Save and deploy the file.
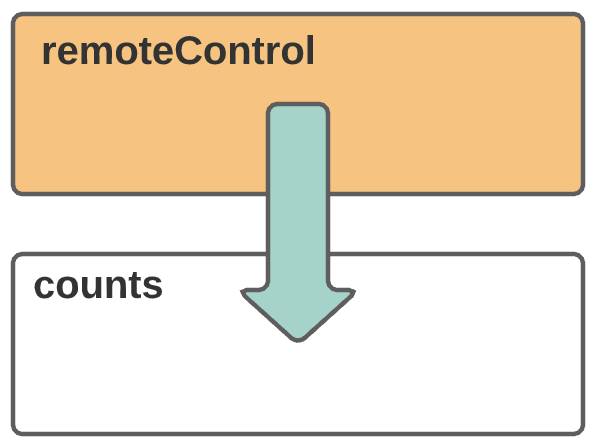
Create the Publisher Component
- Create a Lightning web component named
remoteControl.
- Replace the contents of remoteControl.js with this code:We import
import { LightningElement, wire } from 'lwc'; import { publish, MessageContext } from 'lightning/messageService'; import COUNT_UPDATED_CHANNEL from '@salesforce/messageChannel/Count_Updated__c'; export default class RemoteControl extends LightningElement { @wire(MessageContext) messageContext; handleIncrement() { // this.counter++; const payload = { operator: 'add', constant: 1 }; publish(this.messageContext, COUNT_UPDATED_CHANNEL, payload); } handleDecrement() { // this.counter--; const payload = { operator: 'subtract', constant: 1 }; publish(this.messageContext, COUNT_UPDATED_CHANNEL, payload); } handleMultiply(event) { const factor = event.detail; // this.counter *= factor; const payload = { operator: 'multiply', constant: factor }; publish(this.messageContext, COUNT_UPDATED_CHANNEL, payload); } }publishandMessageContextfrom the Lightning message service. We also import the channel we just created (Count_Updated__c). The data payload is sent with thepublishfunction.
- Save the file.
- Open remoteControl.html and add this code between the
templatetags:Notice that we’re re-using the controls component.<lightning-card title="Remote Control" icon-name="action:change_record_type"> <c-controls class="slds-show slds-is-relative" onadd={handleIncrement} onsubtract={handleDecrement} onmultiply={handleMultiply}> </c-controls> </lightning-card>
- Save the file.
- Update remoteControl.js-meta.xml to make the remoteControl component available on Lightning app pages:
<isExposed>true</isExposed> <targets> <target>lightning__AppPage</target> </targets> - Save the file.
Create the Subscriber Component
- Create a Lightning web component named
counts.
- Replace the contents of counts.js with this code:
import { LightningElement, wire } from 'lwc';
import { subscribe, MessageContext } from 'lightning/messageService';
import COUNT_UPDATED_CHANNEL from '@salesforce/messageChannel/Count_Updated__c';
export default class Counts extends LightningElement {
  subscription = null;
  priorCount = 0;
  counter = 0;
  @wire(MessageContext)
  messageContext;
  subscribeToMessageChannel() {
    this.subscription = subscribe(
      this.messageContext,
      COUNT_UPDATED_CHANNEL,
      (message) => this.handleMessage(message)
    );
  }
  handleMessage(message) {
    this.priorCount = this.counter;
    if(message.operator == 'add') {
      this.counter += message.constant;
    }else if(message.operator == 'subtract') {
      this.counter -= message.constant;
    } else {
      this.counter *= message.constant;
    }
  }
  connectedCallback() {
    this.subscribeToMessageChannel();
  }
}
The reference to @wire(MessageContext) ensures that unsubscribe runs during the component destruction lifecycle.
- Save the file.
- Open counts.html and add this code between the
templatetags:<lightning-card title="Counts" icon-name="action:change_record_type"> <p class="slds-text-align_center slds-var-m-vertical_medium"> Prior Count: <lightning-formatted-number value={priorCount}></lightning-formatted-number> </p> <p class="slds-text-align_center slds-var-m-vertical_medium"> Count: <lightning-formatted-number value={counter}></lightning-formatted-number> </p> </lightning-card> - Save the file.
- Update counts.js-meta.xml to make the counts component available in Lightning app pages:
<isExposed>true</isExposed> <targets> <target>lightning__AppPage</target> </targets> - Save the file.
Add the New Components to the Event Comms App
- Deploy the lwc folder and then refresh the Event Comms app page.
- Open the Event Comms page for editing.
- Drag the remoteControl component to the right region of the page.
- Drag the counts component to the right region, just under the remoteControl component.
- Click Save and then exit Lightning App Builder.
Verify communications
- Click the buttons in Remote Control to change the count in the counts component.
You can use Lightning message service to communicate with Aura components and Visualforce pages as well. It’s the cleanest way to keep different types of components in sync.
Now you have a good working knowledge of how to communicate between Lightning web components. You worked through child-to-parent, parent-to-child, and unrelated component scenarios. Be sure to check out the resources to learn more about communicating with Lightning web components.
Resources
- Lightning Web Components Dev Guide: Communicate Across the DOM
- Lightning Web Components Dev Guide: Configure Event Propagation
- Lightning Web Components Dev Guide: Events Best Practices
- Lightning Web Components Dev Guide: Lightning Message Service
- Lightning Web Components Component Reference: Message Service
- GitHub: LWC Recipes: lmsPublisherWebComponent
- GitHub: LWC Recipes: lmsSubscriberWebComponent
- Salesforce Developers Blog: Lightning Message Service [Developer Preview]
- Salesforce Developers Blog: Step Up Your LWC Skills
- Salesforce Developers Blog: Inter-Component Communication Patterns for Lightning Web Components