Create a Travel Requests by Department Report
Select the Report Type
Next, we create a report to show the number of travel approval requests by department.
- Via the App Launcher, navigate to the Travel App and click the Reports tab..

- Click New Report.
- In the Create Report screen, select the Other Reports Category then select Travel Approvals.
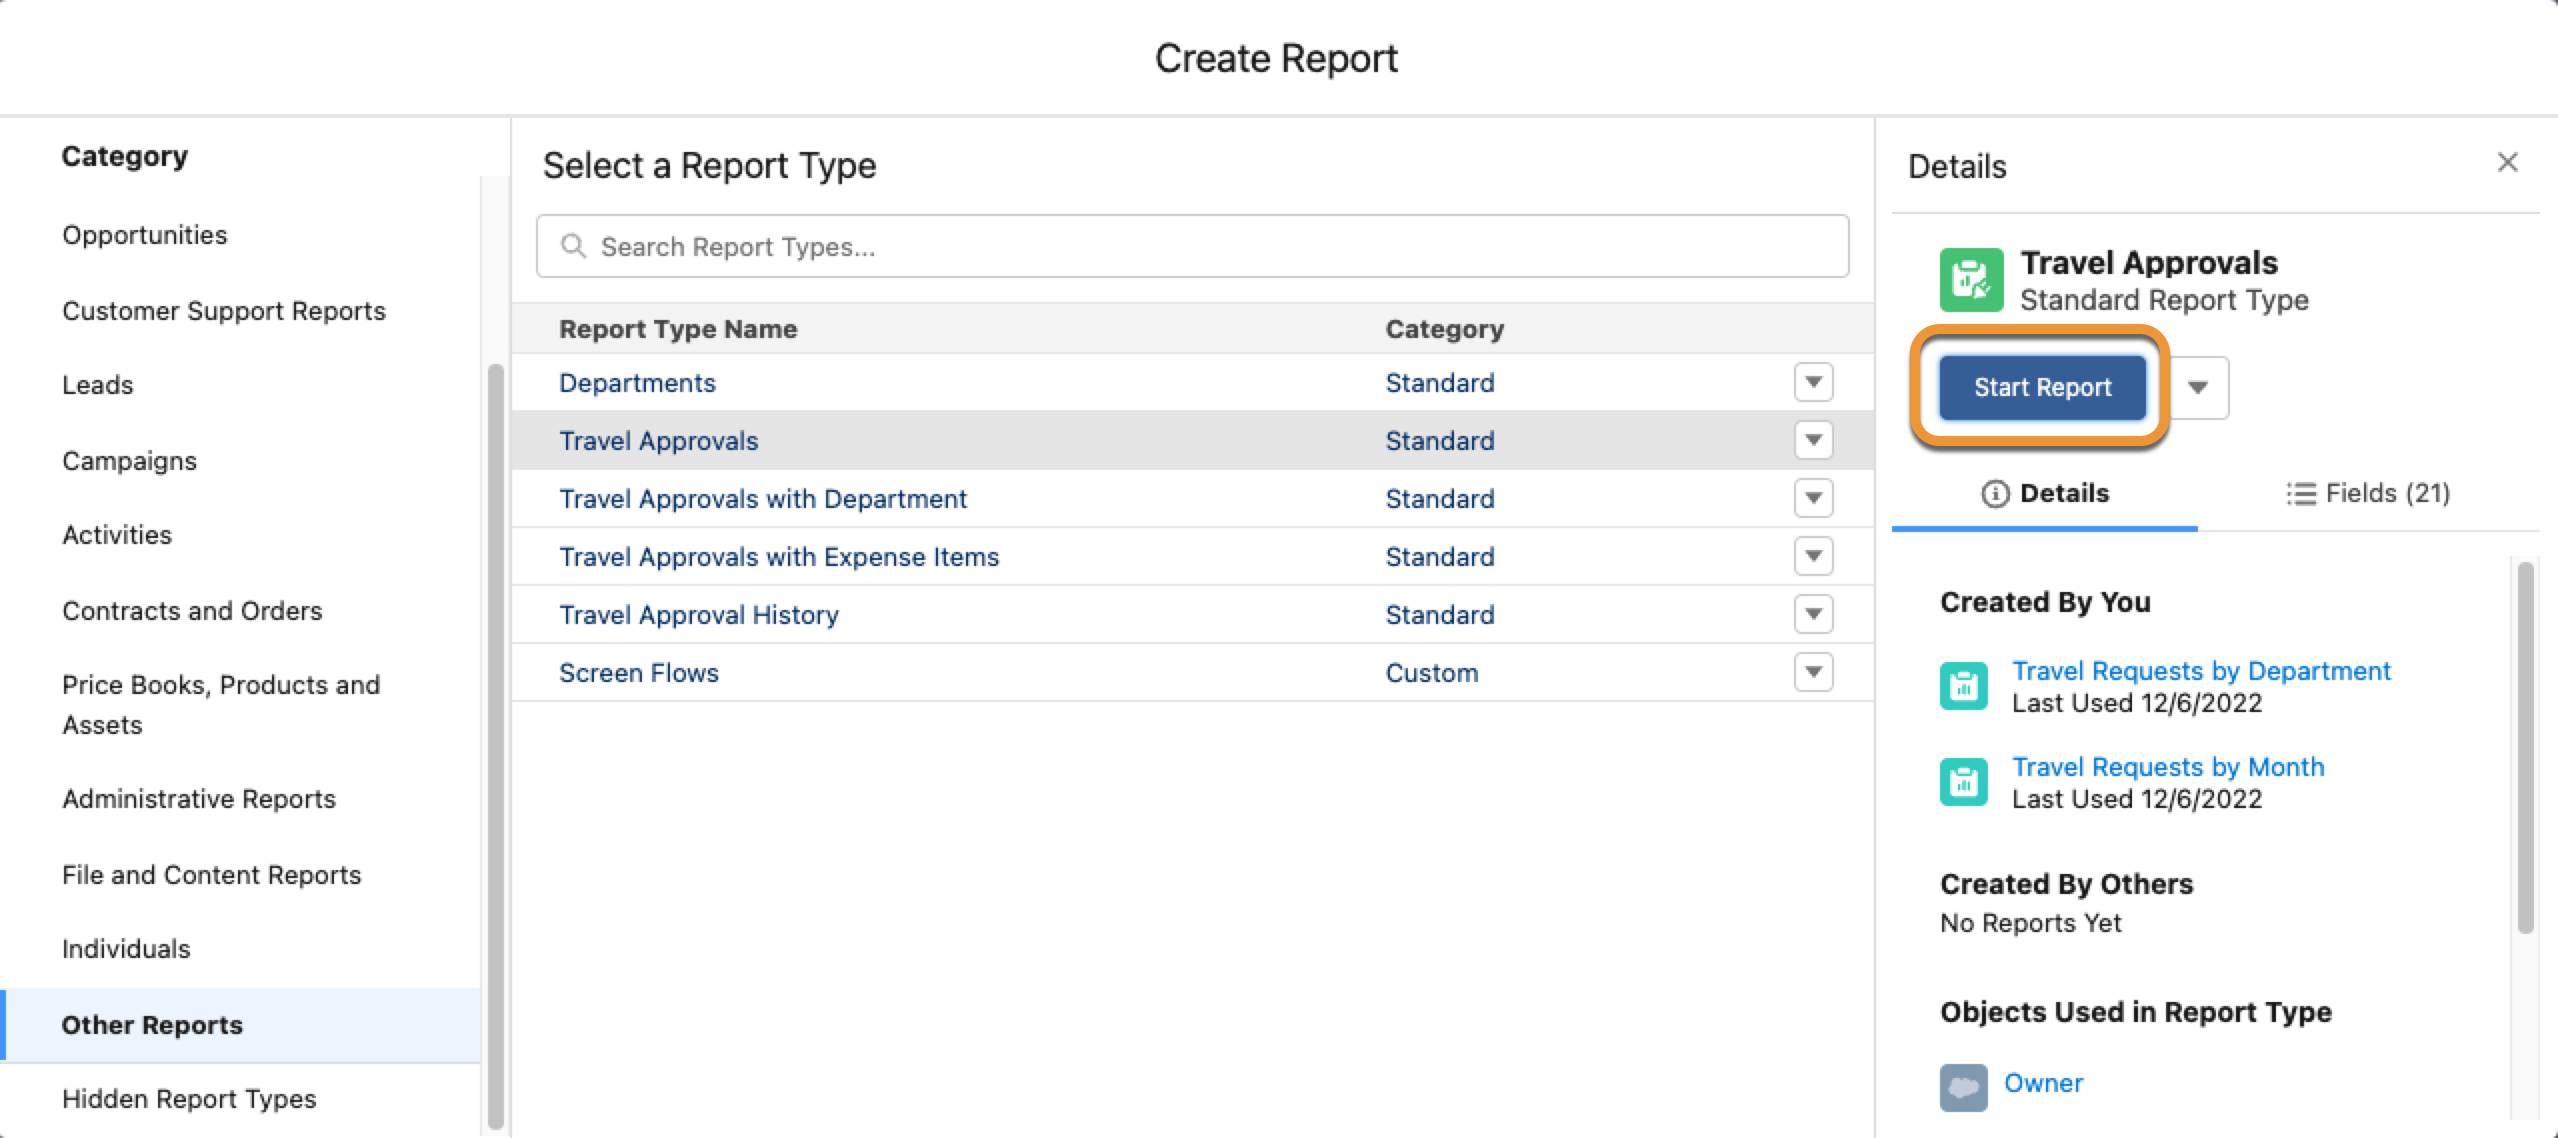
- Click Start Report.
Build Your Report
You are now presented with the report builder. The report builder provides a drag-and-drop interface to easily build and customize your reports. The report builder consists of four main sections.
- Fields: On the left-hand side, there is a list of all the fields you have accessible to create your report. You can easily scroll through the list of fields and drag them over to the Outline or Preview section to add them to your report. (You can double-click as well.) In addition, there is a Search Bar for longer lists of fields.
- Outline: This section lets you quickly view and add Groups to your report as well as Columns. While you can add Groups and Columns directly in the Preview Pane, the Outline Section provides a single view for both.
- Filter: This section lets you define all the filters for your report to filter down to exactly the data you want to include. You have options to filter by any field available on an object including some built-in date/time filters that let you apply an automatic sliding window for “current quarter” or “current fiscal year”.
- Preview: This section is the primary data table section of your report. This is where you define the columns/fields for your report along with any data groupings that drive your dashboard visual components.
- Enter and select the following fields to the Add column… box, in order:
- Department
- Status
- Out-of-State
- Destination State
- Trip Start Date
- Trip End Date
- In the main report table section, left-click the Department column, and select Group Rows by This Field. Alternatively, you can search for the Department Field under Group Rows in the Outline Section, and add it here. Turn on Update Preview Automatically to see the results of your work.

- The report will now be grouped by Department.

- Click Save and set the following parameters.
| Parameter |
Value |
|---|---|
| Report Name |
Travel Requests by Department |
| Report Description |
Leave blank |
| Report Folder |
Public Reports |
5. Click Save.
6. Click Run.
You now have a new report you can add as a component on a Salesforce dashboard. Let’s create one more report for the dashboard.