Test Your Approval Process
Time to Test
Now that you’ve created your approval process, let's test it out.
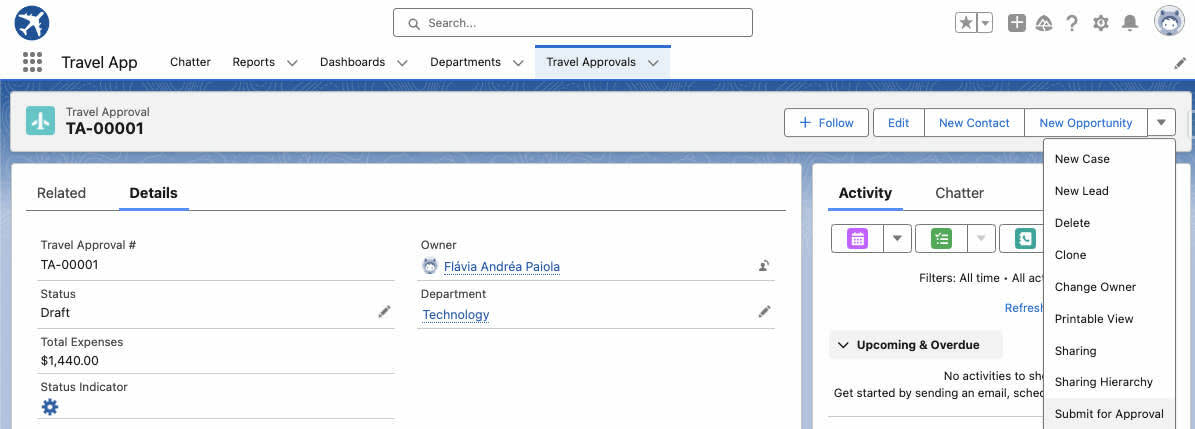
- Using the App Launcher, navigate to the Travel App and click the Travel Approvals tab..
- Select a record from the list. Make sure this is a travel approval record that has at least one expense item and a total expense amount greater than $0.
- Click the down arrow next to the New Opportunity button and select Submit for Approval.
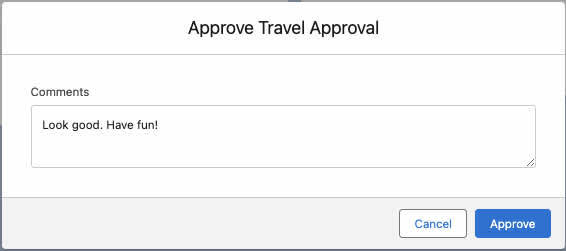
- Enter a comment and click Submit.
- You should receive an email alert like the following that lets Eric Executive know that he has a travel approval to process. Notice that it provides a link to directly access the Travel Approval record so that Eric could review it. Also, the email includes the option to just respond to the email and reply with text like APPROVE, YES, REJECT, NO.

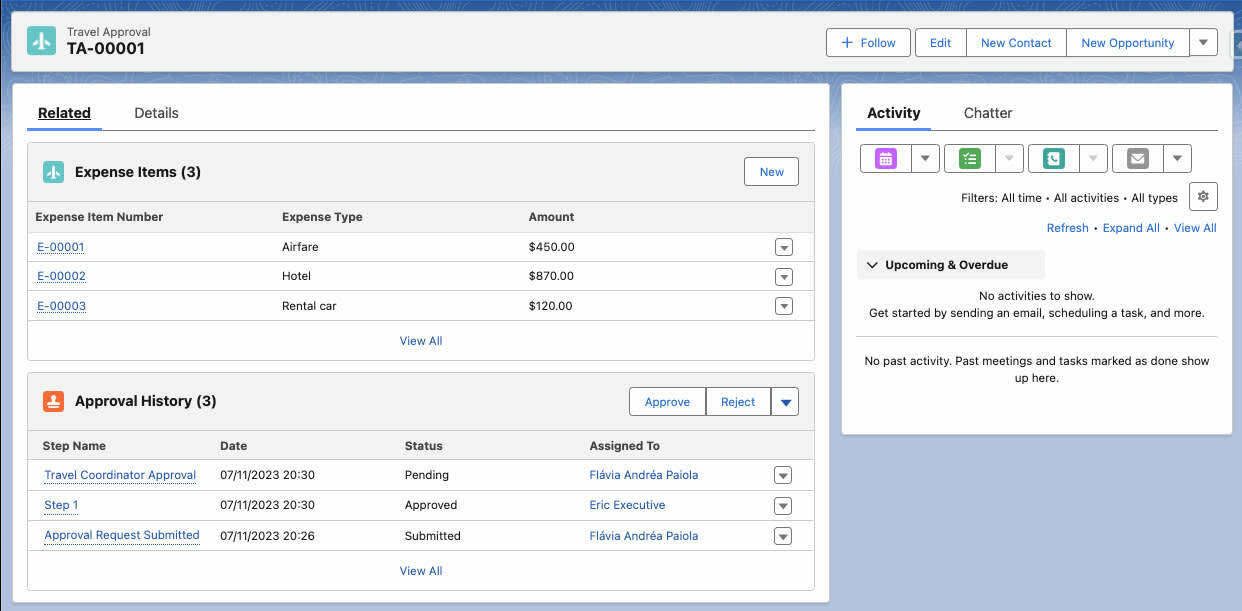
- On your Travel Approval record, click the Related tab and you can see the new section titled Approval History that has details of your approval submission. Its status is Pending and it’s assigned to Eric Executive.
- At this point you could log out of Salesforce and log back in as Eric Executive. You can find this travel approval record (or click the link in the email) and see the same view as above. Since you are a System Administrator, you have the authority to approve any requests even if they are pending on other users.
- Click Approve in the Approval History section.
- In the popup window, enter a comment and click the Approve button once again.
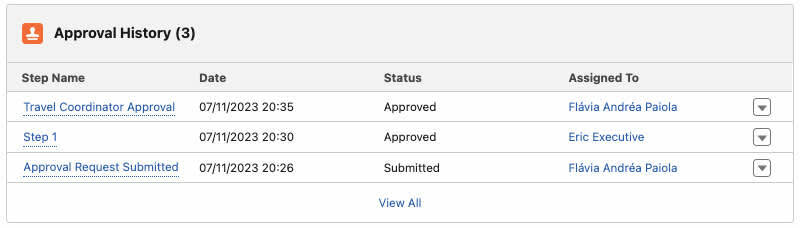
- Since this was for out-of-town travel, the approval was sent to the Travel Coordinator (remember, this is the logic we defined for the Approval Process). The approval is actually pending on yourself since you are acting as the travel coordinator (obviously, this wouldn’t be the case in a real-world implementation).
- Click Approve in the Approval History section to finish the approval.
- Enter a comment in the popup window and click Approve.
- The Approval History section should now look like the following:
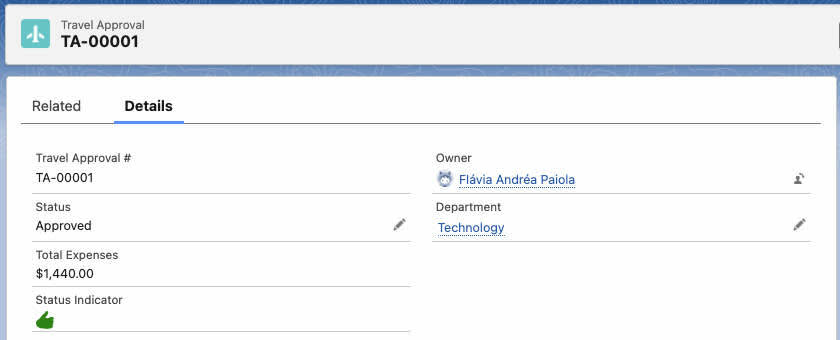
- Click the Details tab for your travel approval record. You should also notice the status value has been updated to Approved and the Status Indicator field now shows a green thumbs-up icon.
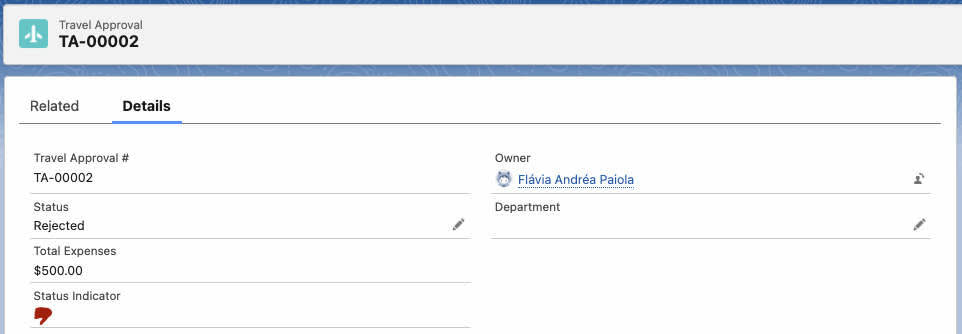
- Pick or create another travel request record and submit it for approval. Check your email and respond to the email with Reject. Navigate back to this travel approval record (or just click the link in the email). You should get the status value of Rejected and a red thumbs-down icon.

Congratulations! You have added automation to your application using point and click tools such as:
- Validations Rules
- Formula Fields
- Roll-Up Summary Fields
- Flow Builder
- Approval Processes