Create an Approval Process
Introduction
Salesforce includes built-in approval process capabilities. An approval process is an automated process your agency can use to approve records in Salesforce. An approval process specifies the criteria a record must meet before it can be submitted for approval, the steps necessary for a record to be approved, and who must approve it at each step. A step can apply to all records included in the process or just records that have certain attributes. An approval process also specifies the actions to take when a record is approved, rejected, recalled, or first submitted for approval.
Create the Approval Process
In this section, you create an approval process that all travel approvals must follow. We keep it simple and use the following logic.
- All travel approvals are sent to the employee’s direct manager for approval.
- If the trip is out of state, the approval is also sent to a travel coordinator for approval. If not out of state, this step is skipped.
Let’s get started.
- Click
 and select Setup.
- Select Process Automation | Approval Processes (or use the Quick Find and search for
Approval Processes).
- In the Manage Approval Processes For list, select Travel Approval.
- Click Create New Approval Process and select Use Jump Start Wizard.

- Enter the following parameters.
- Name:
Travel Approval Request
- Unique Name:
Travel_Approval_Request(This automatically gets sent when you tab out of the Name field)
- Approval Assignment Email Template: Leave blank
- Add the Submit for Approval button and Approval History related list to all Travel Approval page layouts: Leave this selected/checked
- Use Approver Field of Travel Approval Owner: Leave unselected/unchecked
- Use this approval process if the following: criteria are met
- Field: Travel Approval: Total Expenses
- Operator: greater than
- Value:
0 - Select Approver: Select Automatically assign an approver using a standard or custom hierarchy field and select Manager from the dropdown list
- Name:
- Click Save.
- Click View Approval Process Detail Page.
Notice in the Approval Steps section that it already created a rule to route all approvals to a user’s manager.
Create an Approval Step for Out-of-State Travel
Now, let’s create another approval step to send out-of-state travel to a travel coordinator.
- Click New Approval Step.
- Enter the following details.
- Name:
Travel Coordinator Approval
- Unique Name:
Travel_Coordinator_Approval(This automatically gets set when you tab out of the Name field)
- Step Number: 2
- Name:
- Click Next.
- Ensure Enter this step if the following is selected and the criteria are met option is selected.
- Enter the following formula criteria
- Field: Travel Approval: Out-of-State
- Operator: equals
- Value:
True
- Field: Travel Approval: Out-of-State
- Click Next.
- Select the Automatically assign to the approver(s) option.
- Select User from the dropdown and select your name as the travel coordinator.
NOTE: In the real world, a user would not be selected as an approver of their own request. Salesforce demo orgs are limited to two Salesforce users. For this project, just use your user account for the travel coordinator.
- Click Save.
- Select No, I’ll do this later. Take me to the approval process detail page to review what I’ve created and then click Go!
Add Logic
Next, add logic to set the status of the approval request based on if it was Approved or Rejected. We do this by creating a Final Approval action and a Final Rejection action. Let’s start by creating an action if the request was approved by all approvers.
- Click Add New in the Final Approval Actions area of the approval process form.
- Select Field Update from the dropdown list.

[Alt text: Final Approval Actions with Field Update selected]
- Enter the following values.
- Name:
Set Status to Approved
- Unique Name:
Set_Status_to_Approved(This automatically gets sent when you tab out of the Name field)
- Field to Update: Status
- Re-evaluate Workflow Rules after Field Change: Leave unchecked
- Picklist Options: Select A specific value and select Approved from the dropdown list
- Name:
- Click Save.
Next, let’s set the status value to Rejected if any approver rejects the travel approval request.
- Click Add New in the Final Rejection Actions area of the approval process form.
- Select Field Update from the dropdown list.

- Enter the following values.
- Name:
Set Status to Rejected
- Unique Name:
Set_Status_to_Rejected(This automatically gets sent when you tab out of the Name field)
- Field to Update: Status
- Re-evaluate Workflow Rules after Field Change: Leave unchecked
- Picklist Options: Select A specific value and select Rejected from the dropdown list
- Name:
- Click Save.
- Click Activate.
- Select OK in the popup window to confirm activation. Your approval process should now have the Active flag checked.

Next, you enable email approval responses.
Enable the Email Approval Response
Along with being able to approve or reject travel approvals directly inside Salesforce, it’s possible to let users approve via email. When an employee submits their travel approval request, an email is sent to the next approver in the approval process to notify them of the request. That email includes a URL link to the travel approval record so that the approver can access the details easily. It is also possible to allow the approver to just respond to the email with text like APPROVE, YES, REJECT, NO, and so on. Let’s see how you do it.
- Click
 and select Setup.
- From setup, enter
Process Automation Settingsin the Quick Find box and select it.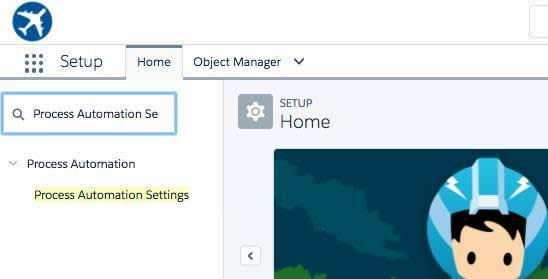
- Click the Process Automation Settings link.
- Make sure Enable Email Approval Response is selected.

- Set the Default Workflow User to your name.
- Click Save.
Great job! Now let's test it out to make sure everything is working correctly.