Write a Jest Test
Learning Objectives
After completing this unit, you'll be able to:
- Write a test to verify your setup.
- Write a failing test and change your component to make it pass.
- Identify the basic Jest commands.
- Explain the Lifecycle Hooks.
Start with a Lightning Web Component
To test a Lightning web component, we must first have a component to test.
Create a Lightning Web Component
- In Visual Studio Code, open the Command Palette by pressing Ctrl+Shift+P (Windows) or Cmd+Shift+P (macOS).
- Enter
lightning web.
- Select SFDX: Create Lightning Web Component.
- Enter
unitTestfor the name of the new component.
- Press Enter.
- Press Enter again to accept the default
force-app/main/default/lwc.
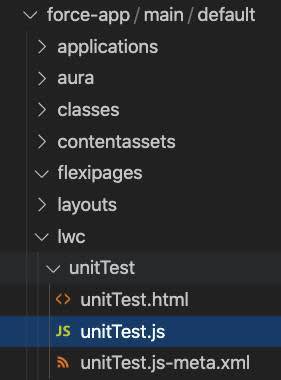
This creates the unitTest directory in the lwc directory with the initial base files.
Write a Basic Test
Jest tests are written, saved, and run differently than Jasmine or Mocha tests written for the Lightning Testing Service for Aura Components. Jest tests are local only and are saved and run independently of Salesforce. In fact, you'll get an error if you try to deploy Jest tests to your Salesforce org. Although Jest tests for Lightning web components are not deployed to your Salesforce org, be sure to commit them to version control along with the component itself.
The __tests__ Folder
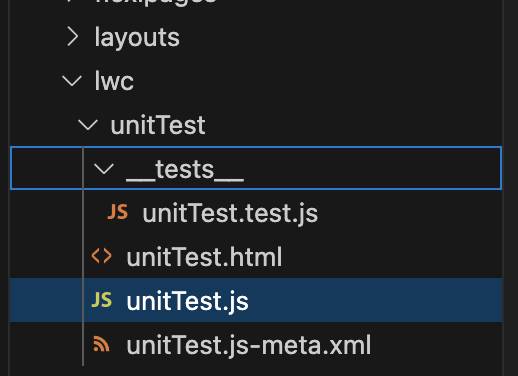
The test files need to be separated out from the other component files. If one wasn't automatically created, create a folder named __tests__ at the top level of your component's bundle folder. Save all tests for this component inside the __tests__ folder.
- In Visual Studio Code, right-click the
unitTestdirectory and select New Folder.
- Enter
__tests__.
- Press Enter.
Configure .forceignore
Share tests with other team members or systems by committing the __tests__ folder to version control. They are a valuable part of your project and continuous integration process. To keep them from getting deployed to Salesforce the .forceignore file has an exclusion entered for it.
Ensure your project's .forceignore file contains the following exclusions. If not, add it and save the file.
# LWC configuration files
**/jsconfig.json
**/.eslintrc.json
# LWC Jest
**/__tests__/**
Create a Jest Test File
Our first test is a simple one. We have a sum() function that is expected to add two numbers that are passed to it as arguments.
- In Visual Studio Code, right-click the
__tests__directory and select New File.
- Enter
sum.test.js.
- Press Enter.
- Enter the following code into the new test file:
import { sum } from '../sum';
describe('sum()', () => {
  it('should add 1 and 2 returning 3', () => {
    expect(sum(1, 2)).toBe(3);
  });
});
- Save the file.
Run the Test
- In Visual Studio Code, select View and then select Terminal. This opens a terminal in Visual Studio Code. The terminal defaults to the current project top-level directory.
- In the terminal, execute the following command from the prior unit:
npm run test:unit
- The test fails due to the missing sum function.
Let's see how you fix it.
- In Visual Studio Code, right-click the
unitTestdirectory and select New File.
- Enter
sum.js.
- Press Enter.
- Enter the following code block into the new file:
export function sum(x, y) {
  return x + y;
}
- Save the file.
- In the terminal run the test again:
npm run test:unit
- The test passes.
Congratulations! You just confirmed that Jest is set up and working.
Let's look at the test code to see what's happening.
import { sum } from '../sum';


describe('sum()', () => {
  it('should add 1 and 2 returning 3', () => {
    expect(sum(1, 2)).toBe(3);
  });
});- Line 1 imports the exported
sumfunction from the sum JavaScript file.
- Line 3 is the start of the Jest test suite. The
describefunction, or block, is a test suite and accepts two arguments. First is the description of the unit we are testing which is usually in the form of a noun. Second is a callback function that holds one or more tests. You can also nestdescribetest suites inside each other to create greater clarity.
- Line 4 is the test (
itis an alias fortest). Theitfunction, or block, accepts two arguments as well. First is another description of what we are expecting, usually starting with a verb. Then a callback function that builds up the test and holds the assertions or expectations for the test.
- Line 5 is the
expectstatement asserting the success condition: that thesumfunction would add the two arguments, 1 and 2, and return 3.toBeis one of the many Jest matchers.
Add another assertion with the following line right after line 5:expect(sum(1, 2)).not.toBeGreaterThan(3);
- Adding
.notand.toBeGreaterThanensures that the number is not greater than 3. You could add another expect statement with.not.toBeLessThan(3).
Now for the Lightning web component test.
Jest tests for a Lightning web component should test the behavior of a single component in isolation, with minimal dependencies on external components or services.
Go through the process again with a unitTest test file
This test will verify that a property is set and when added to the DOM will display the correct text. The unitTest.test.js file was created with the __tests__ folder when the SFDX: Create Lightning Web Component command was run.
- Replace the code in
unitTest.test.jswith the following:import { createElement } from 'lwc'; import UnitTest from 'c/unitTest'; describe('c-unit-test', () => { afterEach(() => { // The jsdom instance is shared across test cases in a single file so reset the DOM while(document.body.firstChild) { document.body.removeChild(document.body.firstChild); } }); it('displays unit status with default unitNumber', () => { const element = createElement('c-unit-test', { is: UnitTest }); expect(element.unitNumber).toBe(5); // Add the element to the jsdom instance document.body.appendChild(element); // Verify displayed greeting const div = element.shadowRoot.querySelector('div'); expect(div.textContent).toBe('Unit 5 alive!'); }); });
- Save the file.
- In the Terminal run the tests again:
npm run test:unit
- The tests fail with this:
Test Suites: 1 failed, 1 passed, 2 total
Tests:       1 failed, 1 passed, 2 total
Let's look at that test code to see what the requirements are before updating the code to get a passing test.
- Line 1 is new. It imports the
createElementmethod from thelwcframework. It's only available in tests.
- Line 2 imports the
UnitTestclass from the component JavaScript controller.
- Line 3 starts the
describetest suite block.
- Line 4 is a Jest cleanup method.
afterEach()is one of Jest's setup and cleanup methods.afterEach()runs after each test in the describe block it is in. ThisafterEach()method resets the DOM at the end of the test. Jest isn't running a browser when tests run. Jest uses jsdom to provide an environment that behaves much like a browser's DOM or document. Each test file gets a single instance of jsdom, and changes aren't reset between tests inside the file. It's a best practice to clean up between tests so that a test's output doesn't affect any other test. There are other setup and cleanup methods available. Check the Resources.
- Line 10 starts the
ittest block.
- Line 11 is where you use the imported
createElementmethod. It creates an instance of the component and assigns it to the constantelement.
- Line 14 has the
expectasserting theunitNumbervariable is set to 5. This is the first requirement that we are testing for, thatunitNumberis set to 5 first.
- Line 16 actually adds the
elementto the jsdom's version ofdocument.bodyusing theappendChildmethod. The call attaches the Lightning web component to the DOM and renders it, which also means the lifecycle hooks connectedCallback() and renderedCallback() are called (more on these later).
- Line 18 uses
querySelector(a standard DOM query method) to search the DOM for adivtag. Useelement.shadowRootas the parent for the query. It's a test-only API that lets you peek across the shadow boundary to inspect a component's shadow tree.
- Finally, line 19 has the
expectlooking at thetextContentof thedivtag to assert 'Unit 5 alive!' is there. This is the final requirement. Asserting the text is correct.
To get the test to pass, you need to add code to the unitTest HTML and JavaScript files. We'll add code to fulfill the requirements.
- Click the
unitTest.htmlfile to open it.
- Overwrite
unitTest.htmlwith:<template> <lightning-card title="Unit Status" icon-name="standard:bot"> <div class="slds-m-around_medium"> Unit {unitNumber} alive! </div> </lightning-card> </template>
- Save the file.
- Click the
unitTest.jsfile to open it and overwrite it with:import { LightningElement, api } from 'lwc'; import { sum } from './sum'; export default class UnitTest extends LightningElement { @api unitNumber = sum(2,3); }
- Save the file and run the tests:
npm run test:unit
- All the tests pass.
Test Asynchronous DOM Updates
When the state of a Lightning web component changes, the DOM updates asynchronously. To ensure that your test waits for updates to complete before evaluating the result, return a resolved Promise. To do this, chain the rest of your test code to the resolved Promise. Jest waits for the Promise chain to complete before ending the test. If the Promise ends in the rejected state, Jest fails the test.
- Open
unitTest.test.js.
- Add this second test after the last test.
In this test, we want to verify that a property change will update the text in the DOM.it('displays unit status with updated unitNumber', () => { const element = createElement('c-unit-test', { is: UnitTest }); // Add the element to the jsdom instance document.body.appendChild(element); // Update unitNumber after element is appended element.unitNumber = 6 const div = element.shadowRoot.querySelector('div'); // Verify displayed unit status expect(div.textContent).toBe('Unit 6 alive!'); });
- Save the file and run the tests.
npm run test:unit
- You get this fail message:
Expected: "Unit 6 alive!"
Received: "Unit 5 alive!"
What's going on? The expect statement is asserting that the div.textContext should be “Unit 6 alive” but it's still “Unit 5 alive!”. In order to see the change, we need to wait for it by returning a resolved Promise.
- Replace the failing
expectstatement with the following, right after the comment// Verify display unit status:expect(div.textContent).not.toBe('Unit 6 alive!'); // Return a promise to wait for any asynchronous DOM updates. Jest // will automatically wait for the Promise chain to complete before // ending the test and fail the test if the promise rejects. return Promise.resolve().then(() => { expect(div.textContent).toBe('Unit 6 alive!'); });
- Run the test using the same command as last time, or use one of the other options from the Run Jest Tests section of the previous unit.
- The test passes.
So far, so good. You have three successful tests in two test suites. Next, you add a fourth test so when an input field updates you can verify the unit status gets updated. To do this, use a change event in the input field.
- Open
unitTest.test.jsif it's not already open.
- Add a line after the last test you added and add this third test to the suite:
  it('displays unit status with input change event', () => {
    const element = createElement('c-unit-test', {
      is: UnitTest
    });
    document.body.appendChild(element);
    const div = element.shadowRoot.querySelector('div');
    // Trigger unit status input change
    const inputElement = element.shadowRoot.querySelector('lightning-input');
    inputElement.value = 7;
    inputElement.dispatchEvent(new CustomEvent('change'));
    return Promise.resolve().then(() => {
      expect(div.textContent).toBe('Unit 7 alive!');
    });
  });
- Save the file and run the test to see the failed message.
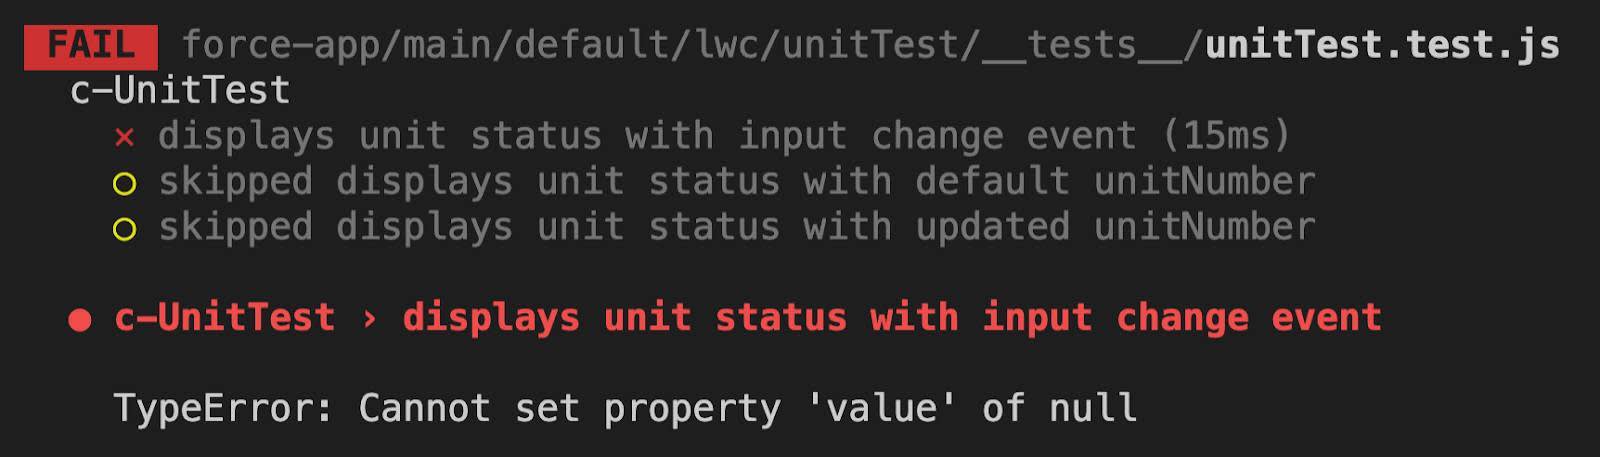
You can see that only one test was run and the other two were skipped.
Let's look at what's being tested:
- The first several lines should be familiar. You're adding the UnitTest to the
document.bodyand then creating a reference to thediv.
- The constant
inputElementis set with a reference to a lightning-input field.
- Next, the value of that input field is set to 7.
- Then we use
dispatchEventto trigger an event with aCustomEventusing an event type of “change”.
- The
Promiseis familiar and only changed for the value of the changed input field.
Let's update the code to get it to pass. To do this, add the lightning-input to the HTML file and the handleChange method to the JavaScript controller.
- Open
unitTest.html.
- Add the following code inside the
lightning-cardand before thediv:<lightning-input label="Unit Number" value={unitNumber} onchange={handleChange} > </lightning-input>
- Save the file.
- Open
unitTest.js.
- Add the following code after the
@api unitNumberstatement:handleChange(event) { this.unitNumber = event.target.value; }
- Save the file and run the tests.
- The tests pass because of the added input element and the JavaScript handler.
Test Lifecycle Hooks
Lightning web components have a lifecycle managed by the framework. The framework creates components, adds and removes them from the DOM, and renders DOM updates whenever the state of a component changes. There are several methods for interacting with the lifecycle.
The connectedCallback() lifecycle hook fires when a component is inserted into the DOM. The disconnectedCallback() lifecycle hook fires when a component is removed from the DOM. One use for these hooks is to register and unregister event listeners.
Take a look at code in the lmsSubscriberWebComponent from the lwc-recipes samples repo for a good example.
Next, we look at writing Jest tests for wire services.
Resources
- Salesforce Blog: Unit Test Lightning Web Components with Jest
- Developer Guide: Write Jest Tests for Lightning Web Components
- Lightning Web Components Developer Guide: Lifecycle Hooks
- External Site: Jest: Getting Started
- External Site: Jest: Expect Reference
- External Site: Jest: Setup and Teardown
- External Site: GitHub: salesforce/sfdx-lwc-jest
- External Site: GitHub: trailheadapps/lwc-recipes
- External Site: Wiki: Test-driven development