Mock Other Components
Learning Objectives
After completing this unit, you'll be able to:
- Describe the stubs provided by the sfdx-lwc-jest package.
- Understand how to override the Jest config.
- Test components outside your development environment.
- Create stubs for external components.
Mocking Base Components
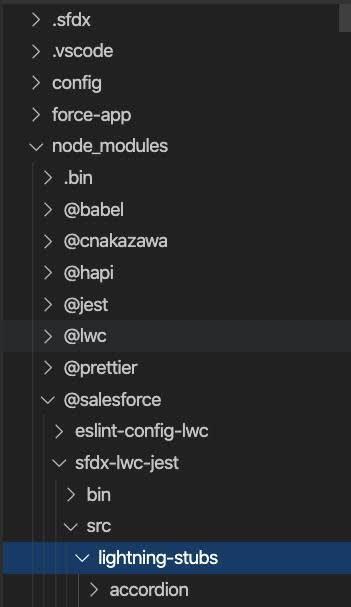
The sfdx-lwc-jest package lets us run Jest on Lightning Web Components. It sets up all the necessary Jest configs to run tests without any additional changes. We've been using it extensively in the prior modules. This package includes a set of stubs (programs that simulate components that a module undergoing tests depends on) for all components in the Lightning namespace. This includes all the Lightning Base Components. This allows us to run the tests in our environment while not in a Lightning environment. The stubs are installed in the src/lightning-stubs directory in the node-modules/@salesforce/sfdx-lwc-jest directory.
There may be times when you need to override the default stubs provided. This is done by overriding the Jest configs and then creating custom stubs. Let's go through the steps of doing this for lightning-button.
Start by setting up the directories for the custom stubs in Visual Studio Code.
- Right-click the
force-appdirectory and select New Folder.
- Enter
testfor the name of the new directory.
- Right-click the new
testdirectory and select New Folder.
- Enter
jest-mocksfor the name of the new directory.
- Right-click the new
jest-mocksdirectory and select New Folder.
- Enter
lightningfor the name of the new directory.
This is the root for Lightning Base Component stubs.
Next, override the Jest config by updating the file named jest.config.js at the root of your Salesforce DX project.
- Open the
jest.config.jsfile.
- Enter the following code block after the
...jestConfig,line:Notice themoduleNameMapper: { '^lightning/button$': '<rootDir>/force-app/test/jest-mocks/lightning/button' },moduleNameMapper. This is telling Jest where to find the stub forlightning-button. The first dash is converted to a forward slash and the rest of the component name goes from kebab to camel case. The reason for the forward slash is because the module resolver treats everything before the first dash as the namespace. Here,<rootDir>maps to the root of the Salesforce DX workspace.
Your file should look like this:const { jestConfig } = require('@salesforce/sfdx-lwc-jest/config'); module.exports = { ...jestConfig, moduleNameMapper: { '^lightning/button$': ' /force-app/test/jest-mocks/lightning/button' }, modulePathIgnorePatterns: ['/.localdevserver'] };
- Save the file.
Now let's add the button stub to the lightning directory we just created.
- Right-click the
lightningdirectory we created in the last steps and select New File.
- Enter
button.htmlfor the name of the new file.
- Enter the following code block into the new file:
<template></template>
- Save the file.
- Right-click the
lightningdirectory and select New File.
- Enter
button.jsfor the name of the new file.
- Enter the following code block into the new file:
import { LightningElement, api } from 'lwc';
export default class Button extends LightningElement {
  @api disabled;
  @api iconName;
  @api iconPosition;
  @api label;
  @api name;
  @api type;
  @api value;
  @api variant;
}
- Save the file.
These two files are copies of the lightning-button files from the lightning-stubs folder. They allow for overriding the base lightning-button for Jest tests if needed.
We can now override the default stubs provided by sfdx-lwc-jest. What about components from other namespaces? We can handle those cases with just a couple of adjustments. Let's dig into that next.
Mocking Other Components
Let's start with mocking components with a different namespace. To do this, you set up a Lightning web component with a Jest test that fails, and then we'll mock out a fix.
- Create a new Lightning web component in Visual Studio Code.
- Set the name to
otherComponents.
Now let's add a component with a different namespace to the LWC.
- Open the
otherComponents.htmlfile and add this code between the template tags:<thunder-hammer-button onclick={makeNoise}></thunder-hammer-button>
- Save the file and run the test.
- The test fails for a new reason:
Test suite failed to run
  Cannot find module 'thunder/hammerButton' from 'otherComponents.html'
Since the <thunder-hammer-button> component is from another namespace, and not in the local lwc directory, you need to create a stub and update the Jest config to map the name of these components to the mock file.
First, you need to add a thunder directory to represent the namespace. Then you add the files to stub it out.
- Right-click the
jest-mocksdirectory inforce-app/test/directory and select New Folder.
- Enter
thunderfor the name of the new directory.
- Right-click the
thunderdirectory and select New File.
- Enter
hammerButton.htmlfor the name of the new file.
- Enter the following code block into the new file:
<template></template>
- Save the file.
- Right-click the new
thunderdirectory and select New File.
- Enter
hammerButton.jsfor the name of the new file.
- Enter the following code block into the new file:
import { LightningElement, api } from 'lwc';
export default class HammerButton extends LightningElement {
  @api label;
  // any other implementation you may want to expose here
}
- Save the file and run the test.
- The test fails. We need to update the Jest config file.
- Open
jest.config.jsand add this line right under themoduleNameMapper: {line:'^thunder/hammerButton$': '<rootDir>/force-app/test/jest-mocks/thunder/hammerButton',
- Save the file and run the test.
- Awesome! The test passes.
There will be times when the LWC you are working with imports another LWC that is not in the local LWC directory of your Salesforce DX project. Without a stub they will cause Jest to fail. Let's test that.
- Open the
otherComponents.htmlfile and add this code after the first template tag:<c-display-panel errors={error} notes={messages}></c-display-panel>
- Save the file and run the test.
- The test fails since it can't find the component.
You can fix that with a stub. You start by creating the stub and then updating the Jest config.
- Right-click the
jest-mocksdirectory inforce-app/test/directory and select New Folder.
- Enter
cfor the name of the new directory.
- Right-click the
cdirectory and select New File.
- Enter
displayPanel.htmlfor the name of the new file.
- Enter the following code block into the new file:
<template></template>
- Save the file.
- Right-click the new
cdirectory and select New File.
- Enter
displayPanel.jsfor the name of the new file.
- Enter the following code block into the new file:Notice that there is an api decorator for each parameter passed in the component call.
import { LightningElement, api } from 'lwc';
export default class DisplayPanel extends LightningElement {
  @api errors;
  @api notes;
  // any other implementation you may want to expose here
}
- Save the file.
- Open
jest.config.jsand add this line right under themoduleNameMapper: {line:'^c/displayPanel$': '<rootDir>/force-app/test/jest-mocks/c/displayPanel',
- Save the file and run the test.
- The test passes.
Well done! You are now equipped to write tests for all your Lightning Web Components. You also have the power to make these stub implementations as sophisticated or as simple as you need them to be.
Resources
- External Site: GitHub: salesforce/sfdx-lwc-jest: Resolving External Lightning Web Components
- External Site: GitHub: trailheadapps/lwc-recipes