Get Started with Swift
Learning Objectives
After completing this unit, you’ll be able to:
- Explain how safety features in Swift solve problems from Objective-C.
- Explain why playgrounds in Xcode are useful.
- Run Swift code in a playground.
- Write a print statement.

Have you ever had an idea for an app and wondered how to turn that concept into a reality? If so, this is designed for you. You'll start your journey into app development by focusing on iOS development tools and basic programming concepts. Building on this foundation, you'll work through practical exercises and create a simple app.
Set Up Your Learning Environment
Learning to build apps involves many tools and resources. At any given time, you may have multiple projects and files open in Xcode—as well as this module, Xcode documentation, Safari, and some number of assets on your desktop. As you start to build apps, you'll discover that you need to maintain an organized workspace.
You decide how to navigate between applications. Some students like to use split-screen mode so they can keep all their tools in a single view. Other students prefer to run each app in full-screen mode and switch between apps as necessary.
To enter full-screen mode, click the green (third) circle in the top-left of the window, or use the keyboard shortcut, Control-Command-F. You can then navigate between the full-screen apps using Mission Control or the keyboard shortcuts Control-Left Arrow and Control-Right Arrow.
Gather Your Materials
To complete the lessons in this guide, you'll need the following items:
- A Mac running macOS High Sierra or Mojave.
- Xcode 10. Download it from the Mac App Store if you need it.
Some features of Xcode require permission from an administrator. When you first use these features, Xcode prompts you to enter the credentials of an administrative account on your Mac.
What is Swift?
Swift is a modern programming language that is designed for writing apps for Apple devices. At the Apple Worldwide Developers Conference (WWDC) 2014, Apple introduced Swift for writing apps for iOS and macOS. Since then, Apple introduced watchOS and tvOS, which also use Swift as the primary programming language.
In December 2015, Apple released the Swift language on GitHub as an open source project, where developers can contribute code and feedback. Open sourcing Swift means that developers can take an active role in evolving Swift with the features and improvements that best serve the developer community.
The Origins of Swift
Since the 1990s, most developers writing apps for Apple devices used Objective-C, a language that is built on top of the C programming language. Swift takes the lessons developers learned while using Objective-C—drawing from concepts that worked and discarding those that didn't work.
Because technology has advanced dramatically since the release of Objective-C in 1984, Apple recognized an opportunity to create a language that incorporates modern programming concepts.
Developers now can write code in Swift that is safer, less error-prone, easier to maintain, and more expressive than code written in Objective-C.
Improving Safety
Swift has safety features to help you write code that is less likely to crash your app. You may not understand some of these terms yet, but it's important to understand why Apple implemented these safety features. Swift includes the following safety features:
- Error handling. Swift provides powerful error handling, which helps you write fewer bugs and better handle scenarios that could cause apps to crash or perform unexpectedly.
- Type safety. Type safety forces you to be clear about the type of each object that you create, manipulate, and assign. For example, the Swift compiler produces an error if you declare a variable to have an integer type, but later assign a string value to the variable. This safety feature ensures that the compiler finds type errors at compile time instead of runtime, when users are running the app. With type safety, you can find and fix errors before they reach your users.
- Optionals. Use optionals to express when a value is or isn't present in your code. If you need to express that your variable could have no value, then you need an optional type. For example, you could have an online store app that sorts items into categories, but you might have an item that doesn't belong to a category. You could make a miscellaneous category, but a clearer way to show your intent is to identify the item's category as an optional.
- Bounds checking for arrays. Arrays organize homogenous items into an ordered list. Bounds checking means that the app isn't allowed to access data outside of the array. Without bounds checking, your app could access memory outside the bounds of an array and create the potential for malicious exploits.
- Initialization. Use initialization to set up an instance of a particular type before the new instance is ready for use. In Objective-C, you would need to follow best practices to ensure an object is properly initialized. In Swift, these practices have been codified so that the compiler can ensure initialization occurs properly. The result is that the compiler finds Swift initialization errors prior to runtime.
Modernizing Features
Swift incorporates many aspects of modern programming languages, including the following features:
- Type inference. The Swift compiler can usually determine the type of each object based on the assigned value if the object type isn't explicitly declared in the code.
- Expressive. With Swift, you can write code simply and be clear with your intentions. For example, if you want to set the title color property of a button, you could write that in Swift as follows:
button.setTitleColor(.blue, for: .normal)
Here it is in SwiftUI.
Button(action: {}) {
    Text("Submit")
        .foregroundColor(Color.blue)
}
To perform the same function in Objective-C, you could write the following:
[button setTitleColor:UIColor.blue
forState:UIControlStateNormal];
The Swift example is more concise and readable. For experienced developers, the Swift syntax might also look more familiar.
- Generics. Generics help you write code that you can use in multiple scenarios, which saves time, reduces code, and introduces fewer errors. If you don’t use generics, you repeat code and create the opportunity to repeat errors.
- Namespacing. In Objective-C, all variables are global so you can access a variable from anywhere in your code. Because global variables can cause security issues and naming collisions, a common practice is to adhere to strict naming conventions. In Swift, you can create your variables and functions within a namespace and avoid naming collisions.
- Functional programming patterns. Swift takes concepts from functional programming, like map, reduce, and filter. These functions simplify code and streamline common actions that previously required multiple lines of code. Functional programming patterns help ensure that an app is deterministic, meaning that the result of the function only changes if the inputs change.
As you progress through this module, you'll learn what each of these features means and how they're relevant to writing safe, fast, and expressive code.
Hello, World!
When starting to develop with a new programming language, a common tradition is to build a "Hello, world!" app, a simple program that you can write in any language. This program prints "Hello, world!" to the screen.
You write Swift code in plain text files with a .swift file extension. Each line in the file represents a statement, and a program consists of one or more statements. These are the instructions that you want your app to run.
As you'll learn, you can control if specific sections of code are executed using control flow statements (if else), how many times the sections of code are executed using loops (for in, while), and how to pass data.
Some programs consist of millions of statements in hundreds of files. The compiler makes the code executable by combining all the files into a program.
For now, let's start with a simple app. How would you write a "Hello, world!" app in Swift?
print("Hello, world!")As you might guess from the code above, print() is a function that uses a piece of text, named a String, and prints that text to the console.
The console is a text-entry and display tool for system administration. Decades ago, users performed all computer interactions through consoles, or command line interfaces. Today we have graphical user interfaces for most tasks, but developers still use the console to perform many programming or administrative tasks. In fact, almost every system that you use has a console behind the scenes, which you can access even when you're using the graphical user interface.
About Playgrounds
One of the most important features Swift introduced is playgrounds, an Xcode document type that runs Swift code in a simple format with easily visible results. When you write code in a playground, you can see how the code executes in the results sidebar.
You can experiment safely with Swift code in playgrounds without interfering with the code in your app. In a playground, you can easily manage more code in one place and see multiple results in the results sidebar. Use playgrounds for prototyping your Swift code and moving your code into an Xcode project after testing.
On a technical level, a playground is a file wrapper around a main.swift file. Every time that you edit the code, you can execute the playground to see the results.
The debug console at the bottom of the screen displays the printed results from your Swift code directly in a playground.
For every expression, results appear in the right sidebar. To view results that are richer than the plain text that you see in the sidebar or debug area, use the Quick Look tool.

To view more details inline, use the Show Results button.

Create a "Hello, world!" App
Now try building your first "Hello, world!" app using an Xcode playground:
- Open Xcode.
- Create a new playground file by choosing File > New > Playground from the Xcode menu bar.
- Select the iOS platform and the Blank template.
- Name your playground "Hello, world!", and save it to a folder. We recommend creating a folder dedicated to learning Swift and Xcode so you can stay organized.
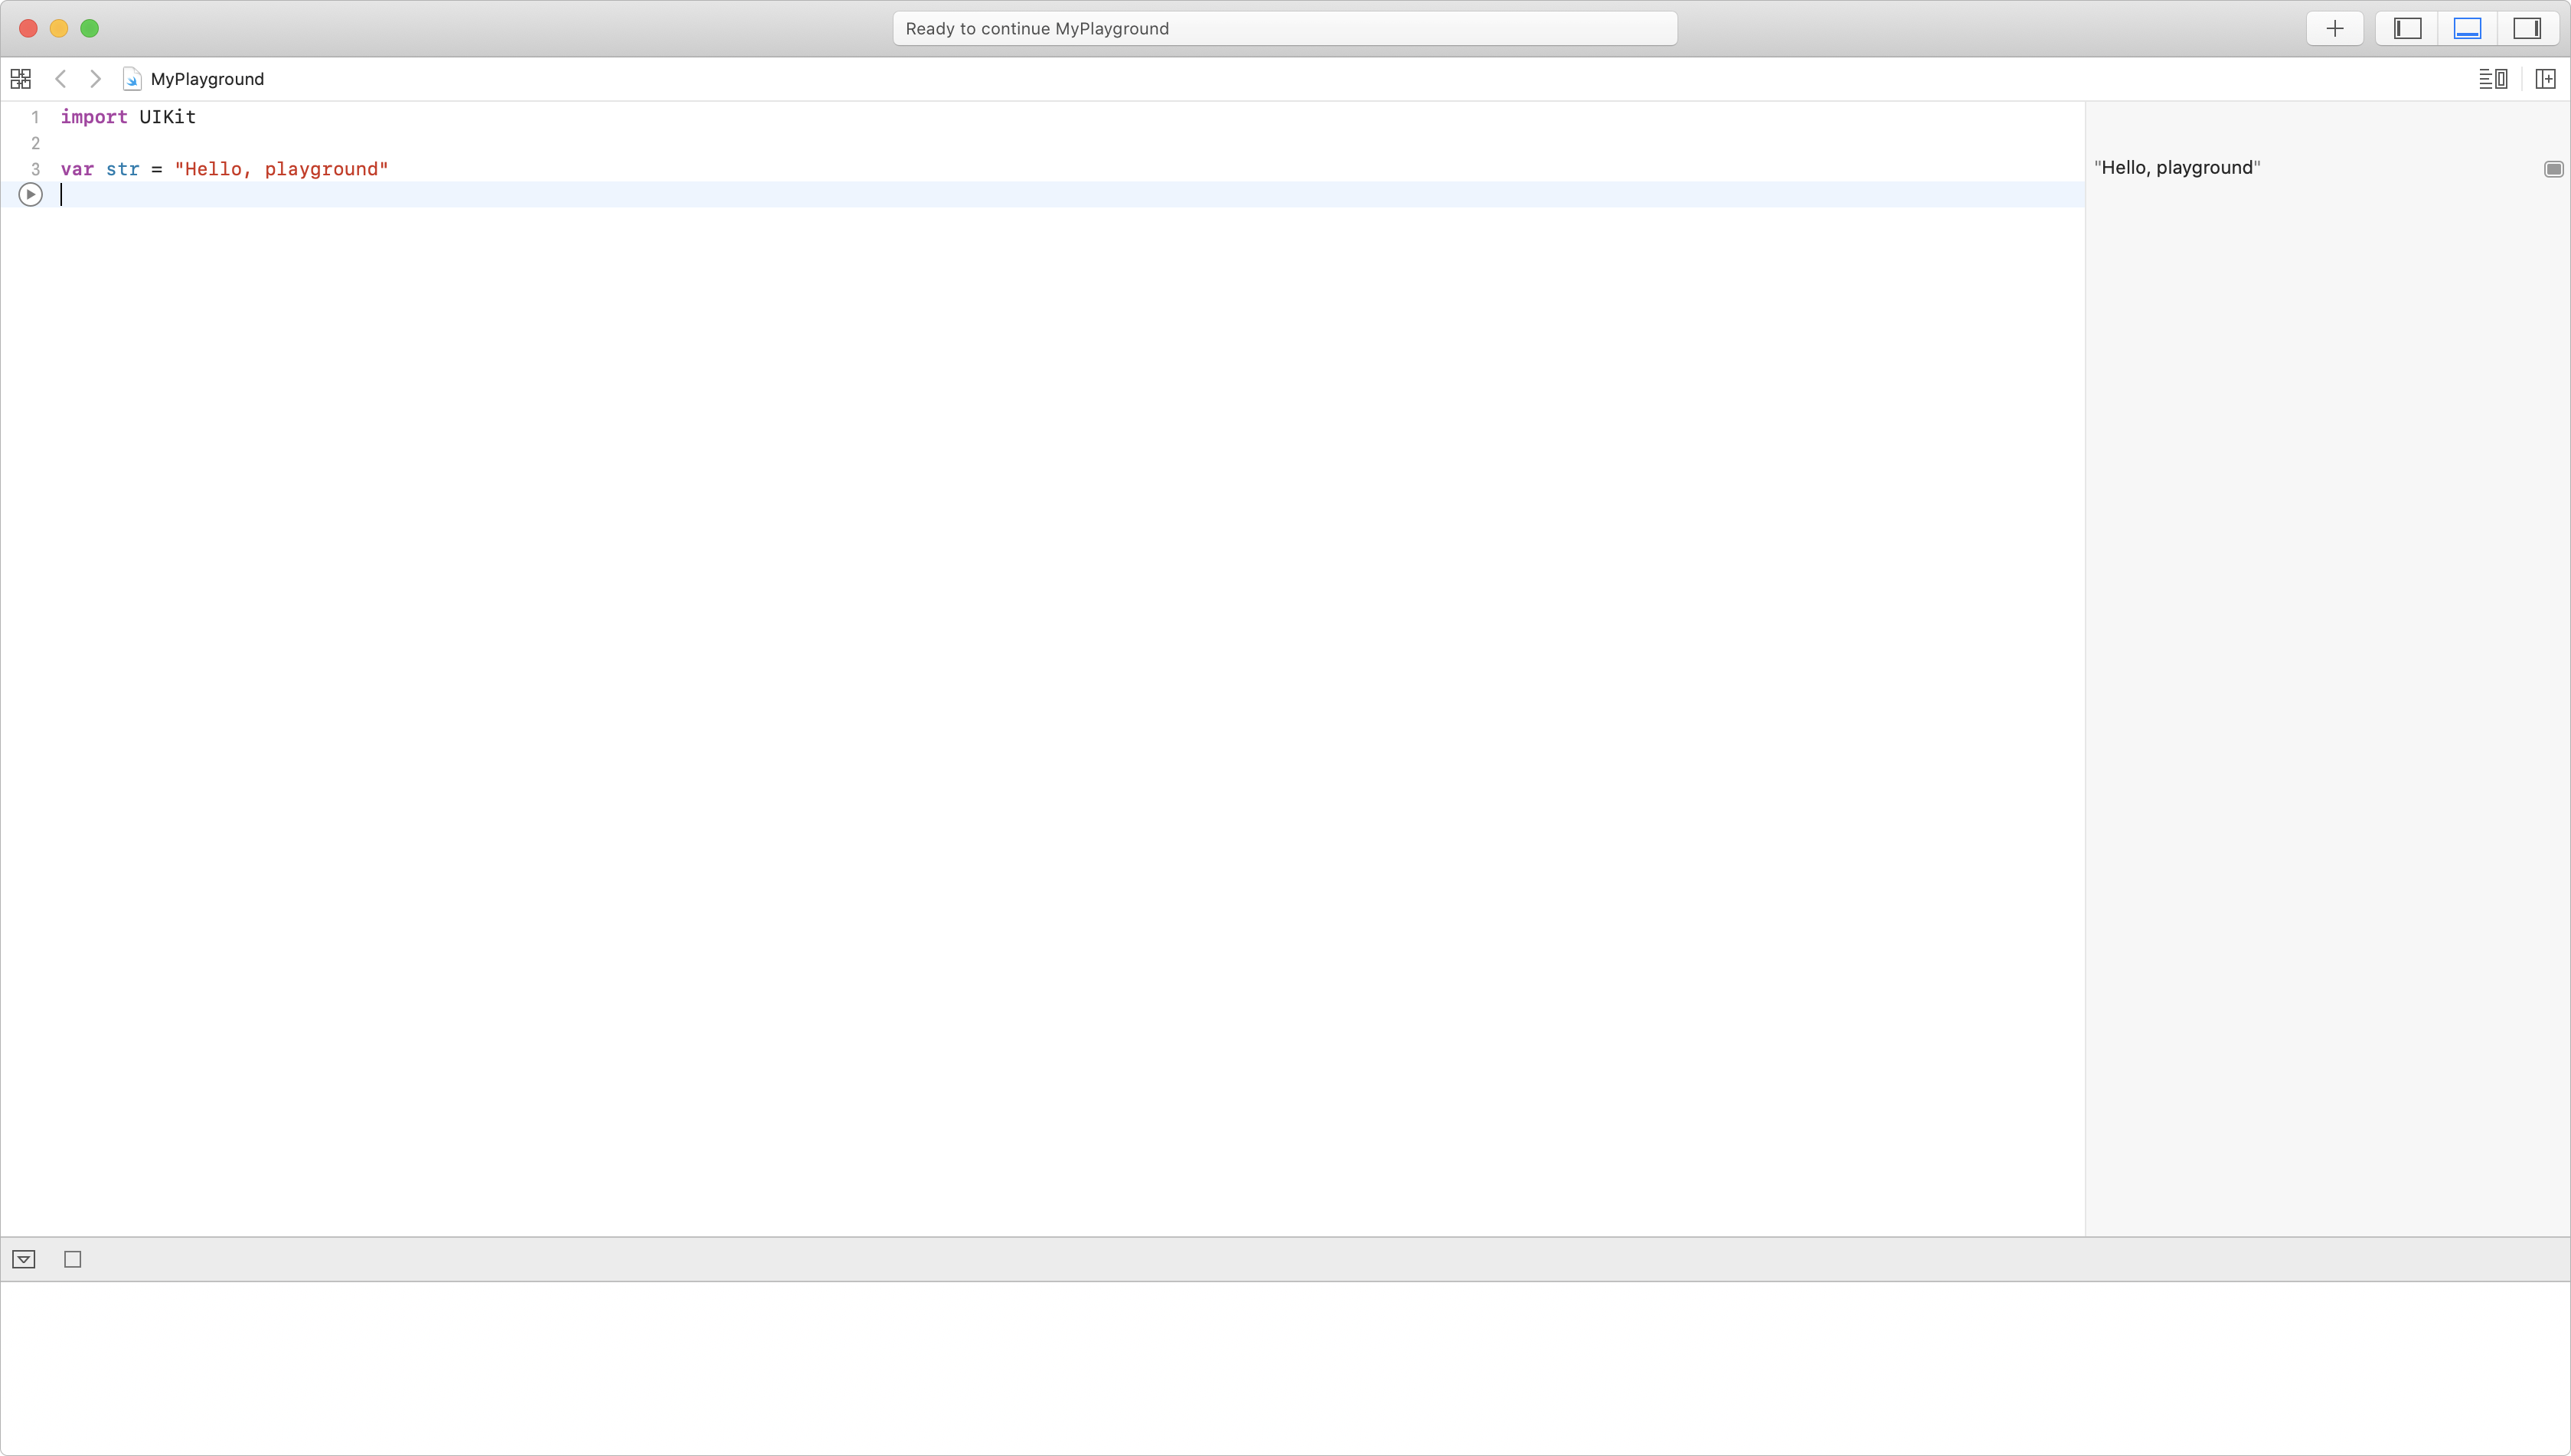
- Did you notice that the default playground includes an
importstatement? Theimport UIKitstatement allows you to use code defined in theUIKitframework. TheUIKitframework is more important as you progress through the exercises in this module. You should typically keep theimportstatement in all of your playgrounds.
- Did you notice that the default playground includes an
- Click Execute Playground to run the code. This is the blue cicle with the triangle inside.
- The default playground also includes the variable
var str = "Hello, playground". Notice that the string value prints in the results sidebar.
- The default playground also includes the variable
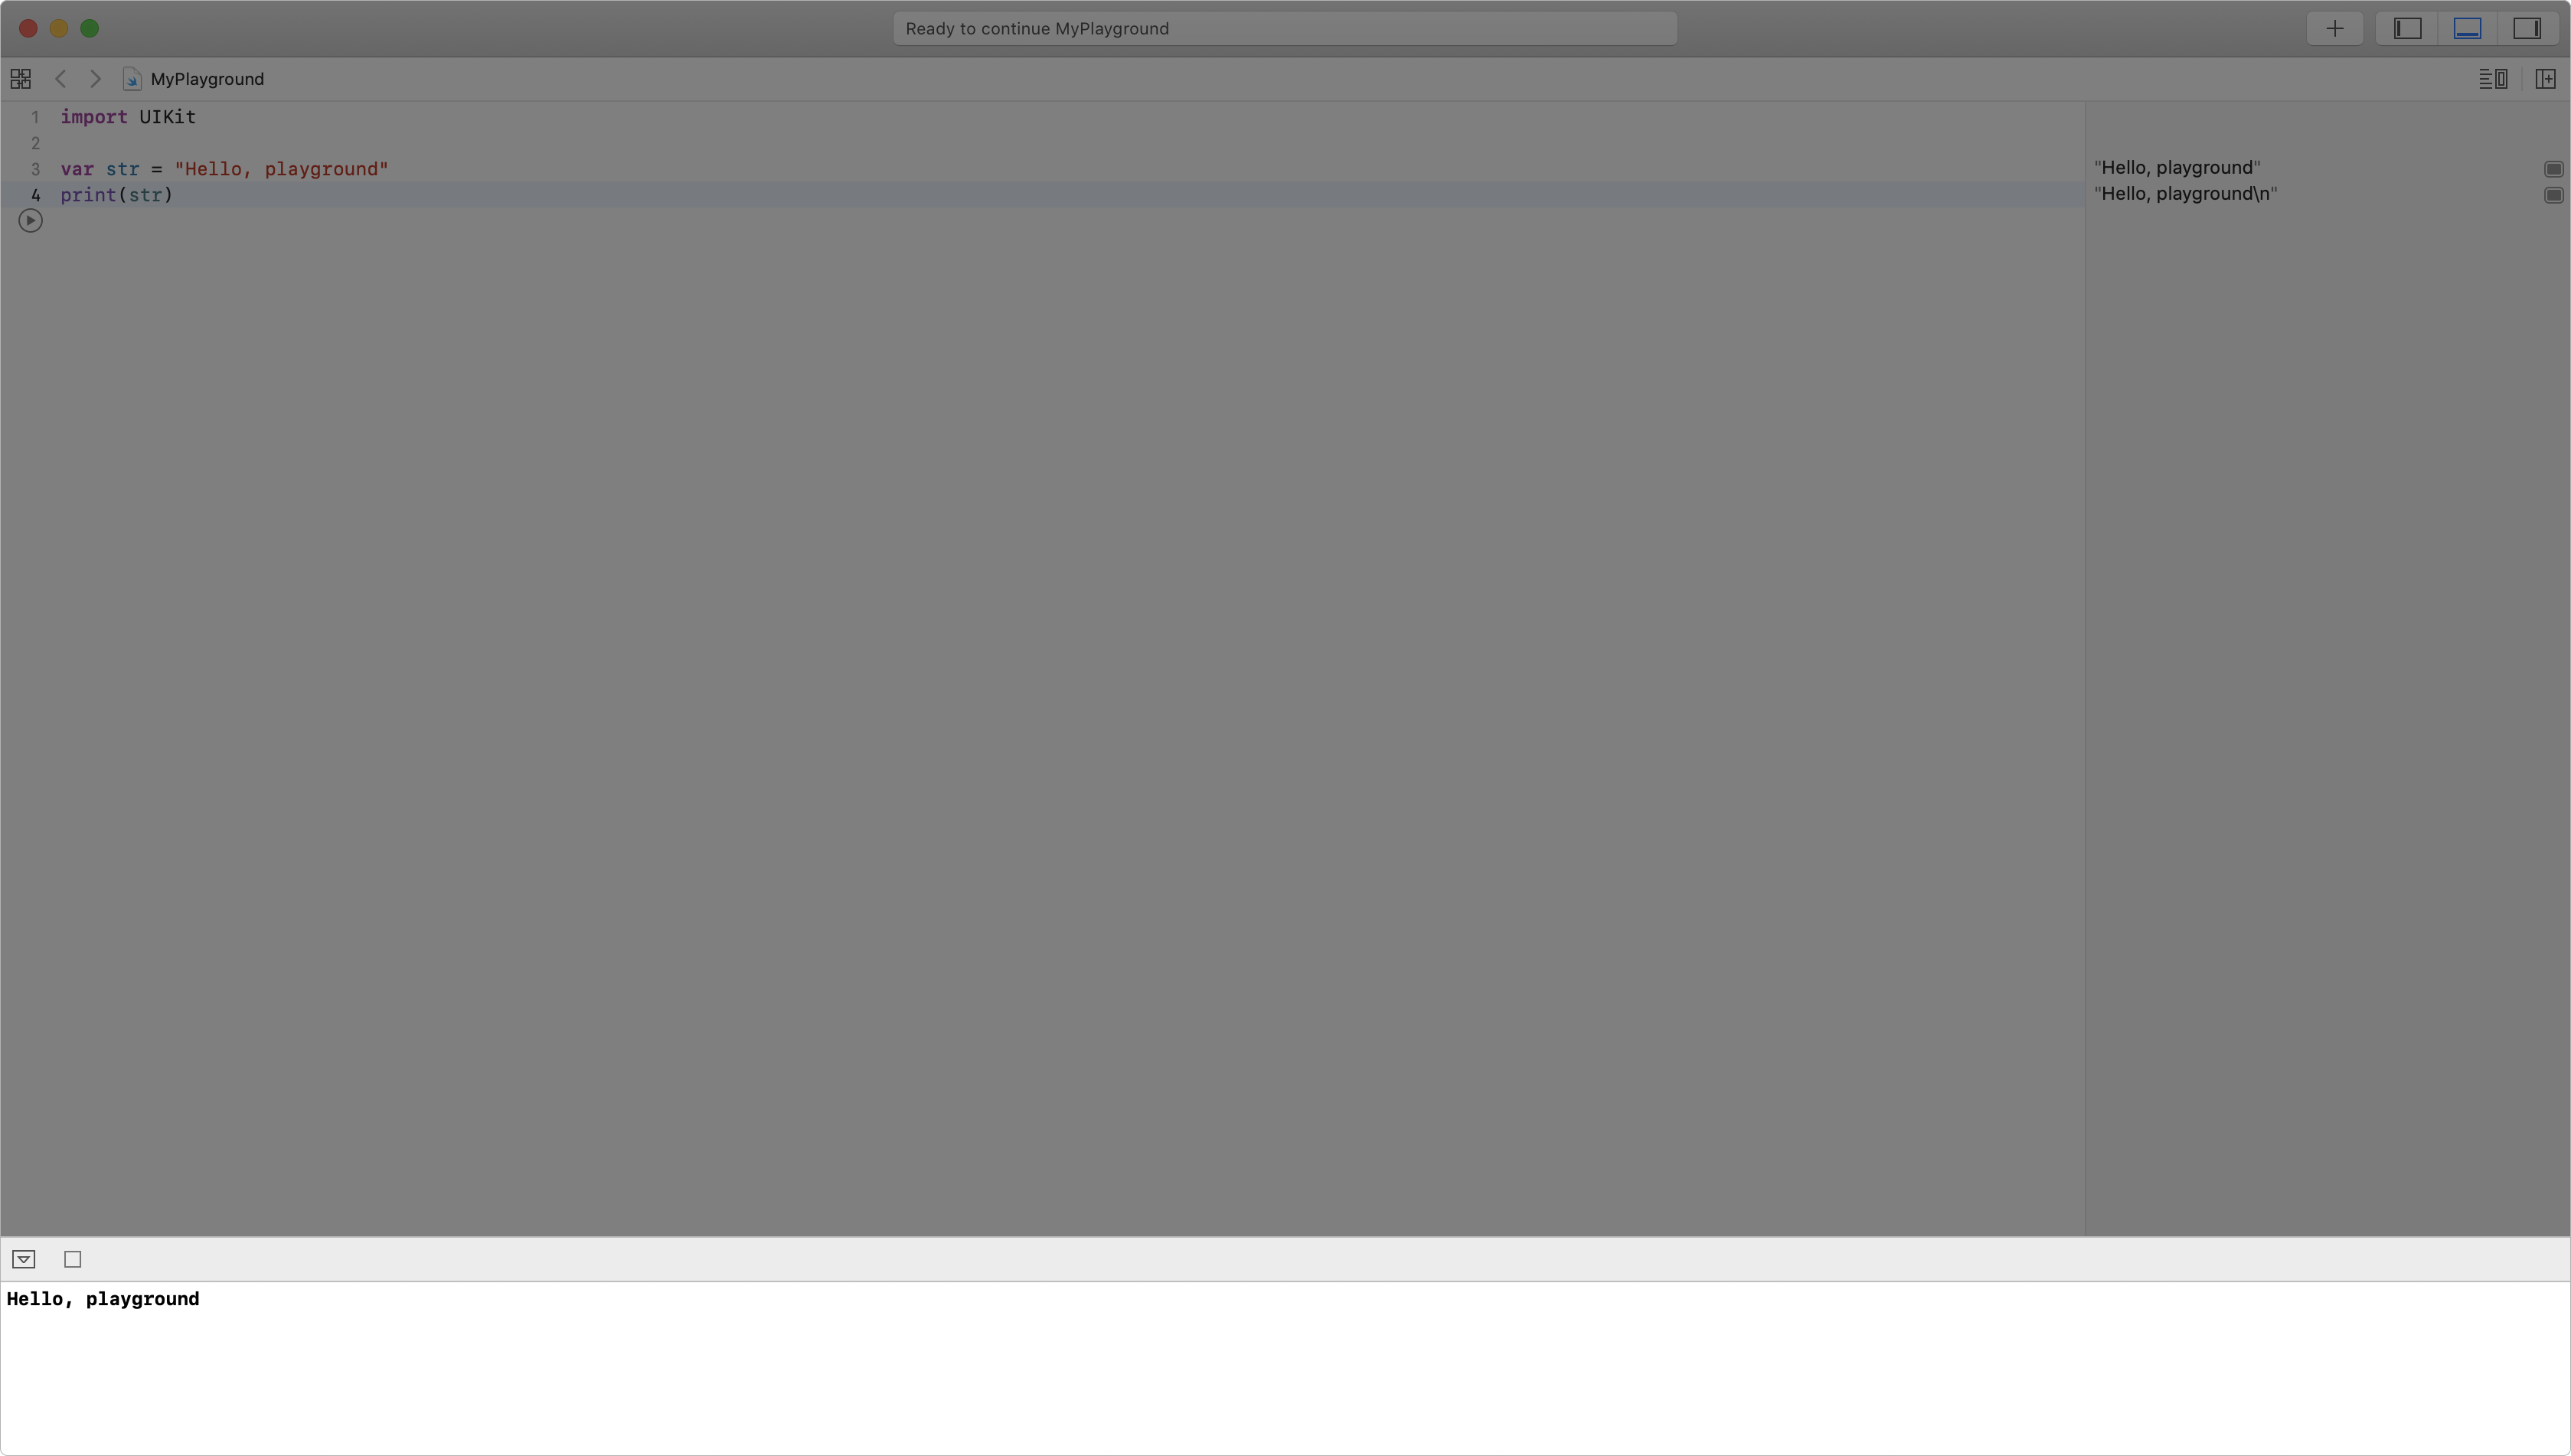
- Start a new line, and type
print("Hello, world!"). - Click Execute Playground to run the new code.
- Notice "Hello, world!" in the results sidebar and in the debug console.
- Replace "Hello, world!" with
strin your print function. Your code now prints the value of thestrvariable instead of the "Hello, world!" text.
Why does this code change work? The print function takes a String parameter and prints its value to the console. Both of these examples work because "Hello, World!" is a literal String, and str is a variable that stores a String value.
You'll learn more about strings and variables in the next unit.
Complete the Lab
Ready to get hands-on experience with Swift? Practice what you learned with the exercises in Lab - Introduction.playground.