Organize and Automate Your Work in Slack
Learning Objectives
After completing this unit, you’ll be able to:
- Explain the purpose of a Slack channel.
- Set up your channels for success.
- Explain the purpose of a Slack workflow.
Trailcast
If you'd like to listen to an audio recording of this unit, please use the player below. When you’re finished listening to this recording, remember to come back to the unit, check out the resources, and complete the quiz. As this is a prototype, we’d really appreciate your feedback on the experience. You can provide it by completing this short survey.
Start with Slack Channels
Slack is a channel-based messaging platform where people can more effectively collaborate. By organizing your work into channels, you’re bringing the right people, information, and conversations together to focus on a shared goal.
Channels provide you and your team a streamlined view into the work that’s being done. Because everyone in the channel has access to the same information, they can work together without missing a thing. When new members join, it’s much simpler to get the context needed to start their work.
Slack channels can be team-based or project-based, read-only or highly interactive, shared with external organizations or internal to your company, and much more. You can set up #help channels to centralize incoming requests for your team, or #feedback channels to track product requests, or #social channels to foster team bonding, or #team channels to coordinate your immediate team’s operations. You’re only limited by your imagination.
Creating a channel is only the first step in configuring a place where you can successfully accomplish a focused goal. Once you’ve set up a channel:
- Make it as welcoming and user-friendly as possible for future members.
- Add a description to let others know what the channel is about.
- Set it to private or public within your company.
- Ensure helpful resources are easy to get to—post a welcome message including those resources, and pin it for easy access for everyone in-channel.
When you combine teamwork in channels with simple workflow automation, you can make Slack even more powerful. So before inviting anyone to your channel, one last customization includes setting up an automated welcome message, or a request form, or a recurring reminder.
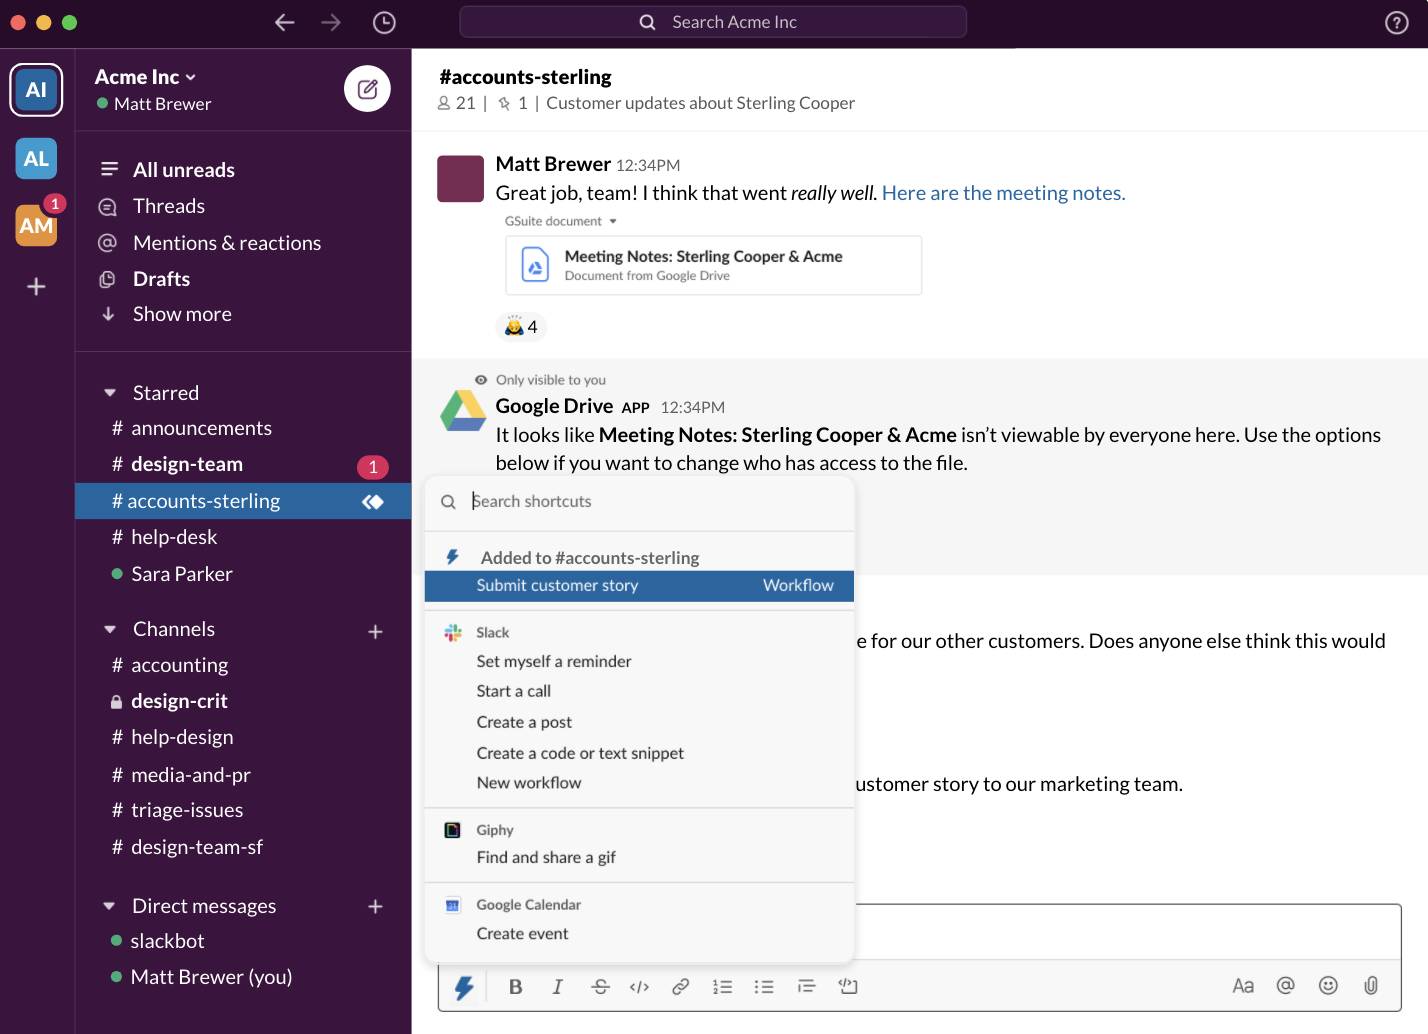
Automate Routine Tasks
When you combine teamwork in channels with workflow automation, you can make Slack even more powerful. With Workflow Builder, you can automate your team’s existing tasks and processes without writing a single line of code.
Workflow Builder helps simplify coordination and communication across the channels where your team gets things done—like tracking down information, following up on requests, helping teammates get up to speed, and so on.
First and foremost, Workflow Builder saves you time as you streamline daily tasks in Slack. You can automate things like recurring reminders, sending messages, gathering requests, and updating other systems and tools.
Second, workflow automation reduces back-and-forth by standardizing common interactions. This allows your teams to establish clear expectations for things like request processes, by automatically collecting the right information upfront, or communicating next steps through Slack messages.
And finally, Workflow Builder helps you customize Slack to fit the unique way you work—bringing together the right people and the right information at the right time, so you and your team can spend less time on coordination and more time on the important work.
Work with Triggers and Steps
Simply put, a workflow is a custom sequence of steps that can be triggered in Slack to run automatically. Let’s take welcoming a new-hire to your team as an example.
You can set up a workflow to kick off after something specific happens in Slack—in Workflow Builder, we call this a trigger. There are a number of workflow triggers to choose from, but in this case, you identify a new person joining a channel as the trigger. Once this trigger is set, you can add steps to determine what happens next—perhaps you want to send a message, or display a form, or send information to another tool or service.
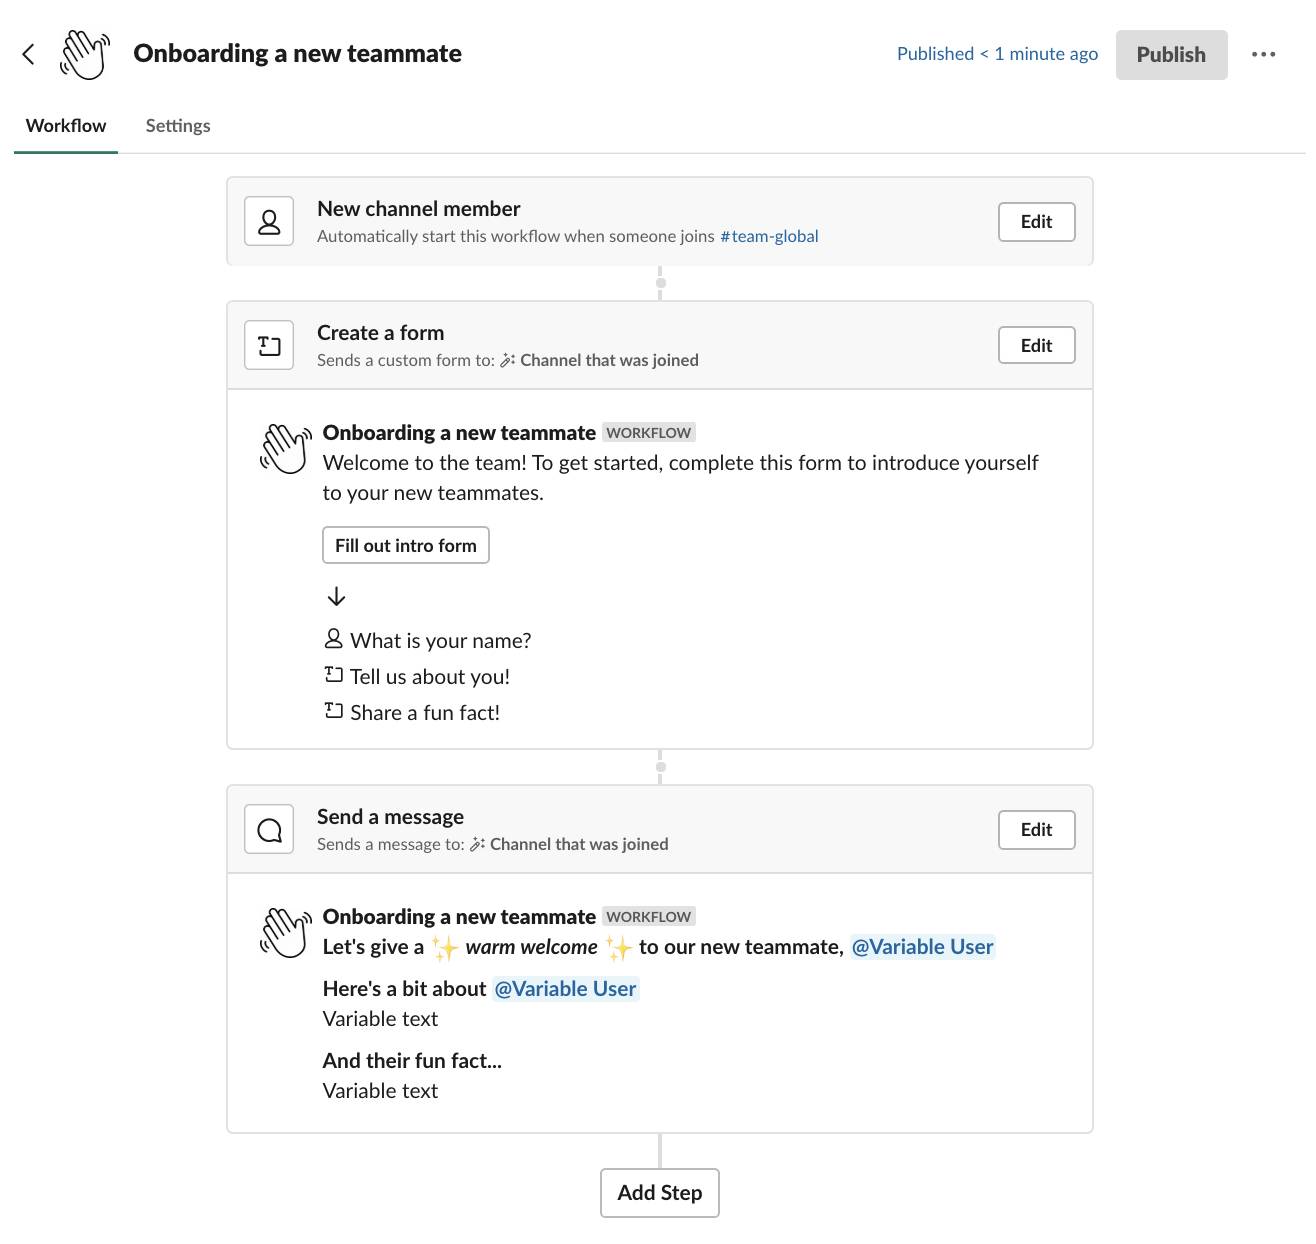
In this example, New channel member is the trigger when someone joins #team-global. This prompts a form to be created for the new team member to fill out their name, a little bit about themselves, and to share a fun fact. This is accompanied by a message introducing the new teammate within the channel.
You can make your workflow as simple or as complex as your use case requires. Decide on the type of trigger you’ll need to initiate your workflow, add your steps—as many as 100—click Publish, and your workflow is ready to use.
In the next unit, we break down the anatomy of a workflow even deeper.