Customize and Automate Quip Templates
Learning Objectives
After completing this unit, you’ll be able to:
- Standardize workflows and enforce best practices using customized templates.
- Use Flow Builder with templates to create a productive and collaborative Salesforce experience.
Sound Familiar?
If you’re like most admins, you’ve probably heard something along the lines of, “Can you put this content in Quip and make it automatic?” That type of direction is not only vague, but it’s also confusing if you don’t know the programs that are now available to you. “How am I supposed to accomplish that task,” you wonder, “Magic?”

Once you have a better handle on Quip, you can understand how to marry your team’s old ways of working with your new technology, making everyone more effective. Rather than just copying and pasting what you were doing, you can use the virtually limitless functionalities available to you in Quip to make a massive impact on your team’s productivity. Even if you’ve never done these things before, it’s well worth your time and effort to dive in to get the most out of Quip.
Don’t Reinvent the Wheel
With Quip and a small investment of time, you can set up powerful automation and customization tools that make a measurable and lasting impact on your team. Just about any document or workflow can be customized and automated for your specific needs. And while automation through Flow Builder is one form of automation, it can and should be used hand in hand with templates.
Curate templates that eliminate the need to manually populate documents with information that’s used over and over again. You can access and engage with real-time information that once lived outside of Salesforce right in your Salesforce instances. Or design multistep procedures that instantly create the framework of workflows that speed up processes for sales, service, and more.
The possibilities are virtually infinite.
In this module, you learn how to build and use templates that drive repeatable, automated processes. In turn, you’ll be able to enable streamlined workflows, a uniform user experience, and built-in communication tools that galvanize teams around key objectives.
Customize Your Way
Don’t know where to start? No worries. Knowing what works best for your team starts with understanding what’s possible. Start by asking yourself, What is your team’s worst bottleneck? We talk to our Salesforce users all the time, and your business challenges are likely similar to those of many others. That’s where templates come in.
Let’s start by taking a look at some example templates.
You’ll find templates for a number of different use cases—from Sales and Service, to work.com. and industry-specific needs. Review the options and see what stands out to you. Where do you see yourself and your team?
Think about templates as a jumping-off point. Instead of simply copying an old account plan or opportunity notes into Quip and calling it a day, this is your chance to create a more dynamic and useful template.
The template library is a great place to start, and you can combine your team’s needs with the best practices of Quip.

The templates in the Template Library are a good starting point to see the key elements of a successful template, where other users are finding success, and how you can emulate their best practices while also customizing for your team’s specific needs. It’s much easier to start with a template than a blank page.

Once you find a template that seems like a good fit for your team, scroll down and click Try Template. Within the template, you have the option to customize key elements that are appropriate for your team. Here’s what you need to know about customizing templates.
Pull in Key Account Information Directly In-Line
You are likely familiar with using mail merge capabilities to pull static data into a document. When utilizing mail merge, you type double brackets and the fields you want to pull in; for example, [[Account.Name]]. Be sure to use double brackets, a period instead of a space, and capitalization.
Template Data Mentions allows for a similar, but elevated, functionality. Rather than have the team manually enter the account name, why not automatically pull that information in? With the @Salesforce Template Data Mention function, you can automatically pull in live Salesforce data via picklists without checking the API names in Salesforce.
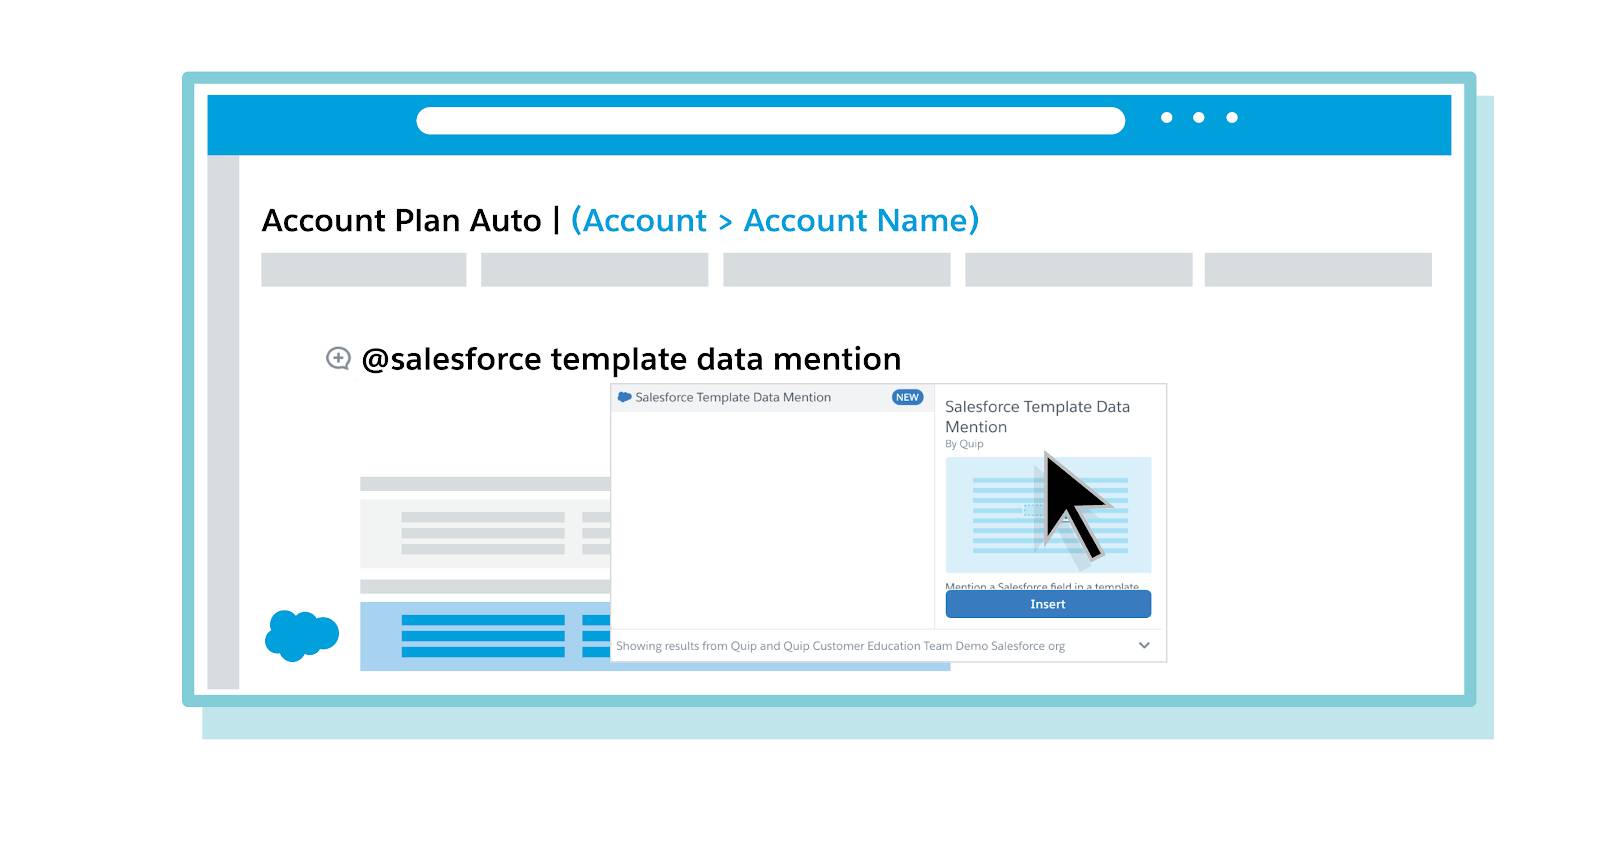
To pull in Salesforce Template Data Mention first, select Document | Mark as Template to change your document to a template. Once you’ve designated your document as a template, you have the option to add a @Salesforce Template Data Mention. Next, select your desired field—in this case, Account Name. You can use this data mention function as many times as you like throughout your template.
One important thing to note: Data mentions automatically populate with a record’s data and continue to stay up to date. So you can make updates to the record and sync them back to Salesforce straight from the data mention. Even better, team members can also add Salesforce record data by using the @Salesforce Data Mention.
Mail merge and Salesforce Template Data Mentions are both great ways to pull in key information for your team, so they won’t have to key in the data manually. While mail merges require specific syntax and can only pull in static data, Salesforce Template Data Mentions let you pull dynamic data in-line simply by typing @.
Get Familiar with Live Apps
Here are the most commonly used live apps for templates.
| Live App or Tool | Description | How You Could Use It |
|---|---|---|
|
Salesforce Record |
Add record-specific information to your document. This allows for in-line editing, comments, and bidirectional syncing to Salesforce.
|
Add account information such as Account Name, Account Number, Industry, and more to your account plan. |
|
Salesforce List |
Add record-specific lists and related lists. This allows for in-line editing, comments, and bidirectional syncing to Salesforce. You can do bulk updates, sync your changes to Salesforce, and add list view filters. You can even add notes and next steps that you can share with your team. |
Add a list containing the related opportunities on an opportunity cost plan. |
|
Salesforce Report |
Add Salesforce reports that you have already created in Salesforce. This data will also stay up to date. This does not allow for in-line editing. |
Add all the open opportunities related to an account onto the account plan. |
|
Salesforce Data Mention |
Pull Salesforce data seamlessly into your documents and spreadsheets. Mention live data from Salesforce to see dynamic fields that stay updated with the latest Salesforce data. Update fields from your documents and spreadsheets and sync them to Salesforce. |
Use data mentions in an executive summary on an account plan to pull in live key contacts, the Account Name, and more. |
|
Relationship Map |
Add lightweight org charts and relationship maps to your documents. Build relationship maps with imported Salesforce record data or create custom and Salesforce cards to manage customer relationships, key stakeholders, and relationship health right from your document. |
Add a relationship map to your account plan using Salesforce contacts from that account. Use this to track key contacts and their relationship health. |
|
Project Tracker |
Easily create a project plan using the Project Tracker. Assign, oversee, and organize your projects. Set deadlines and attach files. Columns can be re-named and rearranged. They can house people (owner), dates, status, files, or plain text. |
Add a Project Tracker to your Opportunity Close Plan to show deadlines, project owners and more. This will help keep the entire opportunity team aligned. |
|
Spreadsheet |
Embed a Quip spreadsheet directly into a document. |
Create a customized robust project plan to an Account Plan using a spreadsheet. You can @metion key people and dates, use data validation, and even add checkboxes to track progress. |
As a best practice, make sure to set up templated live Salesforce data. Templated data saves your team time and effort because the apps automatically pull appropriate data from Salesforce. This provides even more options in the way you use these apps. For instance, you can customize what fields you want to show.
Double Check Your Settings
- Make sure your document is set up as a template by going to Document | Mark as Template.
- You can share this template with any team members you are collaborating with to create the template, just share and assign the appropriate access level
- Turn on Link Sharing, this ensures that when you add the document to Salesforce in the Lightning App Builder the template functions as designed. Go to Share | Shareable Link and then toggle the setting to on.
Now that you know all the best practices for customization using Quip, let’s go back to our original example: Someone asks you to “add content” to Quip. Now, you know all the possible ways you can not only save that document or piece of content centrally, but also optimize it for collaboration and automation with your team. How can you bring that document alive with dynamic info? In what ways can you get creative?
If you want even more ideas about how to use templates and live data, check out the Resources section. In the next unit, we cover how to apply Quip using specific use cases.
Resources
- Training Hub: Quip Admins Learning Path
- Salesforce Help: Template Library
- Salesforce Help: Template Mode for Live Apps in Quip
- Salesforce Help: Quip Document Component
- Salesforce Help: Decide Between Template Data Mentions and Mail Merge
- Video: Quip for Sales Overview and Demo Video
- Salesforce Help: Mail Merge Syntax