Define Your Audience and Message
Learning Objectives
After completing this unit, you’ll be able to:
- Select the audience for your Single Send Journey.
- Create an email using an email template.
- Update default images and text within an email.
Get Your Message Together
If you want to send a single, one-time message using Journey Builder, you’re in the right place. Because you don’t always need a multistep, ongoing journey—sometimes you may want to use a single-send journey to:
- Promote a new sale.
- Offer a new product or service.
- Talk about a new mobile app feature.
- Share a white paper or other vital information.
First, though, you need to craft what you’re going to send. To do that, you can use a message that you’ve already created in Content Builder or create a new message in Journey Builder when you set up your single-send journey. In this example, you’re going to create a new message in Journey Builder.
Time to create your single-send journey using the Trailhead Simulator!
Welcome to Trailhead Simulator
Before starting, there are a few things you should know about Trailhead Simulator.
For the best experience, view the Trailhead Simulator on a computer, not a mobile device. Unlike a Trailhead Playground, Trailhead Simulator provides a simulated user experience that does not store your progress. If you close the simulation and relaunch it, the simulation starts from the beginning. To get back to where you left off, use the simulator navigation controls.
Also, the Trailhead Simulator is designed to highlight the correct click area if you click the wrong area first. Simply click the highlighted area to continue.
Let’s get started!
Define Your Audience
- Launch the Trailhead Simulator.
- Select Exercise 1: Define Your Audience.
- Click Begin.
- Click Create New Journey.
- In the Single Send Journey section of Journey Builder, click Email.
- Click Data Extension.
- Click Select Data Extension. This is where you select the data extension that holds the audience you want to send to. That data extension also contains information you can use for simple message personalization.
- Choose Cloud Kicks customers.
- Click Summary.
- In the Filter Contacts section, click Edit.
- Click Contact Data to choose the criteria that determines which contacts enter the journey.
- Click Scotts Customers.
- Click Cloud Kicks customers.
- Click Purchases.
- Click PurchaseDate to see it dragged over to the canvas.
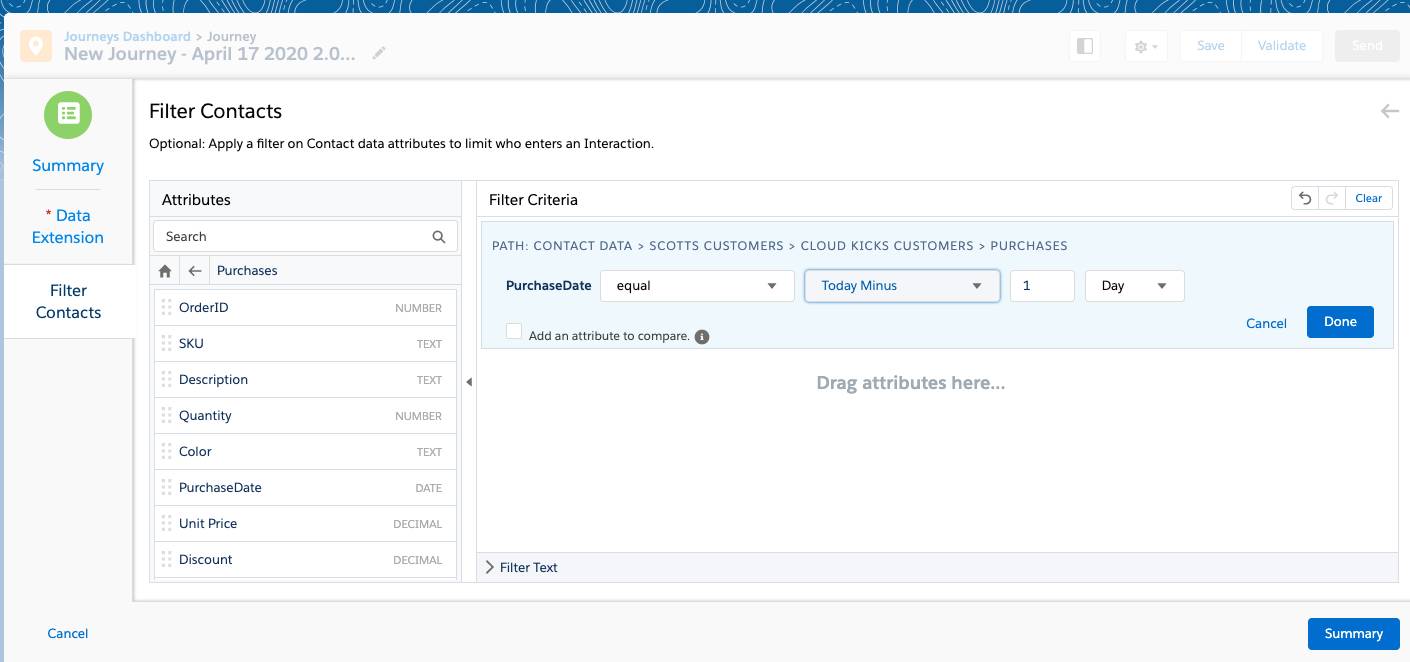
- Click the date May 18, 2020.
- Click the Date dropdown menu, and select Today Minus, which will default to 1 Day.
- Click Done.
- Click Summary.
- Click Done, then click Next Exercise.
At this point, if you have an existing email message, you can use it here. But what if you’re feeling creative and want to use something brand-new? You can do all of that in Journey Builder in just a few steps. Here’s how.
Create an Email Message
- Open the Trailhead Simulator (if you’re not already there) and select Exercise 2: Create an Email Message.
- Click Begin.
- Click the Email activity on the canvas.
- Click New Message.
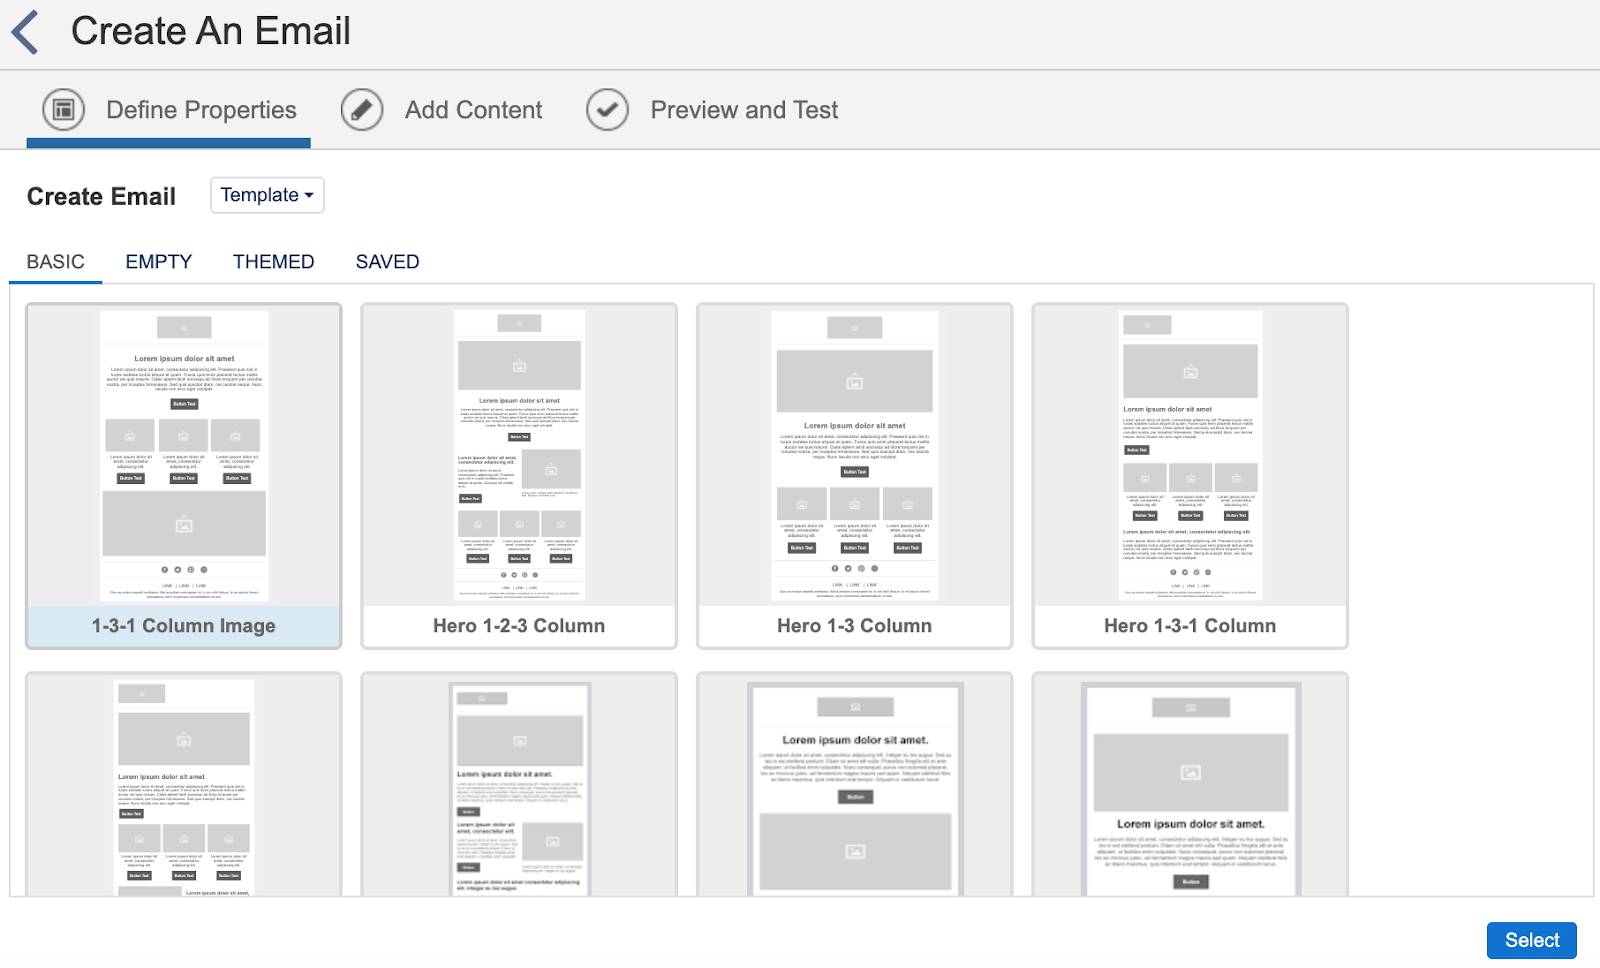
- This example uses a template, so click 1-3-1 Column Image.
- As you can see, there are many available templates to fit your needs, but since we have the one we’re looking for, click Select.
- Enter the name
Welcome to Cloud Kicks!.
- Click Next.
- Click the subject line and enter
Welcome to Cloud Kicks!.
- Click Done.
- Click the preheader line and enter
We are glad to have you.
- Click Done.
- Click the gray box in the top section of the email template to edit the image block.
- Click the image block to edit it.
- Select HeroImg.jpg and click Select.
- Click Next.
- For this example, you can leave the placeholder content as it is. Click the dropdown arrow next to Save and select Save and Exit.
- Click Done.
You’ve got your message together—now you just need to make sure your new journey is working correctly. Time to preview, test, and validate before you send.
Resources
- Salesforce Help: Scheduled Single Sends Dashboard View
- Salesforce Help: Create a Single Send Journey