Test Responses
Learning Objectives
After completing this unit, you’ll be able to:
- Insert a test snippet to assert a response.
- Save a request to a collection.
Insert a Test Snippet
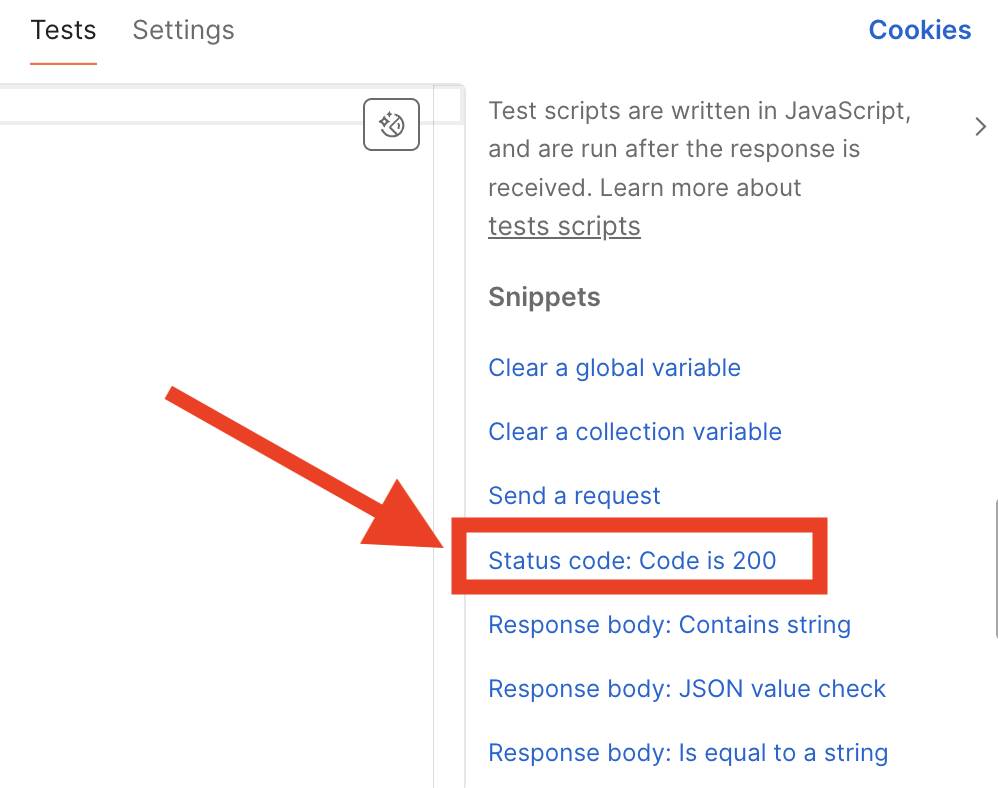
You can write Postman tests in JavaScript to ensure an API is functioning as expected. Under the Tests tab of your request, you can input JavaScript manually, use artificial intelligence to generate tests, or use the SNIPPETS list to the right of the code editor. Clicking one of these popular use cases automatically inserts a bit of code into the editor for you to modify.
- With your request open, click Tests.
- In the SNIPPETS list, find and click Status code: Code is 200 to insert the snippet into the code editor.
A Postman test consists of the pm.test() function, which accepts two parameters:
- The name of the test used to identify it in the Test Results output
- A function that returns a Boolean (true or false) value to indicate whether the test passes or fails
In our example, the name of our test is "Status code is 200". The function contains an assertion about our response, that we will receive an HTTP status code of 200, formatted using Chai BDD syntax.
pm.test("Status code is 200", function () {
    pm.response.to.have.status(200);
});
Run a Test
Since tests are assertions about a server response, tests execute after you run the request and receive a response from the API.
- With your test added to the request, click Send to run the request.
- Open Test Results in the response section at the bottom.
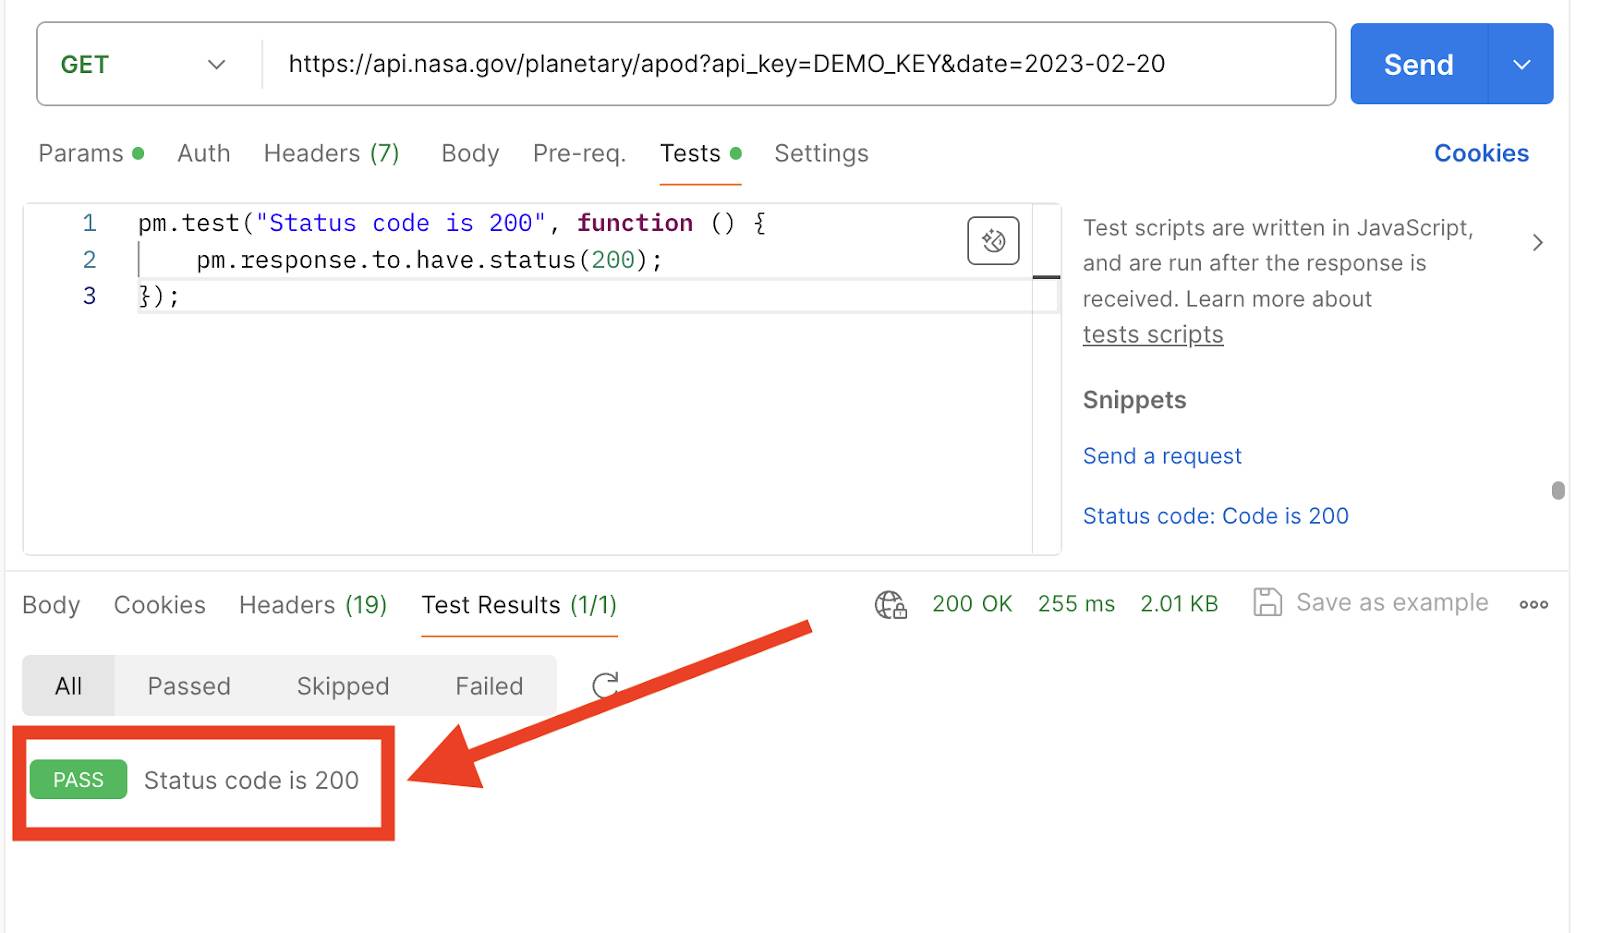
If the call returns a 200 HTTP status code, the test will pass, otherwise it will fail. Try changing the expected status code in your test script to 404, and run the request again. You’ll see that the Test Result gives you a fail and error message.
Save the Request to a Collection
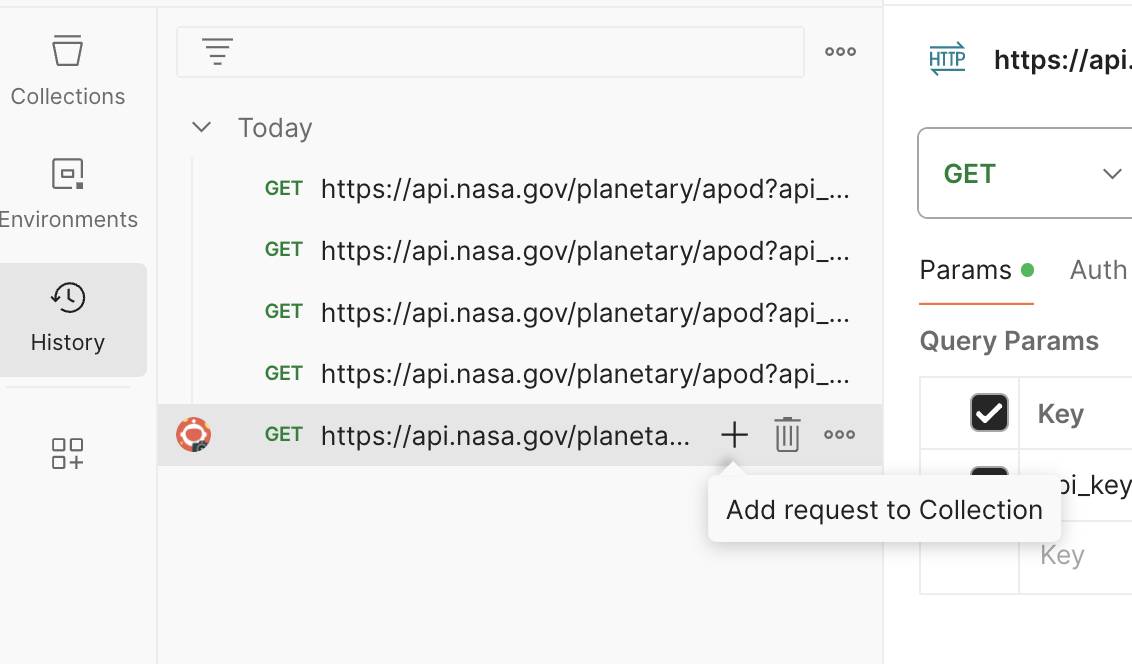
The History tab on the left sidebar maintains a record of the most recent requests you send from Postman. Combing through your history to find and reuse requests can be time-consuming. Instead, you can save a collection of requests to organize your work. Besides improving productivity, collections are the foundation of more advanced features in Postman, like automation, monitoring, and mock servers.
- Click

- Hover over the first request you made and click Add request to Collection (+). This should be the request you made before adding a date parameter.
- Name your collection
Trailhead module
- Click Save. Your request is saved to your new collection.
- Hover over your second call and click Add request to Collection (+).
- The destination should already be Trailhead module. Go ahead and click Save.
Update the name of the first call to Picture of the Day and the name of the second call to Pictures from November 2023.
- Click
 .
.
- Expand the Trailhead module collection.
- Hover over the top request and click

- Click Rename.
- Enter
Picture of the Day
- Rename the second request in your collection
Pictures from November 2023.
Now, let's ensure you're actually requesting all of the pictures from November 2023.
- Click Pictures from November 2023.
- Hover over the
datekey you created and click the trash can icon to delete it.
- Enter a new key to start your retrieval array on the first day of November.
- KEY:
start_date
- VALUE :
2023-11-01
- Enter another key to conclude the retrieval array on the last day.
- KEY:
end_date
- VALUE :
2023-11-30
-
Save your work.
- Click Send to run the request.
Check out the NASA Astronomy Picture of the Day API documentation for more information about its query parameters.
Keep It DRY
DRY stands for don’t repeat yourself. Imagine you always expect JSON objects to be returned from all your endpoints. Instead of adding the same test to every request individually, you can add the test assertion at the collection level to run after every request in the collection. With Postman, you can add tests to individual requests, folders, or collections.
- Click Trailhead module.
- Click the Tests tab.
- Under SNIPPETS, select Status Code: Code is 200 to add the test at the collection level.
- Click Save.
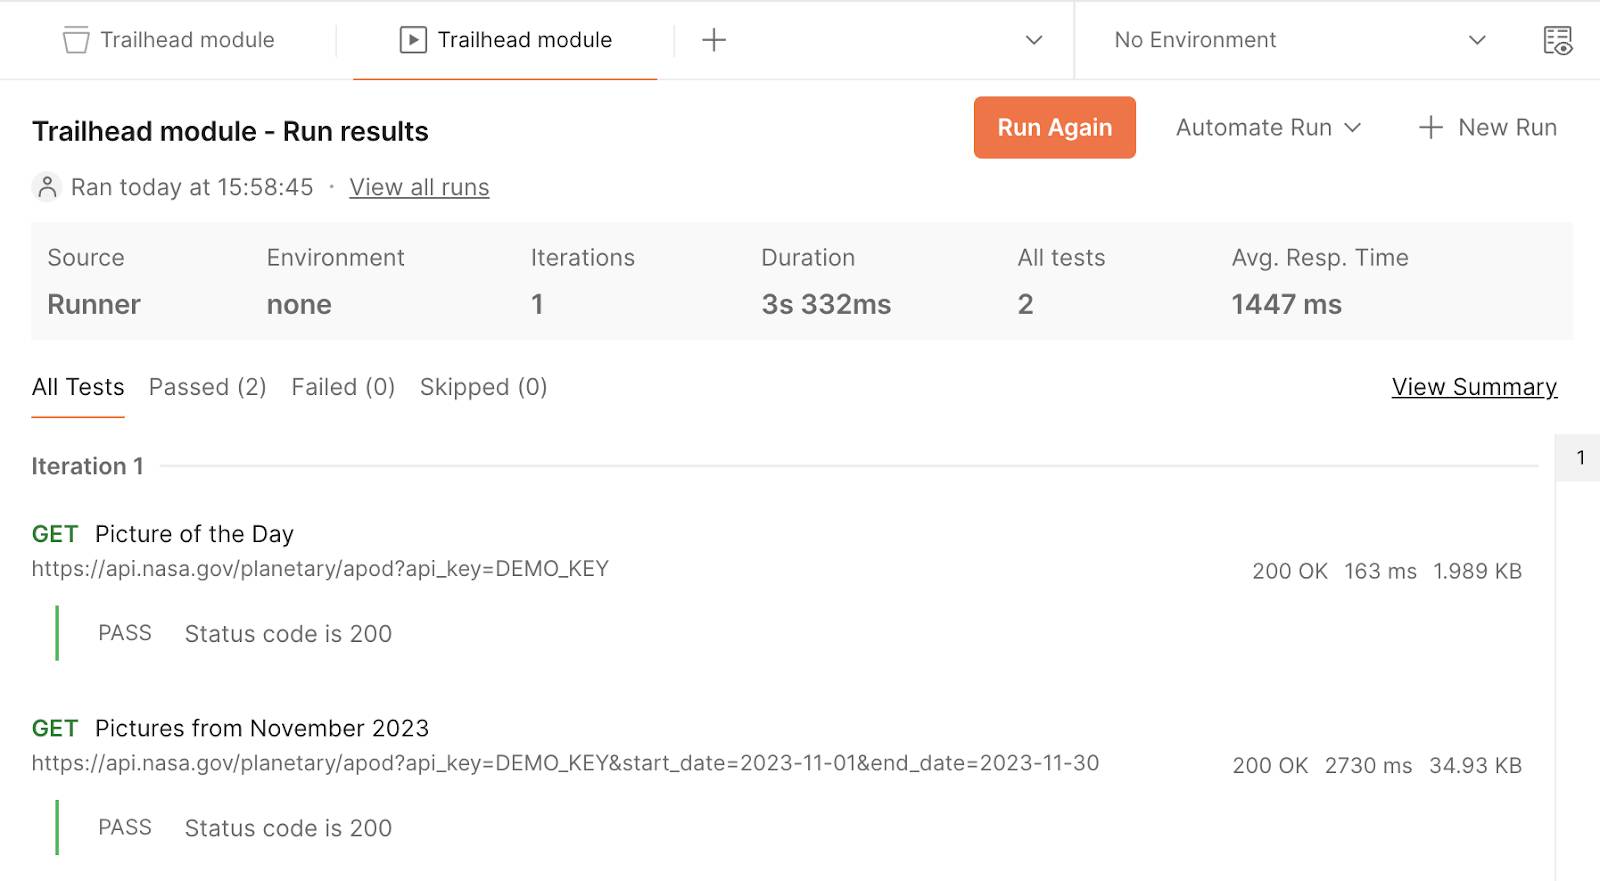
- Next, click Run collection

- Then, click Run Trailhead module. After the collection runs, you can see that each request has passed under the All Tests tab.
In the next unit, let’s learn about another way to stay DRY, using variables to reduce redundant code.