Test Your Emails
Learning Objectives
After completing this unit, you’ll be able to:
- Preview and test emails.
- Develop QA and testing steps for your campaigns.
- Create an email marketing tool kit for your company.
Preview and Test
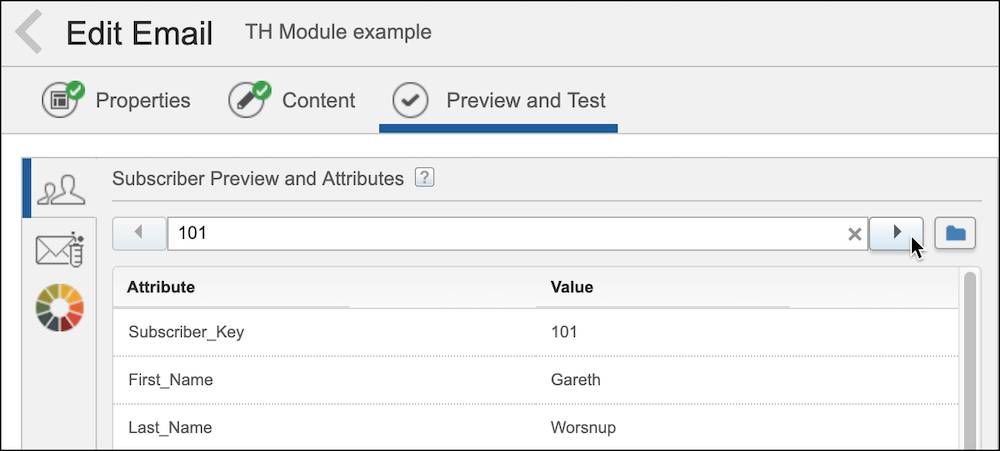
You’ve spent time getting to know your audience and gathering data. You’ve even built a library of great content that follows email design and accessibility guidelines. What else is there to do? Check and preview those emails before sending! In Content Builder, review Preview and Test and click through your sendable data extension to make sure the email is rendering appropriately.
Device Previews
It can be time consuming to make sure your email looks great on all devices. So instead view your email on the email service providers (ESP) and devices they are using the most. Then focus on perfecting those emails.

Litmus Previews
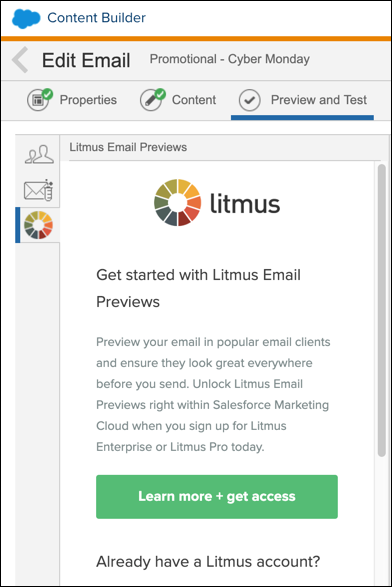
Salesforce Partner, Litmus, offers a plug-in that previews your email across 70+ browsers, devices, and clients. This allows you to easily view the devices that are most popular for your subscriber, and really fine-tune the email to them. If you have a Litmus account, you can preview these versions right in Content Builder, under the test send option.
Quality Assurance
If you’ve previewed and tested your email, you may be tempted to hit send. But don’t overlook the extremely important quality assurance (QA) step. What’s the difference between testing and QA? Well, QA goes beyond previewing your email, and ensures that someone else takes a detailed look at every element of your message—with fresh eyes. The email creator should not do the final QA check.
To kick off your QA process, create a test data extension that includes designated QA testers with various email domains, devices, and so on. When testers access your email in a variety of ways, you are more likely to catch nuanced issues. And remember, to accurately test a dynamic or personalized email, your test data extension needs to include all the dynamic content required for your message. Once you’re ready, send your email to the testers along with a QA checklist—so they are sure to check the most important elements.
Here is a suggested QA checklist for your email campaigns.
QA Checklist:
- The subject line and preheader are correct
- Email is using the correct header and footer
- Email is using the correct template (if applicable)
- No typos or grammatical errors
- All images render correctly
- Email utilizes inclusive marketing principles
- All links work, have alias tags set, and go to the correct location
- ALT text is set and does not include any spelling/grammatical errors (if applicable)
- All required legal copy is present
- Unsubscribe link is correct and present (unless transactional)
- Text version is correct
- Email rendering verified via Litmus previews (if applicable)
- View as a Web Page (VAWP) link is present and working properly (if applicable)
- Tracking pixel is present in the HTML: <custom name="opencounter" type="tracking">
- Email validates against test, proof, seed, and live data
- All dynamic elements are functioning properly (if applicable)
Mistakes Happen
Even if you have practically perfect emails, it’s a great idea to have a plan in place in case you do find a mistake after pressing send. If you do find yourself in an email emergency, here are some suggested steps to follow.
- Identify the issue and the impacted audience.
- Determine messaging appropriate to the level of the issue.
- Create the audience, excluding any subscribers who didn’t receive the email originally.
- Update the incorrect email or create a new email.
- Follow QA steps. (Don’t skip this. No one wants to send a second oops on the same day.)
- Breathe in. Breathe out. Stick to the plan.
You can also prepare by having an oops! template ready to go in Marketing Cloud Engagement. No customer wants a generic oops email, so make sure your template allows for customization and truly showcases your brand. Then if you have a mistake, you can update the message, create your audience, send, and move on with your day.
Email Design and Content Toolkit
If you don’t have one already, you should create an email design guide or toolkit for your team. It’s a great place to store your checklists and reusable content. Plus, it saves you time by answering many of the questions that often end up in marketers' inboxes. (You can even create it in CloudPages with links to content blocks in Content Builder. Talk about self-service.) But a design guide is more than just checklists and content blocks. Here’s what it should include.
- Company style and accessibility guidelines (colors, fonts, sizing guidelines)
- Design system information (framework information)
- Content module library (standard headers, footers, body content)
- Company best practices and metrics (metric goals, voice and tone)
- Technical build information (how-to guides, HTML code, CSS information)
- Quality assurance info (checklists, process documentation, what to do in case of an oops)
Not only does your toolkit help you, it ensures that anyone on your team can help create content that follows the same guidelines, voice and tone, and consistent design.
As we mentioned, there is a ton of content about email marketing out in the world. From preference centers to accessibility, you have the tools to go out and evolve your email marketing strategy. While there’s always more to learn on these topics, we are confident that you’re ready to conquer the email world—one personalized email at a time.