Integrate Lead Generation Into Your Marketing Strategy
Learning Objectives
After completing this unit, you’ll be able to:
- Identify product features of Account Engagement that support your lead generation strategy.
- Create components in Account Engagement to support your lead generation strategy.
Lead Generation with Account Engagement
OK, so now you should know where lead generation fits into your marketing strategy (hint: by generating high-quality leads). So once you’ve gathered those leads, how can you pass them on to your sales team? It’s a whole lot easier with the help of Account Engagement. First, let’s identify some specific automation tools used only in Account Engagement.
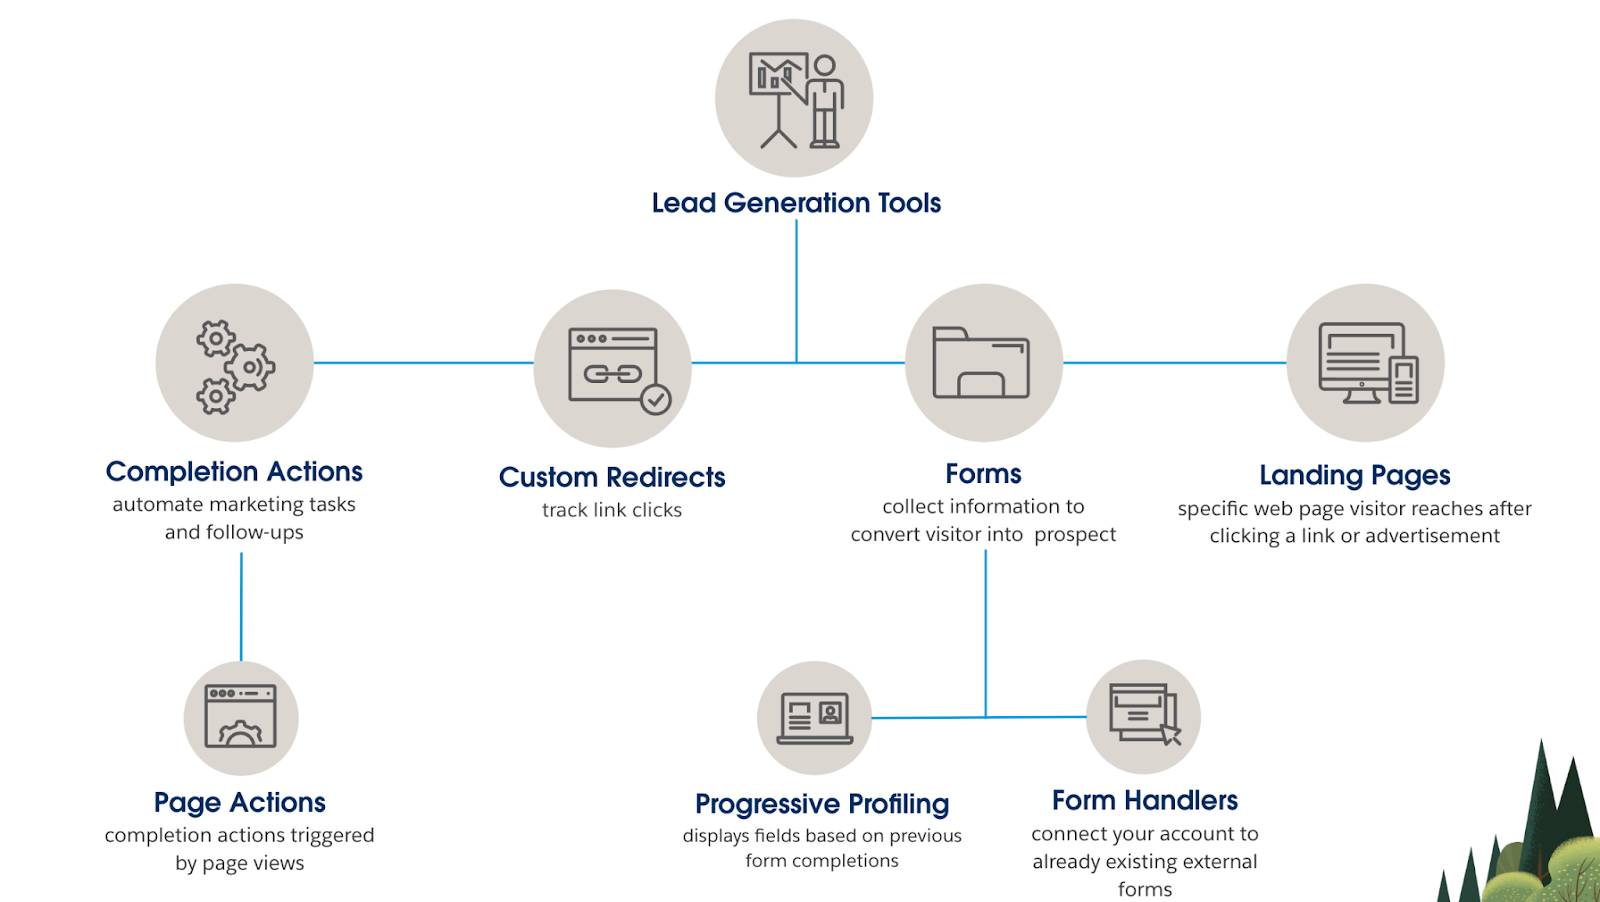
Now let’s look at some features that are especially helpful with lead generation.
Tracking Code
While a visitor is interacting with your site, there’s no way for you to directly market to them or begin moving them through the typical sales funnel. Fortunately, when visitors browse a website that has our tracking code on it, they leave behind traceable crumbs or cookies that are used to track the user’s activities while they navigate your website and interact with your marketing content. There are two cookies that Account Engagement tracks: visitor and opt-in. Both these cookies will stay on the browser unless they choose to opt-out. At some point each visitor will convert to a prospect and all this information will be moved to the prospect’s record which can be synced to a lead or contact record in Salesforce. The most common way a visitor becomes a prospect is by a form submission via your web page, a form handler on your web page or a form hosted on your landing page.
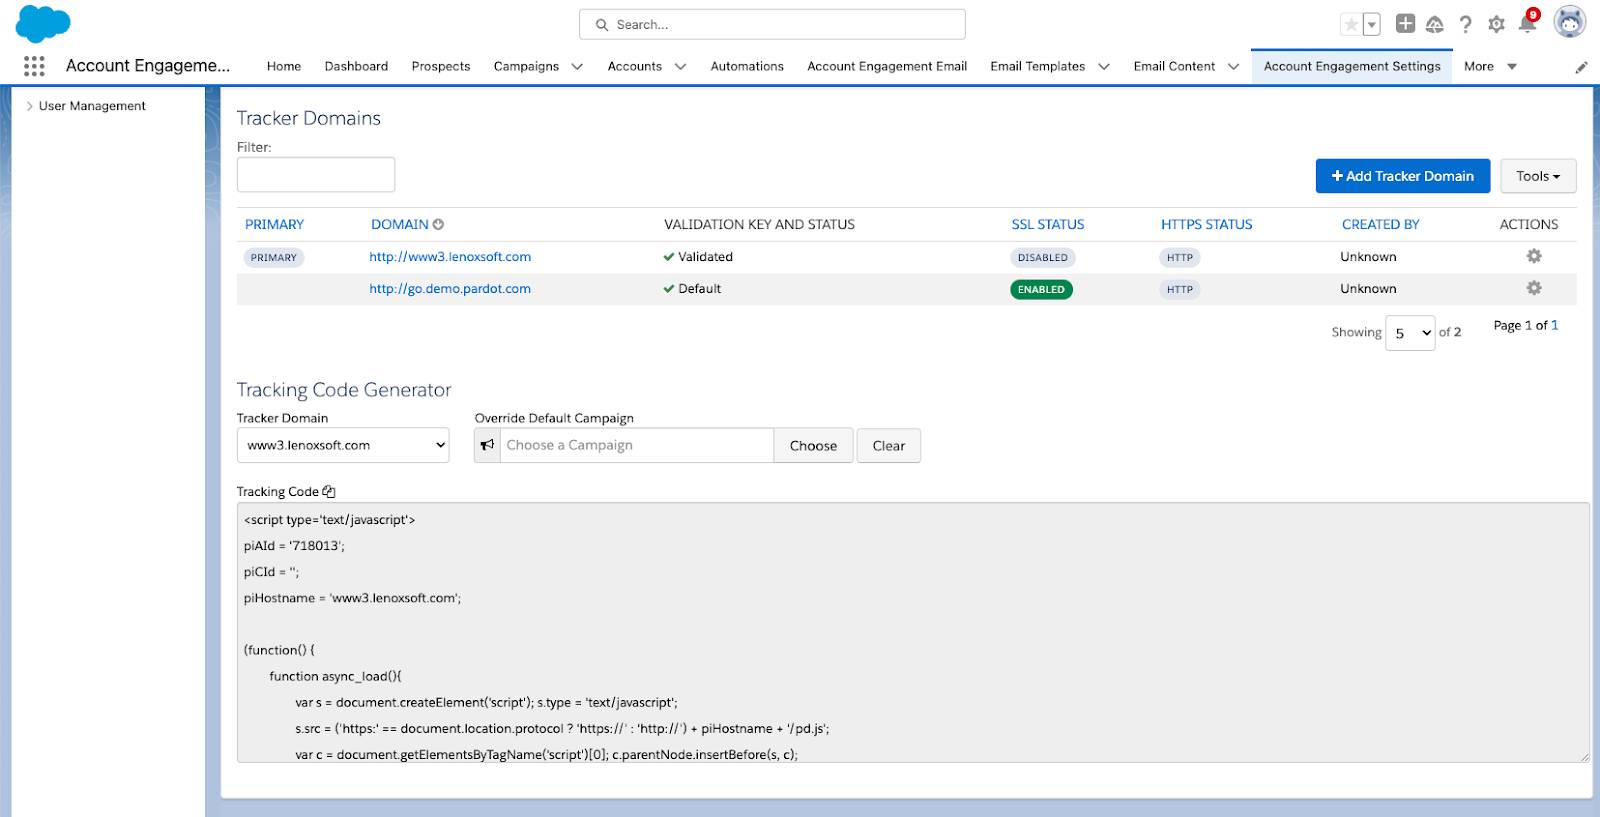
Let’s go ahead and find your Account Engagement Tracking Code and add it to your webpage.
- Select the Account Engagement Settings tab.
- Select Domain Management.
- Select the domain you want to generate code from the Tracking Code Generator toward the bottom of the page. Choose a Campaign from your list of campaigns.
- Copy the code.
- In your web page HTML, paste the campaign tracking code before the close body tag (
</body>).
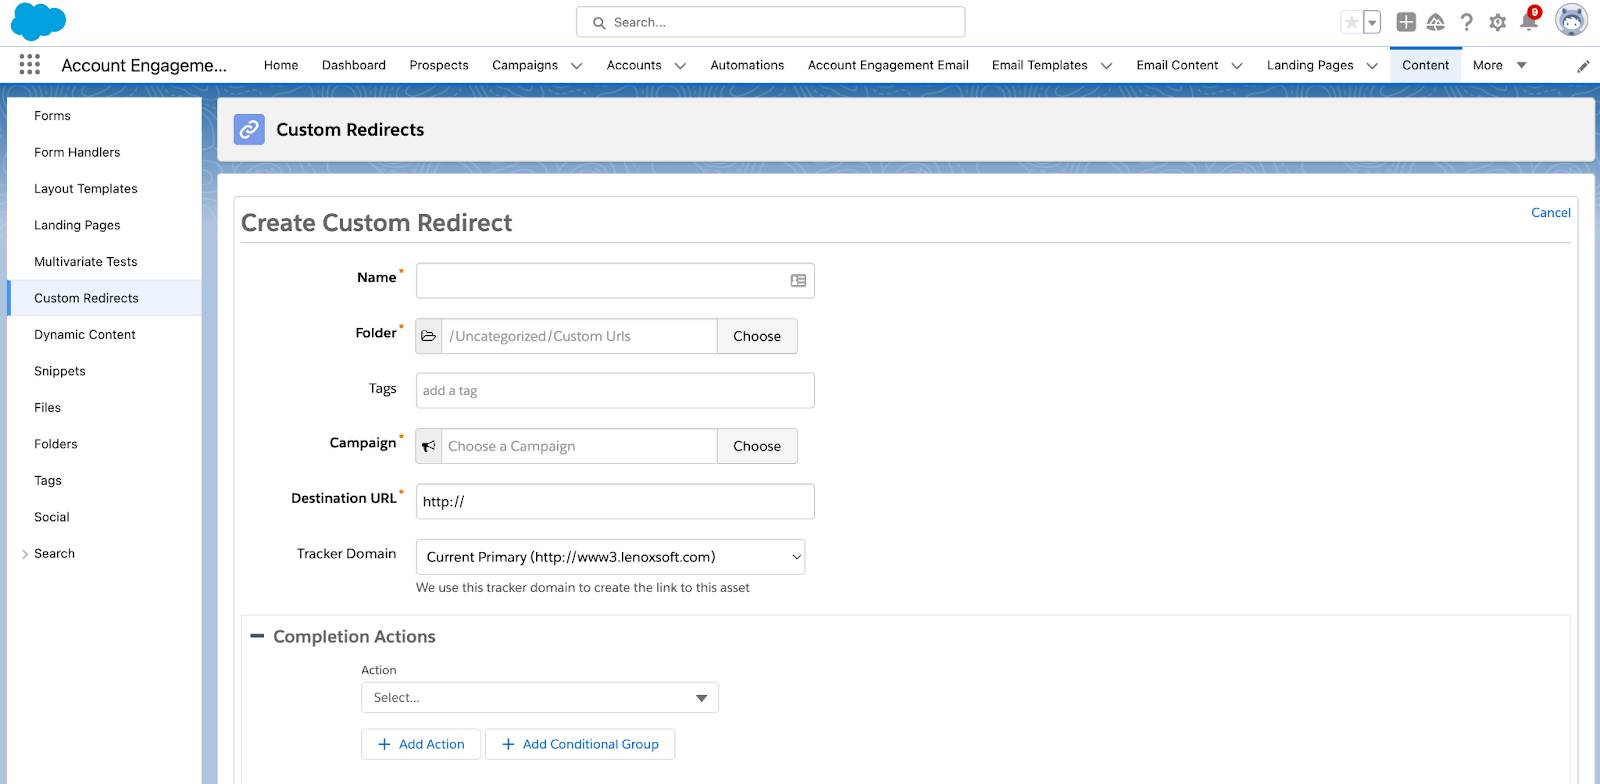
Custom Redirects
A custom redirect tracks links such as banner ad clicks links to your website or a third-party site, links on social media, and access to files hosted outside of Account Engagement. Link clicks appear as activity on a prospect’s record and an overview of the redirect’s performance is available on the custom redirect report. Let’s create a custom redirect real quick as it’s a simple but effective way to automate your marketing efforts.
- Navigate to the Content tab.
- Click Custom Redirects.
- Click +Add Custom Redirect.
- Name your custom redirect.
- Select a campaign.
- Enter the URL to where the prospect will be redirected to.
- Optionally add your Google Analytics tracking code and parameters. Please note that this requires a connector to be set up first.
- Optionally add completion actions here.
- Click Create Custom Redirect.
Completion Actions and Page Actions
Within custom redirects, there are completion actions. Completion actions and page actions are excellent ways to automate processes but should be used for different purposes. If the action you're trying to take is just based on a web page visit, you should use a page action because you can apply page actions to any page that contains your tracking code.
Page actions are completion actions that are triggered by a prospect's page views.
If you’re trying to access something like a page, file, or asset outside of Account Engagement’s tracking then you should use a completion action on the custom redirect. Completion actions automate marketing tasks and follow-ups on your marketing assets like forms. You can use standard actions that apply to all prospects equally or conditional completion actions that apply only to prospects that meet the conditions you specify.

Connected Campaigns
If you’re a new customer of Account Engagement, anytime after March 2019, the connected campaigns feature is already partially enabled. It’s a good idea to connect your Account Engagement and Salesforce campaigns. As a prospect interacts with the marketing assets on an Account Engagement campaign, metrics are pushed to its equivalent Salesforce record.
From here, marketers can track campaign influence, and sales users can clearly see the prospect’s journey to becoming an opportunity. Before you do this, we recommend you outline how your campaigns relate to each other. Make sure that every campaign you want to use has a counterpart. Here are a couple of things to keep in mind when connecting campaigns.
- Identify the Account Engagement campaign that you want to keep, and make sure they have an existing Salesforce campaign.
- Identify the Salesforce campaigns that you want to keep, and make sure an equivalent Account Engagement campaign exists.
- Identify which Account Engagement campaigns, if any, must remain in Account Engagement only.
- Create record types or assignments to organize your campaigns.
- An Account Engagement campaign is updated or created each time a person or process edits the Salesforce campaign. To limit the number of campaigns created in Account Engagement, identify a cut-off date for replication.
For a more detailed guide to connecting Salesforce and Account Engagement campaigns please see Connect Account Engagement and Salesforce Campaigns.
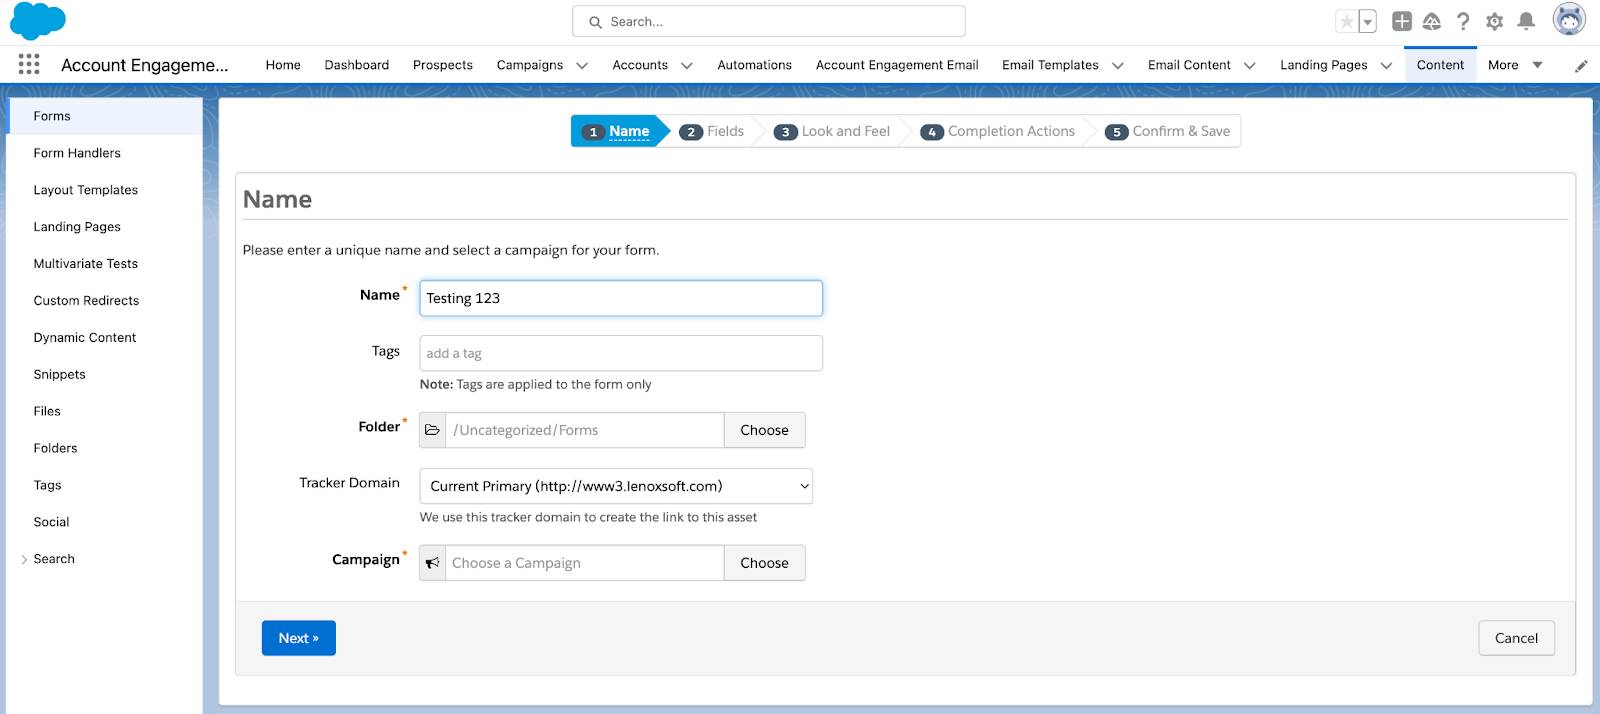
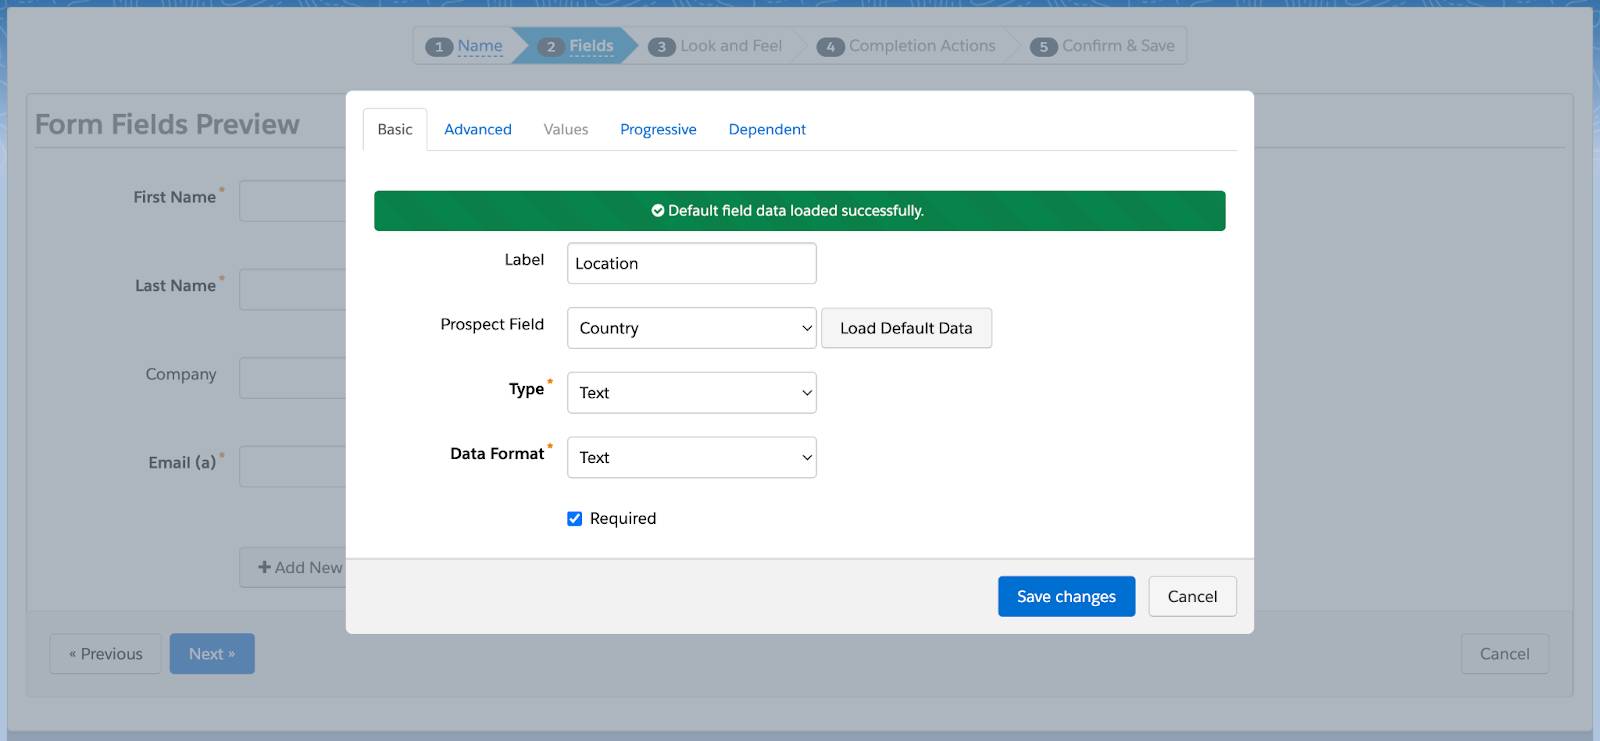
Forms and Form Handlers
Forms and form handlers are excellent ways to convert a visitor into a prospect. These are ideal for when you want to collect information about people visiting your website or landing page. And they're helpful when you turn anonymous visitors into identified prospects. Keep the forms short and easy to fill out. Once they are converted into a prospect, progressive profiling is a great way to continue to learn more about your newly converted leads.
With form handlers, you can keep all of your existing forms and still send the data to Account Engagement. This means if you have an extensive form infrastructure already in place, need total control of your form’s design, or just want to pass data back to Account Engagement from specific fields in pre-existing forms, you can use form handlers to collect the information you need.
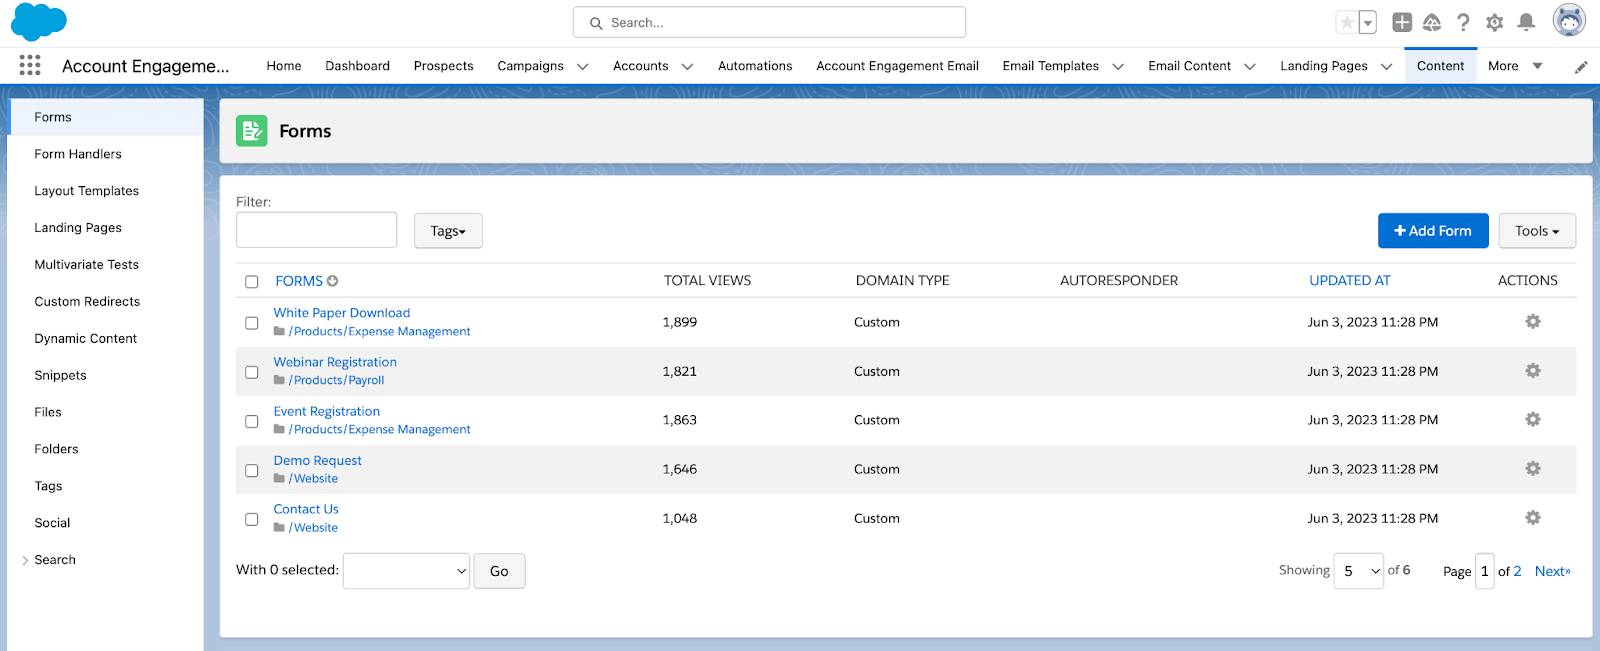
The best way to know if forms or form handlers is the right choice, ask yourself one question: Am I already collecting information on prospects elsewhere that I need to bring into Account Engagement? If the answer is yes, then create a form handler to hook into your existing forms and pass those field values back to Account Engagement. For more detailed information about implementing form handlers check out the resource section.
Progressive profiling displays fields based on fields that a prospect completed on previous forms. It’s a way to keep your forms short to drive a higher conversion rate by gathering more prospect information over time.

Landing Pages
These pages generally display content that is specific to the advertisement, search keyword, or link clicked. These landing pages present an effective and streamlined path designed to elicit a specific action from the visitor or prospect. Account Engagement’s landing page builder helps you build your landing pages without needing a web developer. Since they’re hosted by Account Engagement, you can also build in automation based on whether a prospect has previously viewed or submitted a landing page.
When building or creating an enhanced landing page, you can drag in templates from the layout section and add in several different components to customize to whatever your business needs are. When creating one, connect it with a campaign, then create the content.
There are a few considerations before creating a landing page with our enhanced builder. Review those along with the required permissions that are needed before moving on.
OK, let’s create an enhanced landing page.
- Navigate to the Landing pages tab.
- Click New.
- Enter
Client Appreciation Socialin the Landing Page Name field. - Choose the All Web Marketing campaign for the campaign.
- To make the landing page available at your chosen URL, enter a path in the Vanity URL field.
- Click Save.
- Click Edit in Builder.
- Add or drag in a prebuilt layout from the layouts list.
- Click an item in the Components list and drag it into the canvas.
- Use the editing pane to customize the content and style of each component.
- Click Save to save your landing page.
In this module, we learned all about the automation tools available in Account Engagement for lead generation. We learned that using all of these tools helps automate the information gathering and following up with your prospects. Lead generation is all about getting your prospects interested in your goods or service. Next, we look at how lead nurturing can help further that interest in your company.
Resources
- Salesforce Guide: Lead Nurturing in Salesforce
- Salesforce Help: Connect Account Engagement and Salesforce Campaigns
- Salesforce Blog: What Is a Sales Funnel?
- Salesforce Help: Completion Actions
- Salesforce Help: Page Actions
- Salesforce Help: Account Engagement Connected Campaigns Implementation Guide
- Salesforce Help: Enhanced Landing Page Builder
- Salesforce Help: Generate Leads from Your Website for Your Sales Teams
- Salesforce Help: Form Handlers
- Salesforce Help: Prospect Field Global Settings