Meet the Data Source Wizard
Learning Objectives
After completing this unit, you’ll be able to:
- List the steps the Data Source Wizard takes to create a FlexCard.
- Explain how to define the FlexCard.
- Explain how to select the data source type.
- Explain how to select the data source.
- Explain how to configure the data source inputs.
Create FlexCards with the Data Source Wizard
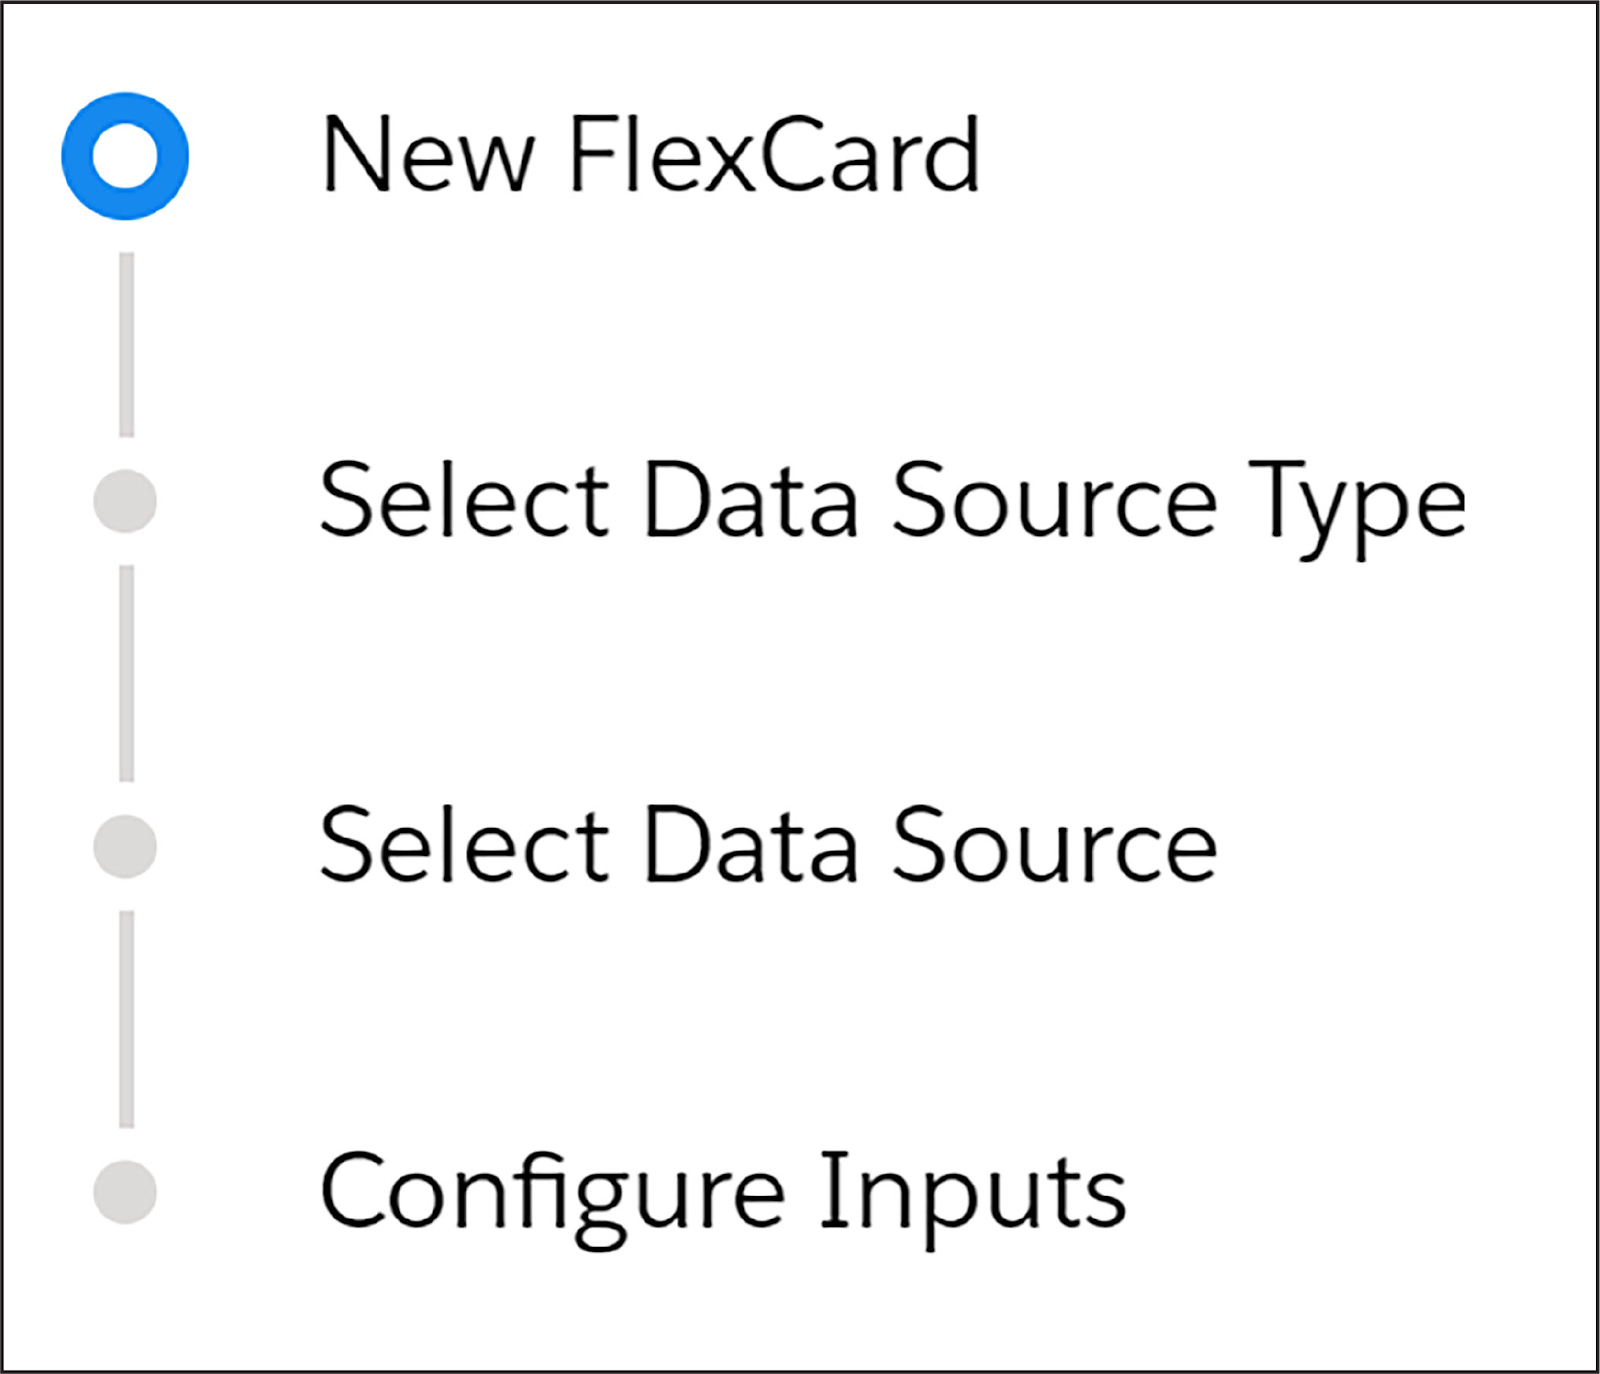
When you create a FlexCard, the Data Source Wizard walks through a series of steps.
- Define the FlexCard.
- Select the data source type.
- Select the data source.
- Configure the data source inputs.
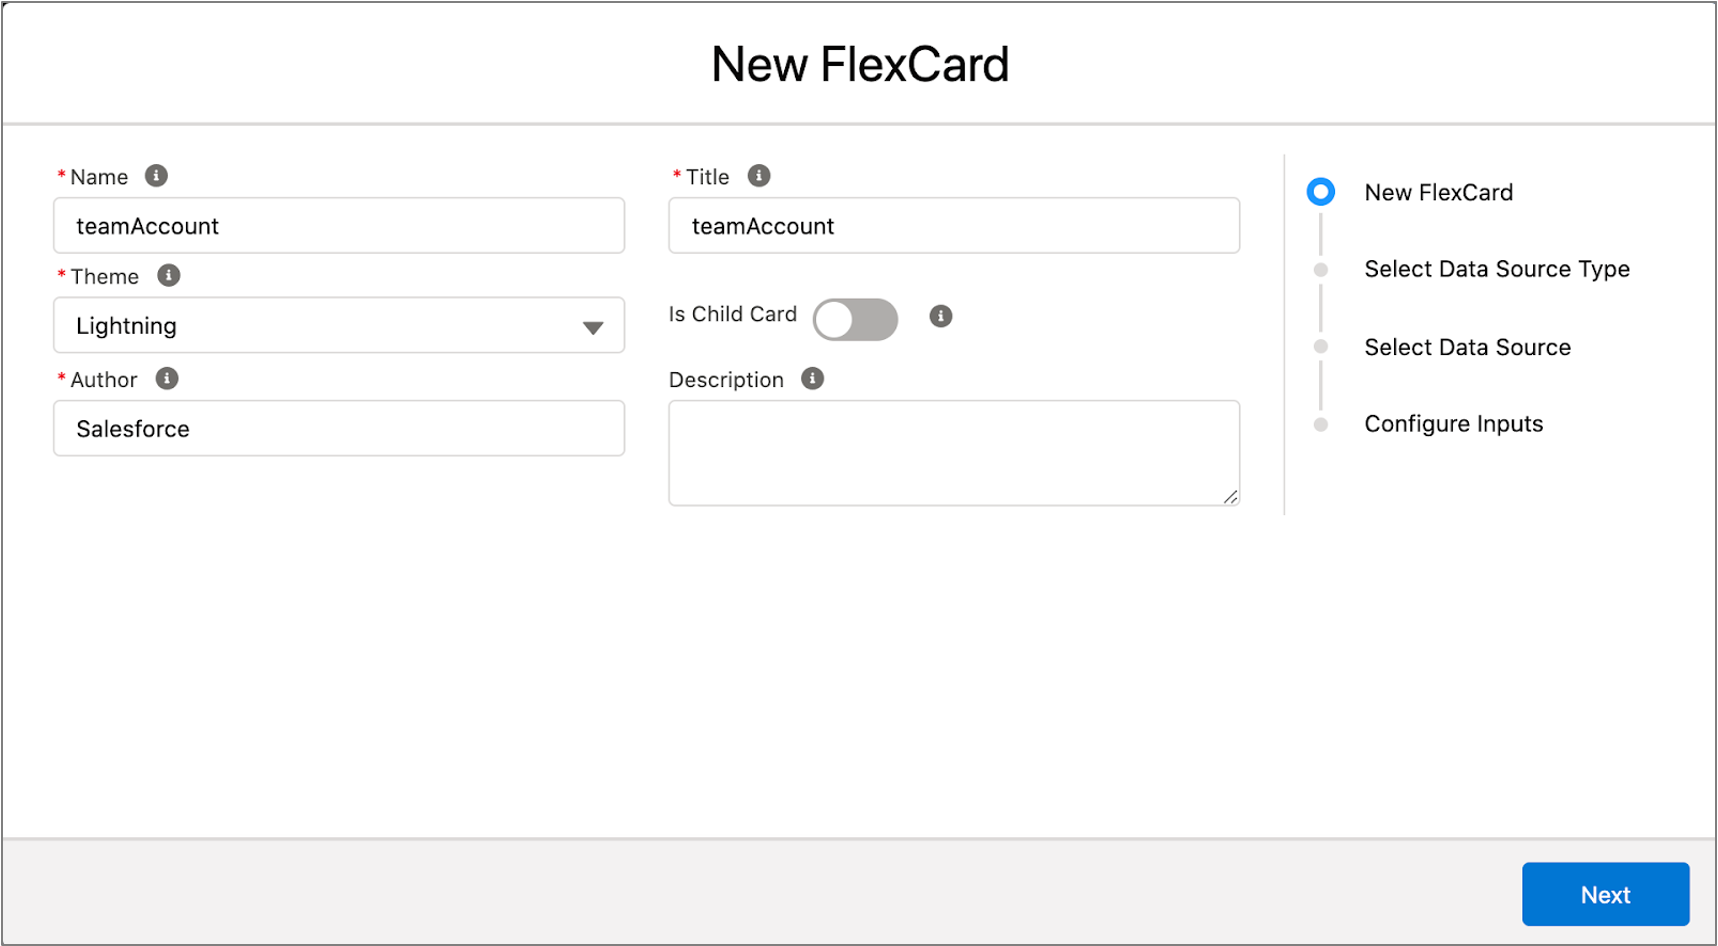
1. Define the FlexCard
This step lets you configure basic settings such as the name, title, author, description, and theme for the FlexCard. You can also set this FlexCard as a child card so it can be embedded in other FlexCards.
Naming Conventions for the Name and Author
FlexCards have strict naming conventions for their names and authors. Avoid spaces, dashes, and any non-alphanumeric characters. Use camel or pascal case for the name and don’t put two consecutive underscores next to each other.
Here are names that adhere to the naming conventions.
- teamAccount
- team_account
The Author defaults to the company name in your Salesforce org. Make sure to follow the same naming convention.
Title
The title lets us find the generated FlexCard Lightning web component in the Lightning App Builder and Community Builder.
Theme
There are two options for the FlexCard theme. Select Lightning to use Salesforce Lightning Design System (SLDS) or Newport to use the Newport Design System. Newport is a CSS framework tool for designers and web developers to easily restyle all OmniStudio components in a single place and generate a custom, optimized CSS file that can be used in all future pages.
When you save the FlexCard, you will no longer be able to edit the name, author, or theme. If you need to complete edits, clone the FlexCard and update these settings when you create the clone.
2. Select the Data Source Type
A FlexCard displays data from a Salesforce object or an external database, or it displays sample (mock) data. The data source type determines how the FlexCard retrieves the data.
The wizard displays the options with a short explanation of when to choose them.
You can update this source at any time before you activate the FlexCard. For example, select a custom source and use sample data while you build and test the FlexCard. Then, when the FlexCard is ready, connect it to a live data source.

Let’s take a look at the types of data sources you can use.
- Apex REST uses a REST endpoint of an Apex class to return data.
- Apex Remote uses an Apex Remote class and method to return data.
- Custom uses sample JSON to set up a FlexCard with temporary data that will eventually be replaced with another data source.
- SOQL Query uses the Salesforce Object Query Language (SOQL) to search an org’s Salesforce data for specific information. For example, SELECT Name, Id FROM Account LIMIT 5.
- SOSL Search uses the Salesforce Object Search Language (SOSL) to construct text-based search queries against the search index.
- Streaming API uses the Salesforce Streaming API to send notifications of general events that are not tied to Salesforce data changes.
- SDK uses a method from a Software Development Kit (SDK) to get data to populate fields on a FlexCard.
You can also use OmniStudio data tools.
- Omnistudio DataRaptor uses a DataRaptor Extract interface to return data from a Salesforce object.
- Integration Procedures uses an Integration Procedure to return data from multiple internal and external sources.
A FlexCard can also have None as its data source. A child FlexCard doesn’t need a data source if a parent FlexCard is set up to push data from its source to that child. A parent FlexCard may not need a data source if the child FlexCard has one.
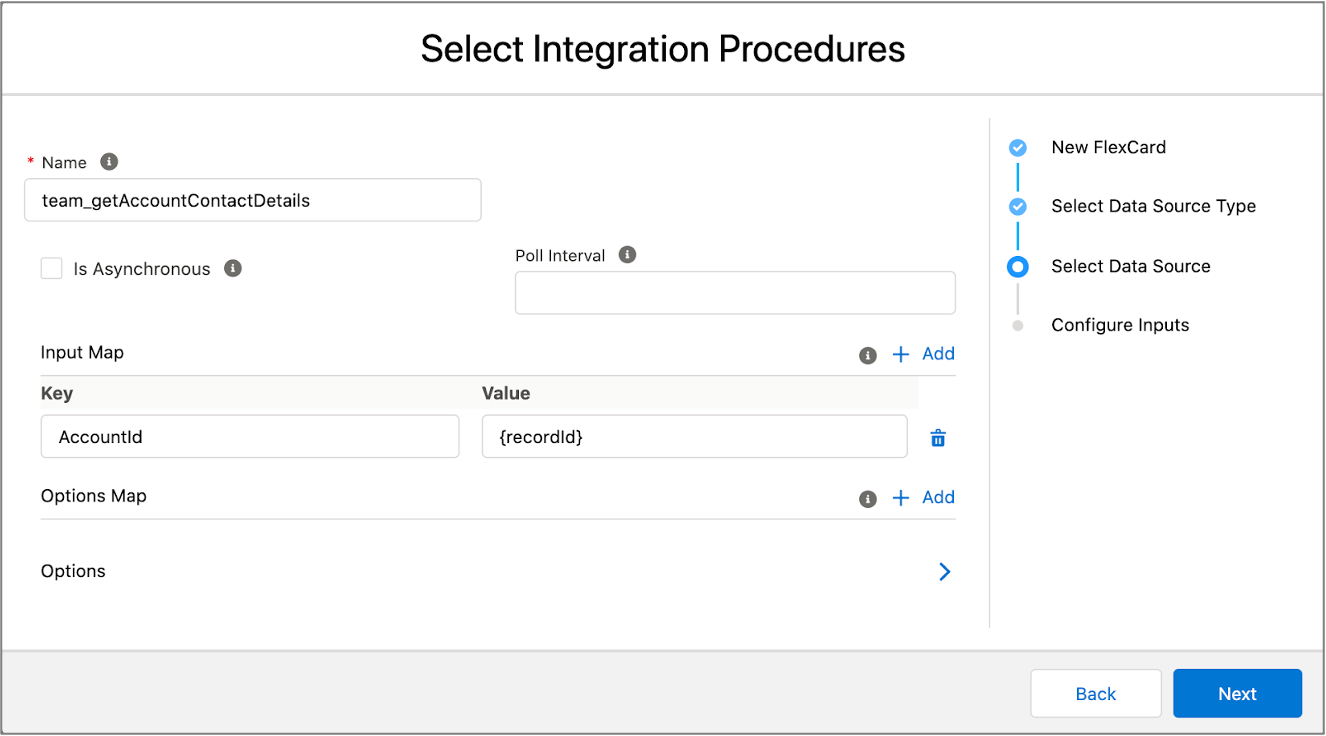
3. Select the Data Source
Your choice of data source type determines the properties that display for the data source itself. In this example, Integration Procedures is selected.
Choose a specific Integration Procedure to use and set the input parameters to define the variables to pass to the integration procedure so it knows what data to retrieve.
In this example, you tell the integration procedure to retrieve details from Account records.
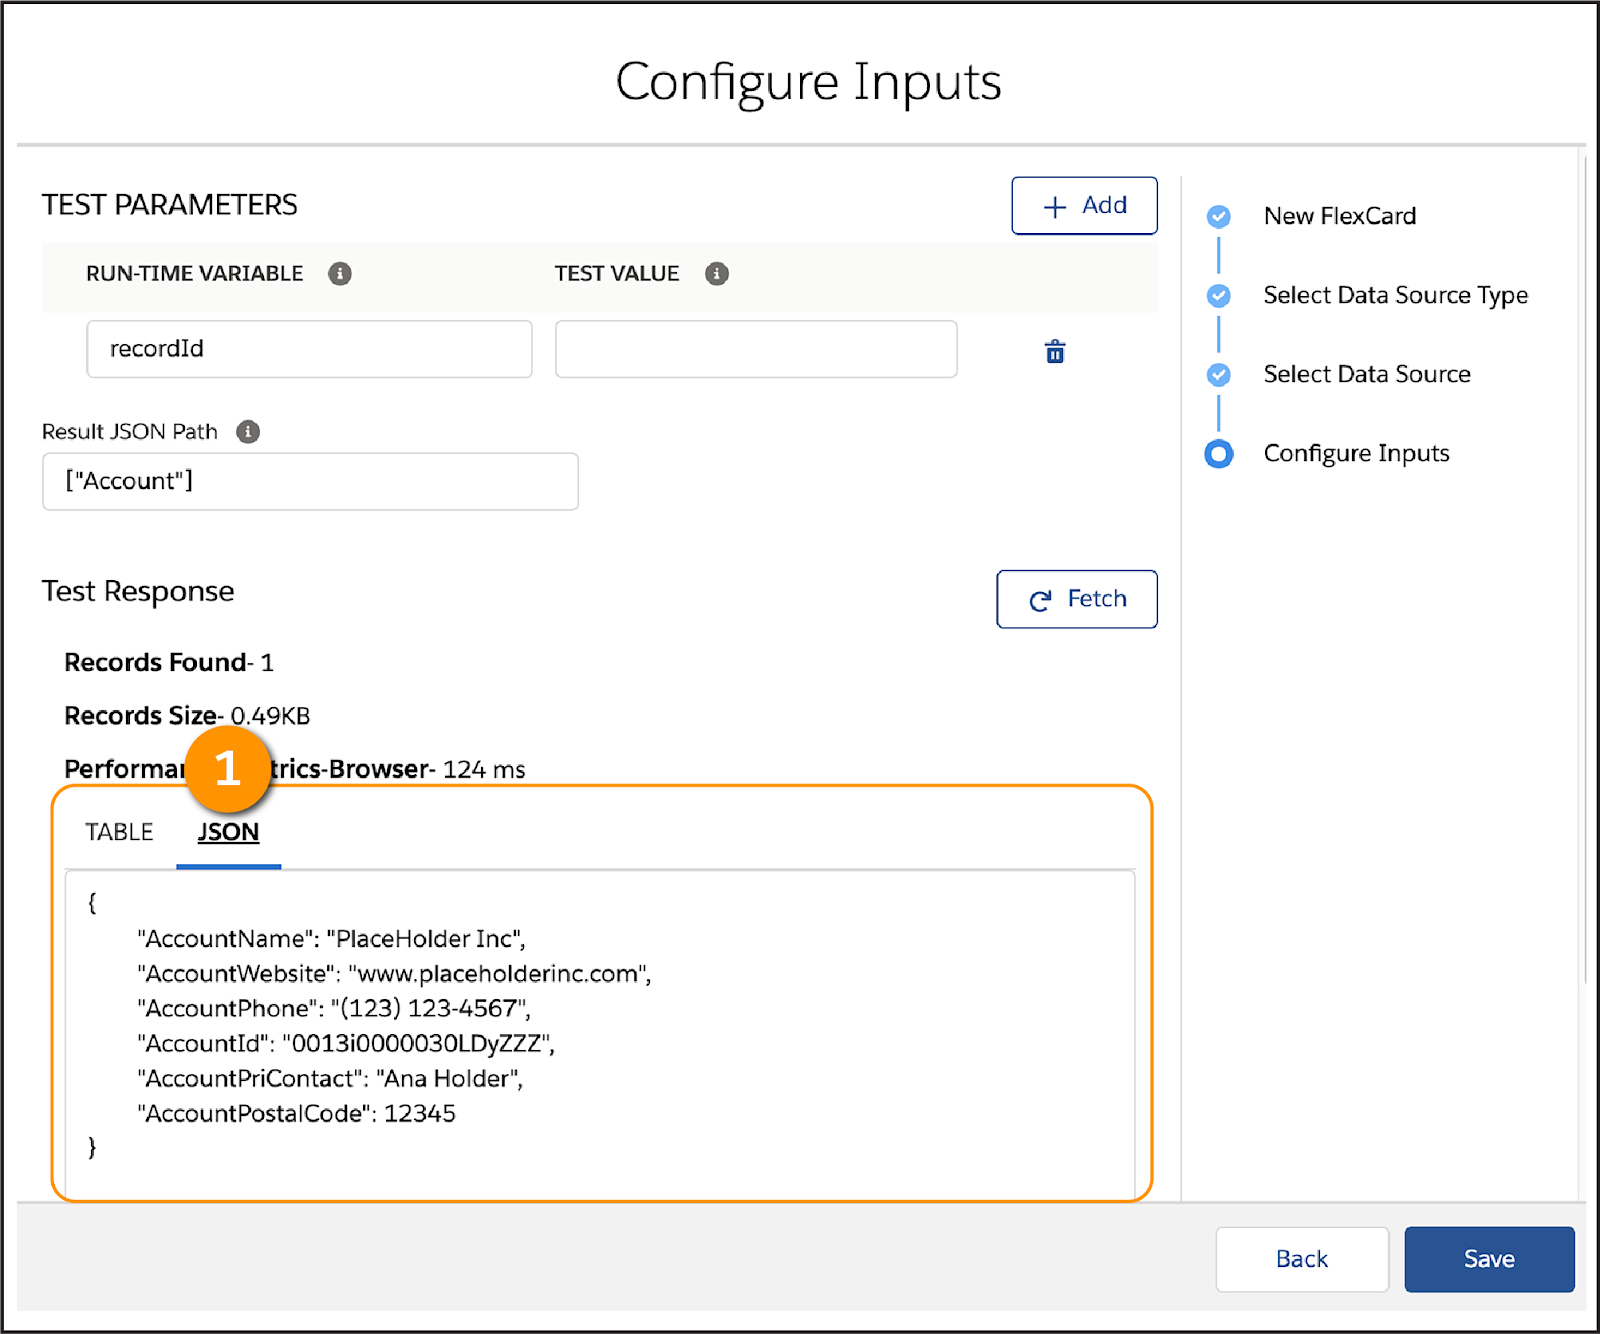
4. Configure the Data Source Inputs
This page lets you add test variables so you can preview the FlexCard using real data. You view test response and performance metrics from the data source, and preview the data returned in JSON format before you start building the FlexCard. Filtering the Result JSON Path (1) pulls only the relevant data to the FlexCard.
Now that you’re up to speed on the wonderful world of the Data Source Wizard, continue to the next unit, where you look at how you display data and actions on a FlexCard.