Explore MuleSoft Composer
Learning Objectives
After completing this unit, you’ll be able to:
- Launch MuleSoft Composer.
- Describe the components of a MuleSoft Composer flow.
- Describe the flow creation tasks.
Launch MuleSoft Composer
MuleSoft Composer is available as a standalone application, or as an application for authorized users in your Salesforce org called MuleSoft Composer for Salesforce. You don’t need to install the standalone version, but you do need an admin to install MuleSoft Composer for Salesforce. To learn how to install and configure MuleSoft Composer for Salesforce, take the MuleSoft Composer Installation and Configuration module.
To launch the MuleSoft Composer standalone application, navigate to the MuleSoft Composer website.
Or, to launch the MuleSoft Composer for Salesforce as an authorized MuleSoft Composer user (with the MuleSoft Composer User permission set), take the following steps.

- Log into your Salesforce org using your username and password.
- From the App Launcher, enter Composer and select MuleSoft Composer.
Components of a MuleSoft Composer Flow
Now, let's get started with MuleSoft Composer. Take a look at this video demonstration showing the basics of how to create a flow.
MuleSoft Composer enables everyone to automate and integrate using flows, a sequence of steps that you assemble and configure to integrate systems and data.

To get started with creating flows:
- Click Create New Flow. A dropdown menu appears.
- Click Create New Flow from Scratch. A blank canvas appears. This canvas is the working area where you design a flow.
- Or, to instead use a pre-designed flow, click Create New Flow from Template. A page with a list of template flows appears.
When you design a flow, you can use a number of components.
Components for Interacting with Systems
|
Component Name |
Description |
Example |
|---|---|---|
|
Trigger |
Starts the flow’s sequence of actions. Flows can start with the following types of triggers:
|
|
|
Connection |
A configuration that uses a connector and associated user or system credentials to connect to a system. Use connections at different steps to perform specific tasks, such as connecting to a system, checking for triggers, and retrieving or manipulating data. |
|
|
System action |
A step in the flow that performs a task in a system. An action might extract data from a system, manipulate data, or send a notification in a system. |
This action creates a sales order in NetSuite. |
|
Variable |
Stores data, including data pills, aggregated values, and custom expressions. You define variables locally within a flow and use them anywhere within that flow. You can create variables in one step and update them in later steps. |
This variable called Number of Failed Sales Order Creations is created and set to 0. |


Components for Flow Control and Logic
Some components allow you to control how the flow will proceed or the logic of a flow.
|
Component Name |
Description |
Example |
|---|---|---|
|
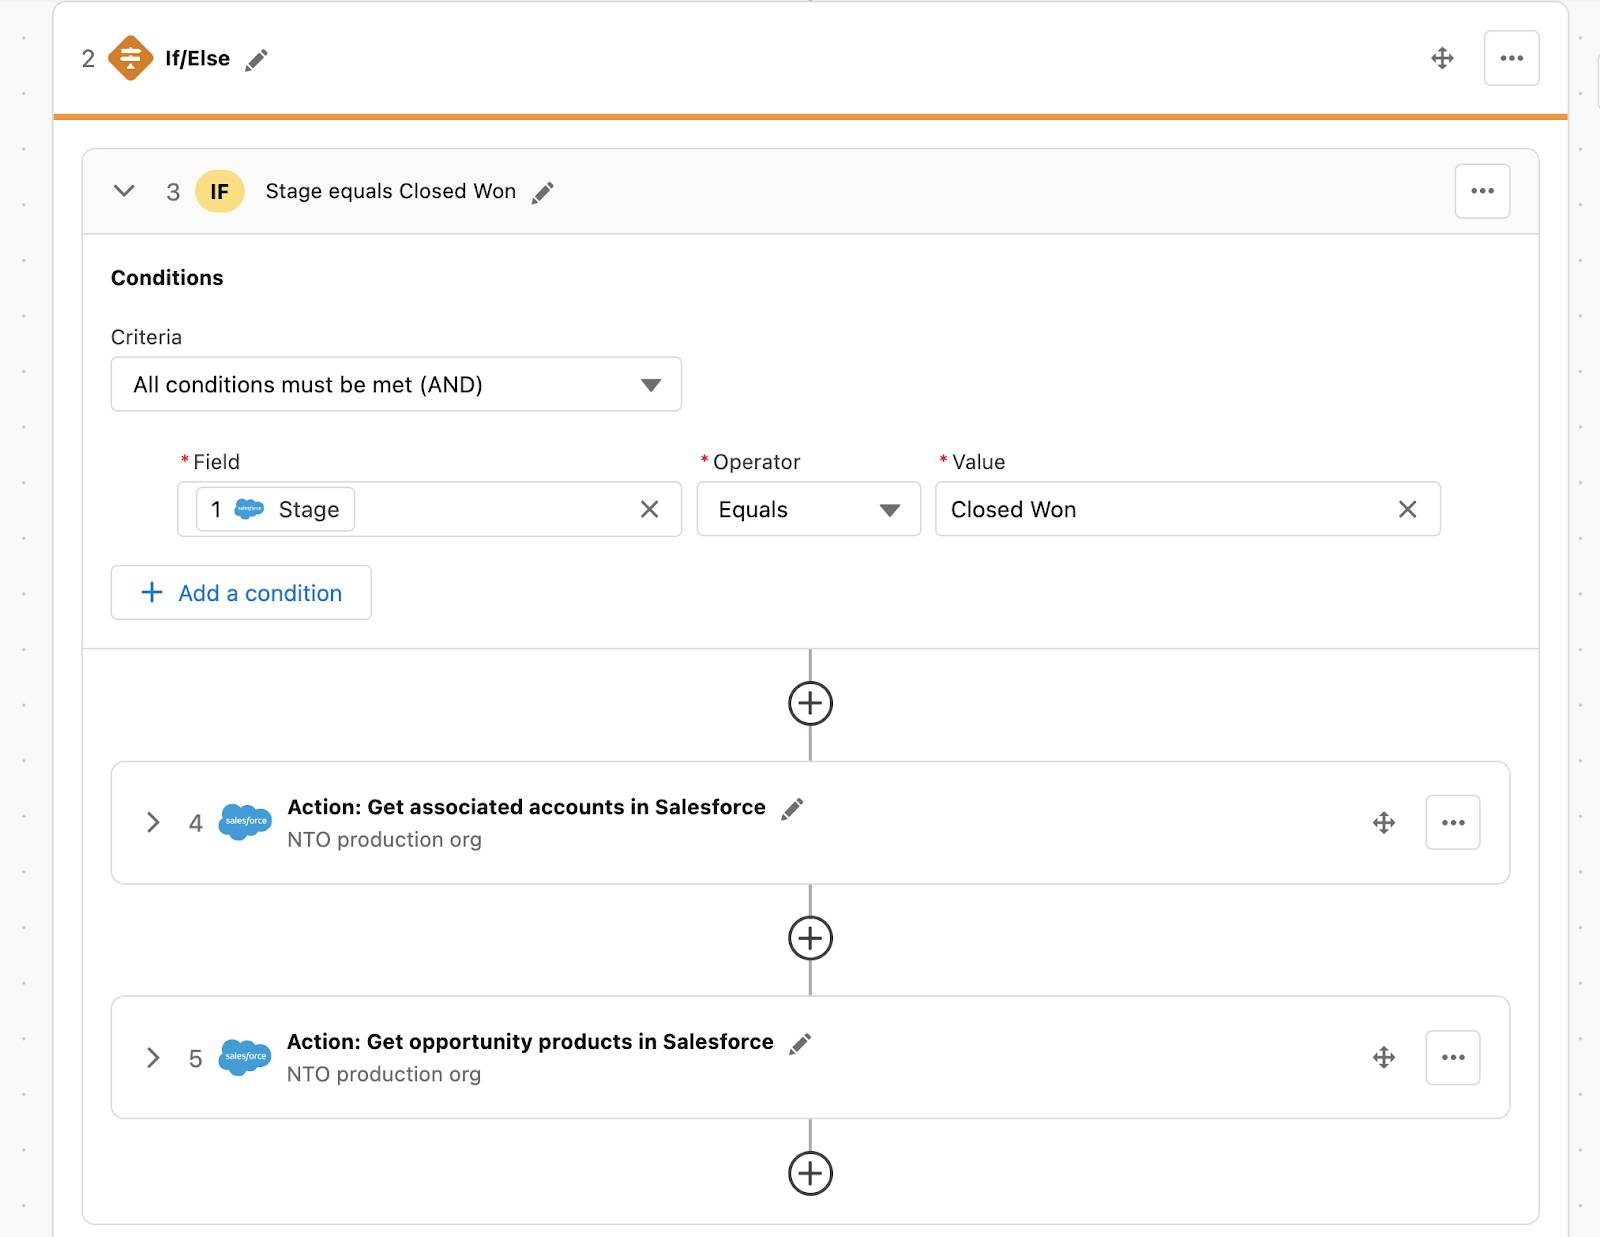
If/Else block |
Evaluates whether data from the preceding steps meets a specific condition.
|
This If/Else block evaluates whether the Stage field of the opportunity record is equal to Closed Won. |
|
For Each block |
Iterates over each record of the input data and performs one or more actions. |
A For Each block might iterate over each account in the input list. |
|
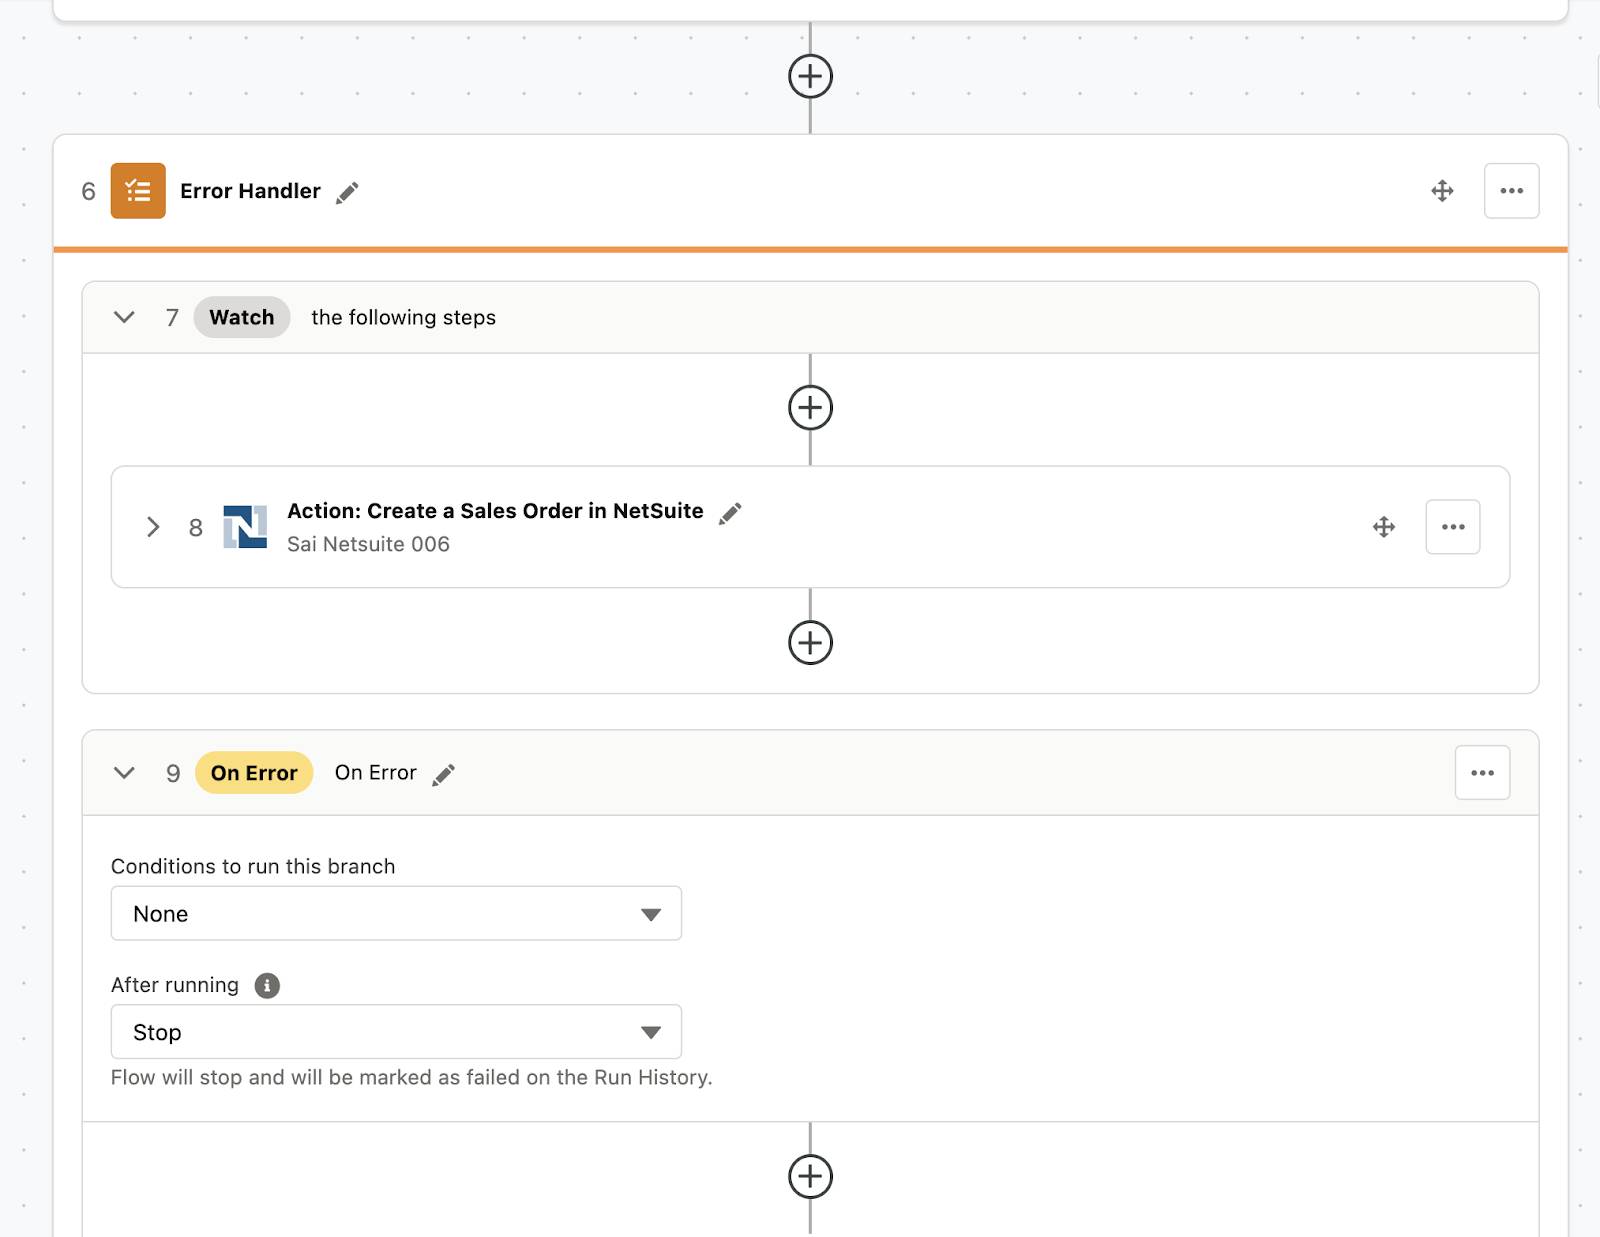
Error Handler block |
Watch for whether an error has occurred in the step(s) within the Watch section. If there is an error, the flow performs the steps specified in the On Error section. |
In this example, the Error Handler watches for any errors that occur in an action step. If an error occurs, the flow evaluates the steps in the On Error section, then stops the flow. |


Now that you’ve learned the main components of a flow, let’s see how they work in an example flow:

This flow is triggered whenever a new opportunity is created in NTO’s production Salesforce org. If the opportunity’s stage is Closed Won, the flow retrieves the accounts and opportunity products associated with the opportunity. Then, the flow attempts to create a sales order in NetSuite, which the error handler watches. If the flow successfully creates a sales order, the flow will end successfully. But if the flow unsuccessfully creates a sales order, the flow will be stopped and marked as failed on the Run History.
Flow Creation Tasks
Create flows easily and efficiently with MuleSoft Composer by performing the following flow creation tasks.
| Task | Description |
|---|---|
|
1. Plan |
First, identify your integration problems and come up with the appropriate solutions. Then, identify the systems you need to access, the credentials you need to access those systems, and the data you want to retrieve and synchronize between those systems. |
|
2. Design and test |
Next, use MuleSoft Composer to build flows by adding and configuring relevant connections, triggers, If/Else blocks, branches, For Each blocks, and actions. As you add each step to your flow, test it to ensure that the flow works as required. |
|
3. Activate |
After you’ve tested the entire flow, activate it so that it can start performing the integration tasks you designed. |
|
4. Monitor and troubleshoot |
After the flow is active, it continues to run in the background. If there's an issue with running the flow, MuleSoft Composer displays the information on the Flow Detail Page. Use the information for a failed instance to troubleshoot your flow. |
|
5. Deactivate |
Over time, if the flow no longer serves its intended purpose, deactivate it. |
In this module, you learned when you can use MuleSoft Composer to automatically integrate systems and data. You also explored the MuleSoft Composer features, flow components, and flow creation tasks.
To learn how to use MuleSoft Composer to build and run flows that solve common integration problems, take the other modules in the MuleSoft Composer Trailmix.