Manage Donors, Tasks, Events, and Email
Learning Objectives
After completing this unit, you’ll be able to:
- View and filter activity history in the Activity Timeline.
- Create and update tasks.
- Work efficiently with calendar events and email.
Use the Activity Timeline to Keep Up-To-Date
On the right side of a contact, account, or opportunity record, you'll find a fundraiser's best friend: the Activity Timeline.
The Activity Timeline makes it easy to review what’s been going on with a specific prospect, donor, or household even if they have been interacting with many different folks throughout your organization.
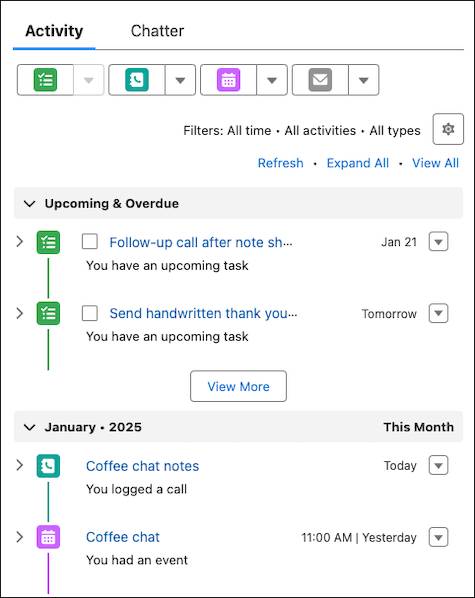
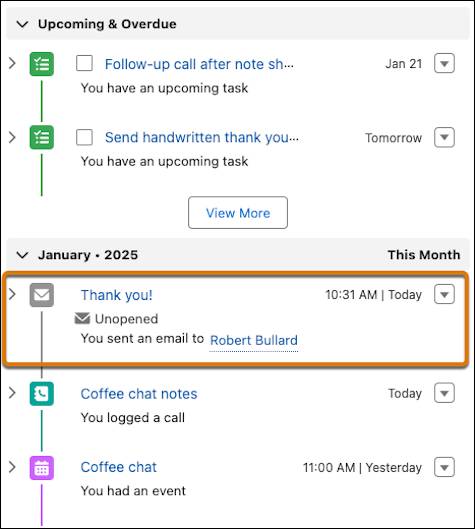
The timeline is divided into sections. First is the Upcoming & Overdue section, where you can see what tasks you need to complete. There are also collapsible sections for past activities arranged by month.
If you need details about an activity, click  next to the activity, then click the arrow again to collapse the details when you’re done. You can also click Expand All above the sections to see details for all the activities.
If you have many tasks ahead of you, you can click View More in the Upcoming & Overdue section to display all of your to-do lists for this record.
Find the Activities that Matter Most
If you’ve been working with a donor (either a contact or household record) or on a specific solicitation (an opportunity record) for any length of time, you probably have a mix of activities in the Activity Timeline. How do you quickly find the details you’re looking for?
Aniyah, Development Director at the nonprofit No More Homelessness (NMH), wants to find a particular email that another NMH fundraiser sent to a prospect. She can use the filter feature to narrow her search. By filtering on Activity Type and Date Range, she can find the details she needs in no time.

As you review the list, you can also update an Activity. From the Activity row, click  and edit options will appear.
Or, as you complete a task, click the checkbox to mark it complete.

But what if Aniyah wants to see a complete list of everything she has to do across her donor and grants portfolio? In fact, she likes to start her day by logging into Salesforce and reviewing her whole list of things to do.
View and Update Your Task Lists
Remember that when you start an engagement plan, it automatically creates and assigns a series of tasks to you and your team members.
All the tasks assigned to you are easy to find and manage in Salesforce and NPSP. Just click the Tasks tab, find and select Tasks in the App Launcher ( ), or click View All from the My Tasks list on the Lightning Experience Home page to manage your tasks across apps, objects, and records.
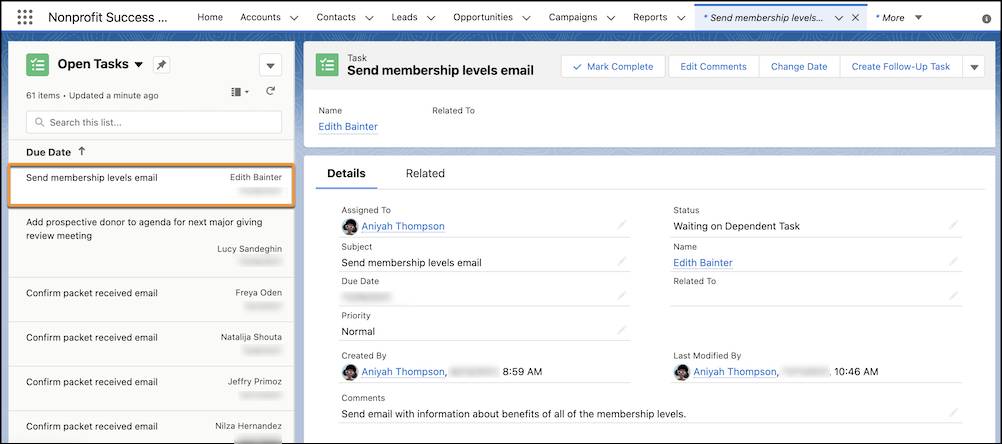
On the Tasks list in the Split View display, you can browse through your entire list in the left column and see details about the selected task to the right. Click any task to open it and see related info.
There are several quick actions in the detail view that make it more efficient to update tasks. Click  to see the options. When a task is done, click Mark Complete to check it off your list and automatically update the Status field.
And, remember, tasks are also in the Activity Timeline for the records to which they are attached, and you can edit them there, too.
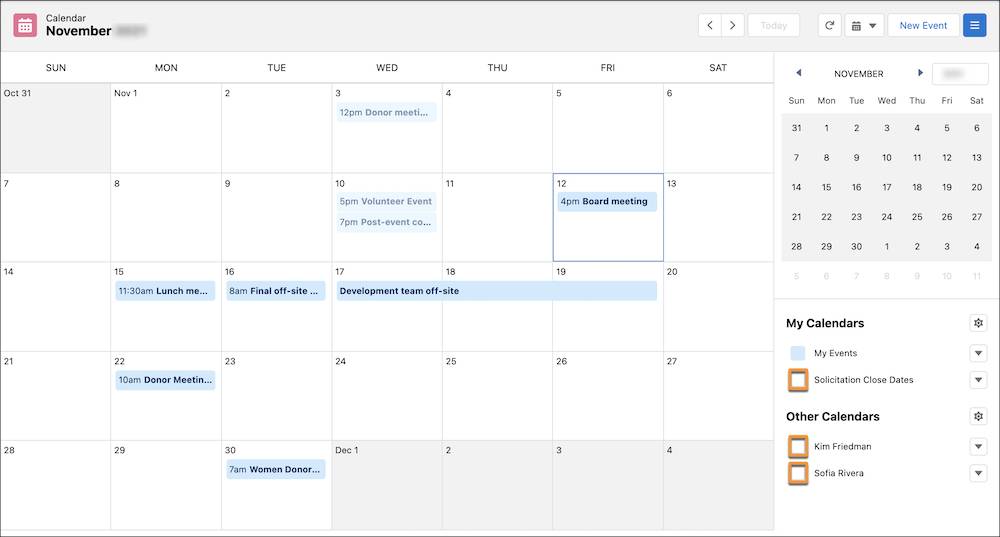
Manage Your Events from Your Calendar
Like tasks, your calendar in NPSP has its own tab, allowing you to get to your schedule quickly. If you don’t see the tab, you can find and select Calendar from the App Launcher ( ).
).
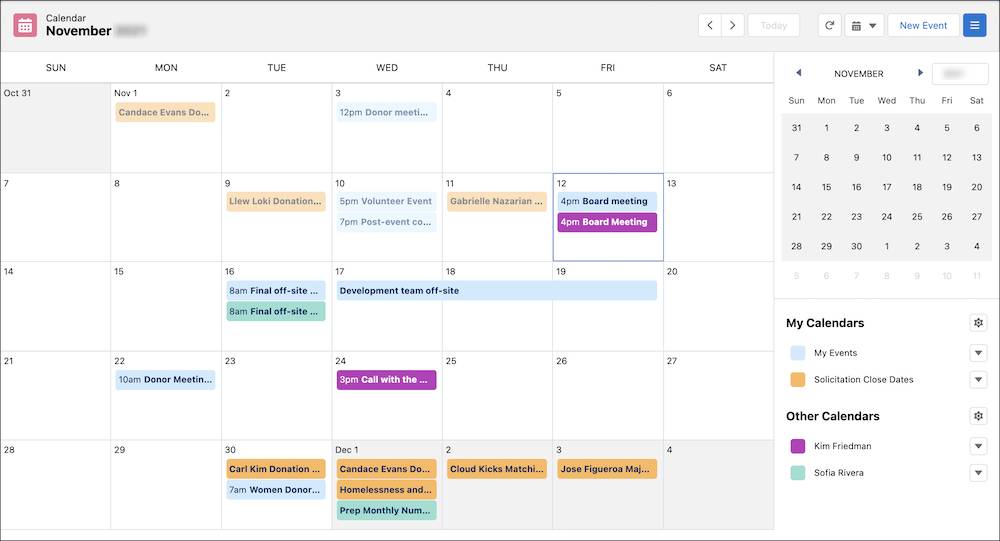
Click the calendar view button ( ) to focus on only a Day, Week, or Month, or to see the Table list view of events.
To create a new event, click New Event, or click the day and time the event starts. The New Event interface appears, with the start and end times already filled out. Enter the event details and click Save.

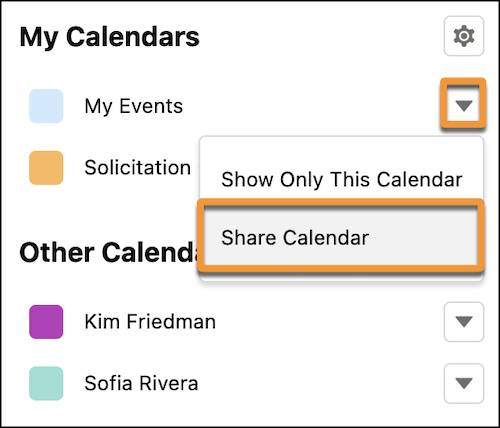
You can share your calendar and view your colleagues’ calendars from your calendar. Shared calendars make it easy to see when events overlap.
When a colleague views your calendar, the details they can view are determined by the default access level. To show a specific colleague more or fewer details about your schedule, click the menu arrow button ( ) on My Events in your calendar, then click Share Calendar. Your Salesforce Admin can limit the details that can be shared.
In addition to shared calendars, your admin can add a customization that allows you to create public calendars. A public calendar can be shared with other users, groups, and specific roles in your organization. They're helpful for scheduling and managing group activities or shared resources, like events and meeting rooms. Talk to your admin if you'd like to use public calendars.
If your calendar view gets crowded with multiple calendars, you can hide any calendar by clicking on the colored square next to its name in My Calendars or Other Calendars. Click the square again to make that calendar reappear.
See Your Data as Events on a Calendar
A handy way to use a calendar in Salesforce is to view your data as events on a calendar. For example, Aniyah wants a calendar to view upcoming solicitation (opportunity record) due dates for her whole team.
Let’s follow along as Aniyah creates a calendar to help track this information:
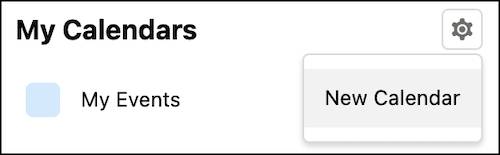
- In My Calendars, click the Calendar Options gear button (
 ).
).
- Click New Calendar.
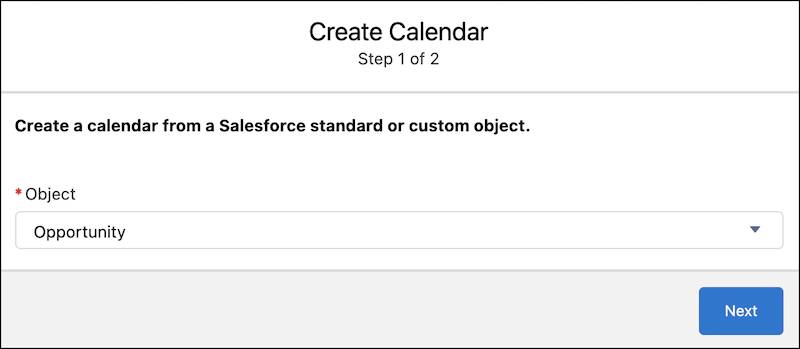
- Choose an Object on which to base the calendar. Since Aniyah wants to see the due dates for upcoming grants and other solicitations, she chooses the Opportunity object.
- Configure the calendar with a name, the fields for the date and time, and other settings.
- Calendar Name:
Solicitation Close Dates - Field for Start: Close Date (Date)
- Field for End: Close Date (Date)
- Apply a Filter: All Opportunities (This field is populated from your list views for the object you select. If you want to use another, more specific filter, choose an existing list view from the picklist.)
- Field Name to Display: Name
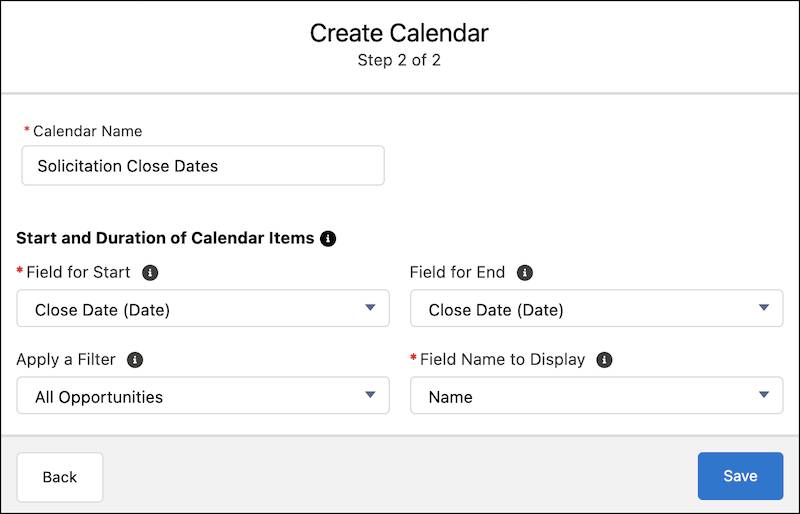
- Click Save.
Aniyah now has a way to track all of the upcoming deadlines.
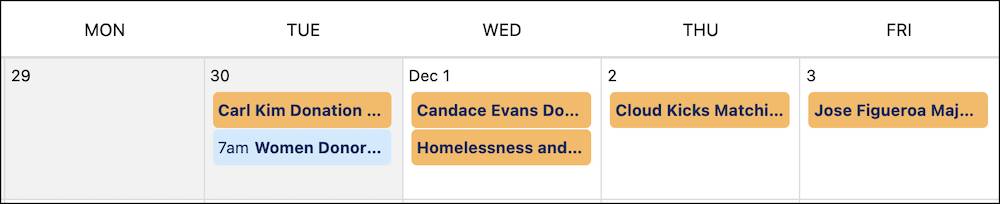
It looks like she'll have a busy week getting prepared for her upcoming solicitations. Now she can plan accordingly and block off time to craft the perfect pitches.
Send and Record Emails
Email is one of the primary ways nonprofits communicate with stakeholders—but important details or information can get lost in an individual's inbox. Recording emails in your CRM allows access to anyone who needs to follow donor communications.
There are many ways to integrate email with NPSP, including apps for integrating Gmail, Outlook, and other tools. Check with your admin to learn more about any integrations you can use.
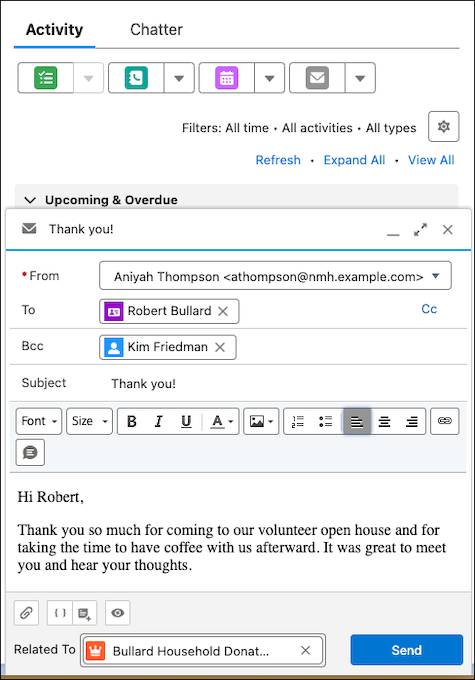
You can also create and send email directly from Salesforce and NPSP. The Activity Panel on a record and the Global Actions menu are the options you’ll probably use most.
To send an emails from the Activity Panel of a record:
- Go to the record you would like to associate the email to, such as a contact, household account, or opportunity.
- Click
 in the Activity Panel.
- Enter your message details, including subject line, body copy, attachments, and additional recipients. You can type your email from scratch or use a template and merge fields. Plus, you can optionally relate the email to other records.
- If you’d like to see what the email will look like before you send it, click the Preview email button (
 ) in the Activity Panel.
- Click Send.
If you don’t want to go to the record you want to relate the email to, click  from any page. If your Salesforce Admin has made sending an email a Global Action, you can click Email. The interface that appears has all of the same email tools you can find in the Activity Panel, you’ll just need to add a recipient.
Regardless of how you send the email, it appears in the Activity Timeline for everyone on your team to see. For example, Aniyah just sent a thank you email, and it’s recorded in context with the rest of the emails, calls, and tasks on a potential donor’s record.
All of these engagement plans, tasks, emails, and events build toward one thing: The ask.
In the next unit you learn about tools to manage the solicitation process and make sure the people you engage with are moving from prospect to supporter to donor.
Resources
- Trailhead: Stakeholder Email Communication with Nonprofit Success Pack
- Salesforce Help: Activities: Tasks, Events, and Calendars
- Salesforce Help: Calendar Views in Lightning Experience
- Salesforce Help: Use Calendars to Track and Visualize Dates in Salesforce Objects in Lightning Experience
- Salesforce Help: Send Email Through Salesforce