Get to Know List Views
Learning Objectives
After completing this unit, you’ll be able to:
- Explain how to create a list view.
- Describe what you can do with a list view.
What’s in a List View?
You got Salesforce to help you organize and act on your company and customer data. So let’s talk about one of the most common places you’ll work: list views.
Salesforce groups your data by object types, such as Contacts or Cases, which appear as navigational tabs. An object tab contains a data table and a toolbar of action buttons. We call this screen a list view, and it contains a ton of valuable information and tools that help you manage your business and interact with customers.
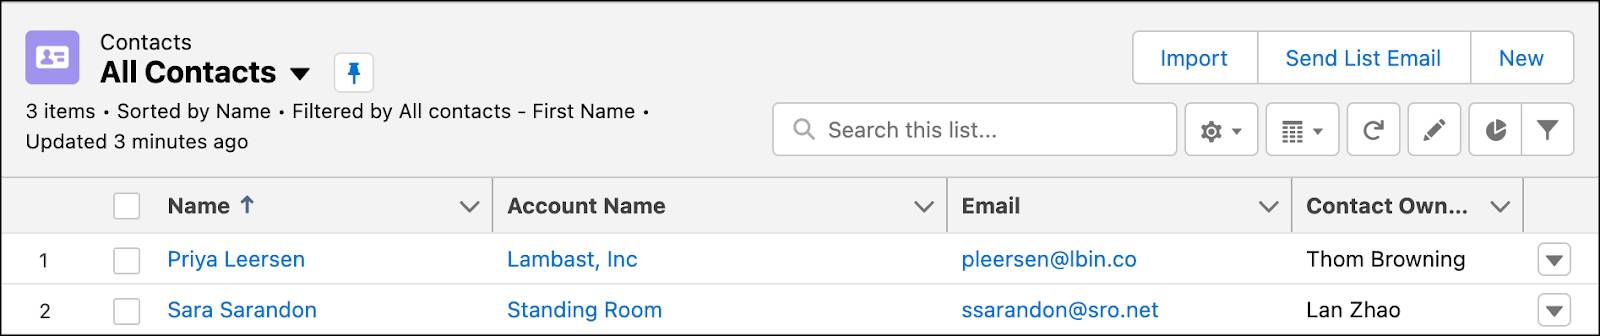
As you import data and create records, rows appear on your list views. We give you a few default list view options, like All items and Recently Viewed items, which you can scroll and search.
But the real power of list views comes with customization. You can create specialized list views to support your most common tasks, such as New Leads or Escalated Cases. When you customize your own list views for different object tabs, you can make them private or share them with the other users in your org.
Let’s see how to create a new list view.
Customize a List View
On any object tab, click the  icon to open the List View Controls menu. To create a list view, select New. Give the list view a name and decide whether to make it available to other users or to keep it private. Once you’ve created a list view, the menu gives you more options such as Rename and Sharing Settings.
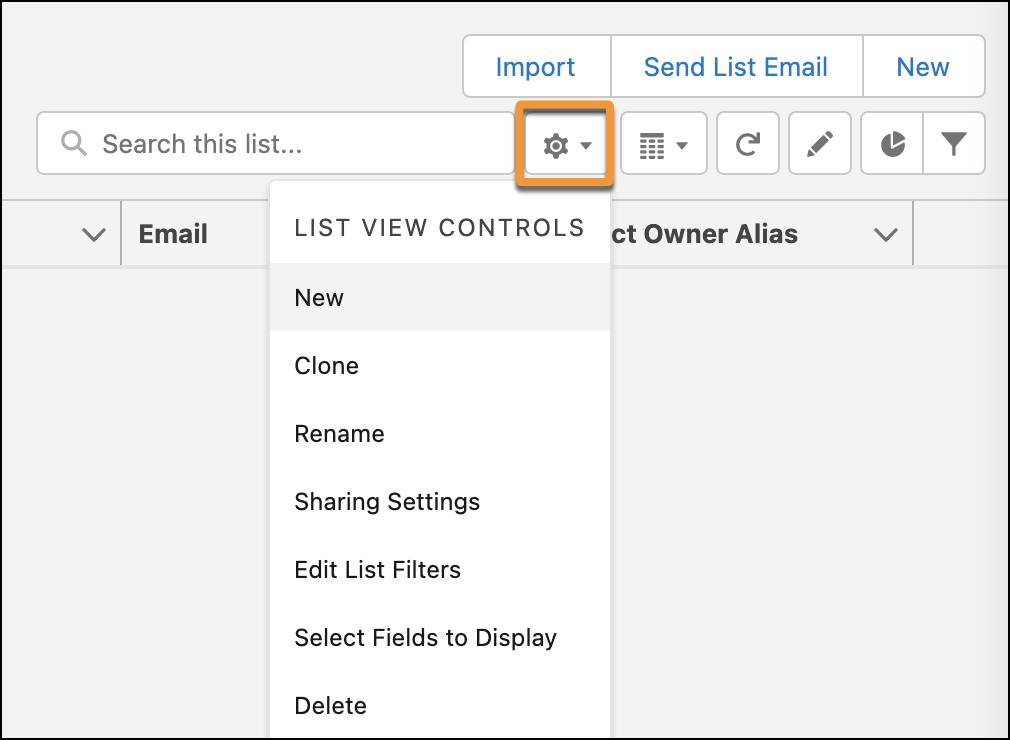
To customize which columns appear in your list view, choose Select Fields to Display. List views can show any field that’s associated with the object. Keep in mind that sharing rules apply to list views, so a user without access to specific records or fields won’t see those records or fields, even if the list view is public.
To narrow your list view, click Edit List Filters or the  icon and add your criteria to the filter pane. Click Add Filter Logic to enter complex relationships.
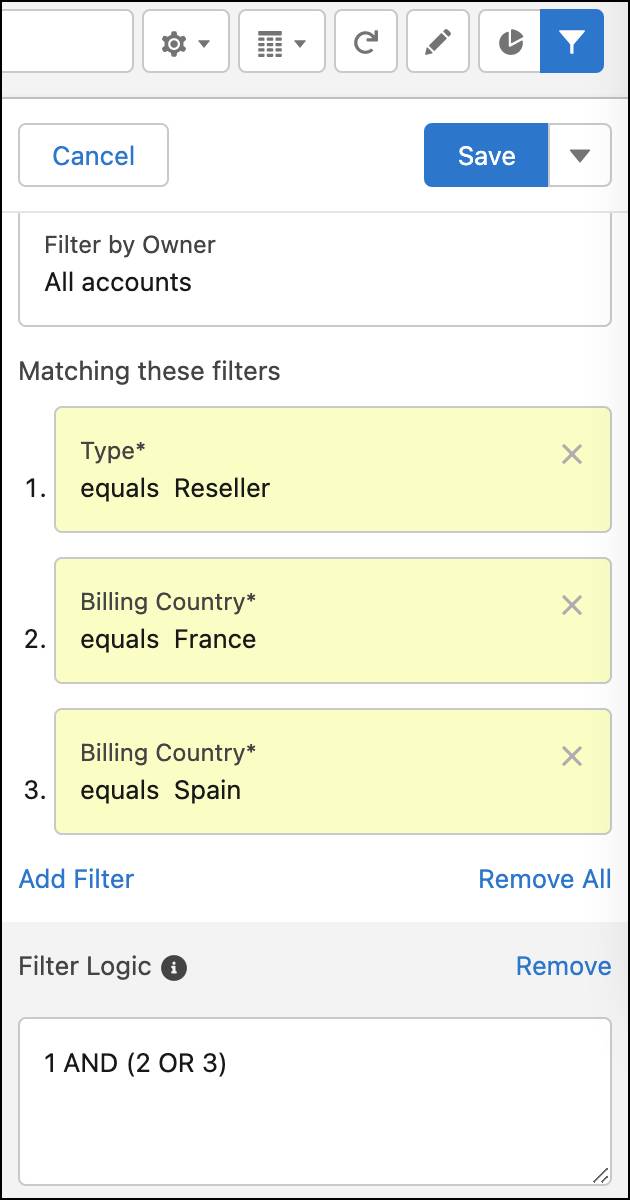
Here’s an example. On the Accounts tab, you can filter for all reseller accounts located in France or Spain by selecting the  icon and then Add Filter. In the filter pane, select:
- Field: Type
- Operator: equals
- Value: Reseller
Add a second filter:
- Field: Billing Country
- Operator: equals
- Value: France
Add a third filter:
- Field: Billing Country
- Operator: equals
- Value: Spain
Now click Add Filter Logic and change the logic to 1 AND (2 OR 3).
Use List Views for Common Tasks
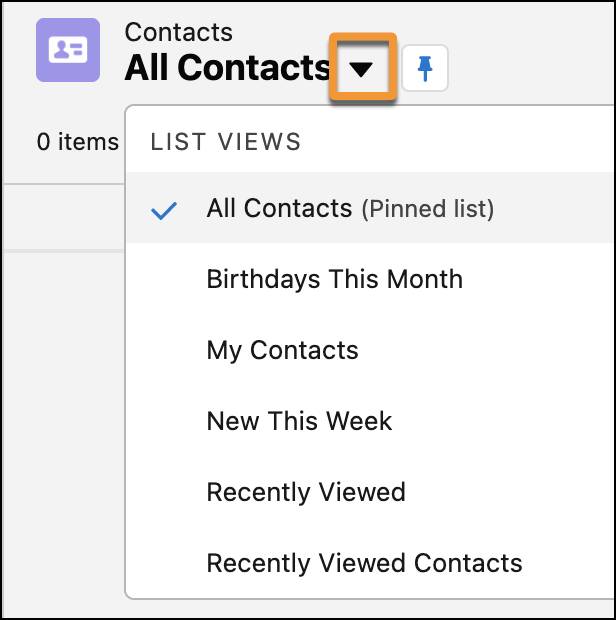
Each tab can support multiple list views, so you can create several list views to use for different tasks. To select a list view, click the icon next to the list view name and select one. Metadata that describes the list view, such as filters, sorting, and the number of items, appears under the list view name.
If you expect to use the same view regularly, click the icon to set it as the default view on your tab. Pinning a list view affects your workspace only.
After you organize and filter your list view, you can take actions on records. To edit, clone, or delete an individual record, click the  menu on a row.
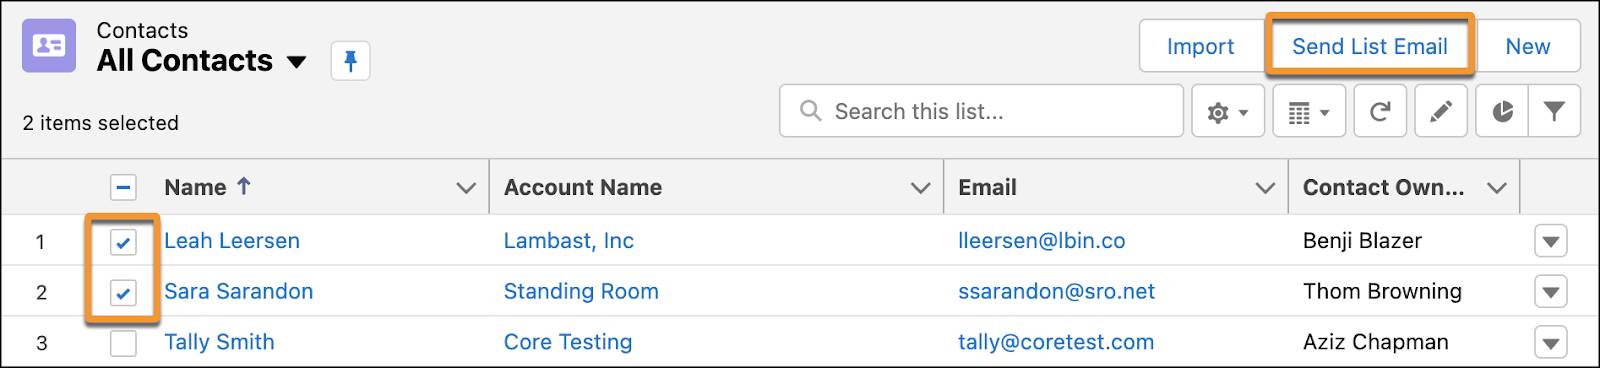
Some object tabs offer bulk actions on list views. For example, on the Contacts and Leads tabs, you can select multiple records and then click Send List Email to add individuals as recipients of a personalized email.
Note: The default view shows up to 50 records. Scroll to see more. When selecting records for bulk actions, keep these details in mind.
- To apply a bulk action to every record in a list, including records that don't appear in the current view, click the bulk action button without selecting any records.
- To apply a bulk action to all of the records on the current view, check every box by selecting the checkbox in the table header, and then click the bulk action button.
- To apply a bulk action to specific records, use the checkboxes on specific rows, and then click the bulk action button.
Example Use Case
Lucinda likes to keep her contact list tidy, so she worked with her admin to enable bounce handling and can now update contact information weekly. She creates a list view to help her with this task.
First, Lucinda navigates to the Contacts tab, opens the List View Controls menu, and then selects New. She names it Contacts with Bounced Emails and makes it visible only to her. To show only contacts that she owns whose email addresses have hard bounced, she adds these filters.
- Filter by Owner equals My Contacts
- Is Email Bounced equals True
- Email Bounce Reason equals Hard Bounce
Next, she opens the List View Controls menu and clicks Select Fields to Display. She selects Name, Account Name, Email, and Email Bounced Date. Later, she can sort the list view by any of these fields and act on individual records. Each Monday, she plans to call contacts to request updated information. When she updates the email address on a record, Salesforce resets the IsBounced value, and removes that contact record from her Contacts with Bounced Emails list view.
Now that you've learned the basics of list views, you're ready to customize or create your own.
Resources
- Salesforce Help: Work with List Views in Lightning Experience
- Salesforce Help: Default List View Filters
- Salesforce Help: Enable Email Bounce Handling