Deliver Your Trial
Learning Objectives
After completing this unit, you’ll be able to:
- List the ways you can deploy your free trial.
- Explain how to create a Signup Request.
- Describe the benefits of hosted trials.
Choose Your Trialforce Delivery Method
You’ve chosen Trialforce because you want to show everyone your best work. And you’ve put in the time to create immersive experiences and package them into templates. Now it’s time to make them available to the world. You have three delivery options. You can:
- Put the free trial on AgentExchange, where prospects can download it directly.
- Deliver your trials using a SignUp Request.
- Set up a customized web form to provide hosted trials on demand.
The AgentExchange option is the easiest approach. The other two allow you to interact with your prospects. Let’s start with the easiest.
Put Your Trial on AgentExchange
As we said, this is the easiest option, but it’s also the most limited. For instance, you can make available only one Trialforce template at a time. Also, you miss out on Signup Request, a really cool feature for capturing more information about your leads. More on this in a minute. But if you have only one template and you just want to get your trial out there, this method can do the trick.
You make your trial available by enabling Trialforce from your AgentExchange listing. To do that, first connect your Trialforce template to the Partner Console.
- Log in to the Salesforce Partner Community.
- Click Publishing to launch the Partner Console.
- Click Technologies.
- Click Trial Template.
- Click Connect Org, and then enter the login credentials for the organization that contains the Trialforce template.
Next, link your Trialforce template to your AgentExchange listing.
- Click Listings.
- Find your listing and click it.
- Click Grow Your Business.
- For Free Trials, provide your trial template ID.
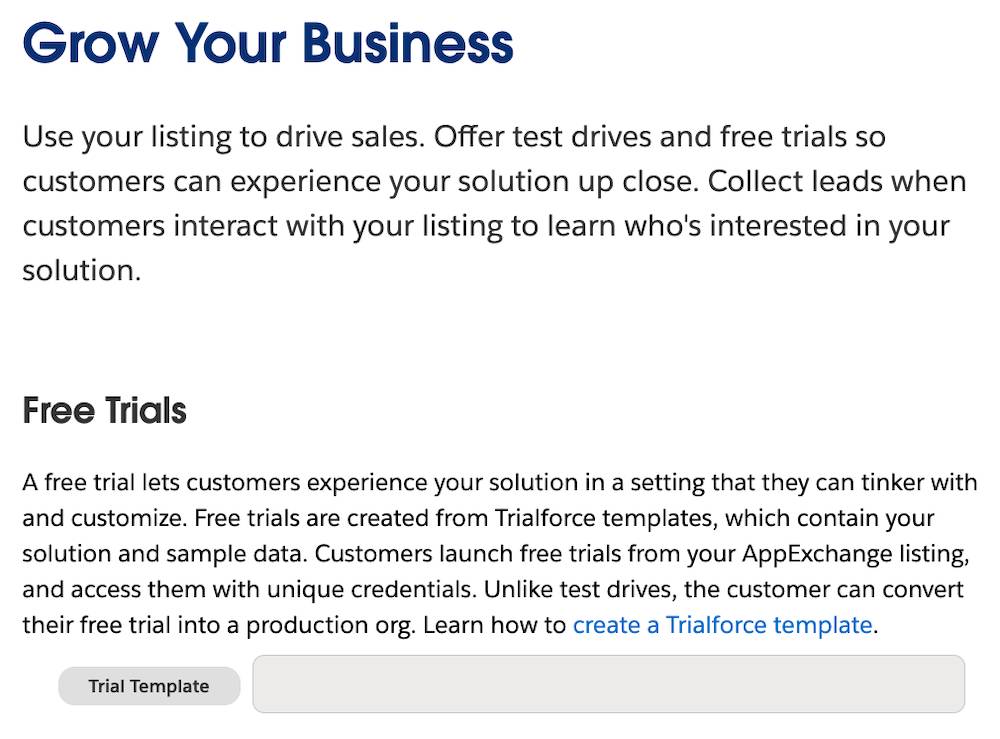
5. In Leads, enter the org ID of your lead collection org.
6. Check Install the solution. This enables lead tracking.
7. Click Save & Exit.
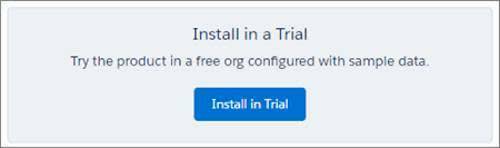
Now when customers visit your listing, they have the option of installing your app in a free trial.
We collect contact information for prospects who start trials on AgentExchange. We ask them to agree to your terms and conditions, as well as our Main Services Agreement. Each prospect who provides this information receives an email with a link to a trial org. If you set up email branding using a Trialforce Management Org, the email comes from you.
As we’ve mentioned, a Trialforce trial org is a fully functioning Salesforce organization. Prospects can use your app and can install additional apps as they see fit for the duration of the trial period.
The other two approaches require you to get information from your prospects before delivering a trial. This information is collected by a Signup Request.
Deliver Your Trials with a Signup Request
If you have more than one template, or if you want prospects to give you more information before you give them a trial, a Signup Request helps you ship them customized trials.
A Signup Request is a standard object used to generate trials using Trialforce templates. Each Signup Request holds basic information about a prospect and the associated template. New Partner Business Orgs come with the Signup Request feature installed. If your Partner Business Org doesn’t have it, log a support case in the Salesforce Partner Community.
You can create a Signup Request object manually by entering a new record or automatically via the Signup Request API. We show you both methods.
Before you use the Signup Request feature, the Trialforce Source Orgs (TSOs) that you use to create templates must be approved for use. To obtain approval, log a support case in the Salesforce Partner Community (login required).
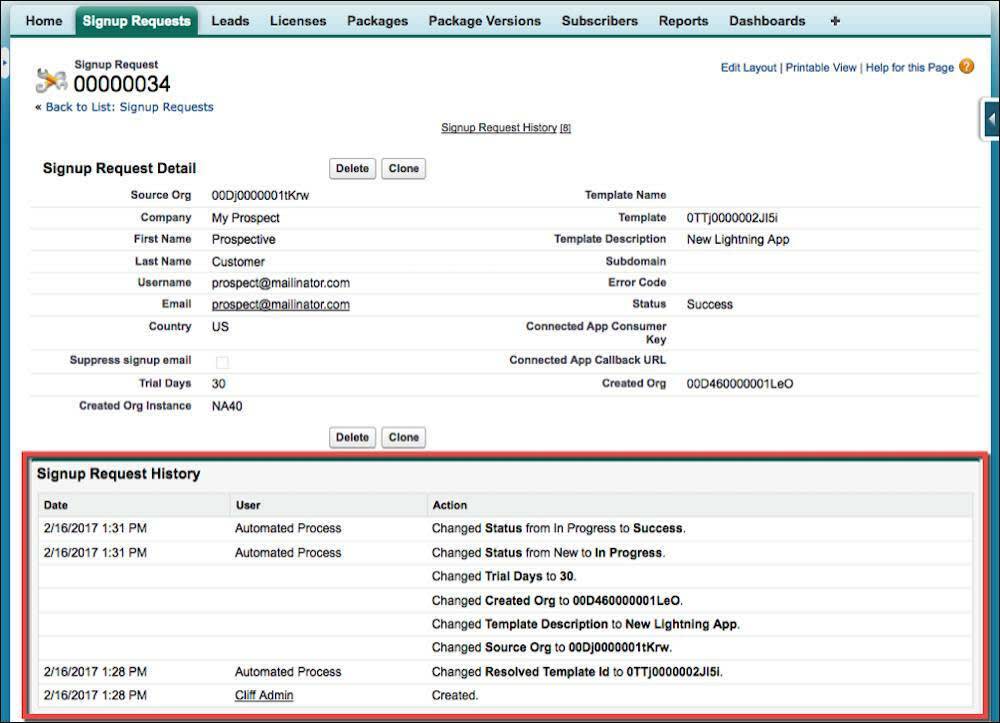
A Signup Request object contains the essential information about your prospect: their name, company, email, and trial username. It also identifies the Trialforce template to use for their trial. Each Signup Request also has a history containing information about a trial’s status and provisioning.
Since it is just a plain old Salesforce object, you can create custom fields to capture additional information from your prospects. You can even add validations and workflows that fit in with your business processes.
Prospects see a link to the free trial on your AgentExchange listing. When they click it, they see a prompt to provide their contact information, which you then receive in an email. You can contact them to discuss their needs or verify their information. Then you create a trial for them by adding a Signup Request record.
To make a new Signup Request record:
- In Salesforce Classic, click Signup Requests.
- Click New.
- Select the prospect’s company, or if you don’t see it listed, type in the name.
- Fill in the prospect’s first and last names.
- Choose a username that is unique within Salesforce, since it’s hard to know whether the prospect’s email address is already used in another org. Like all Salesforce usernames, it must be in a valid email format. For example, if your prospect’s name is Pat Jones and your company name is AcmeApps, use Pat_Jones@AcmeApps.Demo.Org. If you choose a name that exists elsewhere in Salesforce, you see an error in the Signup Request history.
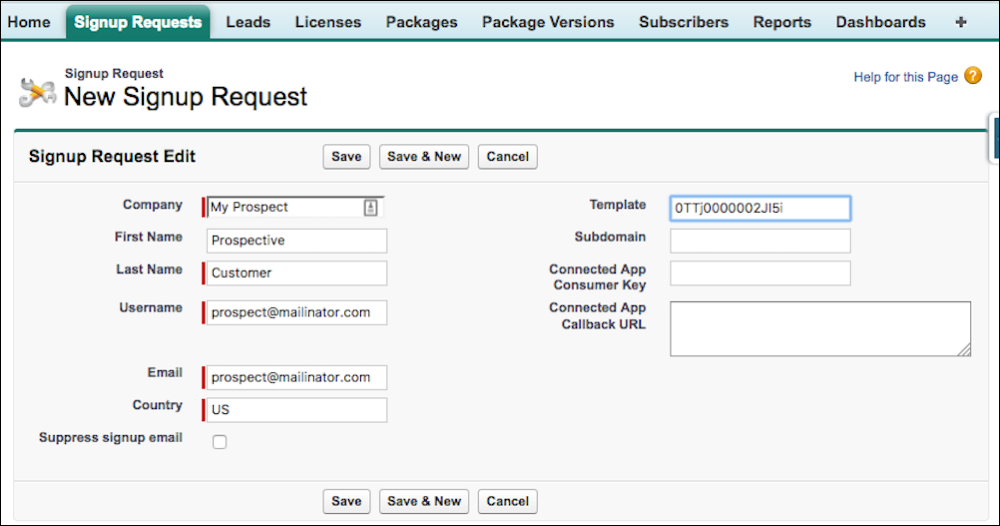
- Select a template for your trial. Every template you create has a unique ID. You can find the IDs for your templates in your Trialforce Source Org (TSO).
- In a separate browser window or tab, log in to your TSO.
- From Setup, type Trialforce into the Quick Find box and then select Trialforce Templates.
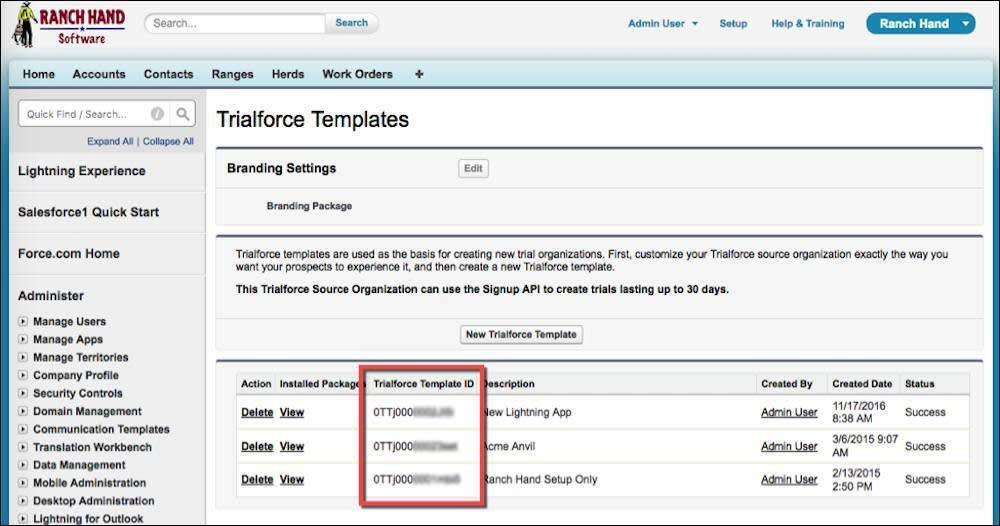
- Now copy the ID for the template you want to use into the Template field in the Signup Request dialog box in your other window.
If you need to do anything special to configure a Trialforce org before your prospect sees it, select Suppress signup email. This prevents Trialforce from automatically sending an email, and it lets you contact your prospect when things are set up.
Because it gives you so much control, this approach is a great way to create demo orgs for internal users. You can also use it as part of an outbound sale, offering an unsolicited trial to a prospect.
Responding to every request for a free trial gives you a lot of control, but it also requires a lot of your time. Use caution with this approach if you have a lot of clients, and make sure you follow up on their requests quickly.
Hosted Trials on Demand
If you want both customization and automation, offer a hosted trial. This is a trial you deploy from your own website:
- Log in to the Salesforce Partner Community.
- Click Publishing.
- Click Listings, and then select a listing.
- Click Grow Your Business.
- For Free Trials, click the search field and select a connected Trialforce template.
- Optionally, collect leads when customers start trials.
- For Leads, specify the ID of the org where Web-to-Lead is enabled.
- Select the checkbox for free trials.
- Click Done.
Then you provide a web form on your own site. Prospects fill out this form to request a free trial. That request generates a Signup Request record using an API call. This record creates a trial for that prospect. Refer to the Signup Request object developer documentation for the list of parameters and error codes.
To create the web form, you can use a traditional HTML form: You can make a picklist that displays user-friendly template names corresponding to template IDs. This lets your prospects select their own experience.
When you build your form, include a link to the Salesforce Main Services Agreement and a checkbox for prospects to accept its terms.
You can also add custom fields to your form to collect more information, but keep it simple—you want your prospects to make it to the end, after all! Your web form must have the same fields as your Signup Request object, so make sure they match.
If you have questions about setting up hosted trials on demand, have a look at our two-part blog article for detailed guidance and sample code.
-
Signup Request: Make it Easy for Your Customers to Provision Trials—Part 1
-
Signup Request: Make it Easy for Your Customers to Provision Trials—Part 2
Provide Trials on Request
Sometimes you want to interact with prospects before giving them a trial, to qualify them, to verify their contact information, or to interview them about their needs.
If you want to talk to your prospects before handing them a trial:
- Log in to the Salesforce Partner Community.
- Click Publishing to launch the Partner Console.
- Click your listing.
- Click Link Your Solution.
- In Installation Methods, click Contact you for install instructions.
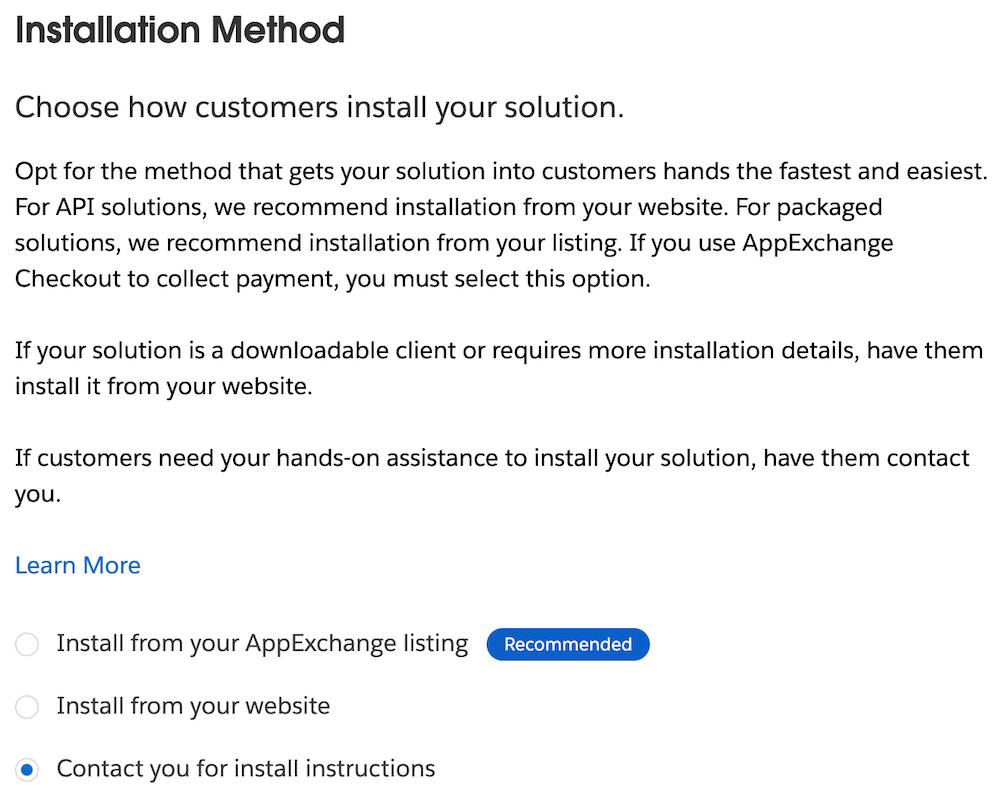
6. Click Next.
7. In Grow Your Business, enter your Lead Org ID.
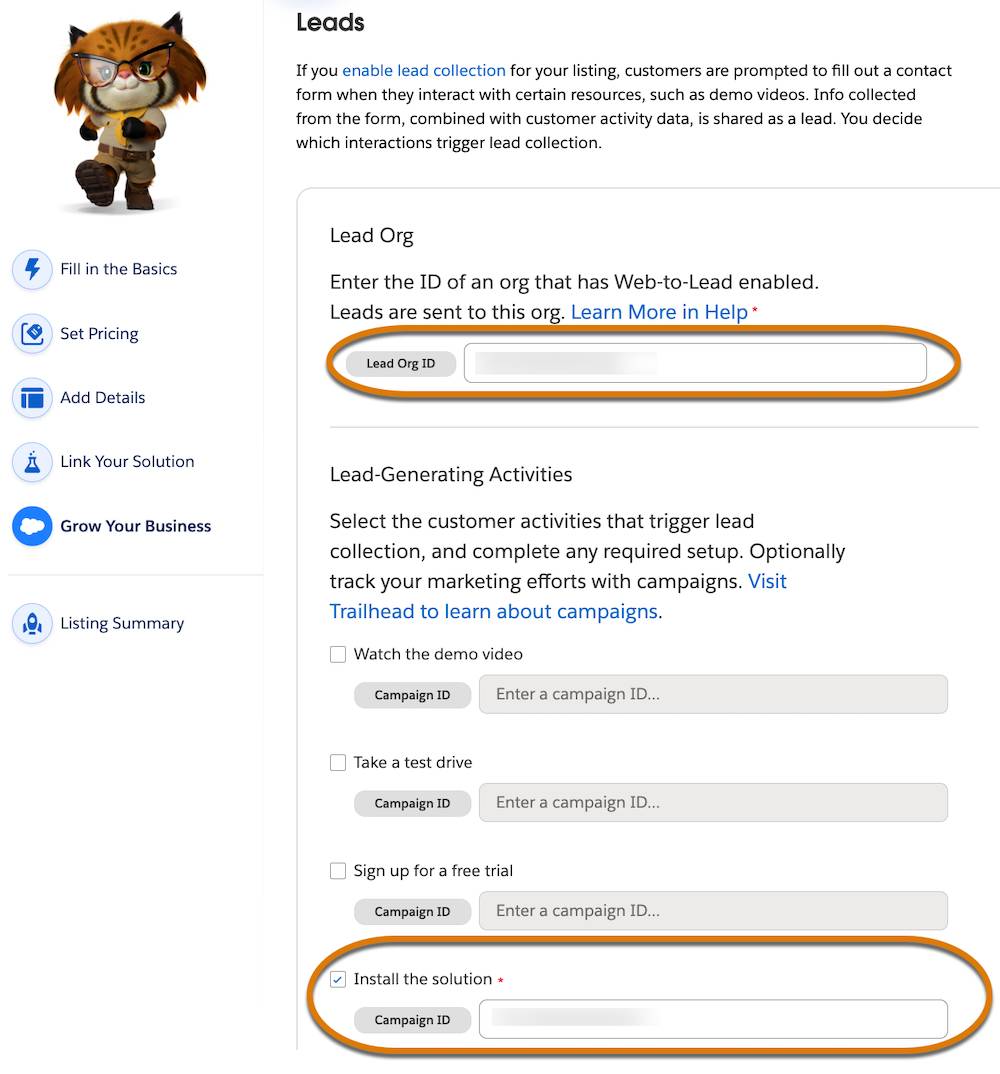
8. Click Install the solution.
9. Enter your campaign ID.
10. Click Save & Exit.
Put Your Product Out There
Let’s take a look back at the tools Salesforce offers you for turning prospects into paying customers:
-
Installable trials: A trial of your product, placed right into a customer’s existing org—a great way to let your app sell itself.
-
Test drive: The easiest way to fire up a simple free trial in its own org, as long as you can sell your product without prospects manipulating data.
-
Trialforce: A full-blown framework for creating immersive experiences tailored to your customers. Sales teams love it!
What you get out of your trial depends on what you put into it. The more you plan how to present your product in a free trial, the more customers you are likely to get from that trial. And we provide the tools you need to execute your plan.
Let’s show everyone why they need what you’re offering!
Resources
- Blog: Signup Request–Make It Easy for Your Customers to Provision Trials—Part 1
- Blog: Signup Request–Make It Easy for Your Customers to Provision Trials—Part 2
- ISVforce Guide: Sign-Ups Using the API
- ISVforce Guide: Creating Proxy Signups for OAuth and API Access
- Salesforce Object Reference: SignupRequest