Create an Interactive Email with AMP
Learning Objectives
After completing this unit, you’ll be able to:
- Identify the AMP for Email components.
- Use AMP tools to build your email.
- Create a carousel email using AMP in Content Builder.
Components of AMP
Like most things, AMP is best learned through practice. In this module, we cover the fundamentals to get you started. We suggest you also review the AMP Dev site to fully learn the tool’s functionality.
Let’s start by reviewing some of the most helpful supported email components. These are the building blocks for creating AMP emails.
| Component | Description | Example | Considerations |
|---|---|---|---|
|
Dynamic |
|
Include forms like RSVPs, preference centers, reviews, and others in your emails. Customers can submit info without leaving the inbox. |
|
|
Dynamic |
|
Use the list component for real-time updates, such as displaying the number of tickets left at an event, product inventory, or order status. |
|
|
Dynamic |
|
Create compelling web-like layouts where users can click to change the content in the email. For example, create a tabbed email format with content hidden behind each tab, or hide and reveal product details without having to leave the email. |
|
|
Layout |
|
Include lists of product color, size, or price range that can be collapsed. |
|
|
Layout |
|
Display a countdown until a new product launch or event; show a countdown to show how much time is left until an offer expires. |
|
|
Layout |
|
Show multiple images in a carousel format with arrows that enable the user to cycle through them. |
|

AMP Code
In addition to components, there are also some specific requirements when using AMP for Email.
- The html tag must include:
<html ⚡4email lang="en">or<html amp4email> - The
<head>tag must also contain a<script>tag that loads the AMP runtime:<script async src="https://cdn.ampproject.org/v0.js"></script> - Include this CSS boilerplate to hide the content until AMP is loaded:
<style amp4email-boilerplate>body{visibility:hidden}</style> - Replace all HTML img tags with
<amp-img>
Here is the base code with the required elements for an AMP email.
<!doctype html>
<html ⚡4email lang="en">
<head>
<meta charset="utf-8">
<script async src="https://cdn.ampproject.org/v0.js"></script>
<style amp4email-boilerplate>body{visibility:hidden}</style>
</head>
<body>
Hello, AMP4EMAIL world.
</body>
</html>
AMP Made Easy
Good news—you don’t need to memorize the nuances of AMP. The Gmail AMP for Email Playground (not to be confused with the playgrounds used here on Trailhead) is an external environment that was created to build and validate AMP for Email code. 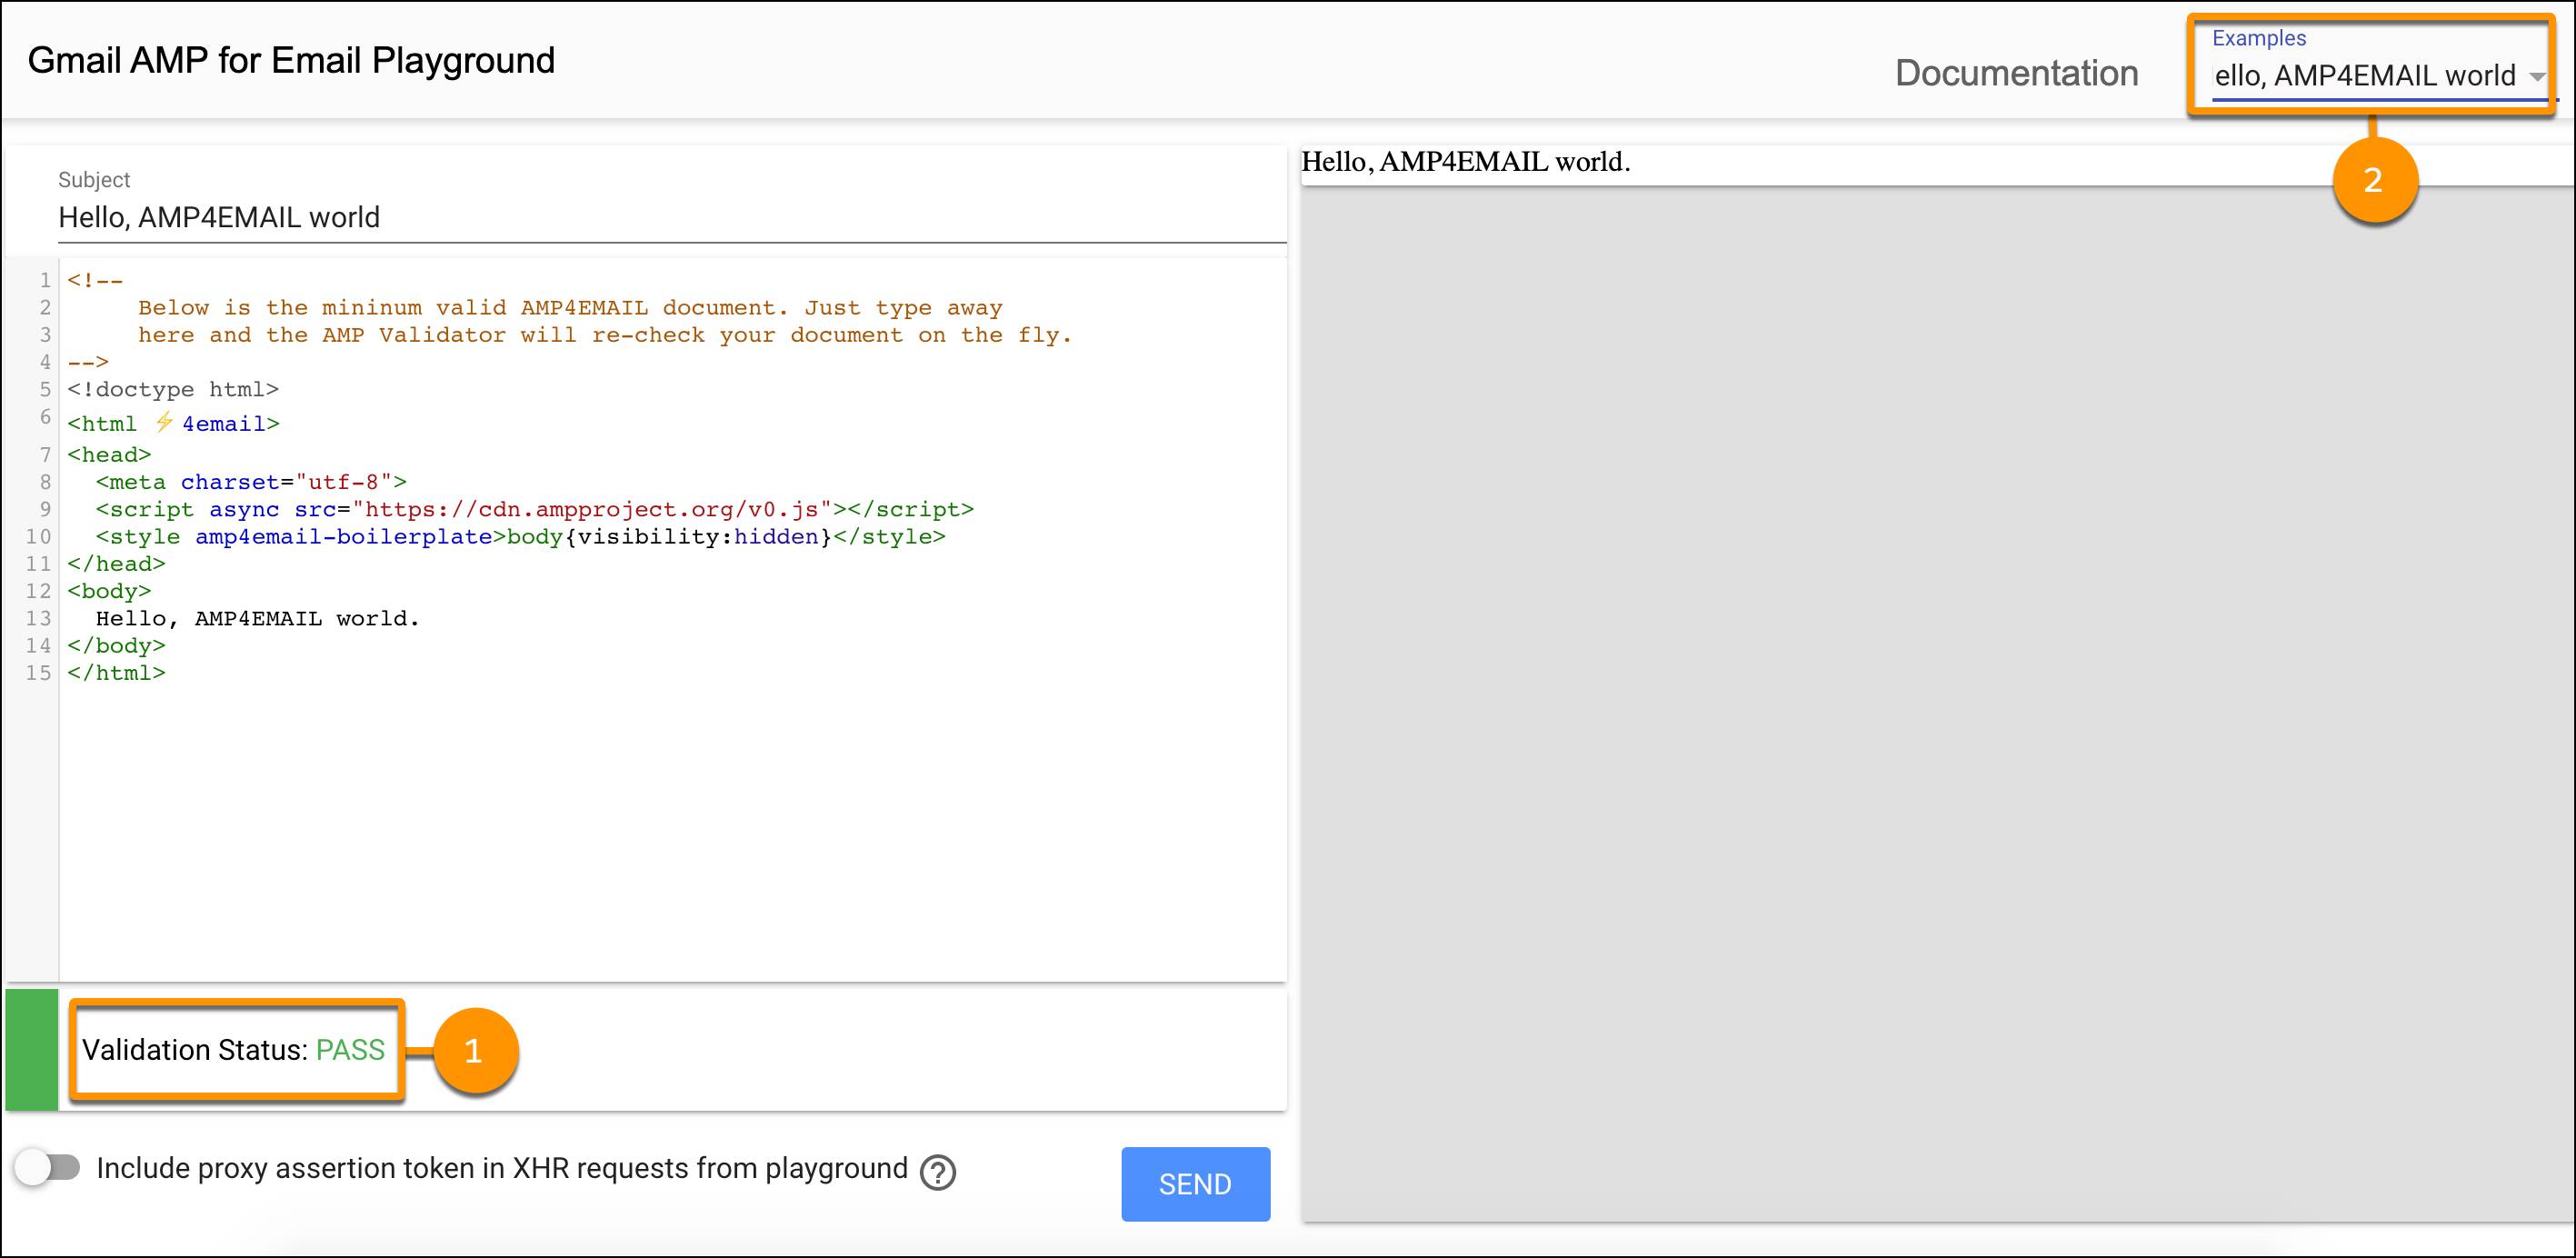
All the required components of an AMP email are loaded for you, so you can develop, test, and validate (1) your code right within the playground interface. You can also view and edit already created code examples (2) using the components you want in your emails, like lists or carousels.
And you don’t have to start from scratch, because you can pull in the HTML version of your email and build from there.
A Note on Accessibility
It is important to note that the tag <html ⚡4email> is used in the Playground. To follow accessibility best practices, we recommend adding a language attribute to this tag, like: <html ⚡4email lang="en">.
Carousel Use Case
Since learning takes practice, let’s work through an example together. Northern Trail Outfitters (NTO), an outdoor gear and apparel retailer, sends a standard tent sale email that could benefit from using AMP for Email. Isabelle Givens, NTO marketing manager, wants to update the hero image of the existing email to include a carousel of all tent options.
Technical marketer and email coder extraordinaire, Michele Hansley, is excited to begin using AMP to help Isabelle realize her vision. She first creates the HTML email in Content Builder and saves the content block.
Carousel AMP Code
Next, Michele opens the AMP for Email playground website. She starts by pasting in the HTML code inside the <body>of the playground code. She then adds in the carousel components and associated images.
Michele confirms in the playground that her code passed validation. 
Create Your Email in Content Builder
In this module, we assume you are a Marketing Cloud Engagement user with the proper permissions to build emails in Marketing Cloud Engagement. If you’re not, that’s OK. Read along to learn how you would take the steps in a production org. Don’t try to follow these steps in your Trailhead Playground. Marketing Cloud Engagement isn’t available in the Trailhead Playground.
Now with the AMP code in hand, Michele logs in to Marketing Cloud Engagement to build her final email. Here’s how.
- She navigates to Content Builder.
- Clicks the +Create button and selects Email Message.
- From the Select Creation Options dropdown, you can select either Template + AMP or HTML + AMP. Michele selects HTML + AMP since she already created her default email in HTML.

- Next Michele names the email and adds a description.
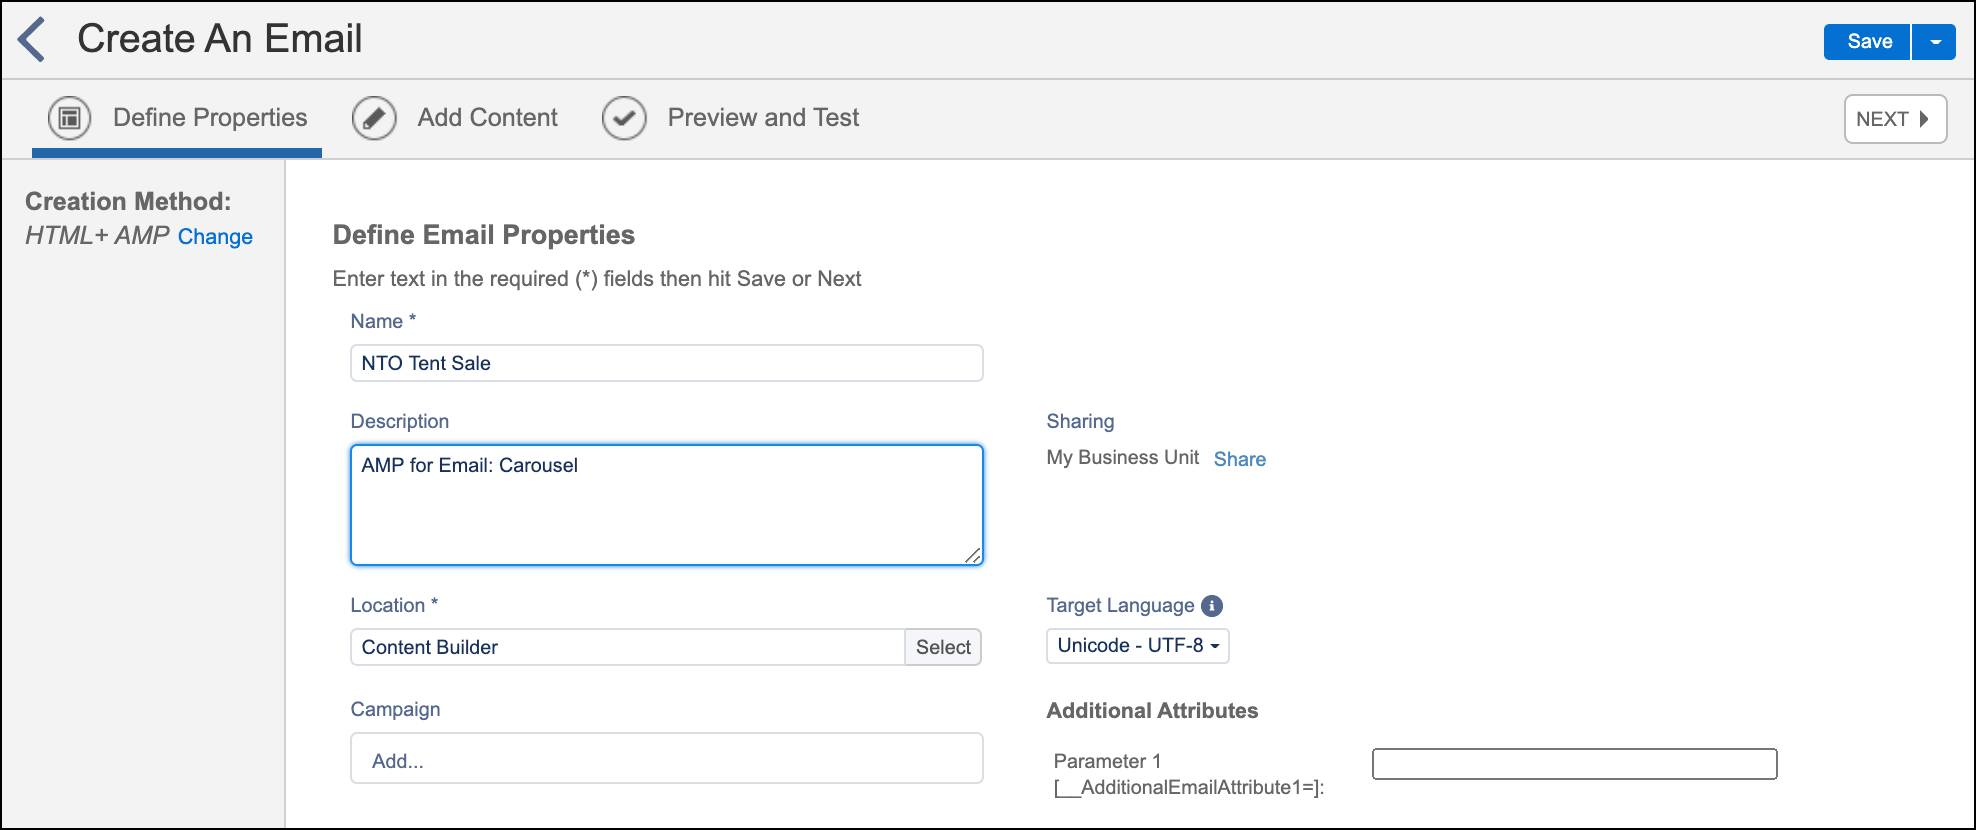
- She clicks Next.
Add Content
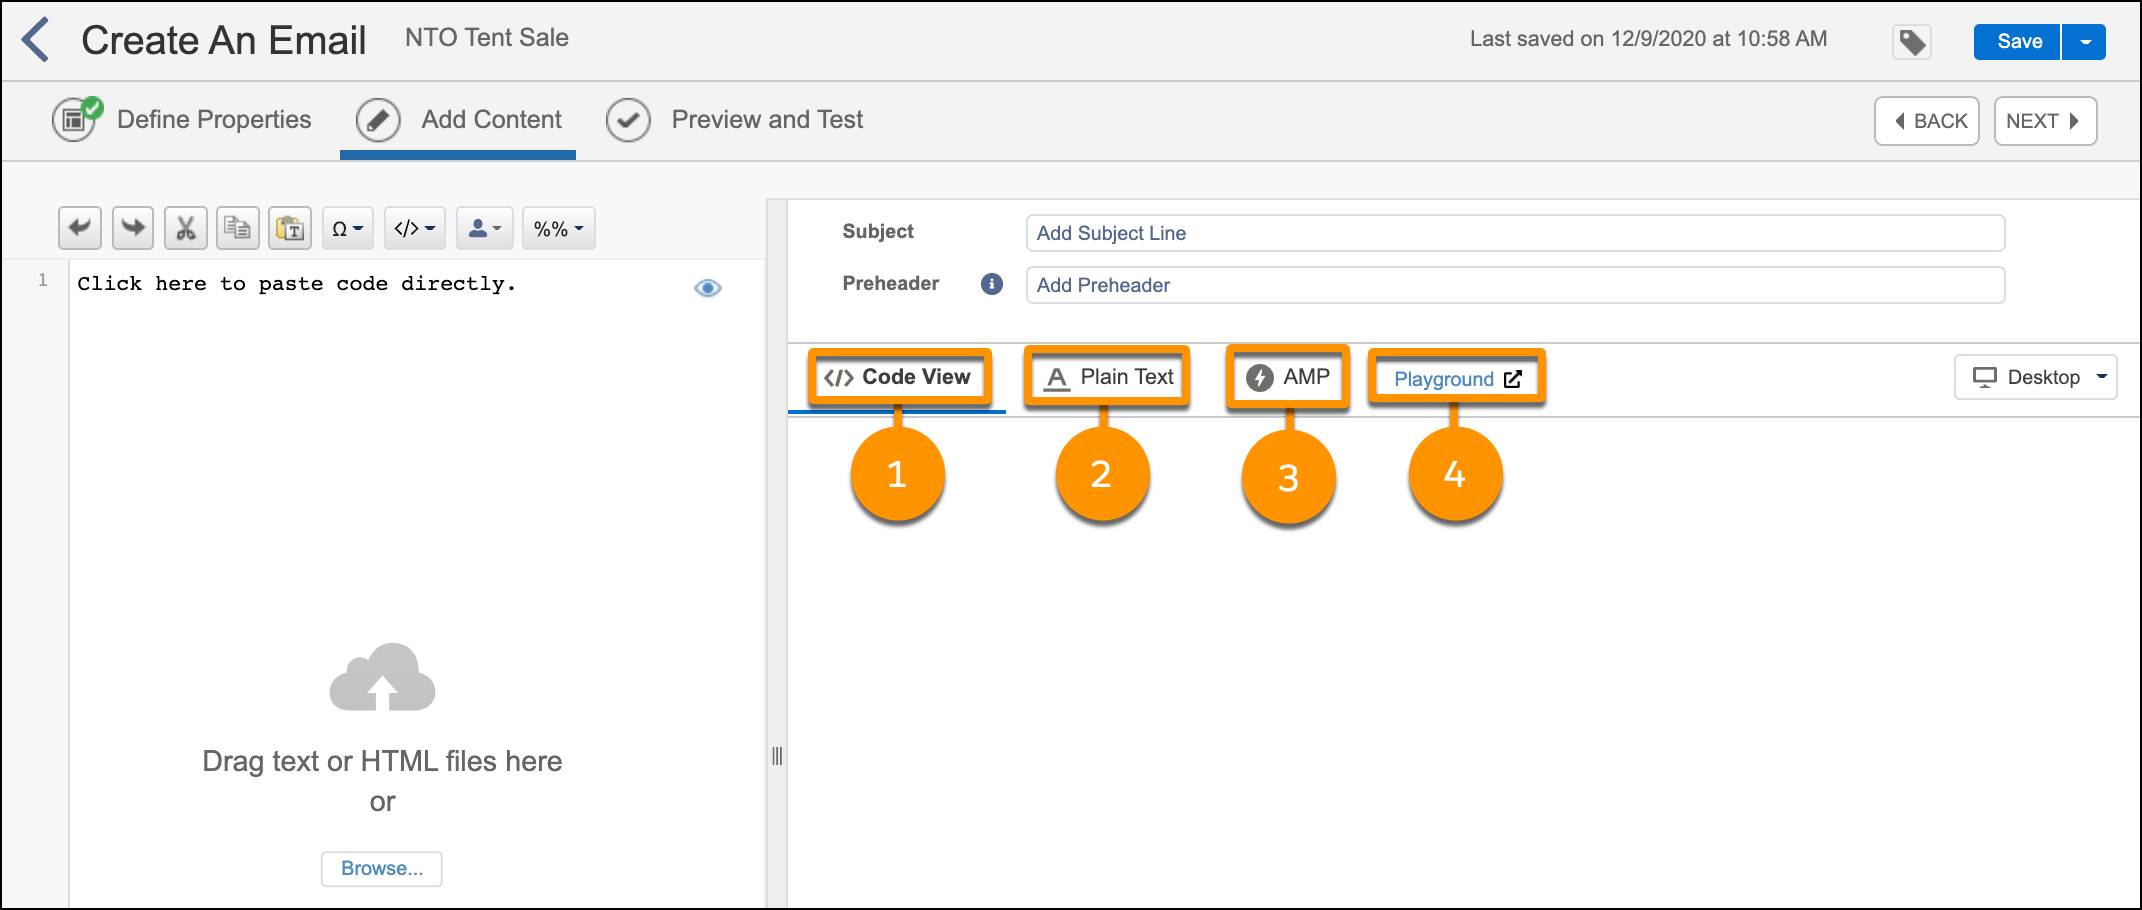
To ensure compatibility across all mail clients, Michele needs to create three versions of her email.
- HTML fallback version (1)
- Plain text (2) version
- AMP (3) version
The interface even includes a link to the AMP playground (4) for easy development.
</> Code View (Fallback Content)
Since Michele is prepared, she starts with the code view, also called the fallback content, for subscribers who don’t use an email client that supports AMP.
- She clicks Browse from the Code View page.
- She locates her HTML content block, NTO Tent Sales, and selects the existing content block.
Plain Text Content
- Next, she clicks the Plain Text tab.
- She pastes in the text from her email and before she forgets, she clicks Save.
AMP Content
Now she adds in the AMP code.
- Click the tab for AMP within your Content Builder email.
- With the AMP Playground open in another window, Michele copies the AMP code into the Content Builder canvas.
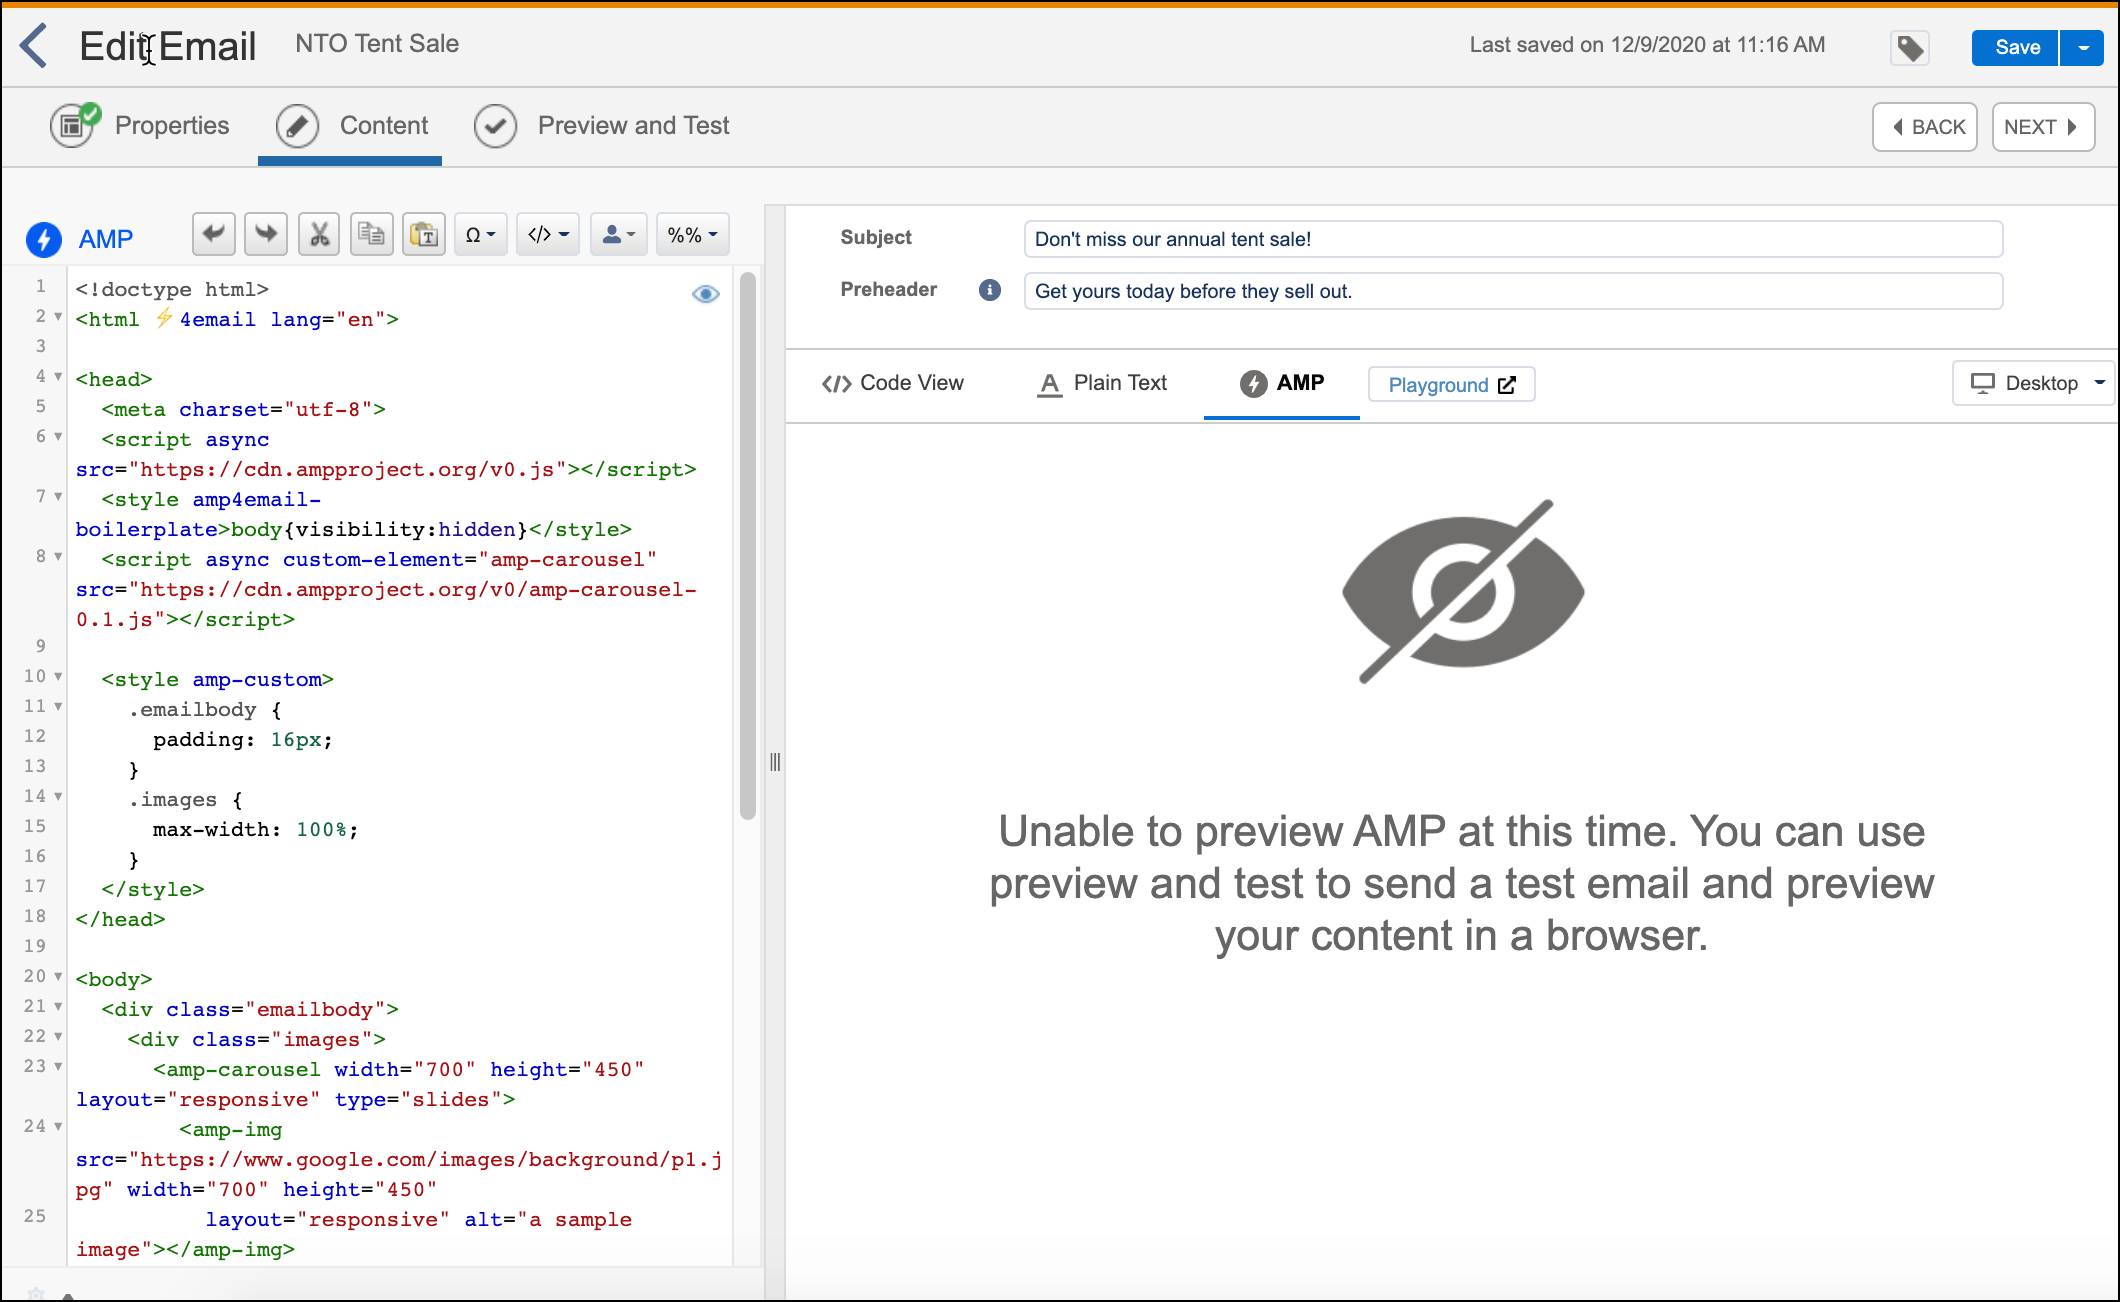
- Once copied, she clicks Save.
With the coding done, she adds in her Subject Line and Preheader, and moves on to preview her email!
It’s important that you test your AMP code in the AMP Playground, and you test your email before sending in several different email clients.
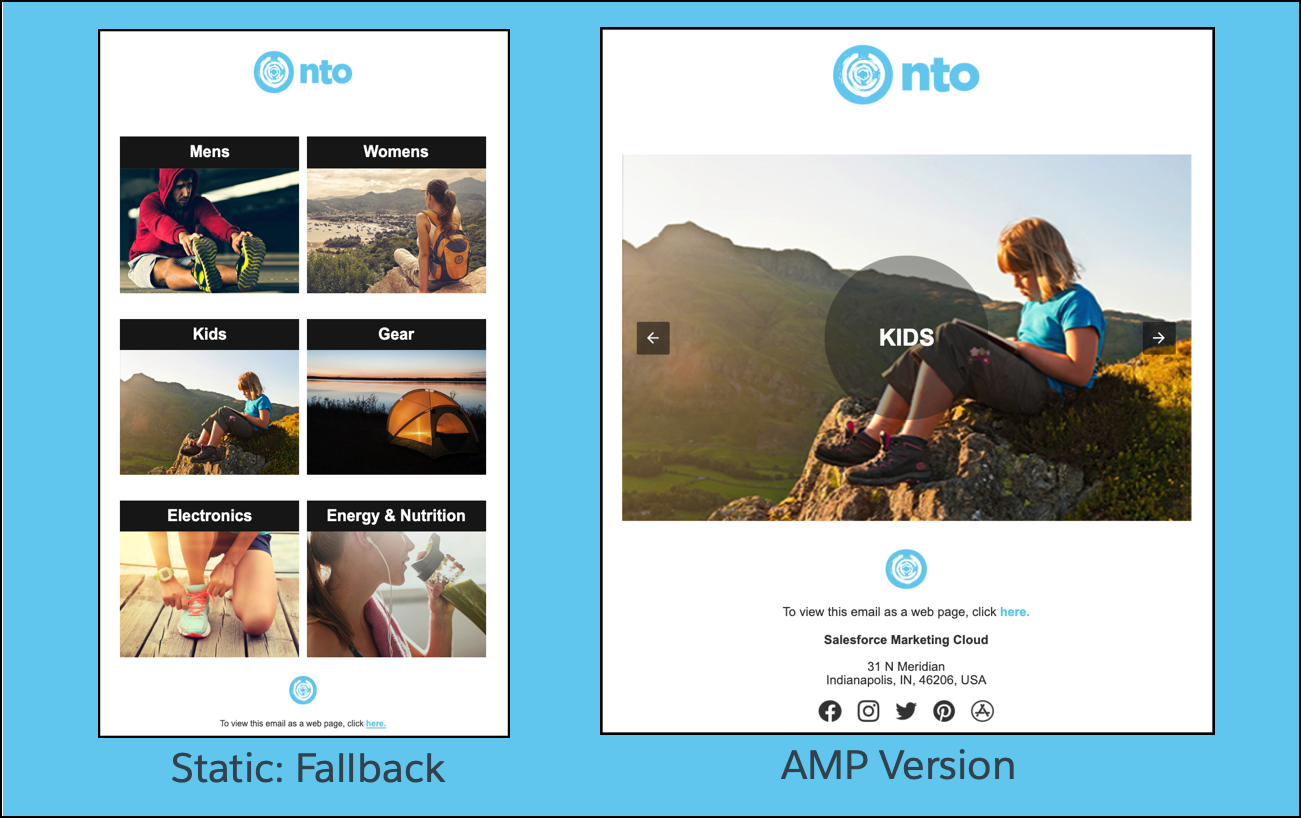
Let’s check out the visual comparison between NTO’s fallback content and the interactive content with a carousel powered by AMP. Remember, you can check out the interactive version in all its glory in the AMP Playground.
Now you know the fundamentals of creating content using AMP for Email. With the right tools and a solid understanding, let’s check out some additional use cases and code in the next unit.