Customize Reports and Dashboards in Student Success Hub for K-12
Learning Objectives
After completing this unit you’ll be able to:
- Explain how reports help track and measure student progress.
- Use dashboards to monitor the impact of interventions.
In Student Success Hub for K-12, you can create customizable reports and dashboards to track progress and monitor programs to see what’s working. Salesforce reporting tools empower schools and districts to make data-driven decisions and drive continuous, evidence-based improvement to help each student thrive. Let’s see how that plays out at our (fictional) example, Connected School District.
Creating Custom Reports
At Connected School District, district leadership uses reports based on alerts logged in Student Success Hub for K-12 to justify allocating staff and resources to specific schools. The principal at Carmen’s school presents alert updates to district leadership on a quarterly basis. For his next meeting, he needs a report that breaks down the status, priority, and reason for each alert logged at his school. He also wants an understanding of how many open alerts there are, and how long they’ve been open. He will use this information to justify a request for more resources to help ensure that all students are equitably supported.
The principal delegates this reporting task to Carmen. He asks her to create a report that includes all of the alert-related metrics listed above. He will share this report in a meeting with district leadership that will include several other school principals. He asks Carmen to include a chart in the report to help him make his case for resources in the limited time he’ll have to spotlight their school’s needs.
Follow these steps to create the custom alerts report the principal has requested.
- From the dropdown menu select Reports, then click New Report.

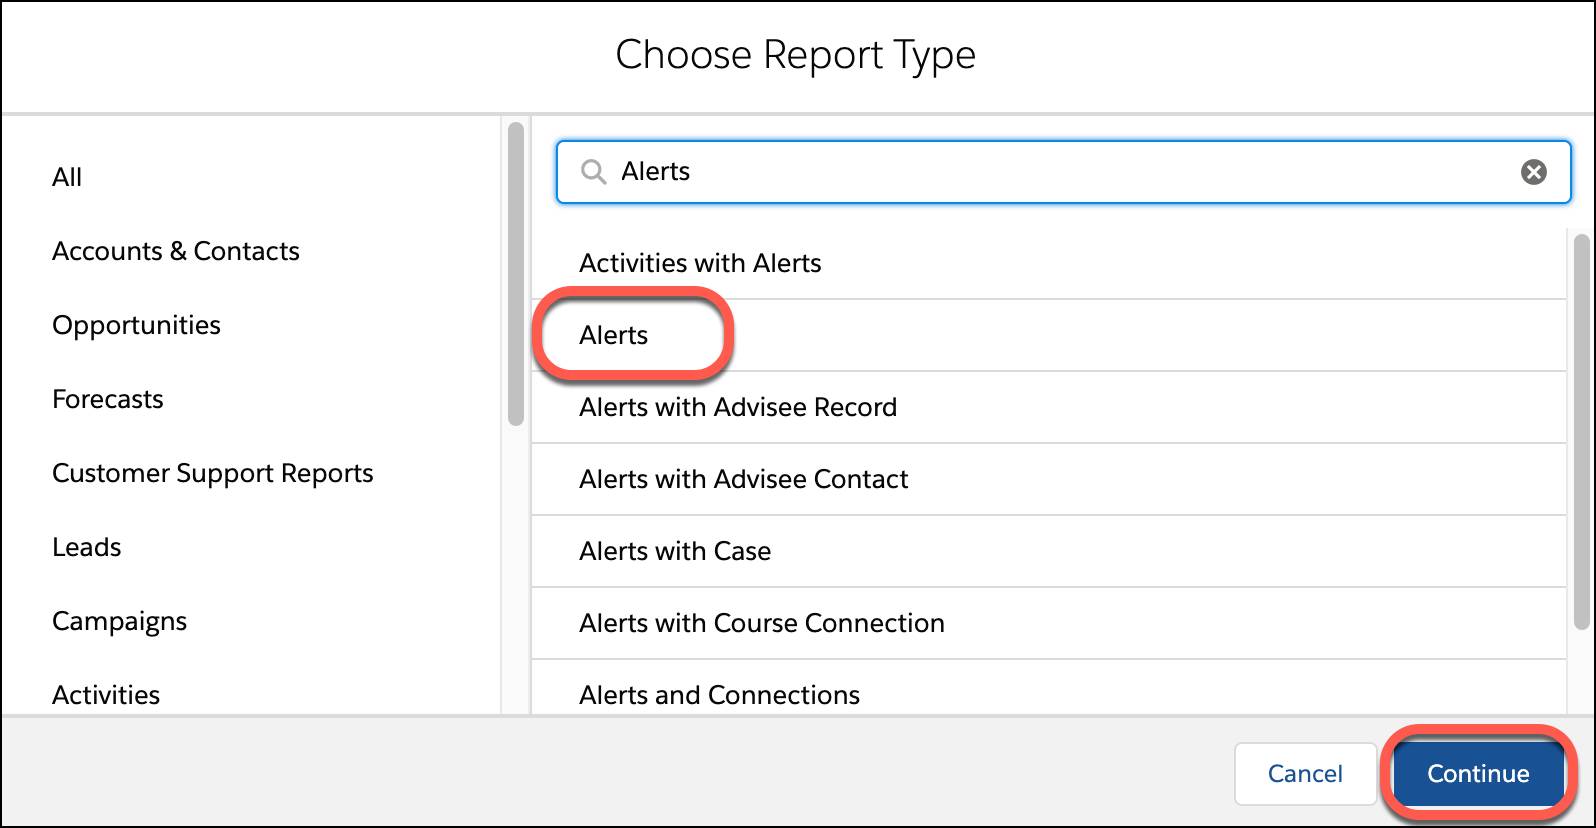
- Search for and select Alerts as the report type. Click Continue.

- On the Filters tab, edit the filter to match your reporting needs. For this example, Carmen edits the filter to select All alerts since the principal wants to see all of the alerts at the entire school. Click Apply.

- On the Outline tab, add reporting fields in the Columns section. For this example, Carmen creates columns for the following fields:
- Alert: Alert # (pre-selected)
- Alert: Created Date
- Alert: Owner Name
-
Reason

- Add groups to your report by searching for and selecting groups in the GROUP ROWS and GROUP COLUMNS search boxes. For this example, Carmen adds the following groups:
- GROUP ROWS—Priority
-
GROUP COLUMNS—Status

This creates a matrix report, which will provide the principal with a great summary of all alerts in his specific school community.
- On the Filters tab, add filters to further refine the report. For this example, Carmen only wants to see open alerts, so she needs to add a status filter. To do this she searches for and selects Status in the Add filter search box. Then, she sets the following parameters in the Filter by Status options.
- Operator—not equal to
-
Value(s)—Closed: Action Taken, Closed: No Action Needed
Click Apply to apply these filter settings.
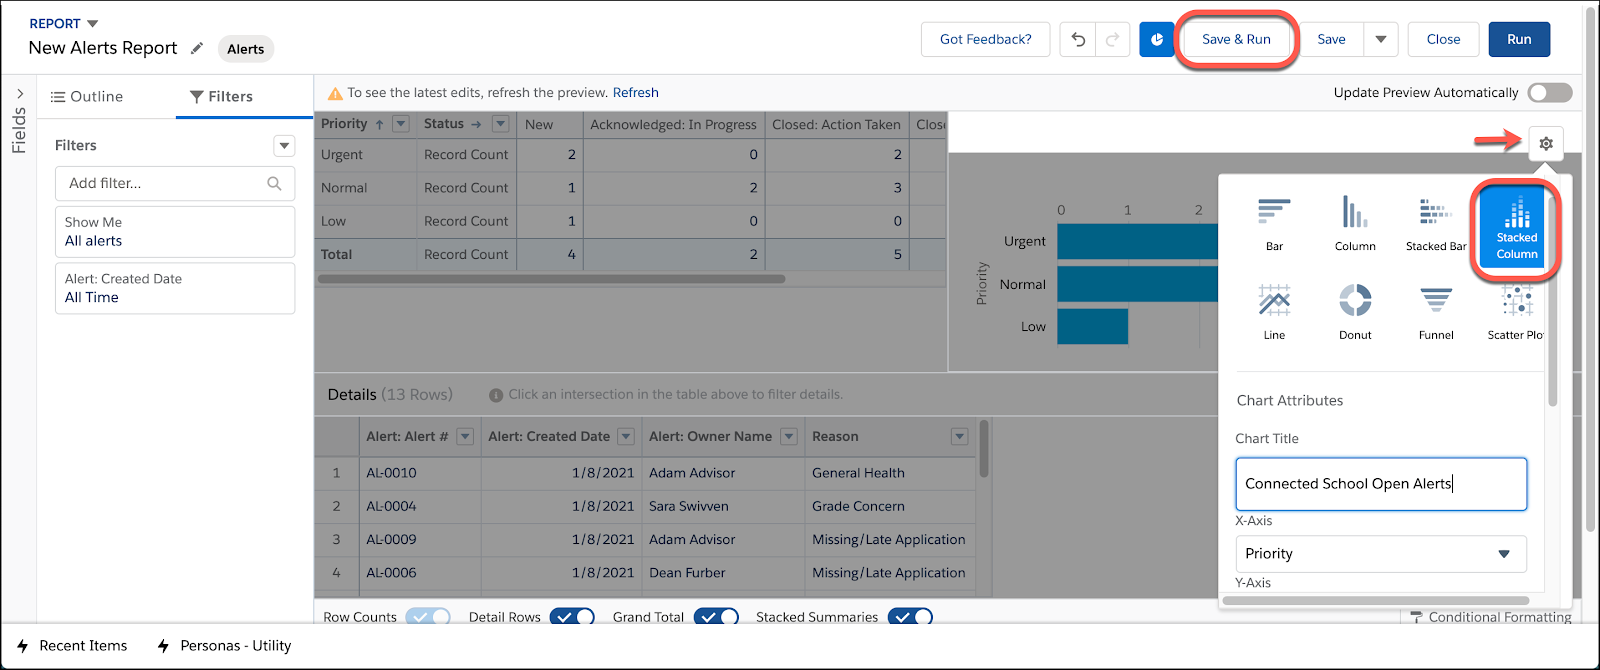
- To add a chart to the report, click Add Chart on the report menu bar.

- Select the chart type that best displays the report data. Carmen decides to use a stacked column chart.
- Click the gear icon for Chart Properties. Refresh the report preview if you don’t see the gear icon right away.
- Select the Stacked Column icon from the Display As options.
- Add a chart title. Carmen titles the chart
Connected School Open Alerts. - Modify chart fields as needed. For this example, leave all the default selections as-is.
- To run the report, click Save and Run on the report menu bar.

- Name the report, add a report description (optional), and select the folder where you want to save the report. For this example, Carmen names the report
Connected School Open Alertsand saves it to a public folder. - Click Save.

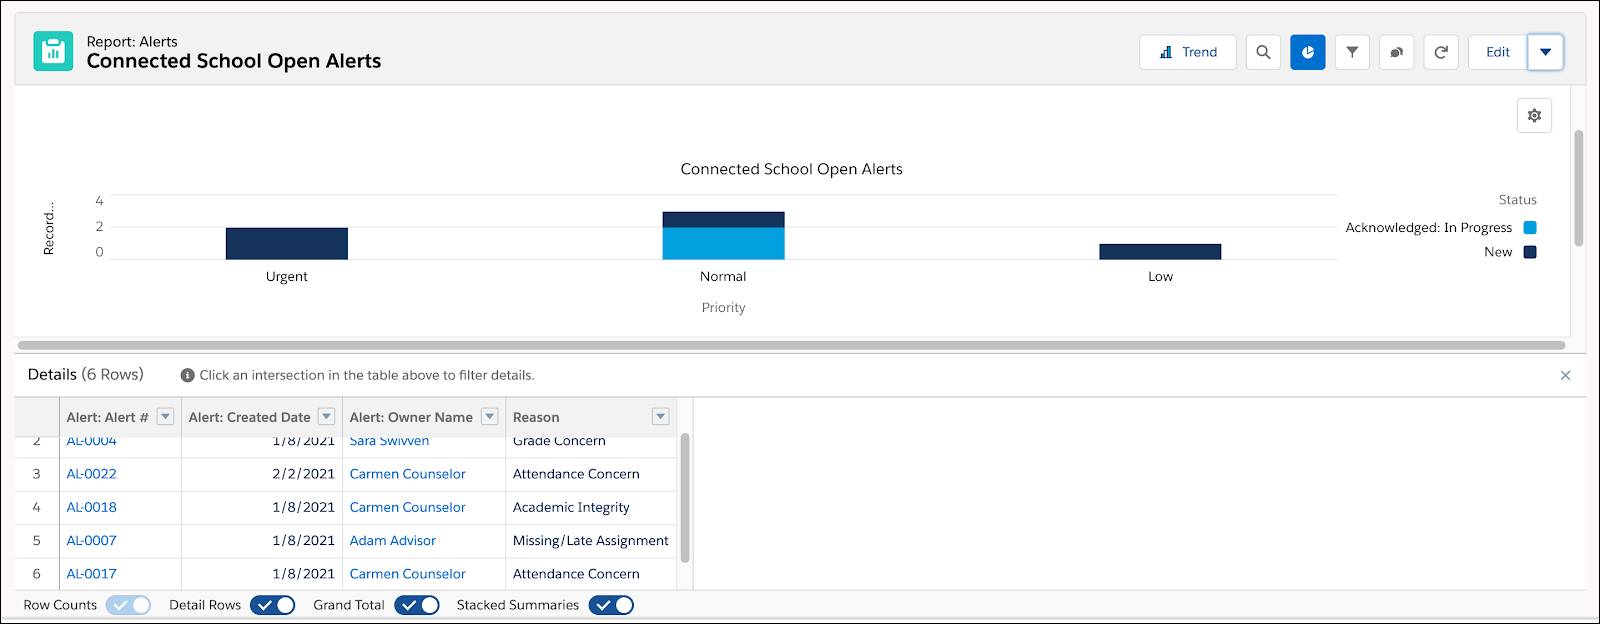
Depending on how much data is included in your report it may take a few moments for it to generate. Once the report loads, admire your handiwork!
Sharing Reports
When your report is ready, you can click the arrow by the Edit button for several next-step options including the option to save, export, subscribe, or add the report to a dashboard. Some of those actions are pretty self-explanatory, but we do want to point out that if you choose to export a report, you’re given the opportunity to download the report data into a spreadsheet. If you choose to subscribe to a report, you’re able to set up a schedule for the report to be automatically run and delivered to your inbox at the cadence of your choice (weekly, monthly, etc.).
Carmen saves the report in a folder the principal has access to, so it’s instantly accessible to him and anyone else with folder access. Since this is a report the principal would like to monitor over time, he adds it to his dashboard and subscribes to the report. He schedules the delivery of the report for every Monday at 8:00 a.m. He then adds the current version of the report to his presentation to district leaders. He loves that the chart Carmen included makes it easy to see the story his school’s alert data is telling. He sends a quick text to Carmen to thank her for her work. Virtual high-fives all around!
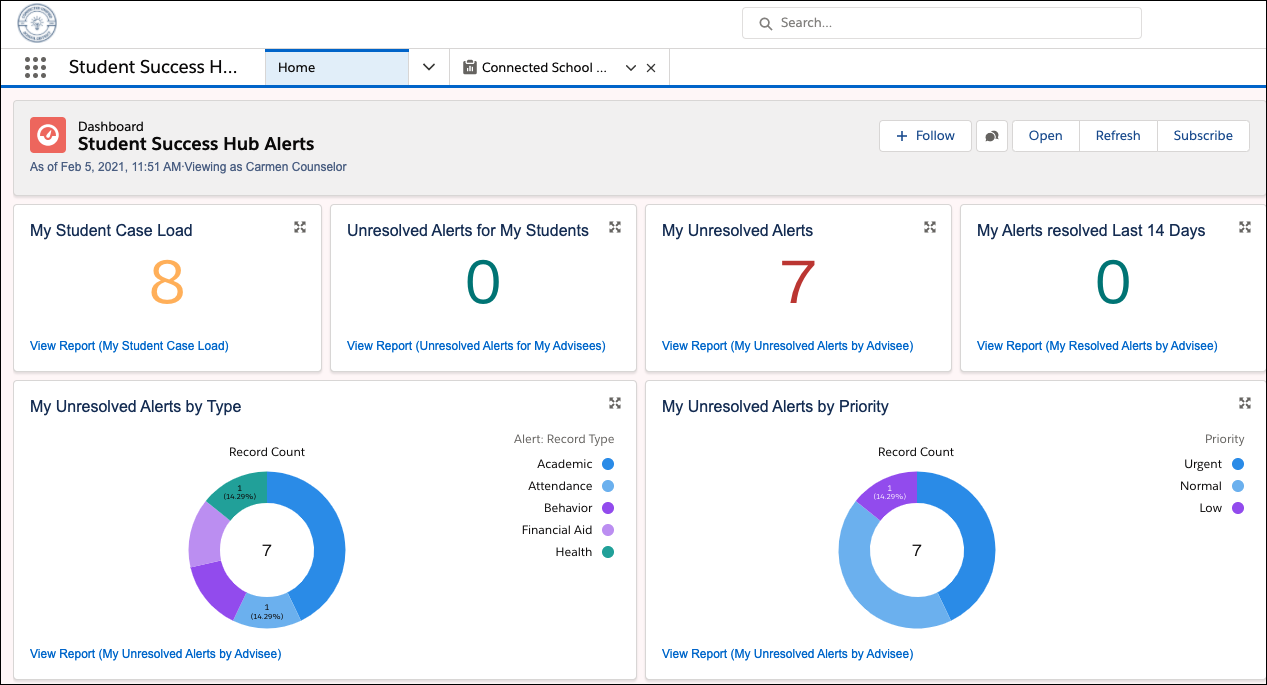
Carmen returns to her Home page in Student Success Hub for K-12 to take a look at her own personal dashboard. One of the things Carmen appreciates most about reports and dashboards is that they make her work easier regardless of whether she needs to “zoom in” or “zoom out” on data. In the report she just created, she zoomed out to keep stakeholders informed of big picture metrics like school-wide alert tracking. But with the click of a mouse, she’s able to zoom in on some more personal metrics directly related to her caseload when she views her personalized dashboard. When Carmen created this dashboard, she intentionally included reports that help her drill down into her individual progress so she can stay on top of her own performance and needs for support.
And with that, Carmen is ready to call it a day. She uses her dashboard to take note of where her priorities will be when she logs on in the morning. Like many people who serve in school communities, Carmen often feels like the work is never done. But with the collaboration made possible by Student Success Hub for K-12, she is energized by the impact of her efforts and she is confident that her school is providing holistic, equitable, and timely support to students in the school community.
Resources
Quiz Scenario
Following Carmen's successful reporting on school-wide alert metrics, her principal asks her to take it a step further and develop a report zeroing in on technology issues experienced by distance learning students at their school. The goal of the report is to share with district leadership the most common types of technology issues faced by students, how many there are, and how quickly they have been resolved, so the district can determine where additional funding, staffing, and support may be needed to provide the best distance learning experience possible.
