Share, Schedule, and Subscribe to Reports
Learning Objectives
After completing this unit, you’ll be able to:
- Share reports using folders.
- Schedule and subscribe to a report.
Report Visibility Options and Folders
So, let’s review. So far, we’ve learned how important it is to collect and maintain quality data, find, format, and customize existing reports and create new ones. But how do you make sure the right team members have access to the right data and reports? Report visibility options and folders. Using report visibility options and folders, your team can organize and share all your various reports. You can see these options in the menu when you land on the reports page (remember when we took a tour of it earlier?). From here, you can click a menu option to see all reports with that visibility or in that folder.
Let’s take a look at the default report visibility options:
- Recent: A list of reports viewed recently; the default view when landing on the reports page
- Created by Me: All reports you created
- Private Reports: All reports that were created by you and can only be seen by you
- Public Reports: All reports saved in the Public Reports folder are available to everyone in your organization
- All Reports: All reports you have access to (like those shared by other users)
And these are the default folder options:
- All Folders: All folders you have access to
- Created by Me: Only folders you created
- Shared with Me: Folders created by others and shared with you
Your admin controls who has access to the contents of a folder based on roles, permissions, public groups, and license types (blah blah blah, admin stuff). But, hey, listen up! Your admin can make a folder available to your entire organization, or make it private so that only the owner has access. And folders can have subfolders—but only if the Salesforce admin at your organization has enabled enhanced folder sharing. Folders are a great way to organize reports, so Gorav, the admin at No More Homelessness (NMH), has that option enabled. If you don’t see this option in your org, check with your awesome admin to see if they can change the setting.
Visibility options, permission settings, subfolders—all of this is great to know in theory, but what does folder sharing look like in action? To find out, let’s rejoin Development Associate Sofia Rivera for a look at how sharing folder access plays out for the fundraising staff at NMH.
Share a Report
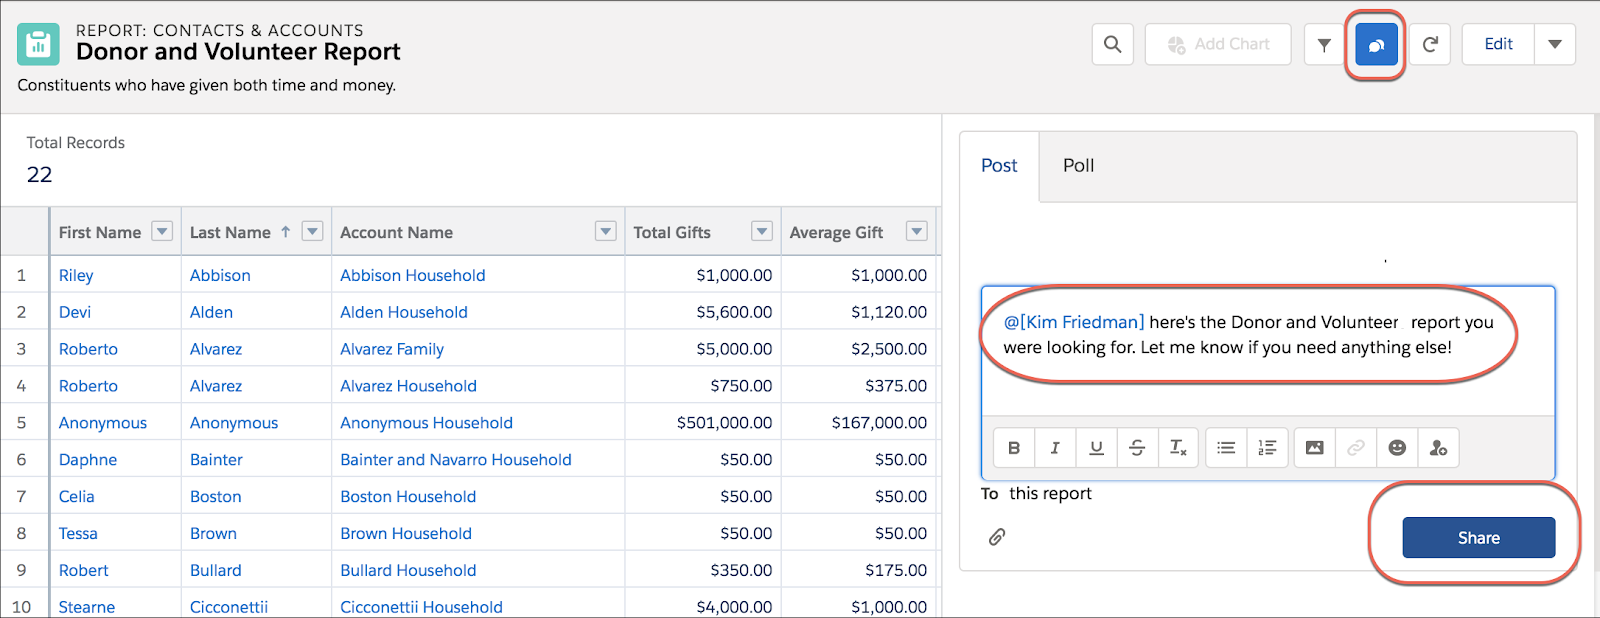
Remember the Donor and Volunteer report that Sofia created earlier? Well, now she’s ready to share it with her Executive Director, Kim Friedman.
But, oh, no! Kim couldn’t see the report when Sofia sent her the link. Instead, Kim received an error message about “insufficient privileges.” D’oh! Sofia forgot that only she could see reports in her Private folder. For Sofia to succeed at sharing reports with Kim and give her the insight she needs to make critical decisions about their fundraising strategy, she needs to know how to share a report and a folder, and how to subscribe to a report. But, before Sofia can share her report, she needs to move it to a public folder. Let’s see how she does this:
- Sofia navigates to her Private folder and clicks Edit on the report she wants to move. She selects the Donor and Volunteer Report.

2. Click the down arrow next to Save, and then click Properties.

3. Select the folder where you want the report to live. Then click Save. In this example, Sofia selects the NMH Fundraising Reports folder.

Boom! Sofia's Executive Director now has access to the report, even if she doesn't know it yet.
Now that the Donor and Volunteer report is in a public folder, Sofia can share it with her Executive Director. There are lots of ways to share a report in Salesforce. This time, Sofia chooses to share the report through Chatter. Without having to leave the report, all Sofia has to do is click the collaborate button, @ mention Kim in the message, and click Share. Kim will then receive a Chatter notification with a direct link to the report. She'll also be able to respond to Sofia's Chatter comment, closing the loop quickly and efficiently.
Schedule and Subscribe to a Report
Another way to make sure you have access to reports is to subscribe to them. In NPSP, you can subscribe to a report when you need to have critical data sent to you via email regularly. Let’s check in with Sofia to see how she does this.
One of Sofia's most important duties as the Development Associate is to follow up on overdue pledge payments, so she decides to subscribe to the report that has the relevant data. Sofia clicks on the Expected Payments report in the NPSP Fundraising Reports folder. She quickly realizes that this report will be her one-stop-shop for keeping track of upcoming (and past due!) payments. Sofia wants to review any overdue payments every Monday when she gets into the office. Follow along in your own org as Sofia subscribes herself and her manager subscribe to this report.
- From the Reports tab page, click the arrow next to the report to which you want to subscribe. Then select Subscribe from the menu. If you've already subscribed to a report, but want to change the schedule, take the same action.

2. Set the subscription schedule. In this case, Sofia chooses weekly on Mondays. Optionally, she could also select Add conditions to this report if she wanted to receive an email when data in the report met her set conditions.
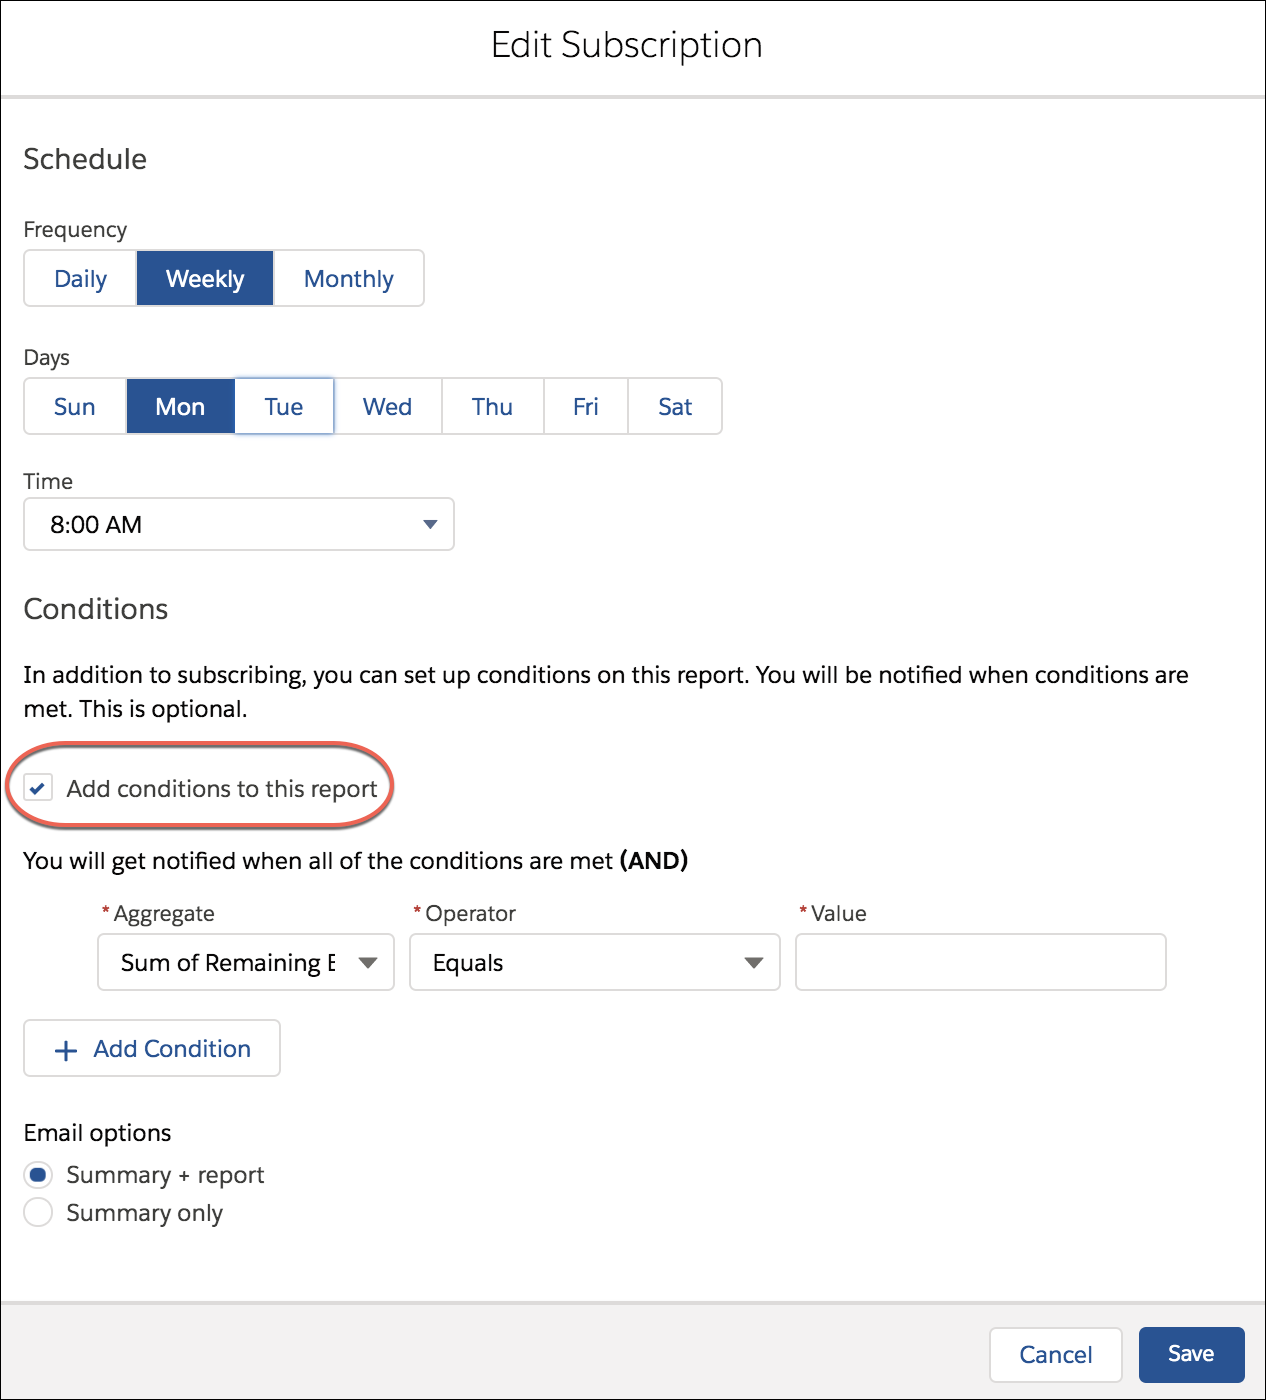
3. Click Save.
Now Sofia will get an email every Monday with refreshed report results by email. If her manager wants the same report, Sofia can walk her through how to subscribe.
OK, so we've learned how to share, schedule and subscribe to reports in NPSP, but sometimes staring at a grid of numbers isn't the easiest way to get a quick read on how you're doing. Next, we’ll learn how a Salesforce Dashboard takes your data and creates a visual representation of your results.