Use Apex in Transaction Security Policies
Learning Objectives
After completing this unit, you’ll be able to:
- Explain how to create a Transaction Security policy that uses Apex.
- Describe the basic elements of the Apex class that implements a Transaction Security policy.
Follow Along with Trail Together
Want to follow along with an expert as you work through this step? Take a look at this video, part of the Trail Together series.
(This clip starts at the 17:20 minute mark, in case you want to rewind and watch the beginning of the step again.)

Create a Policy That Uses Apex
Condition Builder is powerful, but it doesn’t support all complex use cases, such as branching logic, querying for data, or looping over the queried data. In those types of cases, you use Apex classes to define the conditions a Transaction Security policy triggers.
Let’s say you want to create a Transaction Security policy that limits the number of records a user can view or export from a report to 10. However, you also want to exclude users with the Data Steward profile who may need to export more data. You can’t use Condition Builder to implement this logic, so you need to use an Apex class instead.
First you create the policy itself.
- Navigate back to the main Transaction Security Policies page and click New.
- Click Apex then Next.

- In the Event field, select Report Event.
- In the Apex Class field, select New Empty Apex Class.

- Click Next.
- In the Action field, select Block.
- In the Notifications field, select Email notification, and select a user as the recipient. The selected user receives an email every time a user attempts to download too many records. You can also enable in-app notification.
- Name the policy
Prevent Large Data Export.
- Don’t enable the policy just yet—you do that after you’ve finished editing the Apex class.

- Click Finish.
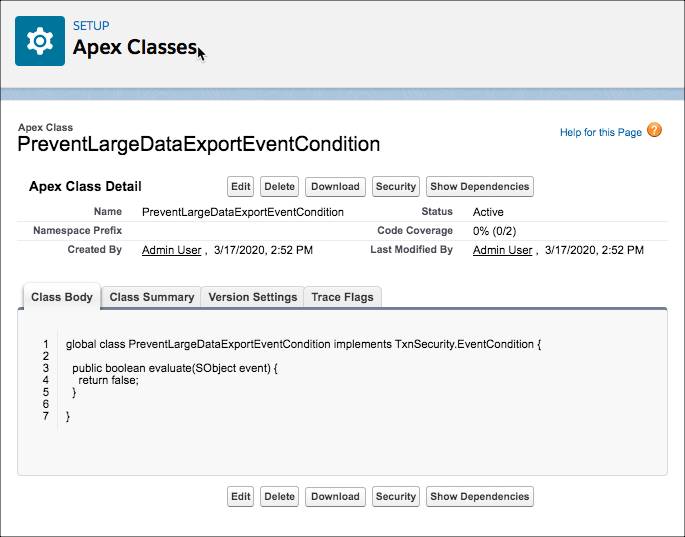
Now you are back at the Transaction Security Policies home page. Remember earlier in this unit how you specified that you wanted to create a new empty Apex class for your policy? The auto-generated class name consists of the policy name without blanks and with EventCondition appended: PreventLargeDataExportEventCondition. This new class is listed in the Apex Condition column.

Your new policy doesn’t really do much yet because the Apex class doesn’t contain the required code. You tackle that in the next section.
Edit the Apex Class
Let’s add the Apex code that implements your use case. Don’t worry, you don’t need to actually write the code, we provide it and explain the important parts.
- From the main Transaction Security Policies page, click on PreventLargeDataExportEventCondition in the Apex Condition column. This brings you to a Setup page where you can edit the Apex class.
- Now let’s edit the template class and add some useful Apex code.
- Click Edit.
- Replace the existing code with this code.
global class PreventLargeDataExportEventCondition implements TxnSecurity.EventCondition { public boolean evaluate(SObject event) { switch on event{ when ReportEvent reportEvent { return evaluate(reportEvent); } when null { // Don't take policy action when event is null return false; } when else{ // Don't take policy action when event is not handled return false; } } } /** * Handle evaluating ReportEvent */ private boolean evaluate(ReportEvent reportEvent){ Profile profile = [SELECT Name FROM Profile WHERE Id IN (SELECT profileId FROM User WHERE Id = :reportEvent.UserId)]; // Take policy action only if the user profile is not 'Data Steward' and // RowsProcessed greater than 10. if (!profile.Name.contains('Data Steward') && reportEvent.RowsProcessed > 10) { return true; } return false; } } - Click Save.
Congratulations, your first Apex-based Transaction Security policy is ready to go. Now let’s talk about what that new code does.
Understand the Apex Code
This is a plain-language explanation of the Apex code in the PreventLargeDataExportEventCondition class. While you’re not required to have Apex experience, it helps if you have some general programming knowledge.
First let’s refamiliarize ourselves with the use case. The policy action (in this case Block) is triggered if both of these conditions are true:
- The user doesn’t have the Data Steward profile.
- The user views or exports more than 10 records of a report.
The PreventLargeDataExportEventCondition class implements this use case. Let’s first examine the basic structure of the class, such as its methods and implementation interface.
- The PreventLargeDataExportEventCondition class implements the TxnSecurity.EventCondition Apex interface, a requirement for Apex-based Transaction Security policies.
- The TxnSecurity.EventCondition interface requires a method called evaluate(SObject). The method takes an SObject parameter and returns a Boolean value (true/false.) The returned Boolean determines if the policy triggers (true) or not (false.)
- In the evaluate(SObject) method, a switch statement transforms the passed-in SObject into an event. Using a switch statement means that this same method can handle multiple event types. In our example, the SObject is transformed into a ReportEvent.
- The ReportEvent is then passed to a helper method called evaluate(ReportEvent). This is where all the condition testing happens.
Let’s look more closely at the Apex code inside the evaluate(ReportEvent) helper method because that’s where you implement the specific conditions of the use case.
First, the code gets the Profile of the user who triggered the event by executing a SOQL query on the Profile and User objects:
Profile profile = [SELECT Name FROM Profile WHERE Id IN
                            (SELECT profileId FROM User WHERE Id = :reportEvent.UserId)];
Now that we know the Profile, we can test our conditions. This Apex code returns true if the Profile name doesn’t contain the string Data Steward and the rows processed in the event is more than 10, which means the user viewed or exported more than 10 records from the report:
if (!profile.Name.contains('Data Steward')
            && reportEvent.RowsProcessed > 10) {
            return true;
        }
The final line of evaluate(ReportEvent) simply specifies that the method returns false if both conditions aren’t met:
return false;
Before we talk about when your new Apex class will actually execute, let’s recap how Transaction Security works. When an event occurs, and it’s supported by Transaction Security, the event checks to see if any policies exist for that event. If there’s a match, the policy executes either its Apex code or the Condition Builder logic to see if the event meets the criteria to trigger the policy. If it does, Transaction Security takes the action and issues any notifications for that policy.
Continuing with our example, PreventLargeDataExportEventCondition runs only when Transaction Security gets a ReportEvent. Transaction Security triggers the policy only if PreventLargeDataExportEventCondition says that the event meets the policy criteria. This entire checking process takes a fraction of a second.
What's Next?
Now that you’ve practiced creating policies that track report usage in your org, check out the other events you can track, such as list view usage and logins. The Transaction Security world is fun and exciting, so go forth and monitor!
Get Ready for the Hands-on Challenge
In the hands-on challenge, you create a Transaction Security policy using Apex. This is the code you use for the challenge. The challenge then asks you to make a few more changes to this code.
global class BlockLargeDataExportEventCondition implements TxnSecurity.EventCondition {
    public boolean evaluate(SObject event) {
        switch on event{
            when ReportEvent reportEvent {
                return evaluate(reportEvent);
            }
            when null {
                // Don't take policy action when event is null
                return false;
            }
            when else{
                // Don't take policy action when event is not handled
                return false;
            }
        }
    }
    /**
     * Handle evaluating ReportEvent
     */
    private boolean evaluate(ReportEvent reportEvent){
        Profile profile = [SELECT Name FROM Profile WHERE Id IN
                            (SELECT profileId FROM User WHERE Id = :reportEvent.UserId)];
        // Take policy action only if the user profile is not 'Data Steward' and
        // RowsProcessed greater than 10.
        if (!profile.Name.contains('Data Steward')
            && reportEvent.RowsProcessed > 10) {
            return true;
        }
        return false;
    }
}
Resources
- Salesforce Help: Create a Transaction Security Policy That Uses Apex
- Apex Developer Guide: TxnSecurity.EventCondition Interface