Set Up Predictions in Salesforce
Learning Objectives
After completing this unit, you’ll be able to:
- Describe the prerequisites for using Einstein Prediction Service.
- Explain the steps involved with building and deploying an Einstein Discovery model.
Introduction
To get predictions and improvements, you first need a predictive model. In this unit, you learn how to build and deploy a model in Salesforce using Einstein Discovery and CRM Analytics Studio. The goal of the model is to maximize sales per customer for a fictional retail superstore.
Einstein Discovery makes it easy to get your model up and running quickly using clicks-not-code tools. Einstein Discovery performs a comprehensive data analysis powered by statistics, machine learning, and AI. Even if you rely on others to produce the models you consume, it’s useful to understand what’s involved to create them.
Try Einstein Discovery with a Developer Edition Org
For this Trailhead module, you can’t use an existing Developer Edition org. Instead, sign up for a free CRM Analytics Developer Edition org, because:
- It comes provisioned with the CRM Analytics Plus license required for Einstein Discovery.
- It has the CRM Analytics Plus permission set required to access Einstein Discovery features. This includes the Manage Connected App permission needed to create a connected app for authentication of the REST client requests.
- It provides a safe environment where you can practice the skills you’re learning.
Note: Even if you already have a CRM Analytics Developer Edition org, sign up for a new one now. The older CRM Analytics Developer Edition orgs don’t get recently released features. Therefore, signing up for a new one ensures that you get the latest and greatest capabilities.
To sign up:
- Go to developer.salesforce.com/promotions/orgs/analytics-de.
- Fill out the form using an active email address.
- After you fill out the form, click Sign me up.
- When you receive the activation email, open it and click the link.
- Complete your registration, and set your password and challenge question.
- Click Save. You are logged in to your CRM Analytics Developer Edition org and redirected to the Setup page.
Way to go! You now have a Salesforce org! Let's jump right in.
Note: You need your credentials later in the module. Be sure to save them somewhere safe so you can retrieve them easily.
Workflow for Prediction Set Up
You complete the following activities using Analytics Studio.
| # | Step | Activity |
|---|---|---|
|
1 |
Prep Data |
Prep and populate a CRM Analytics dataset with training data. |
|
2 |
Create Model |
Using the training data, create an Einstein Discovery model. |
|
3 |
Deploy Model |
Operationalize the model by deploying it into Salesforce. Once deployed, users can access it to get predictions for their data. |
Step 1: Prep Your Data
Begin by loading your training data into a CRM Analytics dataset. You use this data to train your model.
Download the Sample Training Data
We’ve prepared a file with sample training data for a superstore’s current orders. Download the CSV file called superstore-orders.csv and save it to your computer.
Considerations About the Sample Training Data
This sample training data has been simplified so that you can focus on learning how to get predictions via the Einstein Prediction Service. When using this sample data, keep the following in mind.
- Our example CSV file contains a small number of columns. In practice, your use cases may involve more columns of training data.
- Our example CSV file contains almost 10,000 rows of data. In general, the more rows of data you have to analyze, the better the results. Your training data needs at least 400 rows with outcome values. When training models, Einstein ignores rows that don’t have outcome values. Powered by AI and machine learning, you can analyze up to 20 million rows of data with Einstein Discovery!
- The sample data is completely external and is not associated with any Salesforce object. In practice, your use cases may involve data in Salesforce objects, data that is external to Salesforce, or a combination of both (via supplemental datasets).
- The model built from this sample data is for training purposes. It’s designed to get you up and running so that you can quickly start getting predictions via REST API calls. However, the model produced by this sample data is not highly accurate or exemplary of the quality models you might want to produce for your use cases. The performance of your model depends on the quality of your training dataset. To learn more, see Prepare Data for Analysis in Salesforce help.
Create and Populate a CRM Analytics Dataset
The next step is to get the data from the CSV file into a CRM Analytics dataset.
- If you’re not already logged in, log in to the Developer Edition org that you just signed up for.
- From the App Launcher (
 ), find and select Analytics Studio.
 - On the Analytics Studio home tab, click Create | Dataset, and select CSV File.
- In the file-selection window that opens, find the CSV file—superstore-orders.csv—you downloaded, select it, and then click Next.
- In the Dataset Name field, change the default name (superstore-orders), if you want. By default, Analytics Studio uses the file name as the dataset name. The name cannot exceed 80 characters.
- Select the app where you want to create the dataset. By default, Analytics Studio selects My Private App.
- Click Next. The Edit Field Attributes screen appears. Here, you can preview the data, and view or edit the attributes for each field.
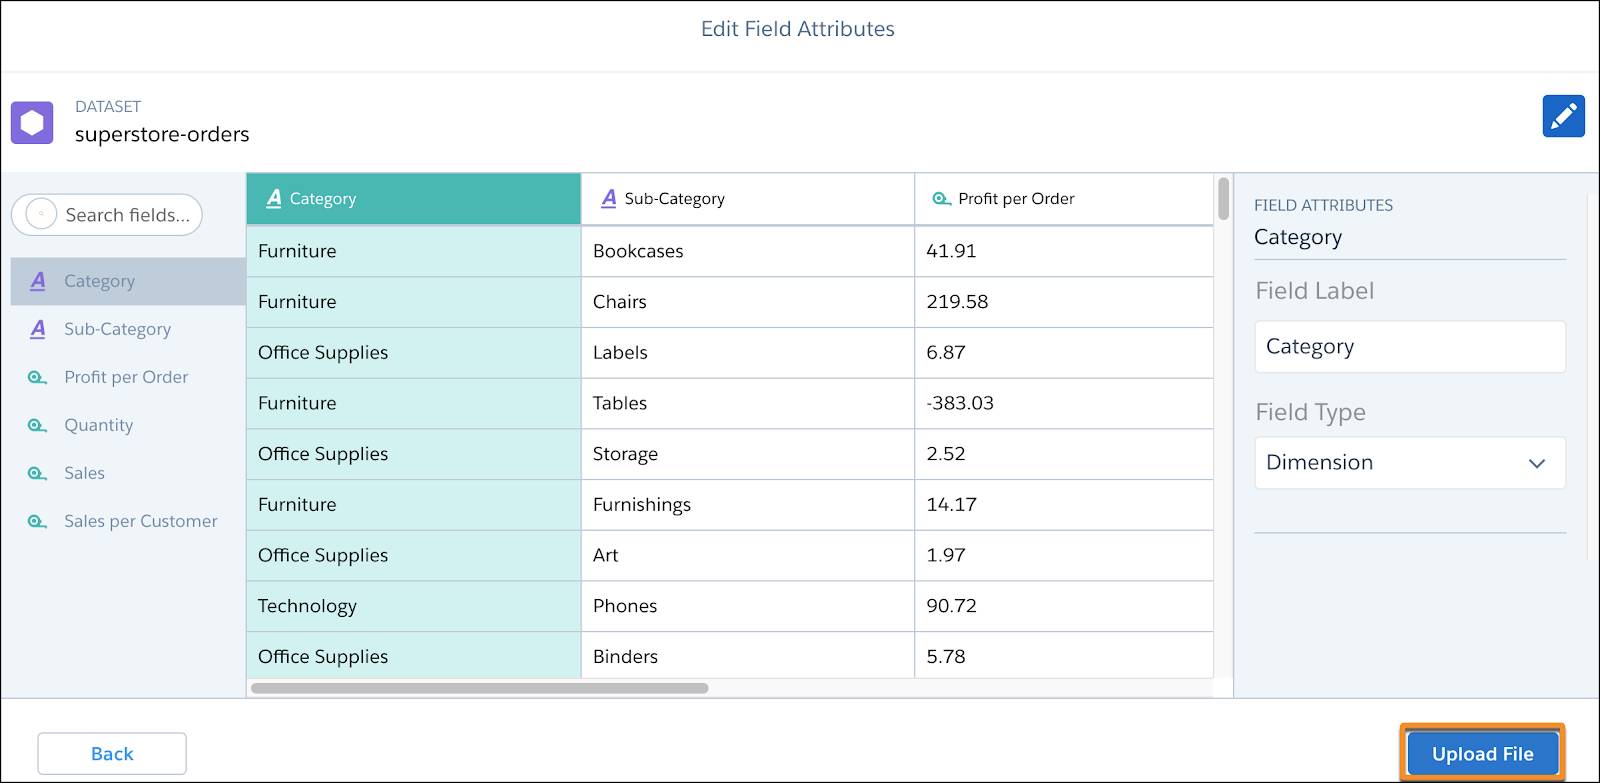
- For now, accept the defaults, and click Upload File. Analytics Studio uploads the data, prepares and creates the dataset, and shows you progress as it happens.
Step 2: Create Your Model
Now that you’ve built a CRM Analytics dataset, let’s analyze its data by creating a model.
A model defines the data and analytical settings that Einstein Discovery uses to generate insights. Model settings include the outcome variable (the data you want to predict), whether to maximize or minimize the outcome variable, the data to analyze in a CRM Analytics dataset, and other preferences. Model settings tell Einstein Discovery how to conduct the analysis and communicate its results.
- In the Dataset tab, click Create Model.
 The Einstein Discovery model setup wizard walks you through the steps to create a model from the dataset.
 - In the Start an Einstein Discovery Model screen, specify the model goal, which defines the outcome you want to predict, as well as whether you want to maximize or minimize that outcome. In I want to Predict, select Sales per Customer, and then accept the default, Maximize. Accept all other the default settings and click Next.

- In the Configure Model Columns screen, accept the default (Automated), and click Create Model.
 Einstein begins analyzing the data using statistical analysis, machine learning algorithms, and AI.
 When finished, Einstein displays the insights it uncovered during analysis.
Note: For this module, we’re going to skip investigating insights (which is covered in the Einstein Discovery Basics module). Instead, let’s move directly into evaluating and deploying the model that Einstein created.
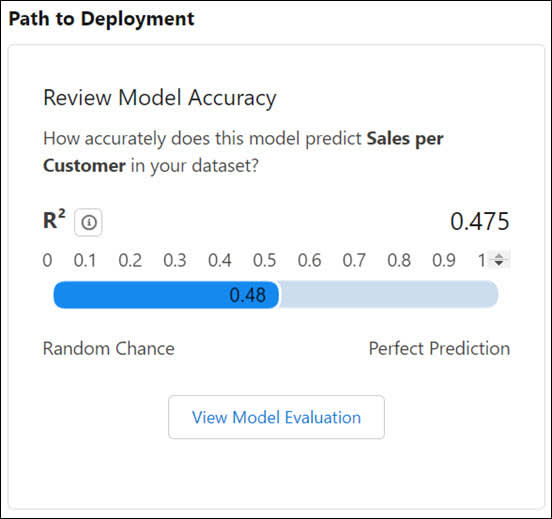
- Einstein shows you the R2 (r-squared) value for this model. R2 is a measure of model quality for numeric use cases. Our model has an R2 value of 0.475. Ideally, our R2 value would be closer to 1, but for our learning purposes, this model will suffice.
- Click Prediction Examination. Notice that the right panel compares, for the selected row in the training data, the predicted outcome with the actual outcome, as well as the top factors that contributed to the predicted outcome.
 Note: Einstein Discovery takes a random sampling of the data in the dataset, so the data on your screen will differ from this screenshot.
 - Click any row to update this panel.
Step 3: Deploy the Model
Now let’s deploy this model into Salesforce.
- Click Overview, then respond to the Ready for Launch? prompt by choosing Deploy Model.

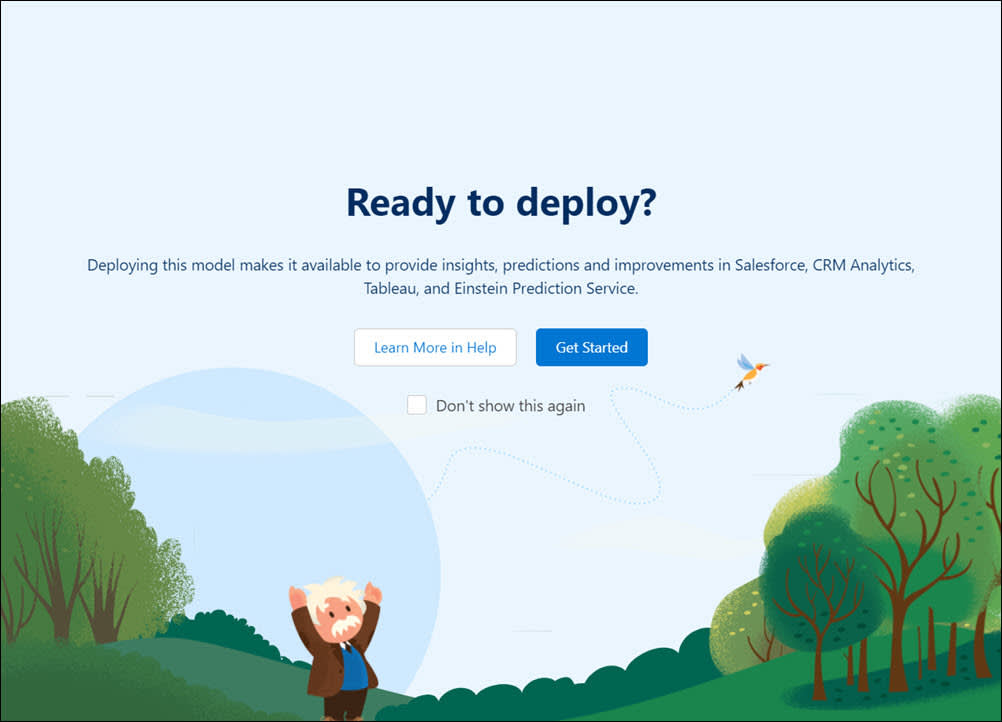
- The Einstein Discovery deployment wizard walks you through the steps to deploy this model. If you see the Ready to Deploy modal, click Get Started.
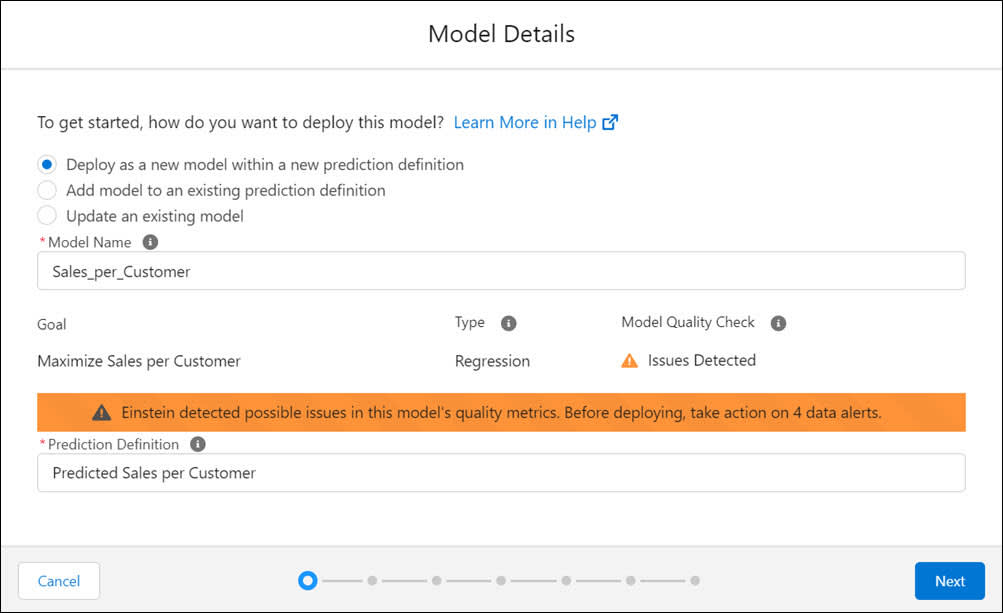
- For model details, accept the defaults, including the Prediction Definition name of Predicted Sales per Customer, and then click Next.
- For connecting to an object, select Deploy without connecting to a Salesforce Object, and then click Next. We can make this selection because our sample data is completely external to Salesforce and not associated with any Salesforce object.

- For segments, accept the default Don't segment, and then click Next.
Note: If you wanted to create a prediction definition with multiple models, this is where you’d define filter conditions for a segment in your data. We can skip this because we’re creating a prediction definition with only one model and no segment filters.
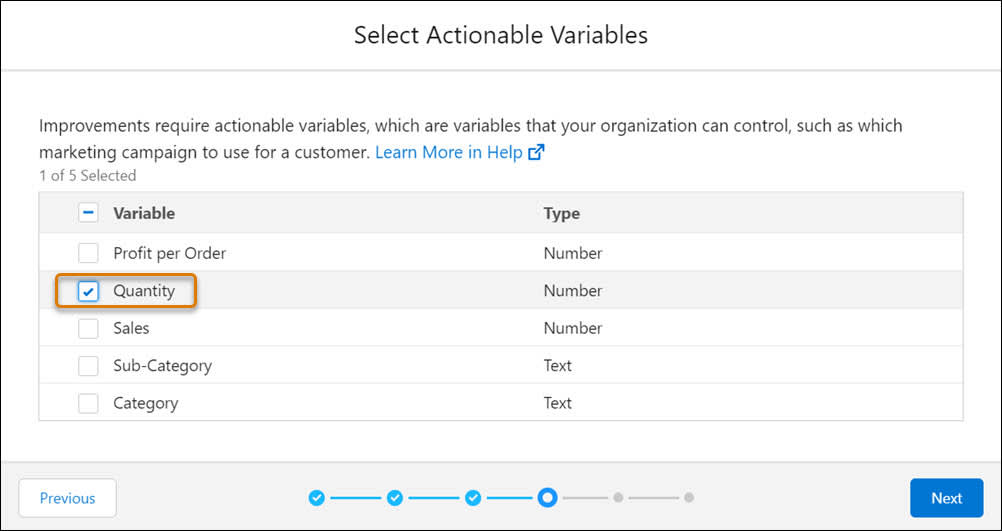
- For actionable variables, select Quantity, and then click Next.
- For customized predictions, select Don't customize, and then click Next.
Note: If you wanted to customize the text for suggested improvements or top predictors to make it easier for your users to understand, this is where you’d do that.
- Review the deployment settings, then click Deploy.
 Einstein deploys the prediction definition with your model into Salesforce and shows it in Model Manager.
 Note: This is only one model. A prediction definition can have multiple models.
 - Click the Advanced subtab.
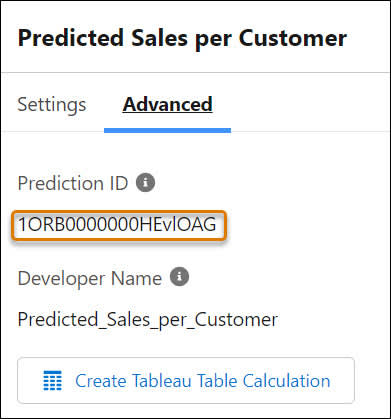
- Copy the Prediction ID (the preceding figure shows an example), and paste it somewhere that you can refer to later. Knowing this ID string helps you identify the exact prediction definition you want to consume. As a developer, if you don’t have access to Salesforce or Model Manager, you can ask a Salesforce admin for this string.
Great! Your prediction definition and model are deployed and ready for use. In the next unit, you use Einstein Prediction Service to get predictions from your model.