Get Predictions with REST Requests
Learning Objectives
After completing this unit, you’ll be able to:
- Describe what’s required to access Einstein Prediction Service from a REST client.
- Create a connected app to manage authentication for your REST API requests.
- Use your REST client to interact with the Einstein Prediction Service.
Introduction
Now that your model is deployed in Salesforce, you can use Einstein Prediction Service to get predictions using your favorite REST client.
Before You Begin
The CRM Analytics-enabled DE org that you signed up for in the previous unit gives you everything you need to complete the steps in this unit.
However, after you complete this module, the following prerequisites are required to interact with Einstein Prediction Service using a REST client.
- CRM Analytics Plus license or Einstein Predictions license, both of which are available for an extra cost.
- A user account with the View Einstein Discovery Recommendations system permission
- Your favorite REST client for submitting requests and handling results. In this unit, we use instructions and example screenshots for the Postman app (desktop version). However, the tasks for interacting with Einstein Prediction Service resources are similar across most REST clients, so you’re welcome to use a different tool and follow along using comparable steps. To get the Postman desktop app, go to www.postman.com and navigate to the Postman app download page.
Note: The instructions in this unit were tested with the Postman desktop version. Postman Web, which requires special setup instructions for Salesforce, has not been approved for use with this Trailhead module. - Access to a managed app in Salesforce that authorizes REST API requests from your REST client. To create a connected app in Salesforce, your user account must have the Manage Connected App permission.
Note: In your organization, your Salesforce admin might create the managed app for you.
Step 1: Create a Connected Application in Salesforce
Begin by creating a connected app so that your REST client can connect securely to your Salesforce org. To learn more, see the Connected App Basics Trailhead module.
- From Setup, in the Quick Find box, enter
appsand then click App Manager.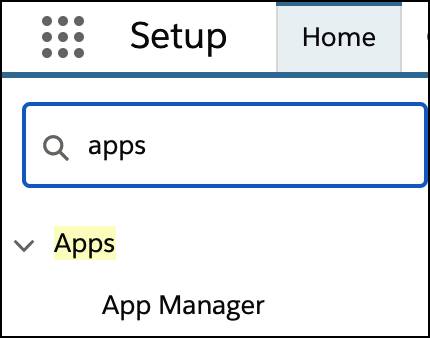
- In Lightning Experience App Manager, click New Connected App. Then, in the New Connected App page, specify the following basic information.
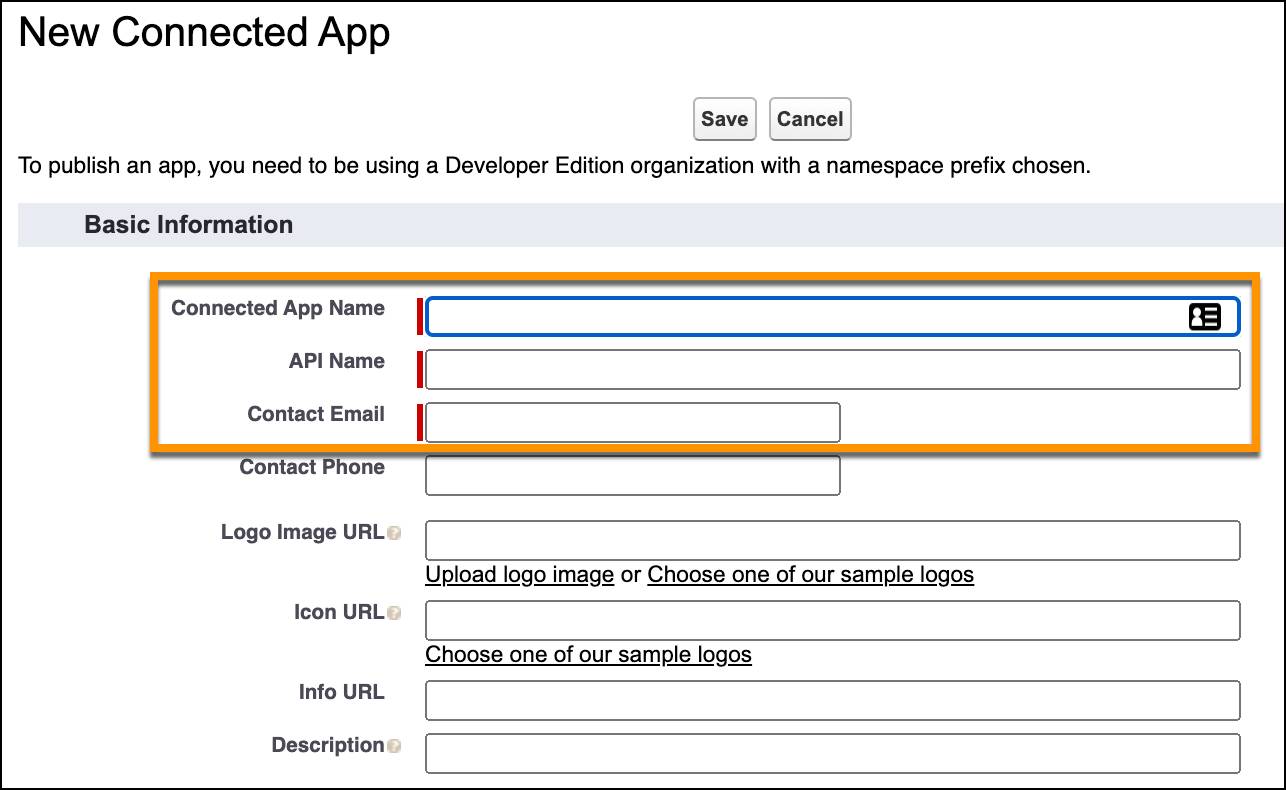
Setting Description Connected App Name Specify a name that is descriptive and easily distinguishable. API Name Use the Salesforce API Name structure. Contact Email Specify the email address associated with your user credentials. - Next, select the Enable OAuth Settings checkbox and specify the following settings.

Setting Description Callback URL This example uses https://login.salesforce.com/services/oath2/callback. You can use the URL associated with your Salesforce org (for example,https://test.salesforce.com/services/oauth2/callback).Selected OAuthScopes Add the following OAuth scopes: - Access Analytics REST API resources (wave_api)
- Manage user data via APIs (api)
- Save your settings, then click Continue to create the Connected App.
- Click Manage Consumer Details.

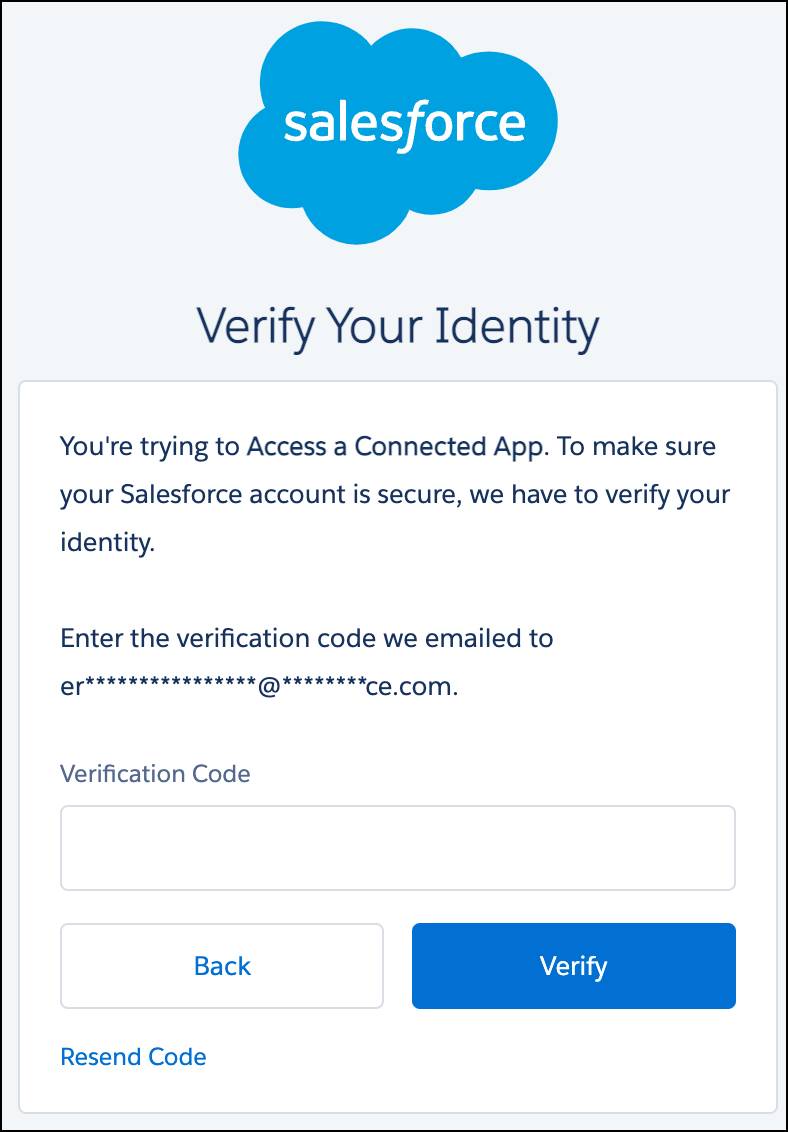
- If prompted, provide the verification that was emailed to you, then click Verify.
When creating the connected app, Salesforce generates two credentials: a Consumer Key and a Consumer Secret.
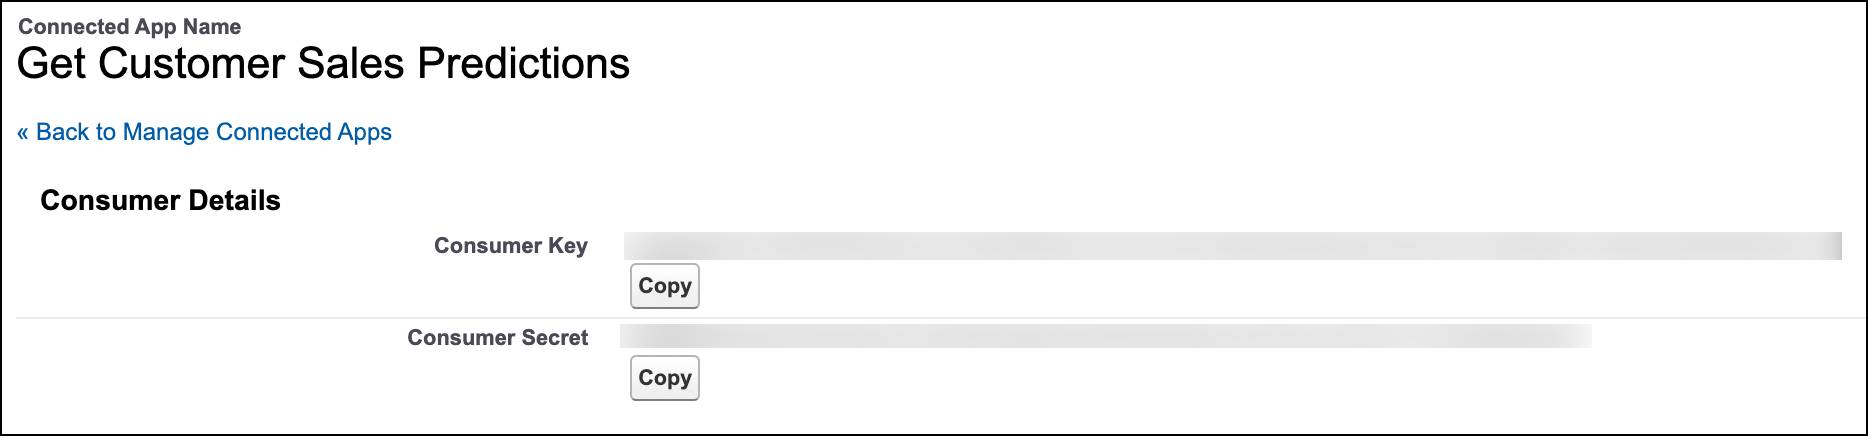 These are the credentials you need later when you connect from your REST client to Salesforce via this Connected App.
- Your Consumer Key will serve as your client ID.
- Your Consumer Secret will serve as your client secret.
Keep this window open so that you can copy the Consumer Key and Consumer Secret later in this unit.
Step 2: Set Up Authentication in the REST Client
Next, let’s set up authentication in your REST client using the Connected App credentials you just created. Authentication is required for access to the Einstein Prediction Service.
Note: The following instructions use the Postman client (desktop app) as an example, but you can use any REST API client with comparable functionality.
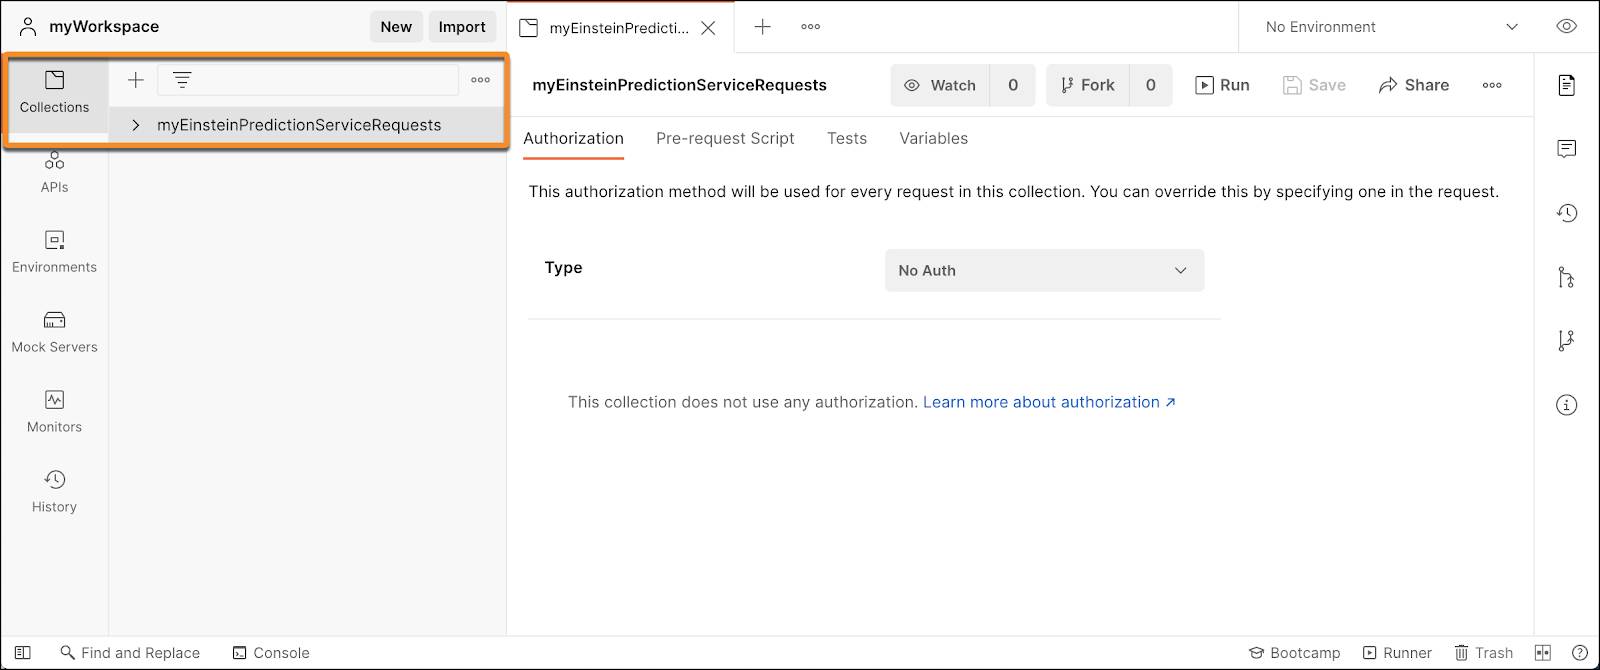
In Postman, create a new workspace, if necessary. Then, create a new collection (optional but recommended) using a descriptive name. A collection stores all of your Einstein Prediction Service requests in a single place.
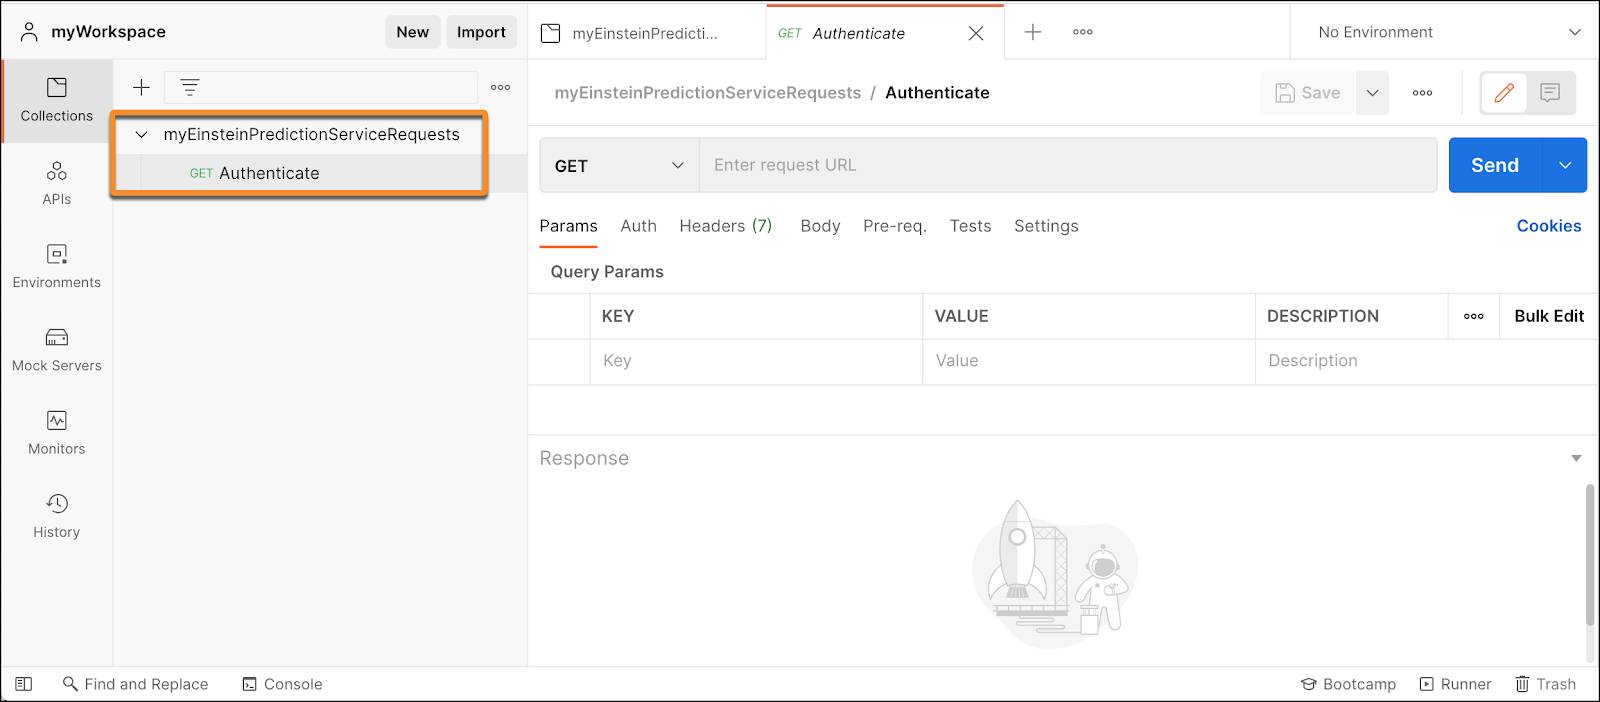
- Select the collection in the list, click Add request, and then rename this request Authenticate.
- Next, configure the following params for the Authenticate request.
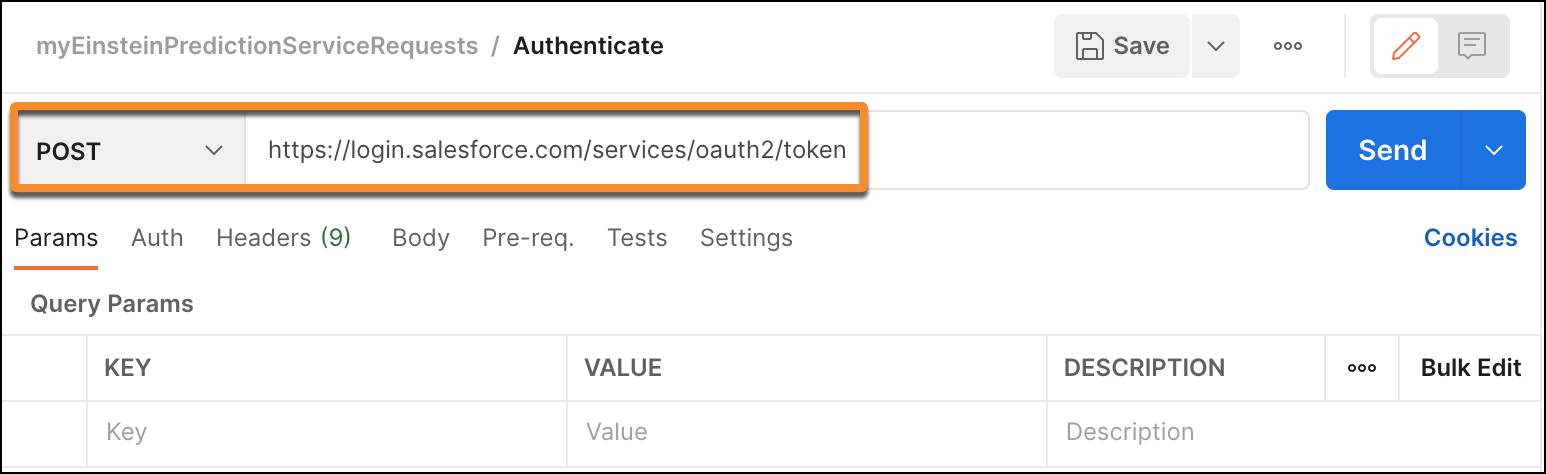
Setting Description Request Type Change to POST Request URL Specify https://login.salesforce.com/services/oauth2/token
- Click the Body tab, change the Body Type to x-www-form-urlencoded, then add the following keys and values.
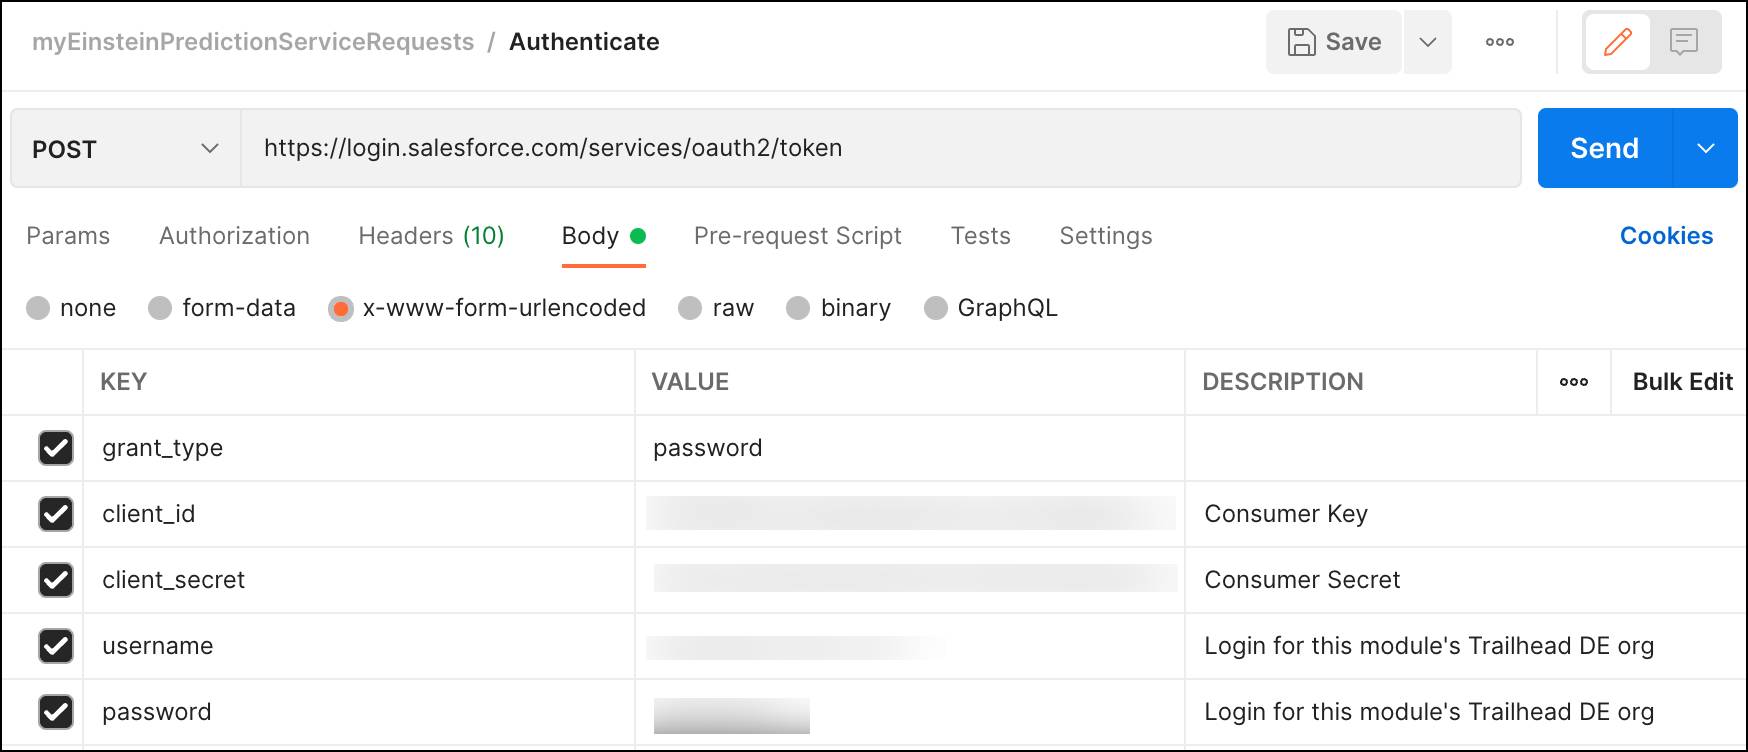
Key Value grant_typeSpecify password.client_idCopy and paste the Consumer Key from the Connected App you created previously. client_secretCopy and paste the Consumer Secret from the Connected App you created previously. usernameSpecify the user name for the account associated with your DE Trailhead org. passwordSpecify the password for the account associated with your DE Trailhead org.
- Save the request, then click Send. If you configured your settings correctly, you should see a response that is similar to the following example (note that security information has been intentionally obscured).
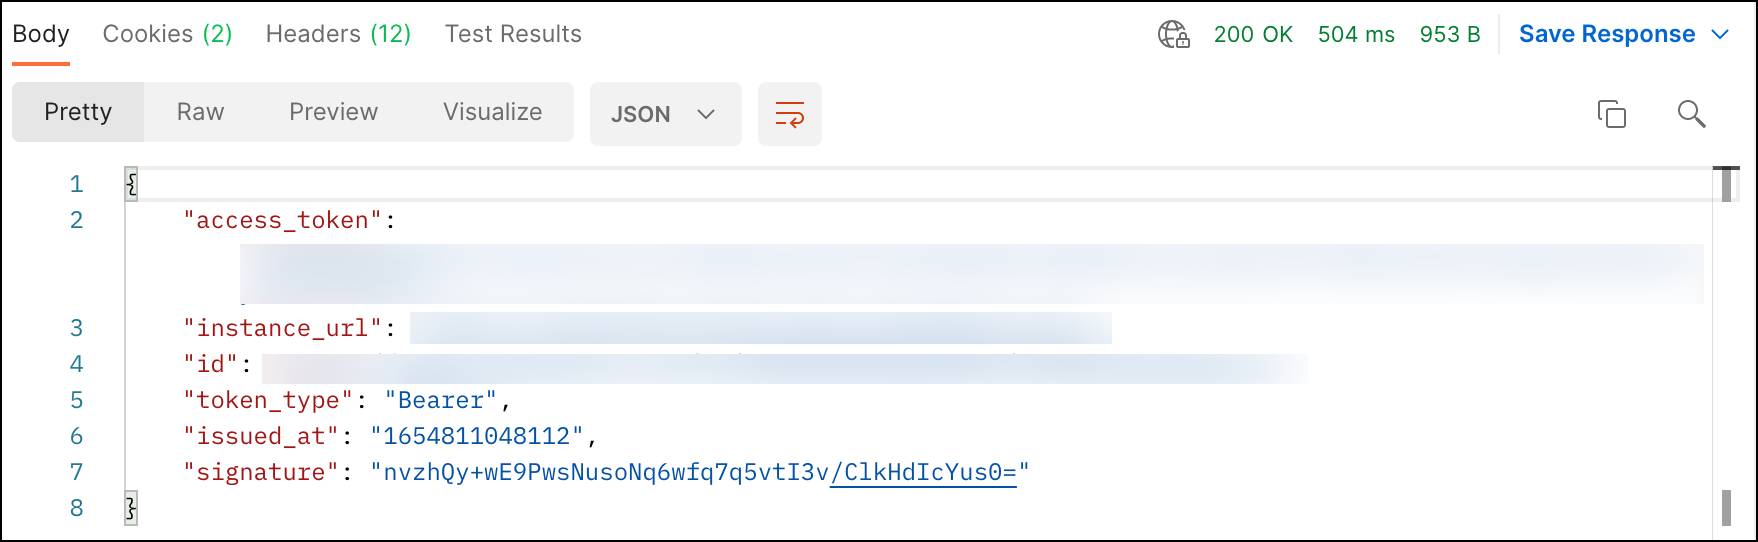
- Finally, complete the following steps:
- Copy the
access_tokenstring and paste it somewhere for later. You need this to run API requests for Einstein Prediction Service. - Copy the
instance_URLstring and paste it somewhere for later. You need this for subsequent requests.
- Copy the
Now you’re ready to create and submit your REST API requests to Einstein Prediction Service!
Step 3: Get Available Prediction Definitions
Let’s begin by retrieving the list of all available prediction definitions in our org.
- Create a new GET request and name it Get Prediction Definitions. Configure the request using the following settings.

Setting Description Request Type GET Request URL Specify instance_URL/services/data/v55.0/smartdatadiscovery/predictionDefinitions, whereinstance_URLwas returned from your authentication request.
- Click the Authorization tab and configure the following settings.
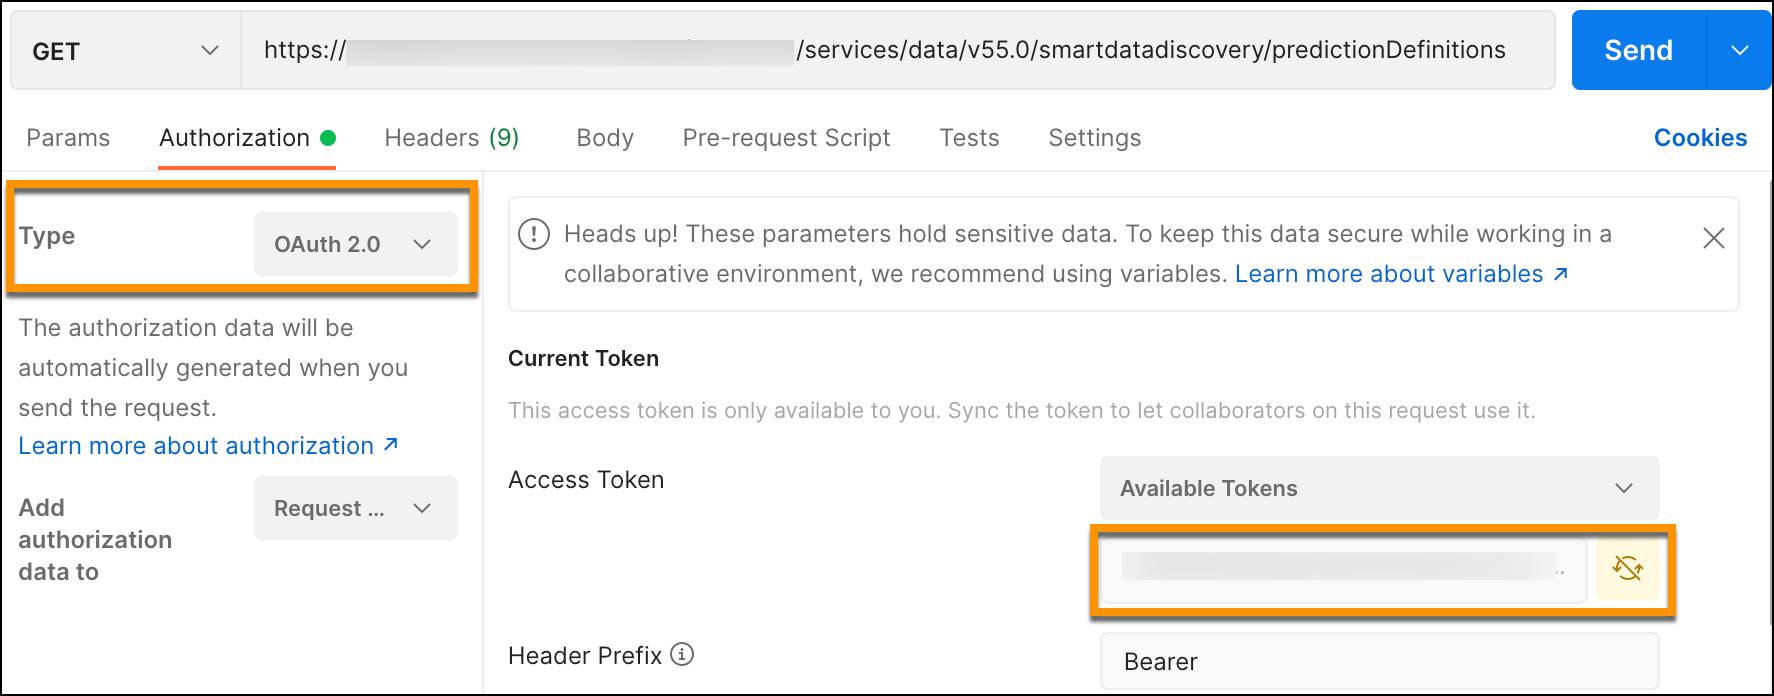
Setting Description Authorization Type Select OAuth2.0. Set Access Token Paste the access token you saved from the previous step.
- Save the request, then click Send. If you configured your request settings correctly, you should see a response that is similar to the following example.
{
  "nextPageUrl": null,
  "predictionDefinitions": [
    {
      "countOfActiveModels": 1,
      "countOfModels": 1,
      "createdBy": {
        "id": "your-account-id",
        "name": "your-name",
        "profilePhotoUrl": "https://xxx-instance-url-xxx/profilephoto/005/T"
      },
      "createdDate": "2022-06-09T21:23:54.000Z",
      "id": "1ORB00000008RSROA2",
      "label": "Sales_per_Customer",
      "lastModifiedBy": {
        "id": "your-account-id",
        "name": "your-name",
        "profilePhotoUrl": "https://xxx-instance-url-xxx/profilephoto/005/T"
      },
      "lastModifiedDate": "2022-06-09T21:23:54.000Z",
      "modelsUrl": "/services/data/v55.0/smartdatadiscovery/predictiondefinitions/1ORB00000008RSROA2/models",
      "name": "Sales_per_Customer",
      "outcome": {
        "goal": "Maximize",
        "label": "Sales per Customer",
        "name": "Sales_per_Customer"
      },
      "predictionType": "Regression",
      "status": "Enabled",
      "url": "/services/data/v55.0/smartdatadiscovery/predictiondefinitions/1ORB00000008RSROA2"
     }
  ],
  "totalSize": 1,
  "url": "/services/data/v55.0/smartdatadiscovery/predictiondefinitions?pageSize=25"
}
Step 4: Get Prediction Definition Metadata
The response in Step 3 includes the URL for retrieving the metadata for the prediction definition you created in the previous unit. It should look similar to the following example.
/services/data/v55.0/smartdatadiscovery/predictiondefinitions/1ORB00000008RSROA2
The prediction ID matches the one you saw earlier in Model Manager.
- Add a new GET request, name it Get Prediction Definition, and substitute this request string in the URL. Remember to include the
instance_Url.instance_Url/services/data/v55.0/smartdatadiscovery/predictiondefinitions/1ORB00000008RSROA2
- Also, configure the Authorization settings (Authorization Type and Access Token) as before. Click Send and review the response. It should look similar to the following example.
{
  "countOfActiveModels": 1,
  "countOfModels": 1,
  "createdBy": {
    "id": "your-account-id",
    "name": "your-name",
    "profilePhotoUrl": "https://xxx-instance-url-xxx/profilephoto/005/T"
  },
  "createdDate": "2022-06-09T21:23:54.000Z",
  "id": "1ORB00000008RSROA2",
  "label": "Sales_per_Customer",
  "lastModifiedBy": {
    "id": "your-account-id",
    "name": "your-name",
    "profilePhotoUrl": "https://xxx-instance-url-xxx/profilephoto/005/T"
  },
  "lastModifiedDate": "2022-06-09T21:23:54.000Z",
  "modelsUrl": "/services/data/v55.0/smartdatadiscovery/predictiondefinitions/1ORB00000008RSROA2/models",
  "name": "Sales_per_Customer",
  "outcome": {
    "goal": "Maximize",
    "label": "Sales per Customer",
    "name": "Sales_per_Customer"
  },
  "predictionType": "Regression",
  "status": "Enabled",
  "url": "/services/data/v55.0/smartdatadiscovery/predictiondefinitions/1ORB00000008RSROA2"
}
Step 5: Get Models Associated with a Prediction
The response in Step 4 includes the URL for retrieving metadata for the model you deployed in the previous unit. It should look similar to the following example.
/services/data/v55.0/smartdatadiscovery/predictiondefinitions/1ORB00000008RSROA2/models
- Add a new GET request, name it Get Models, and substitute this request string in the URL. Remember to include the
instance_Url.instance_Url/services/data/v55.0/smartdatadiscovery/predictiondefinitions/1ORB00000008RSROA2/models
- Also, configure the Authorization settings (Authorization Type and Access Token) as before. Click Send and review the response. It should look similar to the following example.
{
  "models": [
    {
      "createdBy": {
        "id": "your-account-id",
        "name": "your-name",
        "profilePhotoUrl": "https://xxx-instance-url-xxx/profilephoto/005/T"
      },
      "createdDate": "2022-06-09T21:23:55.000Z",
      "fieldMappingList": [
        {
          "modelField": {
            "label": "Quantity",
            "name": "Quantity",
            "type": "Number"
          }
        },
        {
          "modelField": {
            "label": "Sub-Category",
            "name": "Sub_Category",
            "type": "Text"
          }
        },
      {
        "modelField": {
          "label": "Category",
          "name": "Category",
          "type": "Text"
        }
      },
      {
        "modelField": {
          "label": "Sales",
          "name": "Sales",
          "type": "Number"
        }
      },
      {
        "modelField": {
          "label": "Profit per Order",
          "name": "Profit_per_Order",
          "type": "Number"
          }
        }
      ],
      "filters": [],
      "historyUrl": "/services/data/v55.0/smartdatadiscovery/predictiondefinitions/1ORB00000008RSROA2/models/1ORB00000008RSROA2/histories",
      "id": "1Ot4W000000XezqSAC",
      "isRefreshEnabled": false,
      "label": "Sales_per_Customer",
      "lastModifiedBy": {
        "id": "your-account-id",
        "name": "your-name",
        "profilePhotoUrl": "https://xxx-instance-url-xxx/profilephoto/005/T"
      },
      "lastModifiedDate": "2020-08-31T21:23:55.000Z",
      "model": {
         "id": "1OT4W000000LejUWAS"
      },
      "modelType": "Regression",
      "name": "Sales_per_Customer",
      "predictionDefinitionUrl": "/services/data/v55.0/smartdatadiscovery/predictiondefinitions/1ORB00000008RSROA2",
      "prescribableFields": [
        {
          "customDefinitions": [],
          "field": {
            "label": "Quantity",
            "name": "Quantity",
            "type": "Number"
          }
        }
      ],
      "sortOrder": 0,
      "status": "Enabled",
      "url": "/services/data/v55.0/smartdatadiscovery/predictiondefinitions/1ORB00000008RSROA2/models/1Ot4W000000XezqSAC"
    }
  ],
  "totalSize": 1,
  "url": "/services/data/v55.0/smartdatadiscovery/predictiondefinitions/1ORB00000008RSROA2/models"
}
Notice the fieldMappingList, which provides the list of fields in the model. We use these in the next step.
Step 6: Get Predictions
Now that you’ve practiced interacting with the Einstein Prediction Service, let’s get some predictions!
- Add a new request, name it Get Predictions, and configure the following params.

Setting Description Request Type Change to POST Request URL Specify instance_URL/services/data/v55.0/smartdatadiscovery/predict, whereinstance_URLwas returned from your authentication request.
- Configure the Authorization settings (Authorization Type and Access Token) as before. For Add Authorization Request To, be sure to select Request Headers.
- Because this is a POST call, we need to specify the request body. Click the Body tab and select the following options.
Setting Description Body Type Select RAW Body Type Request Select JSON
- Add the request body in JSON format.
{  "predictionDefinition": "yourPredictionDefinitionId",
   "type": "RawData",
   "columnNames": ["Quantity","Category","Sub_Category","Sales","Profit_per_Order"],
   "rows": [
      ["2","Furniture","Chairs","300","10"]
   ]
}
- Substitute
yourPredictionDefinitionIdwith the prediction ID that you retrieved previously. A few notes about this request body.
Element Notes "type": "RawData"Using the RawDatatype allows us to specify raw input values directly in the prediction request. There are two other types,RecordsandRecordOverrides, that you can use when the prediction is associated with a Salesforce object. However, our prediction is not affiliated with a Salesforce object."columnNames"Comma-separated list of names that the model expects as input variables. These correspond to the "modelField": "Name"element in thefieldMappingListreturned in the response in Step 5."rows"Comma-separated list of text values to send to the model. These are the input variables that the model uses to derive a prediction.
- Save your request, click Send, and review the response. It should look similar to the following example.
{
  "predictionDefinition": "1ORB00000008RSR",
  "predictions": [
      {
        "model": {
          "id": "1OtB00000008S34KAE"
         },
      "prediction": {
        "middleValues": [],
        "total": 88.68177540182317
      },
      "prescriptions": [],
      "status": "Success"
    }
  ],
  "settings": {
    "maxMiddleValues": 0,
    "maxPrescriptions": 0,
    "prescriptionImpactPercentage": 0
  }
}
The "prediction": "total" value is the predicted sales per customer that the model calculated based on your input values.
- Next, copy and paste the following code into your request body (replacing what’s there currently). Add your prediction ID, and then click Send.
{  "predictionDefinition": "yourPredictionDefinitionId",
  "type": "RawData",
  "columnNames": ["Quantity","Category","Sub_Category","Sales","Profit_per_Order"],
  "rows": [
    ["2","Furniture","Chairs","262","42"],
    ["5","Office Supplies","Art","7","25"]
  ]
}
The response should look similar to the following example (prediction values might differ).
{
  "predictionDefinition": "1ORB00000008RSR",
  "predictions": [
    {
      "model": {
        "id": "1OtB00000008S34KAE"
      },
      "prediction": {
        "middleValues": [],
        "total": 88.68177540182317
      },
      "prescriptions": [],
      "status": "Success"
    },
    {
      "model": {
        "id": "1OtB00000008S34KAE"
      },
      "prediction": {
        "middleValues": [],
        "total": -155.263449836085
      },
      "prescriptions": [],
      "status": "Success"
    }
  ],
  "settings": {
    "maxMiddleValues": 0,
    "maxPrescriptions": 0,
    "prescriptionImpactPercentage": 0
  }
}
The order of the predictions in the response match the order of the input values in the request body.
- Finally, let’s also retrieve top factors and improvements in the response. Remove the second line of data, add the following lines to your request, and then click Send.
{  "predictionDefinition": "yourPredictionDefinitionId",
  "type": "RawData",
  "columnNames": ["Quantity","Category","Sub_Category","Sales","Profit_per_Order"],
  "rows": [
    ["2","Furniture","Chairs","262","42"]
  ],
  "settings": {
    "maxMiddleValues": 2,
    "maxPrescriptions": 2}
}
In this request:
-
maxMiddleValuesenables the return of top factors (up to 2, in this example). -
maxPrescriptionsenables the return of improvements (up to 2, in this example).
The response should look similar to the following example.
{
  "predictionDefinition": "1ORB00000008RSR",
  "predictions": [
    {
      "model": {
        "id": "1OtB00000008S34KAE"
      },
    "prediction": {
      "baseLine": 438.5059113062626,
      "middleValues": [
        {
        "columns": [
          {
            "columnLabel": "Sub-Category",
            "columnName": "Sub_Category",
            "columnValue": "Chairs"
          },
          {
            "columnLabel": "Sales",
            "columnName": "Sales",
            "columnValue": "262"
          }
        ],
          "value": -730.8852909080902
        },
      {
      "columns": [
        {
          "columnLabel": "Sales",
          "columnName": "Sales",
          "columnValue": "262"
        }
      ],
          "value": 244.82002630727217
          }
        ],
        "other": 136.2411286963786,
        "smallTermCount": 3,
        "total": 88.68177540182317
      },
      "prescriptions": [],
      "status": "Success"
    }
  ],
  "settings": {
    "maxMiddleValues": 2,
    "maxPrescriptions": 2,
    "prescriptionImpactPercentage": 0
  }
}
In this response:
- The
totalrepresents the prediction value. - The
middlevaluessection describes the two top factors returned for this prediction. In this example:- When Sub Category = chairs and Sales is 262, the effect is a reduction in the prediction by almost 731 (-730.8852).
- When Sales is 262, the effect is an an increase in the prediction by about 245 (244.8200).
For more information about other elements in the response, see Get Predictions in Salesforce help.
Review Usage Monitoring
Einstein Discovery monitors usage statistics in real time. To view usage statistics for your org, from Setup, in the Quick Find box, enter discovery and then select Usage.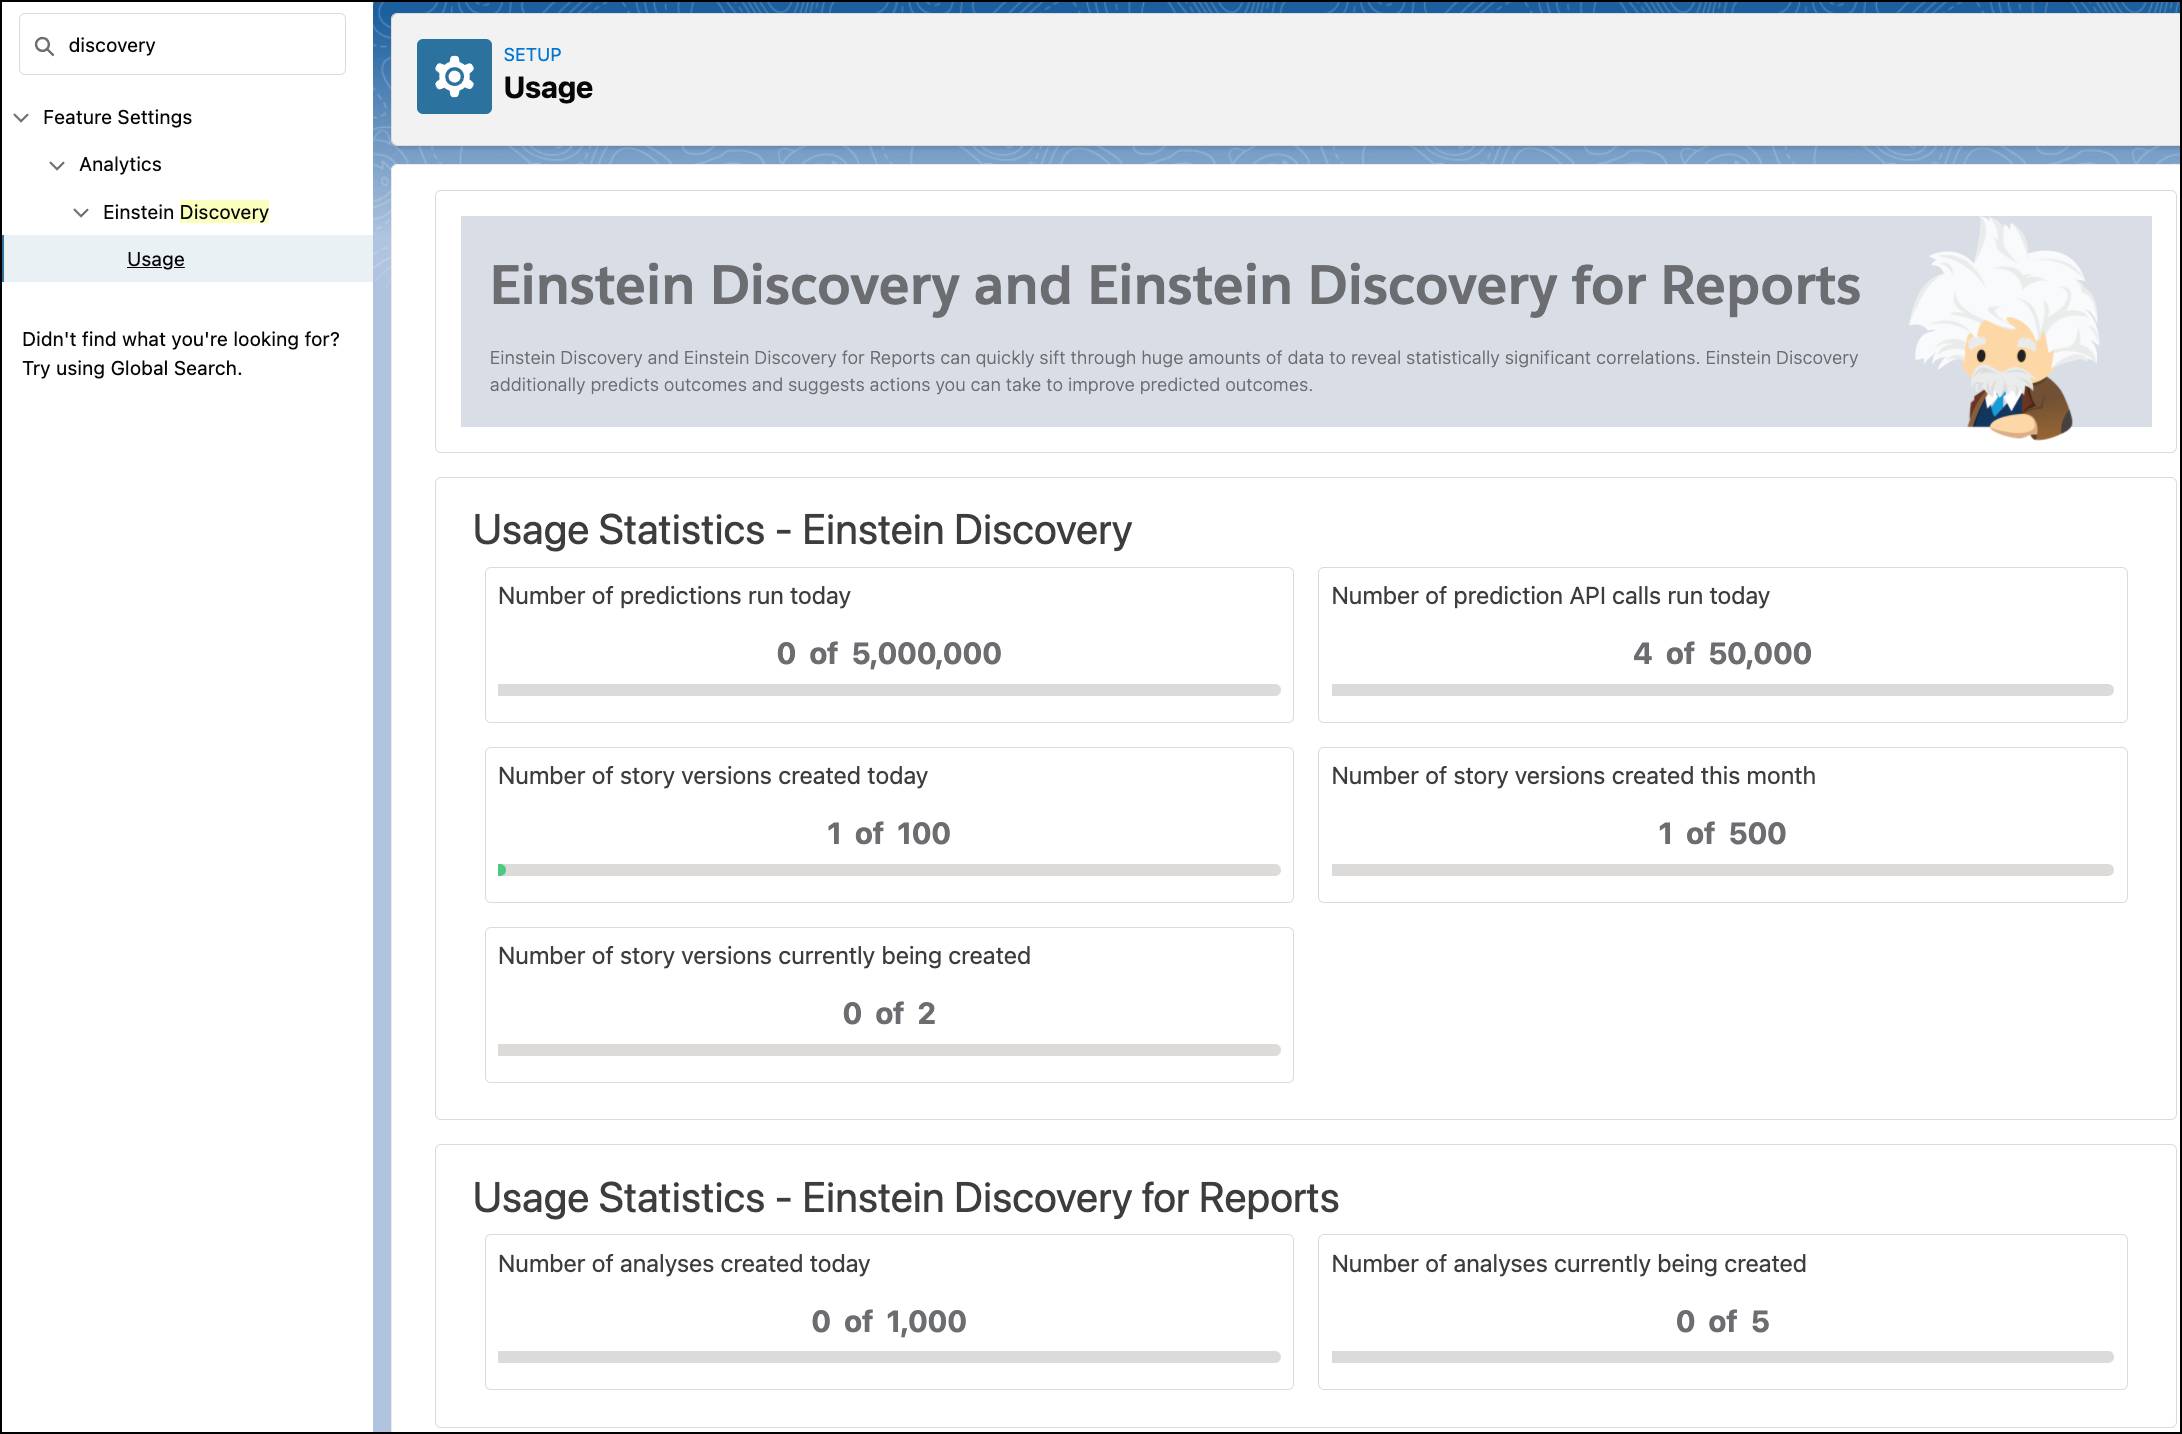
Einstein tracks REST API requests, along with other programmatic prediction requests, under Number of prediction API calls run today.