Acknowledge a Donation
Learning Objectives
After completing this unit, you’ll be able to:
- Send donation acknowledgment messages via email.
- Create printed donation acknowledgment letters.
- Add custom follow-up activities and tasks for donations.
Show Gratitude
A donation can—and often will—come from a supporter who has ties to many of a nonprofit’s teams and departments, which is why everyone across an organization needs to familiarize themselves with the process of donation acknowledgment.
And, yes, this can be a time-consuming process—but also one of the most valuable things you can do to build relationships with donors.
Let’s review how Nonprofit Success Pack (NPSP) makes it a little easier to say thanks.

Email an Acknowledgment for a Single Opportunity Record
NPSP gives you tools to email an acknowledgment or ‘thank you’ to a donor right from the app.
To start, open an opportunity record and make sure the Primary Contact lookup field lists the appropriate contact—and remember the warning about using test addresses to practice these steps!
Next, go to quick actions—possibly under the quick actions Show Actions menu ( )—and select Email Acknowledgment. (If you’re following along in a Trailhead Playground with the Trailhead version of NPSP, this may not be activated.)
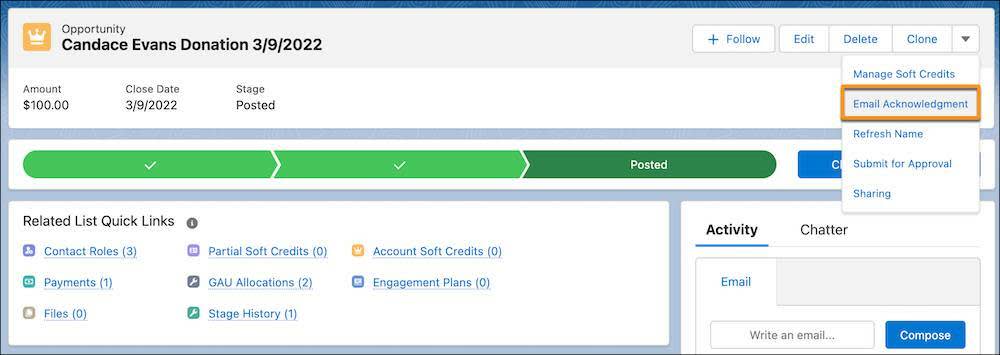
Selecting the email acknowledgment action will:
- Trigger an automation that sends an email.
- Update the opportunity’s Acknowledgment Status field to Acknowledged if the email is successful, or Email Acknowledgment Not Sent to records where the acknowledgments failed. Acknowledgments can fail if the email bounces or there is no email address on the primary contact record.
- Update the opportunity’s Acknowledgment Date field to the current date.
- Display a status page to show you which acknowledgments were successfully sent and which failed.
Your admin can set up and customize the email template used for these auto-generated emails. Check in with your admin to review the template.
Email Acknowledgments for Multiple Opportunity Records
NPSP also supports sending acknowledgment emails for multiple opportunity records at once.
- Click the Opportunities tab.
- Click the list view name—likely Recently Viewed—and select the To Be Acknowledged list view. This list view is filtered, by default, to any opportunity record with an Acknowledgment Status of To Be Acknowledged or Email Acknowledgment Not Sent.
- Select the opportunities you would like to acknowledge using the checkboxes in the list view.
- Click Email Acknowledgments.
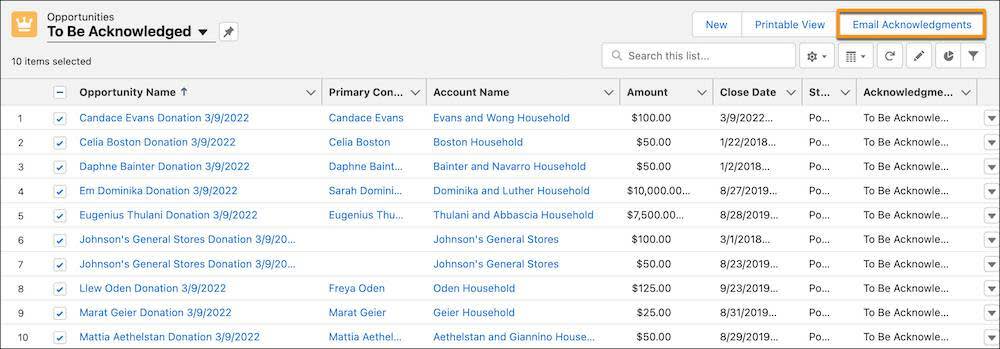
Just like with the email acknowledgment action on a single opportunity record, the automation will send an email for each opportunity, update the Acknowledgment Status and Acknowledgment Date fields, and display the status page.
Create Printed Acknowledgment Letters
Email is great, but sometimes a physical note—on paper and everything!—has more meaning. There are several ways to create printed donation acknowledgment letters using Salesforce and NPSP, but they require a bit of extra time and sometimes money, depending on your needs.
We recommend using a document generation app from the Salesforce AppExchange that can automate your acknowledgment process for single letters, batches of letters, and annual tax receipts. These apps usually have an additional cost, but many are discounted for nonprofits. Check with your admin to see if your organization is using an app for this purpose.
Another way to produce printed donation acknowledgment letters is to run a report and include the fields needed to do a mail merge using a word processing application like Google Docs or Microsoft Word. To acknowledge gifts by households, for instance, you might run an opportunities report with the Primary Contact fields to use for your mail merge.
After you run the report in Salesforce, export the data to a spreadsheet and use that sheet as the data source for your mail merge.
Follow-up Tasks and Activities
Sometimes you want to do more than send a letter or email to thank a donor. You may want to send flowers or throw them a ticker-tape parade.
But, seriously, you probably just want to create a task for another user at your organization, like your executive director, to call a donor and thank them personally.
With a capital campaign pledge as large as the one NMH received from Jose Figueroa earlier in this module, Sofia, a development associate at NMH, wants to create two tasks for her executive director to show her appreciation. Sofia will create one task to call and thank Jose, and another to call and thank the board member who solicited the gift.
Let's follow along as she creates the first task.
- Open the opportunity record to which the task should be connected. Sofia finds Jose’s major gift pledge from earlier.
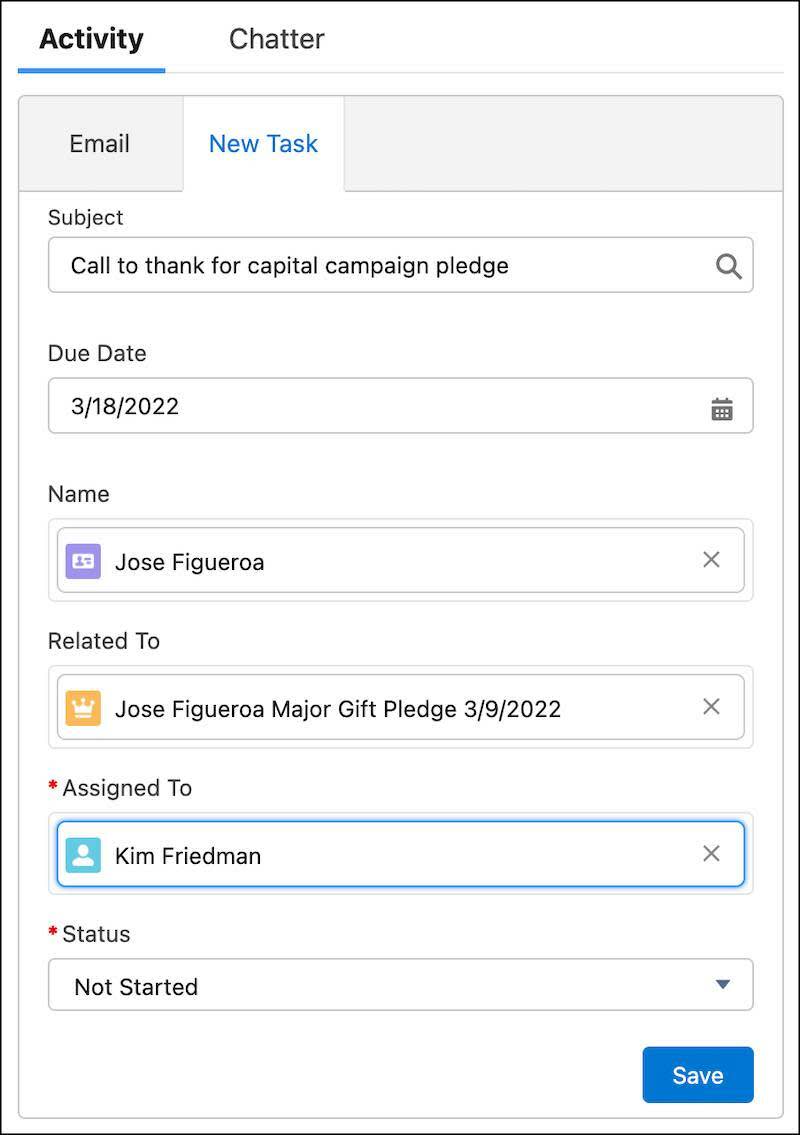
- In the Activity Composer on the opportunity record, click the New Task tab and enter the details. (If you don't see the New Task tab, ask your admin to add it to the Quick Actions available on the Opportunity object.)
- Subject:
Call to thank for capital campaign pledge
- Due Date: Sofia gives Kim until the end of the week.
- Name: Find and select a contact to relate. Sofia finds and selects Jose Figueroa.
- Related To: This field already has the opportunity record preselected.
- Assigned To: You will be assigned by default. Sofia clicks the X on her record in the field, then finds and selects her executive director.
- Status: Not Started
- Click Save.
The task now appears in the Activity Timeline for this opportunity record under Upcoming & Overdue. Sofia's executive director also sees the tasks listed on her Tasks tab and receives alerts about the tasks through in-app notifications. Plus, everyone on the team can see when tasks are assigned and completed on the opportunity record, so two teammates don’t call independently.
Take Your Donation Management to the Next Level
Now you’re ready to put the basics of managing donations in NPSP to good use—congratulations! To move on to the next level with some advanced tools, we recommend a couple of additional Trailhead badges. Check out the Donation Soft Credit Management with Nonprofit Success Pack module to learn how to track more details about your donors and their contacts. Then, earn the Moves Management with Nonprofit Success Pack badge to learn more about tasks and how to use NPSP to deepen relationships with donors.
Good luck and happy fundraising!
Resources
-
Salesforce Help: Acknowledge Donations by Email
-
Salesforce Help: Configure Acknowledge Donations by Email
-
Video: NPSP How-To Series: Donation Acknowledgments
-
AppExchange: Search for Document Generation
-
Trailhead: Donation Soft Credit Management with Nonprofit Success Pack
-
Trailhead: Moves Management with Nonprofit Success Pack