Customize Dispatcher Console Settings
Learning Objectives
After completing this unit, you’ll be able to:
- Change dispatcher console settings.
- Change the fields displayed in the dispatcher console.
- Enable drip feed scheduling.
Before You Start
To follow along in this module, you need a special Developer Edition org that contains Field Service with the managed package and our sample data. Get the free Developer Edition and connect it to Trailhead now so you can follow along in your own org. Later, you'll use it to complete challenges. Note that this Developer Edition is designed to work with the challenges in this badge, and may not work for other badges. Always check that you’re using the Trailhead Playground or special Developer Edition org that we recommend.
- Sign up for a free Developer Edition org with Field Service.
- Fill out the form. For Email, enter an active email address. For Username, enter a username that looks like an email address and is unique. It doesn’t have to be a valid email account (for example, yourname@test.com).
- After you fill out the form, click Sign me up. A confirmation message appears.
- When you receive the activation email (this might take a few minutes), open it and click Verify Account.
- Complete your registration by setting your password and challenge question.
Tip: Write down your username, password, and login URL for easy access later.
- You’re logged in to your Developer Edition org.
Now connect your new Developer Edition org to Trailhead.
- Make sure you’re logged in to your Trailhead account.
- In the Challenge section at the bottom of this page, click the current playground name and then click Connect Org.
- On the login screen, enter the username and password for the Developer Edition you just set up.
- On the Allow Access? screen, click Allow.
- On the Want to connect this org for hands-on challenges? screen, click Yes! Save it. You're redirected back to the challenge page and ready to use your new Developer Edition to earn this badge.
Open the Gantt and view the sample data.
- From the App Launcher
 , find and select Field Service.
- Click the Field Service tab.
- In the calendar on the Gantt, choose September 22, 2021.
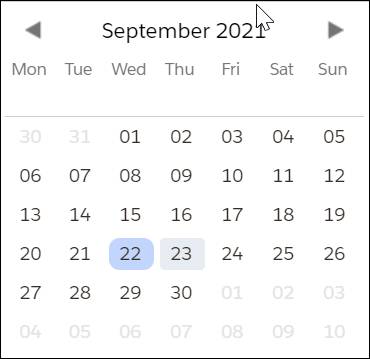 The sample data in this org runs from September 22, 2021, to September 24, 2021, so we go back in time for this module.
Change the Time Zone Displayed
The dispatcher console includes a Gantt that displays appointments and mobile workers organized by time of day. Ursa Major’s dispatcher Jacinta has a Gantt that shows her appointment times in the Los Angeles time zone. Since Jacinta lives in Los Angeles, California, it’s her primary service territory, so it makes sense that her appointments are displayed in Pacific Time.
But when the Denver, Colorado dispatcher goes on vacation next week, Jacinta must take over that territory too. Denver is in the Mountain time zone, which is one hour later than the Pacific time zone. Jacinta wants to see the Denver appointments in her Gantt using Mountain Time, and her Los Angeles appointments using Pacific Time.
Maria tells her it’s not a problem to set this up for her.
- From the App Launcher
 , find and select Field Service Admin.
- Click Field Service Settings.
- Open Dispatcher Console UI and click Gantt Configurations.
- From Gantt chart timezone, select Territory Timezone to display appointments in the time zone used by the territory.

- Click Save.
Jacinta selects Field Service from the App Launcher and clicks the Field Service tab to view the changes on her Gantt. She sees her Los Angeles appointments in Pacific Time and her Denver appointments in Mountain Time.
Add and Remove Fields with Field Sets
Field sets are a great tool to personalize the dispatcher console experience. An admin can add custom fields, move fields around, or remove fields the dispatchers don’t use.
In the dispatcher console, field sets control which fields appear in the following places:
- As columns in the appointment list
- In a tooltip, when you hover over an appointment on the Gantt
- As fields in the resources lightbox that appears when you double-click a mobile worker on the Gantt
- As fields used to filter mobile workers or other service resources on the Gantt
Jacinta requests that Maria add a field to the resources lightbox called Efficiency. The Efficiency field tracks how quickly a mobile worker completes a task. It’s used to help determine an appointment’s scheduled end time.
Maria adds the new field.
- Click
 , then select Setup.
- Click Object Manager.
- Click Service Resource.
- Click Field Sets.
- Click Resource Lightbox.
- Drag the Efficiency field onto the layout.

- Click Save.
Maria verifies the change. From the App Launcher  , she finds and opens Field Service, then clicks the Field Service tab. On the Gantt, she double-clicks James Clifton’s name in the resource list. The Efficiency field is now visible. Way to go!

Field sets are tied to objects. You can click Field Sets on any field service object in the Object Manager to change the fields displayed for that object. Then see the changes in your dispatcher console.
Enable Drip-Feed Scheduling
Schedules have been changing constantly at Ursa Major. Mobile workers receive dispatched appointments and then have to switch to a new appointment before they get started. Mobile workers aren’t confident about what they’re really going to do next.
Jacinta requests that Maria enable drip-feed scheduling. When drip-feeding is enabled, mobile workers don’t receive their new appointment until they complete their current one. It’s useful for companies with appointments that move around a lot throughout the day.
- From the App Launcher
 , find and select Field Service Admin.
- Click the Field Service Settings tab.
- Open Dispatch and click Drip Feed.
- Select Enable Drip Feed Dispatching.
- Select the number of appointments to dispatch. Maria selects 1.

- Click Save.
Each service appointment is dispatched to its mobile worker as soon as they've completed the last one. Dispatching later keeps them insulated from last-minute schedule changes so they can focus on the task at hand.
Maria set up Jacinta’s time zones so she can see appointments in Denver in their local time. She also changed the fields displayed in the resources light box. Finally, she enabled drip-feed scheduling. Jacinta enjoys her customized Gantt, and she has more customizations in mind.
Resources
- Salesforce Help: Customize the Dispatcher Console
- Salesforce Help: Customize the Dispatcher Console with Field Sets
- Salesforce Help: About Field Sets