Customize Dashboards
Learning Objectives
After completing this unit, you’ll be able to:
- Add and customize widgets.
- Apply custom designs to your pages.
What Are Widgets?
Widgets are the graphic elements that appear on the page and display your data in different ways—such as pie charts, tables, and bar graphs. Creating a widget is simple. You can build your widget in just three steps.
- Add data to your widget (mandatory).
- Apply a filter (optional).
- Design your widget (optional).
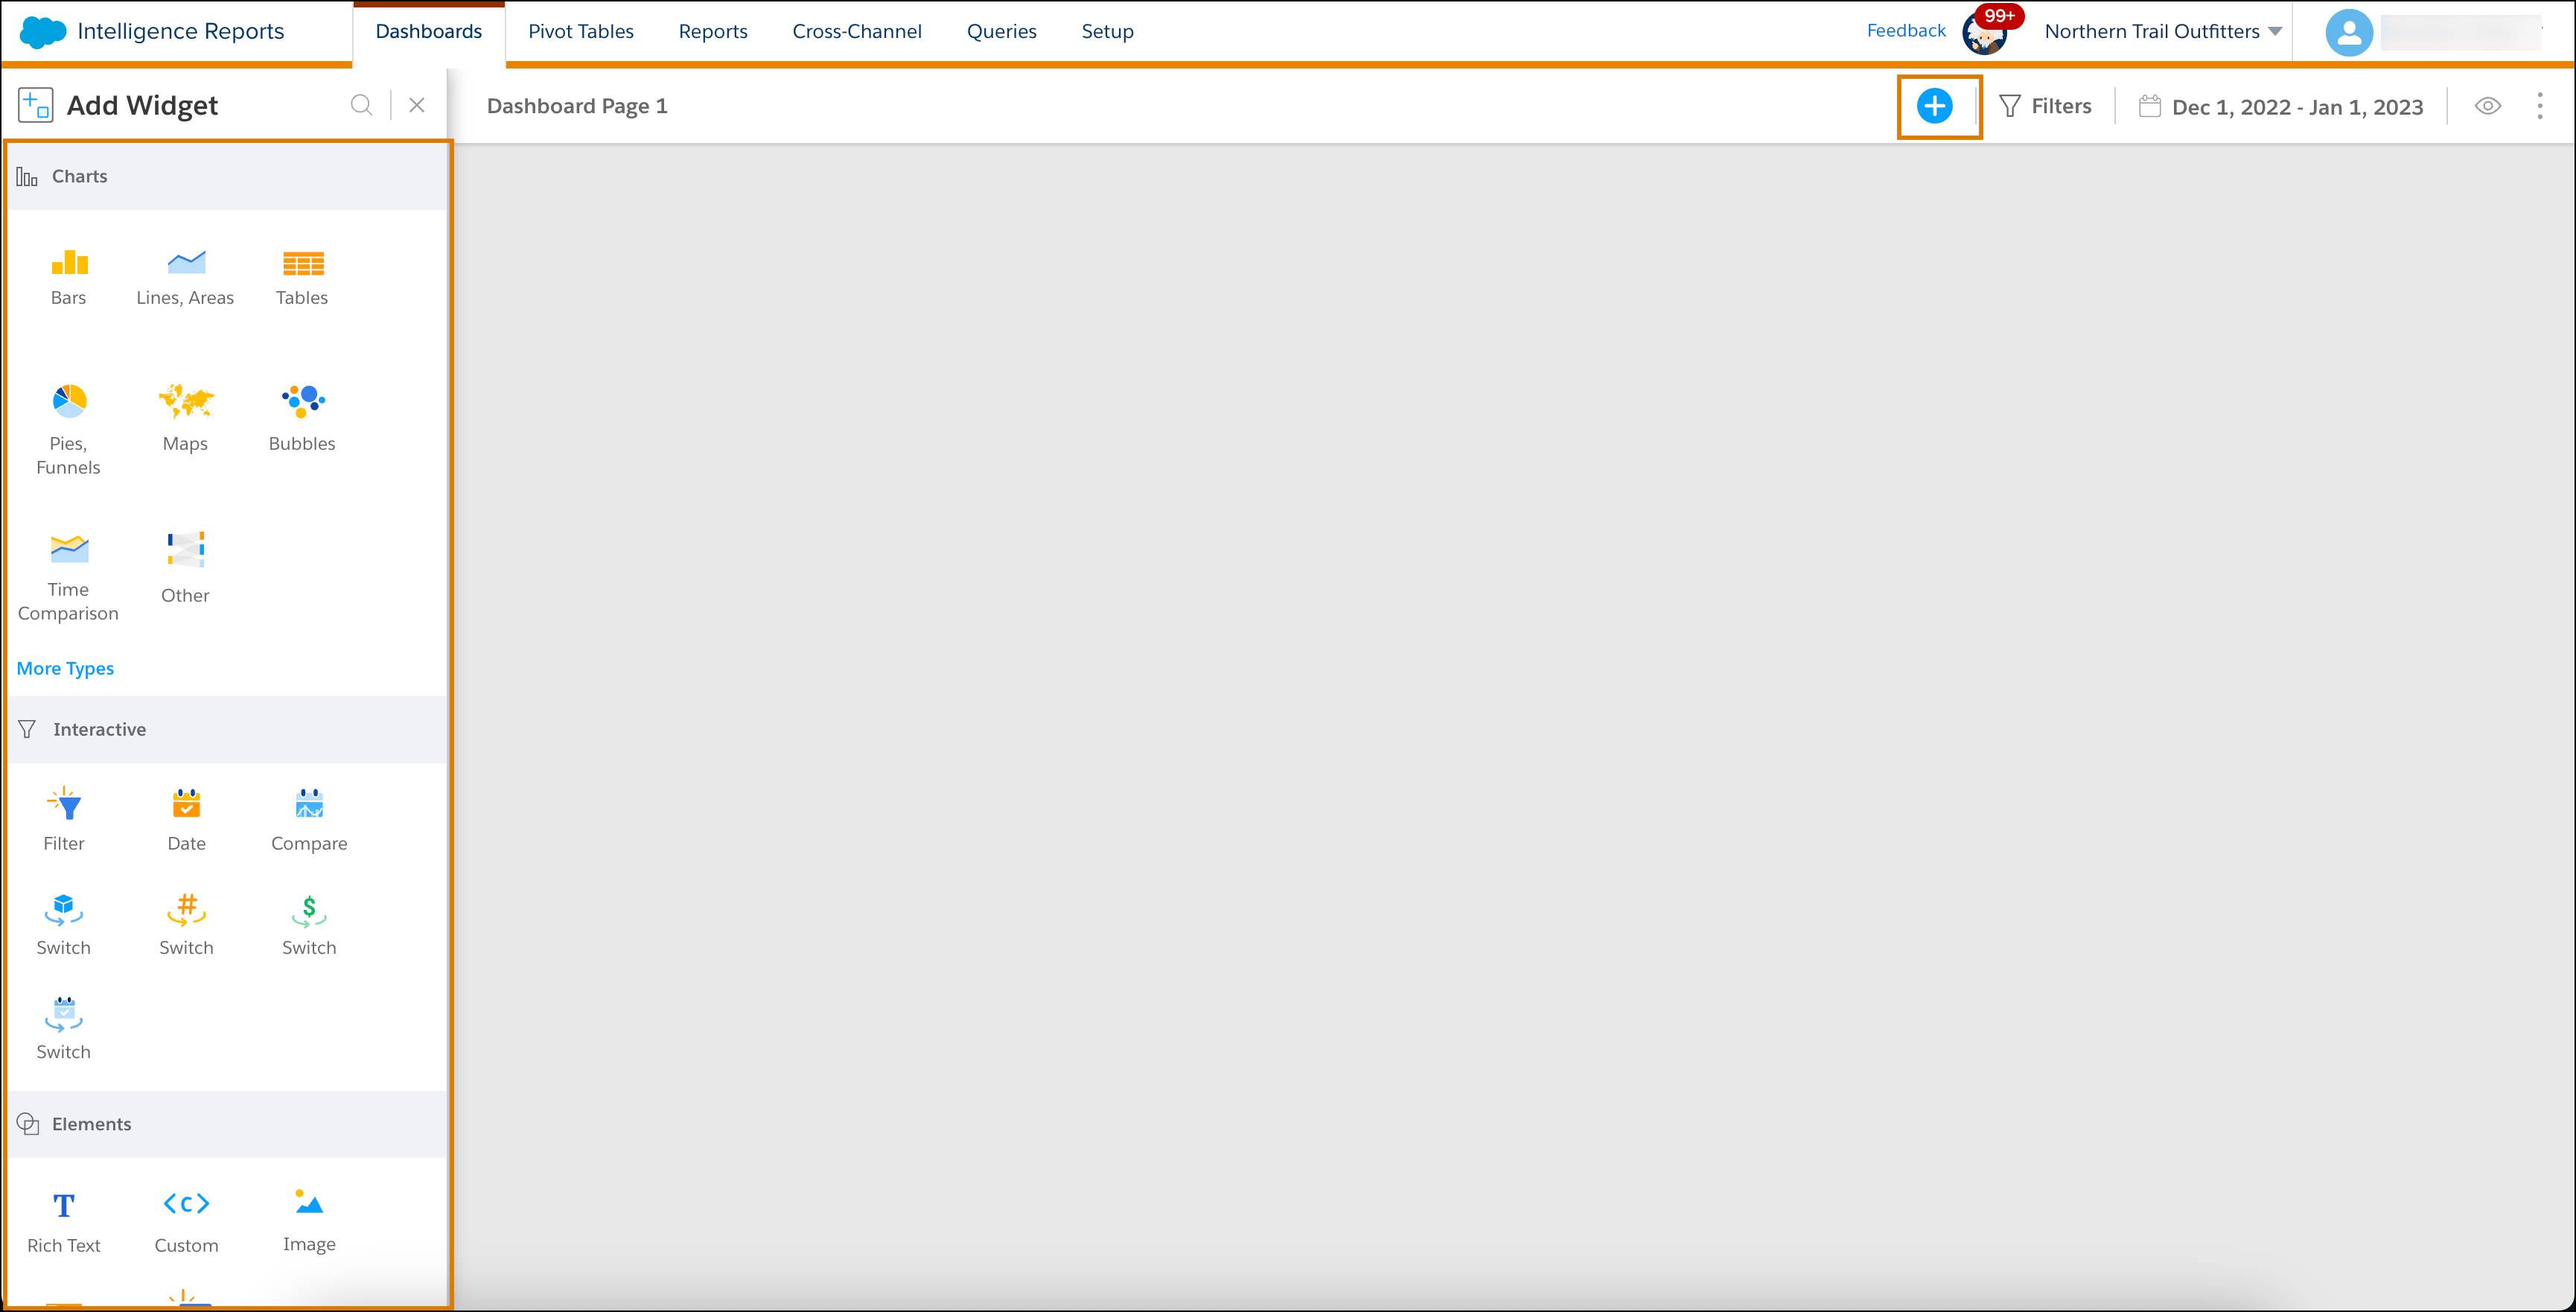
To add a new widget, click on the Add New (+) icon and choose the type of widget you want to add. Widgets are sorted into three categories for easy selection.
- Charts: These display data in various chart forms, such as bar graphs, line charts, pie charts, and maps. Once one of the categories is chosen, the default widget appears. To change categories and widget types, click More.
- Interactive: Interactive widgets allow users that browse the page to dynamically toggle between date ranges, measurements, and dimensions. This allows them to filter the data within the widgets on the page, without modifying the page.
- Elements: You can insert static elements to the page such as rich text, videos, images, and custom widgets you created using JavaScript, CSS, or HTML.
Customize Your Widget
After you’ve selected your desired widget, click the Add New (+) icon to add data to your widget.

Select the measurements and dimensions you want to display. You can easily recognize whether an entity is a measurement, dimension, or date by its icon.

You get to see real-time changes in the widget as you add your data.

Next, you have the option to add or edit filters. Filters allow you to remove any unwanted data depending on the criteria you set. To view the filters applied to the page and add filters to a widget, select the Filters tab (1). Then click + Add Filter (2) to add a new filter. Here you can also edit the date range (3) and the sorting of the data (4), such as showing the top five results or displaying the data in ascending order.
![Dashboard page showing the filters tab in a widget]](https://res.cloudinary.com/hy4kyit2a/f_auto,fl_lossy,q_70/learn/modules/datorama-reports-advanced-in-marketing-cloud/customize-dashboards/images/eecbcccfe0ad11149258b6c278a54730_edit-20-filters.png)
Now you can customize the design of your widget using the Design tab. This is where you tailor the appearance of selected widgets on your dashboard page, such as modifying the background, fonts, and grid. Let’s take a closer look.
Apply Custom Design to Your Page
After you create an amazing page filled with valuable data, it’s time to take your page design to the next level. With InstaBrand, you can create a customized and branded page with just a few clicks.
To activate InstaBrand, click anywhere on the page, aside from widgets, like the top navigation bar (1). Click the Design tab (2) within the Edit Page pane to see an array of customization options. Click the InstaBrand toggle (3) to activate InstaBrand.
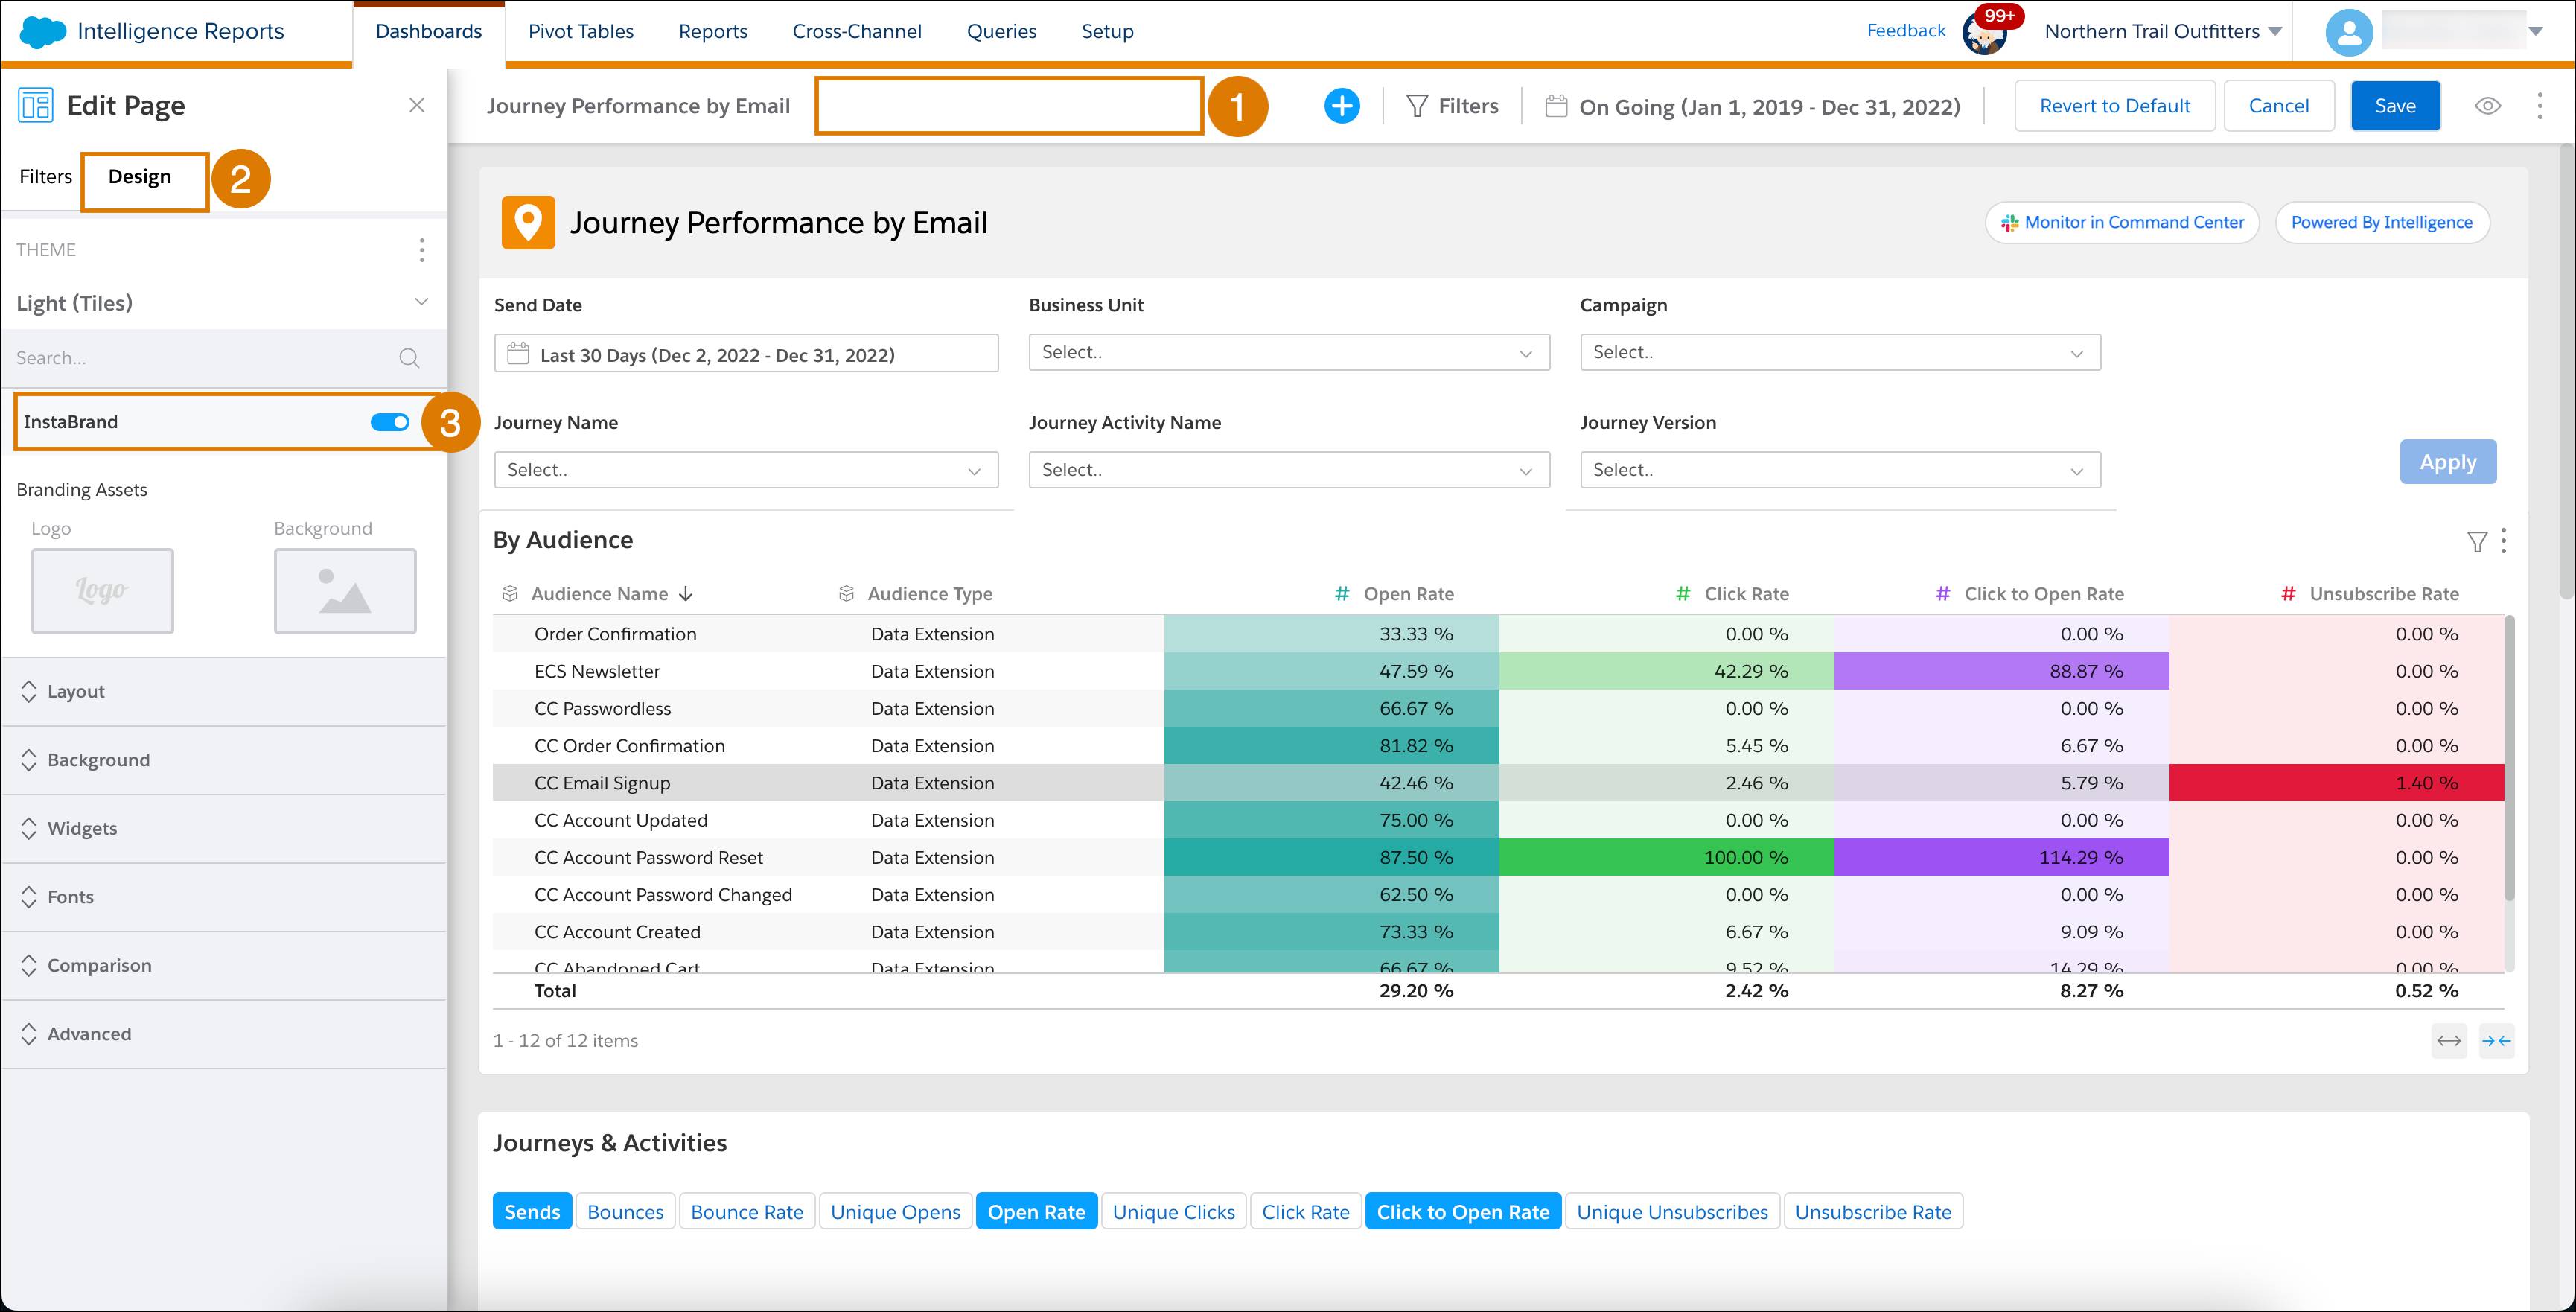
Next, under Branding Assets, add your logo and a picture for the background. You can even use the Unsplash library of images by clicking the image box. Here you can enter a keyword to search through hundreds of images. Click the image you want to add as your background image and your page will automatically apply the selected image. Once you have selected the image, not only will the image be added to the background, but InstaBrand will work its magic to create a beautifully designed page according to the color palette of your chosen image.
Your page is instantly transformed into a branded, color-coordinated page that looks unique and professional. If you prefer, you can select a predefined theme from the THEME options menu which offers an array of generic themes you can also instantly apply.
After you create or select a theme, you can continue customizing by changing the color palette, adjusting the background settings, or editing the fonts.
Create a Page Design Theme
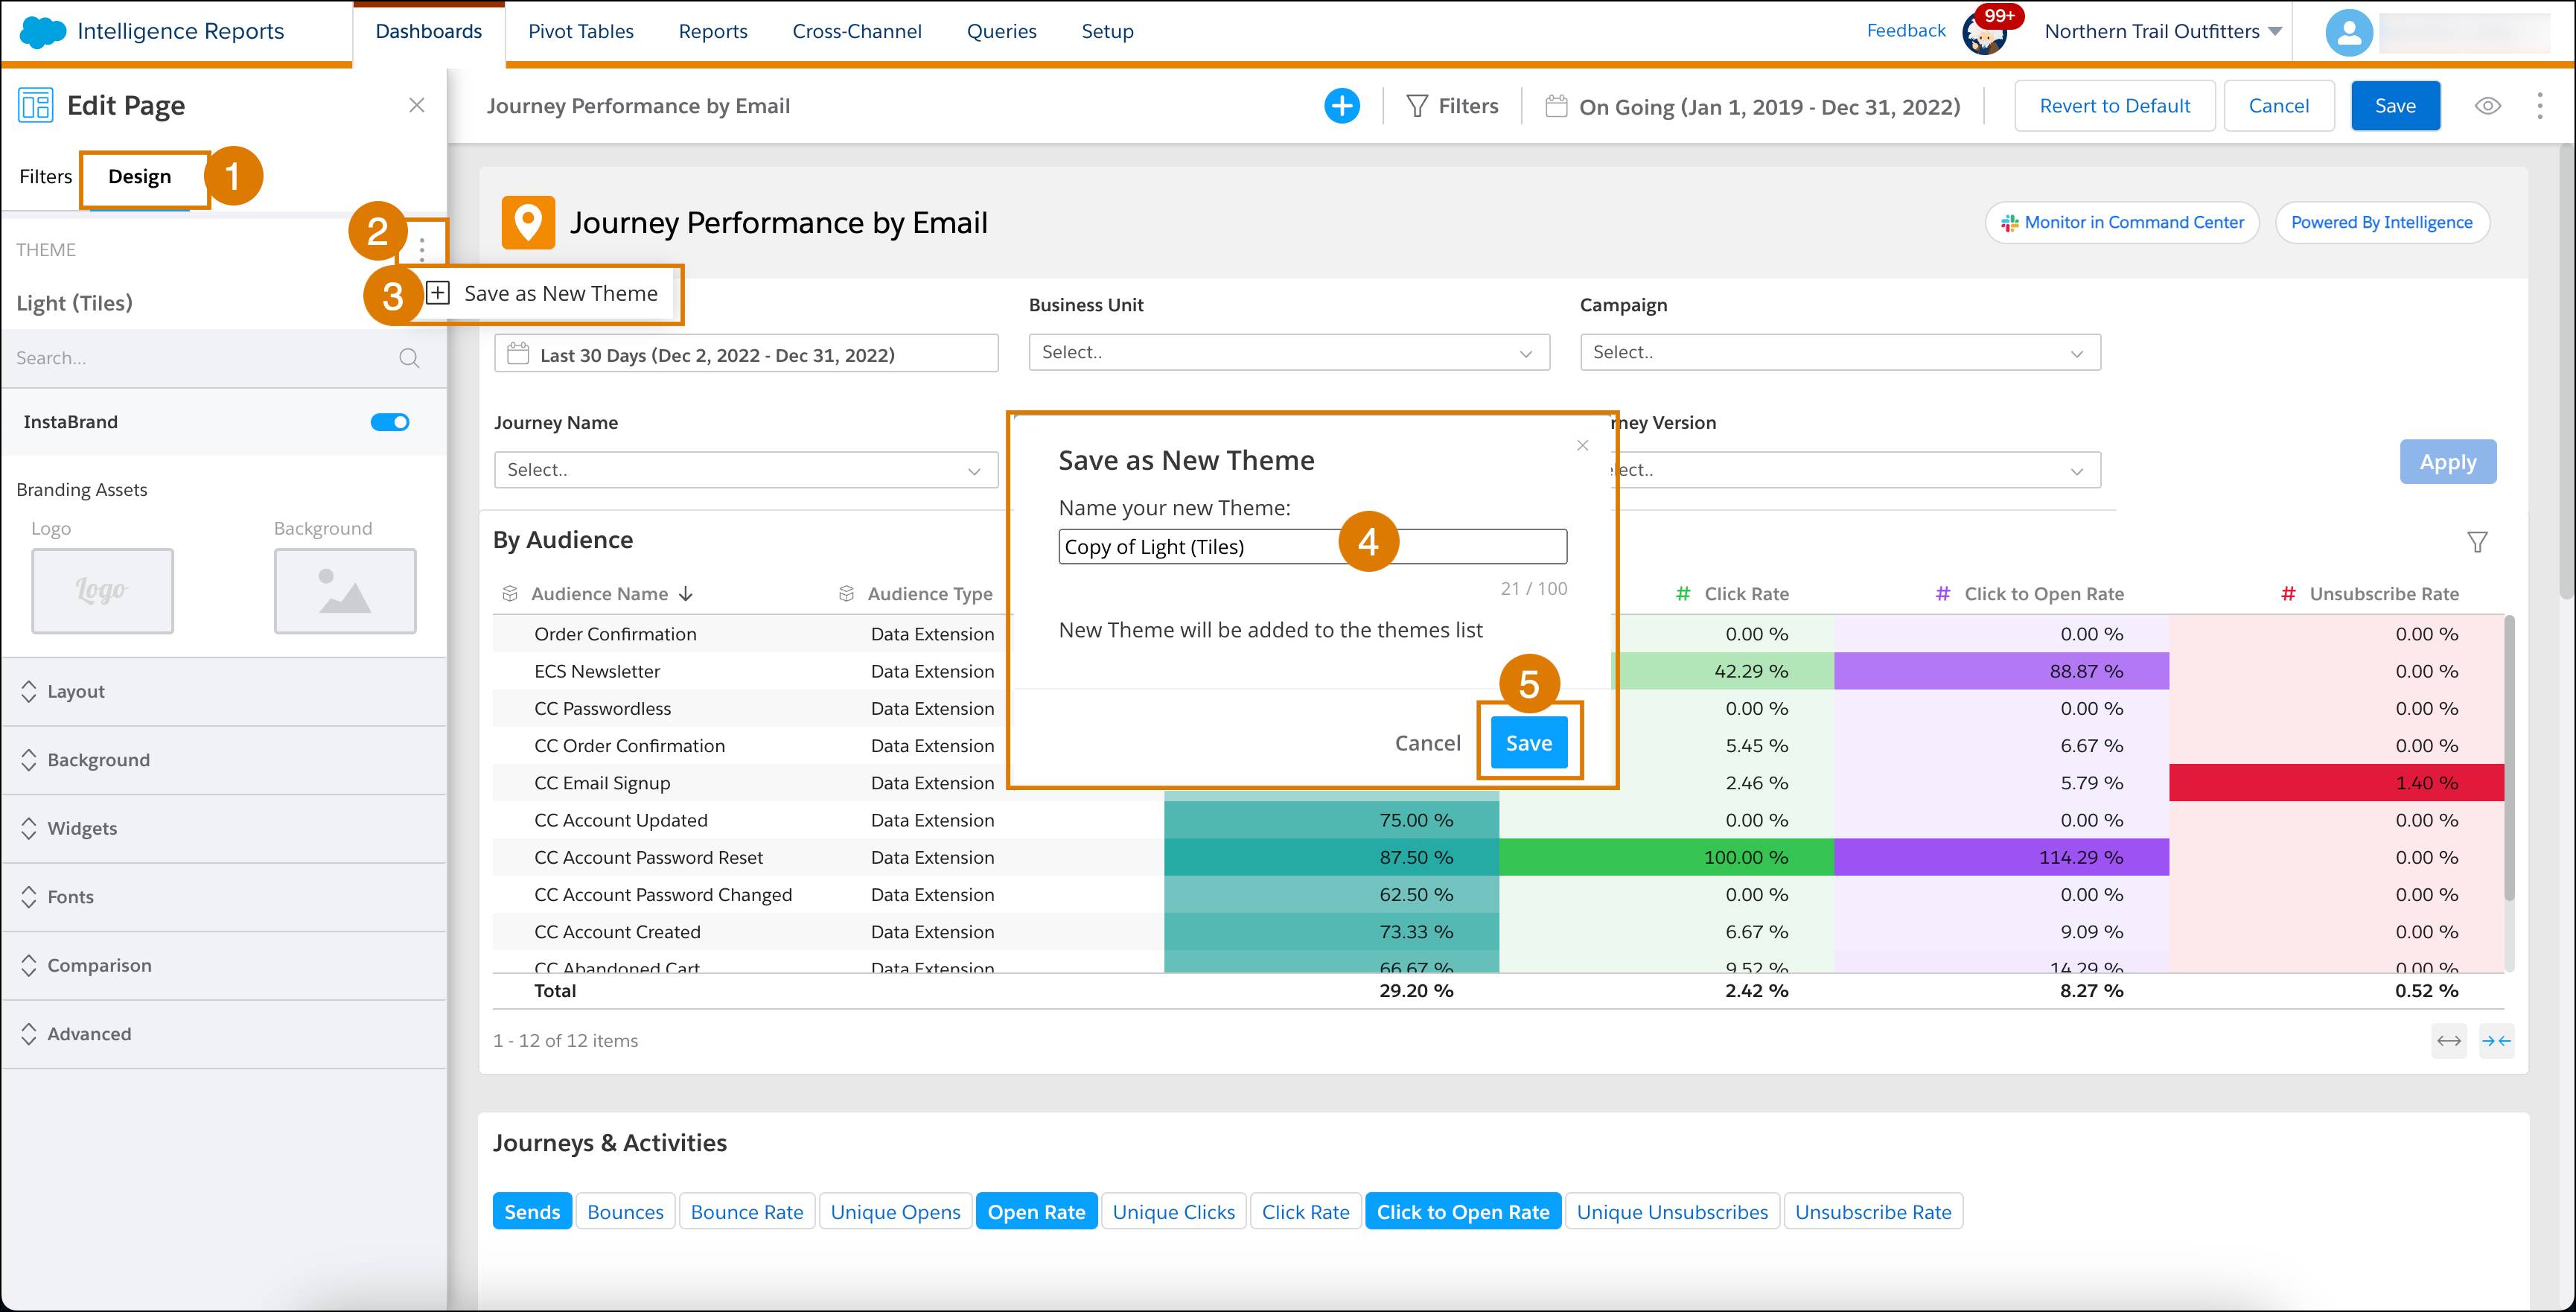
After you create your perfect page, you can use the same design for all your pages by using a page design theme. To do this, click anywhere on the page, aside from widgets. This brings you to the page level Design tab (1). Click the options button (2) next to THEME and select Save as New Theme (3). Name your Theme (4) and click Save (5).
Apply Custom Design to Your Widgets
Now that your page is branded and beautifully composed, make it more informative by making specific widgets more prominent. To do this, select the widget and click the Design tab. Customize the design of your widget with the available setting options (Note: The Design tab options vary between widget types.)

These are the available widget design options.
-
Grid: Set the layout style of the widget. There are three types of grid styles.
- None: The widget stays put on the page.
- Sticky: Fixes the widget to the top of the page and it remains there when users scroll.
- Float: Floats the selected widget on top of your existing widgets and remains floating when users scroll.
- Background: Adjust the background display of the widget, such as the color, opacity, brightness, and shape of the corners.
- Fonts: Adjust the fonts featured in your widget, such as headings and axis.
- Advanced: Add Custom Cascading Style Sheets (CSS) to your widget.
In this unit, you learned how to add, define, and customize widgets, transform your page into a branded page, and create a page design template. Continue to the next unit to learn how to create calculated dimensions and measurements.