Develop Your Custom Activity
Learning Objectives
After completing this unit, you’ll be able to:
- Create the necessary files for your custom activity.
- Configure your activity to work with Postmonger.
- Create an active REST endpoint with a Marketing Cloud Engagement installed package.
In this unit, we take a look at one example of how the Journey Builder API can handle custom activities. Again, because every system is unique, you may need to tweak the sample code provided to make activities occur the way you want. But this example should give you the foundation to get started.
Before You Start
This module is considered advanced and assumes you have the necessary knowledge and access to complete the steps. Review this list of prerequisites to make sure you’re ready before you dive in. You need:
- A working knowledge of RequireJS for dependency management.
- A working knowledge of jQuery.
- An understanding of the Postmonger event framework.
- Access to a Marketing Cloud Engagement account with a fully provisioned and operational Journey Builder instance.
- An understanding of how journeys function in Journey Builder.
Check and check? Great. Let’s dig into our custom activity example for outdoor gear and apparel retailer Northern Trail Outfitters (NTO).
Meet Warren

Warren Mehta is an IT systems specialist for Northern Trail Outfitters, and he has a complex task to complete. NTO wants to send discount codes as part of their messaging for a new sale, and the codes come from a third-party generation system. Warren checks out the documentation for the Journey Builder API and the third-party system and gets to work!
Create a Custom Activity
Before anything, of course, you have to write the activity. After all, this code outlines what the custom activity can do. You’re free to let your imagination run wild with the objectives, but each custom activity must include these components.
The Parts of a Custom Activity
No matter what the custom activity does, each one has some very specific components.
- We recommend that the user interface for the custom activity include these parts:
- A folder named for the endpoint URL of the activity as defined in the Journey Builder component of your installed package (we’ll get to the installed package later in this unit). This folder contains the
index.htmlfile, theconfig.jsonfile, and thecustomActivity.jsfile for your custom activity. For thecustomActivity.jsfile, you can rename the file to whatever you need it to be, and you can embed this value in the script in theindex.htmlfile. Review the Example REST Activity and Postmonger Events Reference for details. - A folder named {yourEndpointURL}/js that includes the
require.js,jquery.min.js, andpostmonger.jsfiles. - A folder named {yourEndpointURL}/images with an
icon.pngfile for your activity.
- A folder named for the endpoint URL of the activity as defined in the Journey Builder component of your installed package (we’ll get to the installed package later in this unit). This folder contains the
- You then need to host your custom activity on a web server that communicates via SSL (port 443). We recommend using Heroku as a hosting provider.
- Finally, you need to register the custom component endpoint for your custom activity in a Marketing Cloud Engagement installed package.
NTO’s Custom Activity
So let’s take a look at Warren’s custom activity for NTO. You can review the actual sample code for this app in this GitHub repo, but we cover the highlights here.

- The app folder contains an app.js file that reacts to the status of the journey and calls for a random discount code at the appropriate time.
- The config folder contains a config-json.js file that outlines the schema and arguments for the custom activity.
- The html folder contains an index.html file that outlines the menu and the button for the custom activity in Journey Builder.
- The images folder contains .png and .svc versions of the custom activity’s icon.
- The src folder contains an index.js file that interfaces with the third-party service to generate the discount code, using postmonger to bridge the gap between Journey Builder and the service.
- The webpack.config.js file loads the design elements for the custom activity.
Want to see a custom activity created right before your eyes? Check out this video as a custom activity is written and deployed in less time than it takes to get a pizza delivered!
This example shows you how a basic custom activity is created and organized, but it doesn’t necessarily look exactly the same as your custom activity. That’s because your functionality obviously differs from what Warren needs to accomplish. Keep that notion in mind as you proceed through the rest of this unit. The steps are similar, but not exactly the same. We all blaze our own trail!
The Installed Package
Once Warren has plotted out the custom activity, written the code, and hosted it on a public web server, he needs to make the connection between the hosted files and Marketing Cloud Engagement. That’s where the installed package comes in. Assuming that Warren completed all of these steps (helpfully included in the GitHub repo we provided earlier), he can follow the instructions for creating the installed package. Let’s follow along.
- In Marketing Cloud Engagement, Warren navigates to the Apps section of Setup and selects Installed Packages.
- He clicks New.
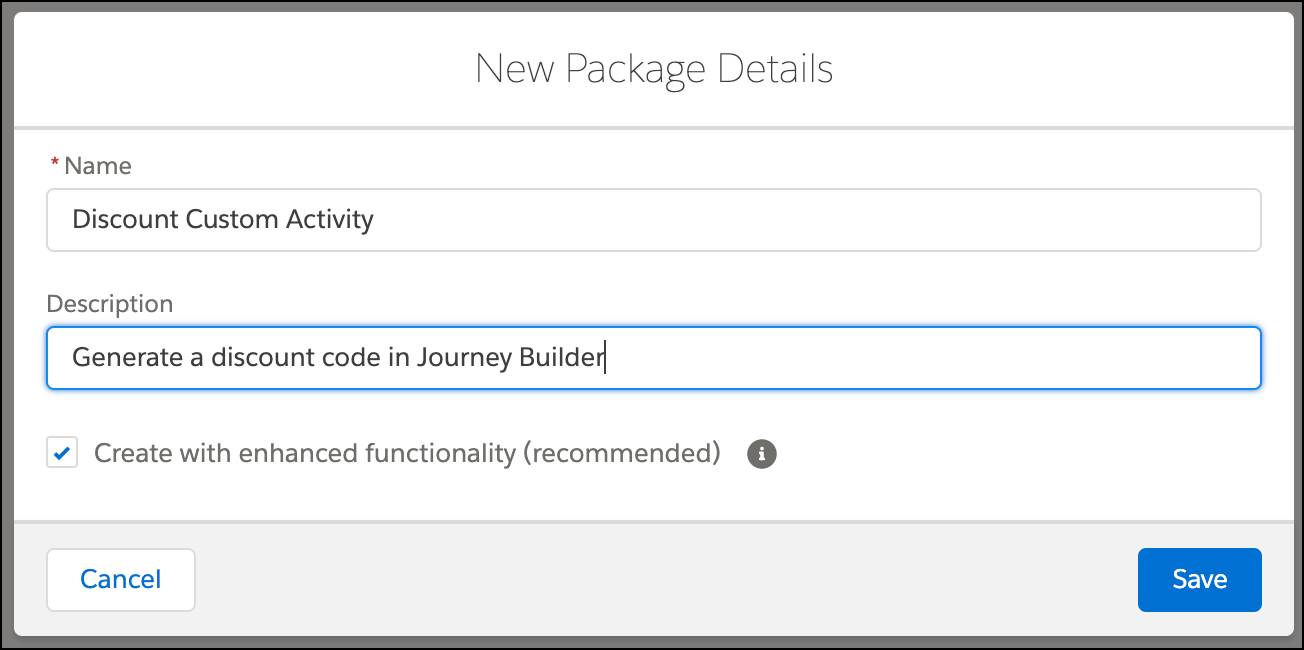
- He names the package Discount Custom Activity and enters a brief description.
- He saves the package, clicks Add Component, and selects Journey Builder Activity.
- After clicking Next, he names the component Discount Activity Component and enters a brief description of the endpoint URL for the activity.
- He selects Custom for the activity’s category in Journey Builder, enters the endpoint URL, and saves the component.

The capacity of your own custom activity may vary from these examples, but now you have both firm theoretical and practical examples of creating a custom activity. Warren’s custom activity is almost ready! Let’s fix any bugs by troubleshooting in the next unit.