Change the Feature User Experience
Learning Objectives
After completing this unit, you’ll be able to:
- Determine how features appear in the user interface.
- Choose which columns are displayed per feature.
Follow Along with Trail Together
Want to follow along with an expert as you work through this step? Take a look at this video, part of the Trail Together series on Trailhead Live.
(This clip starts at the 1:13:31 minute mark, in case you want to rewind and watch the beginning of the step again.)
Introduction
We can make the bundle configuration experience even better by changing the user interface to present features in tabs instead of sections—or even choose a combination of tabs and sections! You can also decide which columns display in features on the configuration page.
Option Layout
The Option Layout field on the lead product determines the layout and user experience of configuration pages for bundles that use features. There are three values for Option Layout: sections, tabs, and wizard.
-
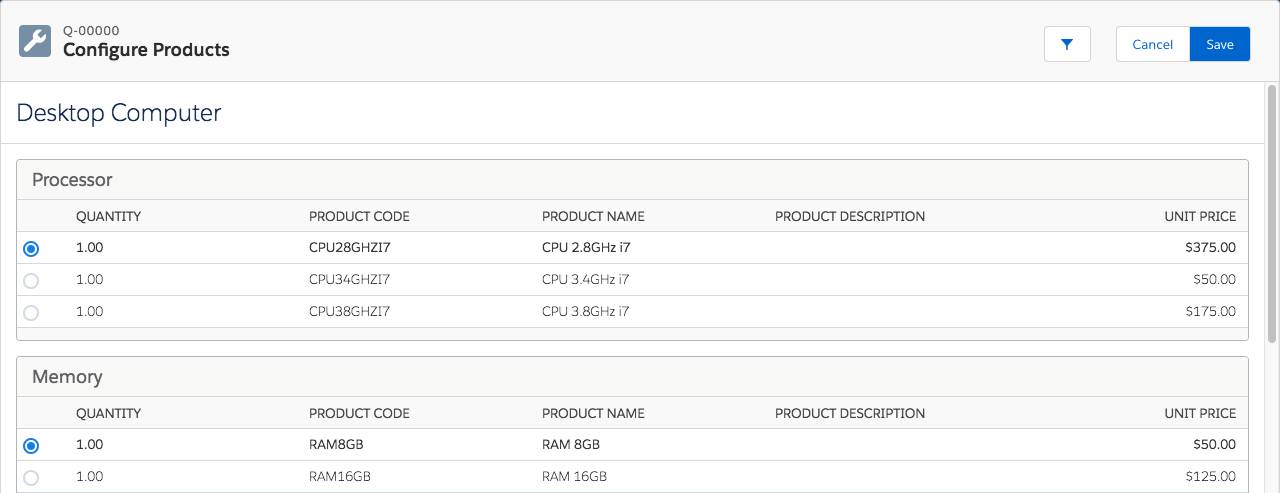
Sections: Features are listed in boxes, one after the other. Sections are the default layout when the Option Layout field is blank.
-
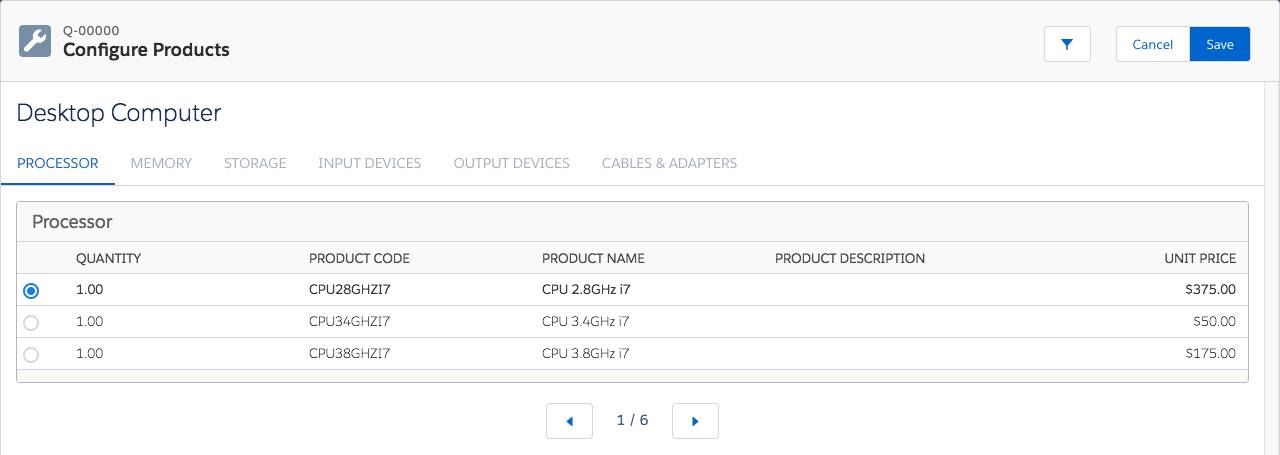
Tabs: Each feature has its own tab, arranged horizontally across the page.

-
Wizard: Each feature has its own tab, and users navigate through tabs from left to right. Users can’t skip any tabs.
Feature Category
With the Category field on the feature, you can organize features into categories, with each category having its tab. Each tab lists related features in sections.

Imagine we have a Smartphone bundle with four features. Chargers and Service features are the most important, so we put them together on a tab named Essentials. The other features, Cables and Cases, are on a separate tab. Here’s how we set this up.
- Click
 and click Setup. The Setup page opens in a new tab.
- Click Object Manager.
- Click Product Feature.
- Click Fields & Relationships.
- Click Category.
- In the Values list, click New.
- Enter
Essentials.
- Click Save.
Close the Setup tab and return to the Salesforce CPQ tab. Now we update the two features, Chargers and Service, to use the new category.
- Refresh your browser window.
- Click Products in the navigation bar, then choose the All Products list view.
- Click 6" Smartphone.
- Click the Related tab.
- From the Features related list, open the dropdown menu for Chargers and click Edit.
- Set Category to Essentials.
- Click Save.
- From the Features related list, open the dropdown menu for Service and click Edit.
- Set Category to Essentials.
- Click Save.
Congratulations! You created the Essentials category and assigned two features to it. You can test the new category by adding the 6" Smartphone bundle to Q-00005 on the Smartphones for Field Service Team opportunity for Edge Communications.

Configuration Field Set
Features show five columns of information by default: Quantity, Product Code, Product Name, Product Description, and Unit Price. You can display different columns with field sets.
For example, consider the Storage feature in the Desktop Computer bundle. You can’t tell by looking at the configuration page that there’s a limit to how many hard drives can fit in the computer. But if we display the Max Quantity field in the layout, sales reps know without guessing.

Let’s show the Max Quantity column in just the Storage feature.
- Click
 and click Setup. The Setup page opens in a new tab.
- Click Object Manager.
- Click Product Option.
- Click Field Sets.
- Click New.
- For Field Set Label and Field Set Name, enter
StorageAlt.
You can choose any name you like; just remember it for a later step.
- In the Where is this used? Field, enter
Configurator.
- Click Save.
- Drag Quantity, Max Quantity, Product Code, Product Name, Product Description, and Unit Price fields into the In the Field Set box.

- Click Save.
Now we have a new set of columns, but we can’t yet use it on any features. For that we update the Configuration Field Set field on the Feature object.
- Click Object Manager.
- Click Product Feature.
- Click Fields & Relationships.
- Click Configuration Field Set.
- In the Values list, click New.
- Enter
StorageAlt.
This must be the same field set name you created earlier.
- Click Save.
Close the Setup tab and return to the Salesforce CPQ tab. Now we update the Storage feature to use the new columns from the field set.
- Refresh your browser window.
- Click Products from the navigation bar, then choose the All Products list view.
- Click Desktop Computer.
- Click the Related tab.
- From the Features related list, open the dropdown menu for Storage and click Edit.
- Set Configuration Field Set to StorageAlt.

- Click Save.
OK, that was a lot of steps. The good news is that you can now use the StorageAlt field set on any feature. And of course, your sales reps now see the Max Quantity column.
You can test your work by adding a Desktop Computer to Q-00006 for the Desktop Computers for Training Room opportunity for Edge Communications.
One last thing about Configuration Field Sets: You can only put fields from the Product Option object into the field set. If you want information from the Product record to appear, create a formula field on the Product Option object that returns the value pulled from the Product field.
Summary
CPQ does a great job making the configuration experience intuitive for your sales reps, and with a few small tweaks, you can make it even better.
Resources