Create WhatsApp Messages
Learning Objectives
After completing this unit, you’ll be able to:
- Use WhatsApp messaging templates.
- Create a default session message.
- Personalize your messages.
Message Types
You can send two types of messages through WhatsApp. For conversations that your business initiates, you must use a template message. For conversations that a customer initiates, you can choose whether to use a template message or session message.
- Template messages
- Marketing
- Utility
- Authentication
- Service
- Session messages
To learn more about message types, see WhatsApp Message Types and Use Cases for Marketing Cloud Engagement.
This badge describes the WhatsApp Business Platform from Meta. In this badge, we assume you’re using Meta’s WhatsApp Business Platform for your messaging experiences. For help with using WhatsApp with Sinch, see Create a WhatsApp Template Message (Sinch).
Template Messages
Template messages handle transactional actions, such as purchase notifications or booking reminders. They allow a company to open conversations with customers about business transactions and require WhatsApp approval before sending. Approval can take up to 24 hours.
Create a Template
Use Meta to create templates for your transactional messages. Marketing Cloud Engagement supports text, image, and button message types.
So let’s get started–we help you save time along the way.
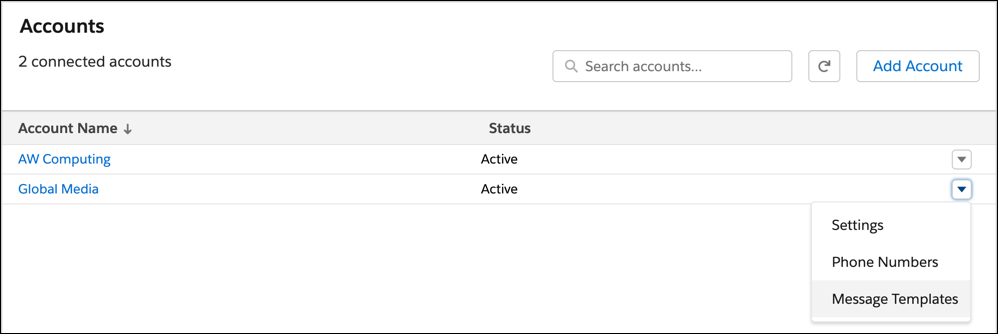
- In Marketing Cloud Engagement, from the dropdown for your active WhatsApp Business account, select Message Templates. If prompted, log in to the Facebook account associated with your business.
- Select Create Template.
- Choose a template category, and name your template.
- Select a language, and click Continue.
- Enter the message body. Note: If you include a URL in your template message, ensure that the URL has a valid landing page and belongs to your business. A template with an invalid URL will be rejected.
- Optional: Add a header, footer, and buttons.
- To add an image, document, or video file to the header image, select Media from the dropdown list.
- Click Add Sample, and upload a JPG, PNG, PDF, or MP4 file from your computer.
- Click Done.
- Submit your template request, and confirm your selected language.
After you submit your template request, WhatsApp checks that the template contains only transactional information.
For more information on template elements, see WhatsApp Template Message Elements.

Personalize a Template Message
If your template uses variables, you can also add personalized content. Message personalization requires audience attributes from Journey Builder, which originate in Content Builder. Let’s set up those personalization fields now.
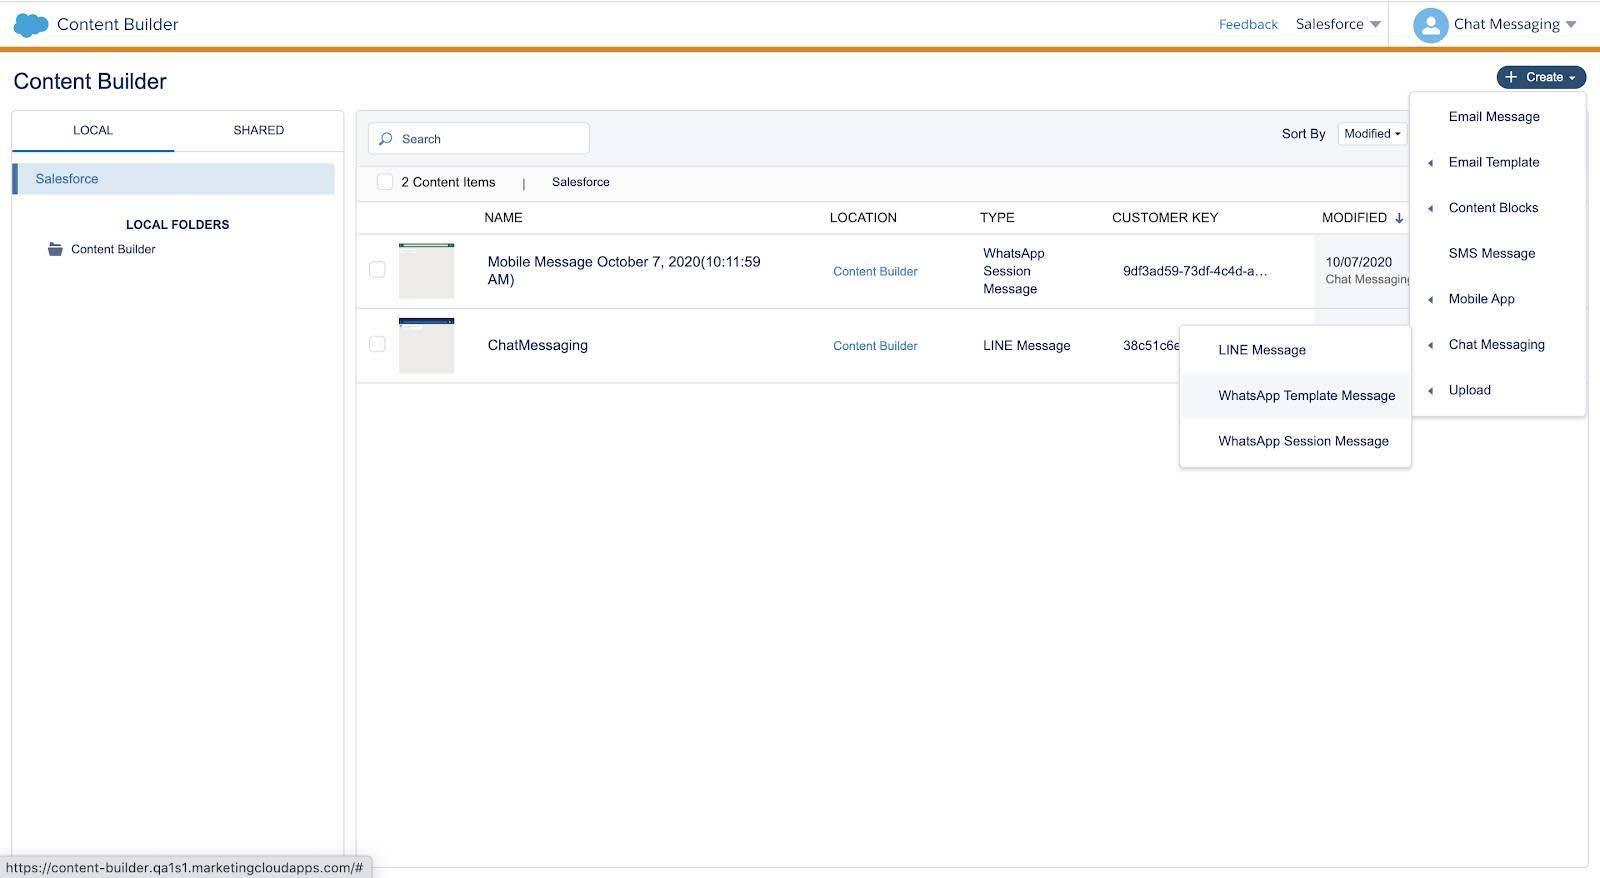
- In Content Builder, click Create.
- In the dropdown, select Chat Messaging, and then select WhatsApp Template Message.
- To see your approved templates, click Browse.
- Click the template you want to use, and click Select.
- Select the language you want to use, and click Next.
- Select the variables to use in your message. Complete the message body using AMPscript or personalization tags.
- Click Save.
After you're happy with your template, submit it for approval. When submitting, be sure to include samples for any message variables. Approval can take up to 24 hours. After approval, you can only add the variables to templates. You can’t edit the rest of the message.
Now that you’ve created your template messages, let’s learn how to reply to incoming messages with session messages.
Session Messages
Session messages handle responses to messages your customers send via WhatsApp. You can create several responses, including answering product questions, sending welcome messages, or other types of conversations. They’re free-form, auto-reply messages and don’t need approval before sending.
Any session messages you create are designed to auto-reply to incoming messages, and it may take some time to wrap your head around all of the possible scenarios in which somebody might send a message. The good news is that you don’t need approval from WhatsApp to use these kinds of messages.
Create a Session Message
To start out, create a default session message that includes your company’s contact and support details so that the user can contact you for more information. That way, any message that Marketing Cloud Engagement can’t process receives an automatic response with information on how to ask for help.
- In the app switcher, hover over your name, and then click Setup.
- In the Quick Find box, enter
WhatsApp, and then select WhatsApp Default Responses. - Next to the default message, click Edit.
- Enter the message body.
- Save your changes.
From there, you can create messages associated with specific keywords or conversations. For example, you can create a keyword for each sale or marketing effort.
Because you’re using WhatsApp with Journey Builder, you can use the Inbound Chat element to listen for specific keywords in your customer’s messages. When you create a journey with Inbound Chat keywords, the system checks to see if the user message has one of those keywords. If not, the default message is sent.
Personalize a Session Message
Just like templates, you can personalize session messages in Content Builder.
- In Content Builder, click Create.
- In the dropdown, select Chat Messaging, and then select WhatsApp Session Message.
- Select the Message Type from the dropdown.
- Complete the message body using AMPscript or personalization tags.
- To save your changes, click Save.
Create all the messages you need. When you’re ready, move on to the next unit and learn how to send them.