Set Up Compliant Data Sharing
Learning Objectives
After completing this unit, you’ll be able to:
- Set organization-wide sharing defaults for CDS.
- Enable CDS for the Financial Deal object.
- Create permission sets for CDS managers and users.
- Assign permissions to CDS managers and users.
- Grant profiles access to the Financial Deal object.
Set Organization-Wide Sharing Defaults
In this module, we assume you’re a Salesforce admin who’s authorized to set up CDS. If you’re not an admin, that’s OK. Read along to learn how your admin would take the steps in a production org. Don't try to follow these steps in your Trailhead Playground. CDS isn’t available in the Trailhead Playground.
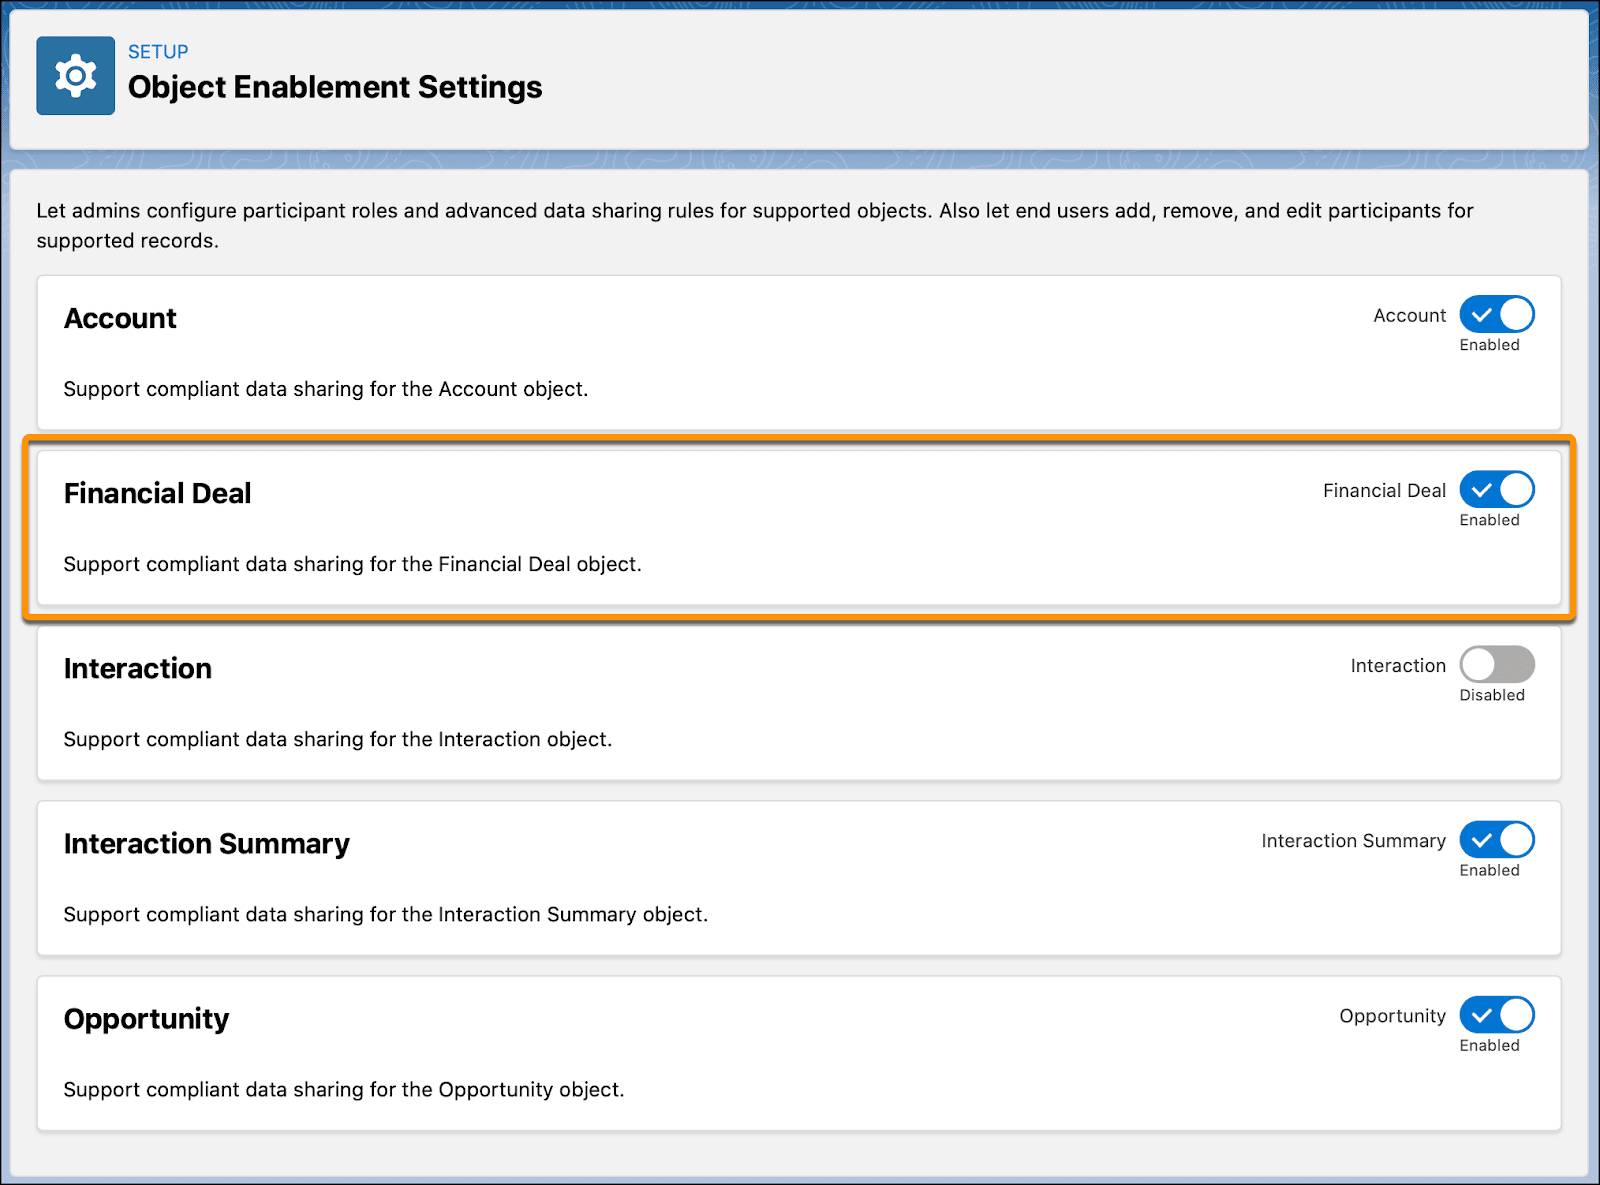
CDS currently supports Account, Opportunity, Interaction, Interaction Summary, and Financial Deal objects. In this module, we work with the Financial Deal object.
Matt must ensure that the Financial Deal object has the right organization-wide sharing settings. CDS can be used to grant access to data beyond organization-wide sharing defaults (OWD). It creates share table entries only when the data access that’s based on the participant role exceeds the OWD setting. Participants are users who are granted access to a deal record using CDS, and participant roles define the participants’ default access levels to those records. More on them later.

Here’s what Matt does to change the organization-wide sharing defaults of the Financial Deal object.
- Click
 , and then click Setup.
- In the Quick Find box, enter
sharing, and select Sharing Settings.
- In the Manage sharing settings for picklist, select Financial Deals.
- Under Organization-Wide Defaults, if the value in the Default Internal Access column is Public Read/Write, click Edit.

- Find the Financial Deal object, and in the corresponding picklist, select either Private or Public Read-Only.
- Click Save.
Enable Compliant Data Sharing for Financial Deal Object
Next, Matt enables CDS for the Financial Deal object so that Financial Deal records can later be created to capture deal data.
- Click
 , and then click Setup.
- In the Quick Find box, enter
deal management, and select Deal Management Settings.
- Enable Deal Management.
- In the Quick Find box, enter
object enableand select Object Enablement Settings. The page displays all the objects currently supported by CDS.
- Enable Financial Deal.
Create Permission Sets for CDS Managers
Deandra wants to manage CDS settings, such as enabling or disabling supported objects, managing users, and managing user access to deal records. Matt must create an appropriate permission set for her so she can configure CDS.
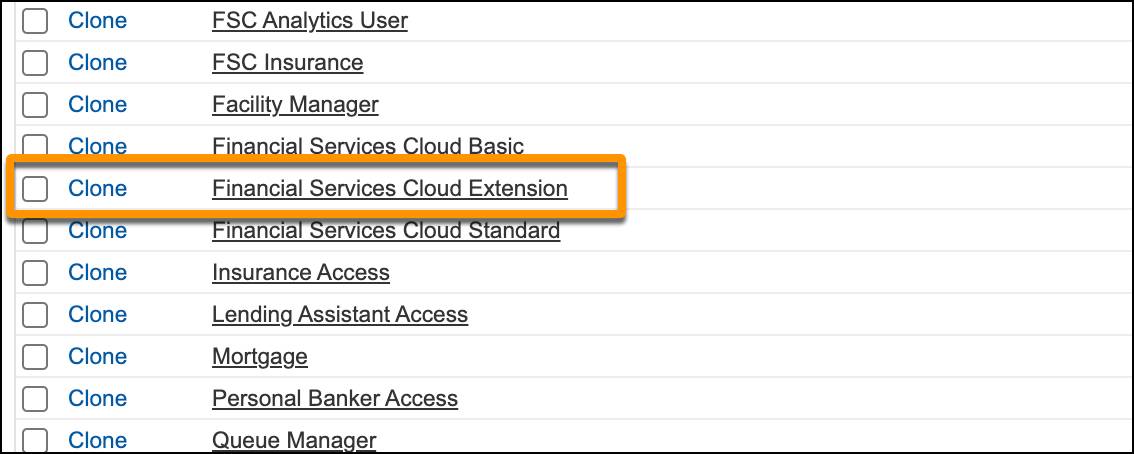
The Financial Services Cloud Extension permission set has the required permissions to configure CDS. Matt clones the permission set and enables the permissions in it.
- From Setup, in the Quick Find box, enter
permission sets, and select Permission Sets.
- Next to the Financial Services Cloud Extension permission set, click Clone.
- In the Label field, enter a suitable name like
Compliant Data Sharing Manager.
- In the API Name field, enter a unique API name or use the auto-generated value.
- In the Description field, enter an optional description for the permission set.

- Click Save.
- On the Permission Sets Setup page, click the new Compliant Data Sharing Manager permission set.
- Under System, click System Permissions, and then click Edit.
- Enable Configure Compliant Data Sharing and Use Compliant Data Sharing permissions.
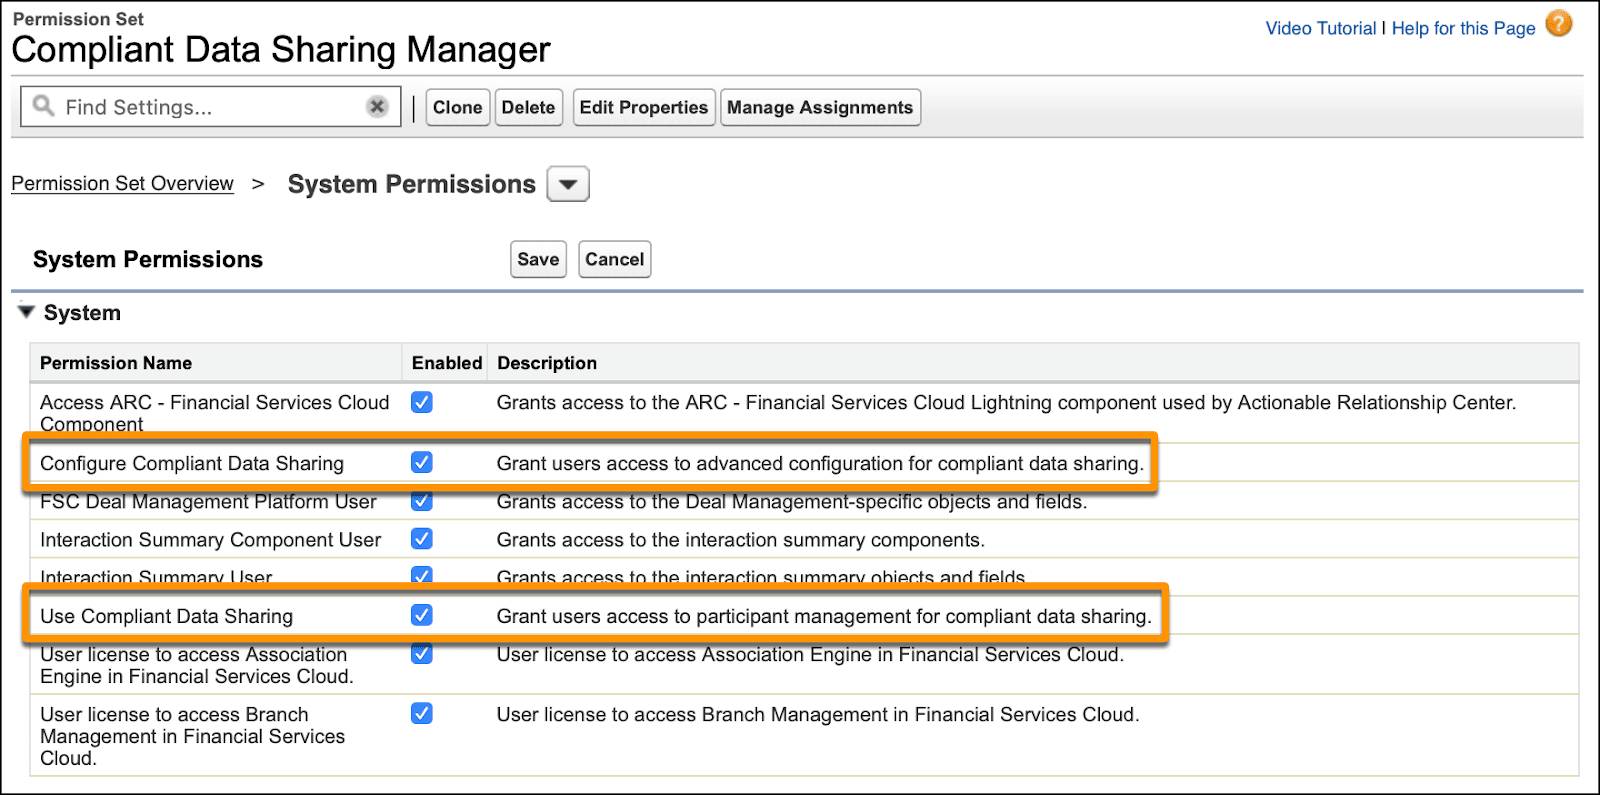
- Click Save, and then click Save again.
Create Permissions Sets for CDS Users
CDS users must be able to access records but not configure CDS. To give them access, Matt creates permission sets the same way he did for Deandra but enables only the permission to use CDS. He performs the steps in the previous section with the following changes.
- In step 3, enter
CDS User.
- In step 9, enable only the Use Compliant Data Sharing permission.
Assign Permissions to CDS Managers
Now that Matt has created the appropriate permission sets for CDS managers and users, he must assign the permission sets to Deandra, Rob, and Charlie.
First, Matt assigns the Compliant Data Sharing Manager permission set to Deandra.
- Click
 , and then click Setup.
- In the Quick Find box, enter
permission sets, and select Permission Sets. The new permission sets you created are now listed here.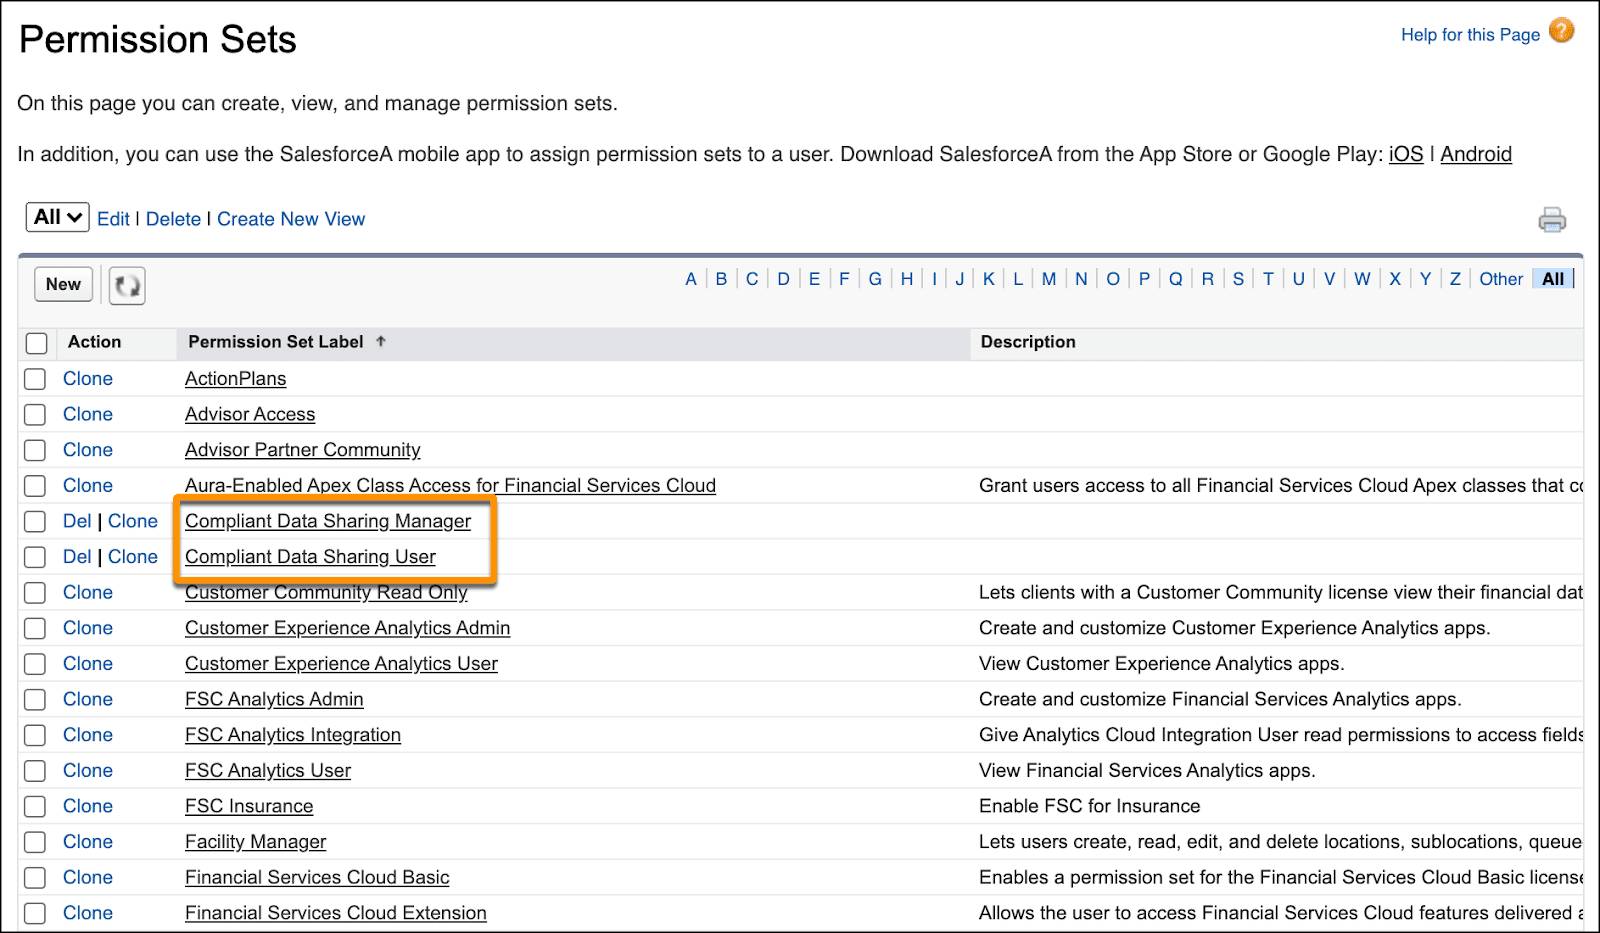
- Click Compliant Data Sharing Manager.
- Click Manage Assignments, and then click Add Assignments.
- Select Olson, Deandra and click Assign.
- Review the changes and click Done.
As a CDS manager, Deandra only gets access to CDS settings. She doesn’t have access to general admin settings.
Assign Permissions to CDS Users
Next, Matt assigns the Compliant Data Sharing User permission set to Rob and Charlie. He performs the steps mentioned in the previous section with the following changes.
- In step 3, click the Compliant Data Sharing User permission set.
- In step 5, select McDonald, Rob and Melly, Charlie and click Assign.
Grant Profiles Access to Financial Deal Object
Parent objects and participant objects share a master-detail relationship, which means that the access you set for a parent object is inherited by its participant record.
Cumulus Capital has strict compliance guidelines, and Deandra wants data sharing for the deal record to be configured according to those guidelines. For Deandra, Rob, and Charlie, their profiles must have the required access to the parent Financial Deal object to manage Financial Deal participant records. Let’s check if Rob has these permissions, and grant him if he doesn’t.
- Click
 , and then click Setup.
- In the Quick Find box, enter
profiles, and select Profiles.
- Look for the Associate profile and click Edit next to the profile name.
- Find the Tab Settings section and look for Financial Deals.
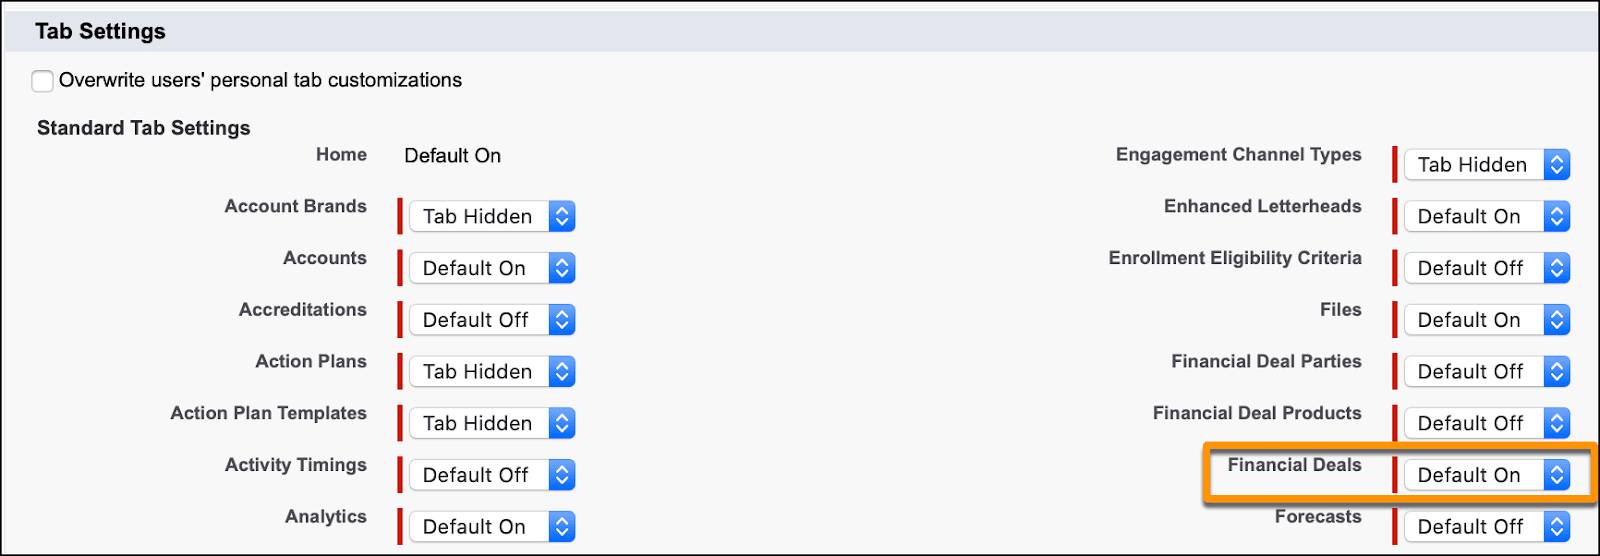
- In the Financial Deals picklist, select Default On. This step makes the Financial Tab visible on the navigation bar for all users with the Associate profile.
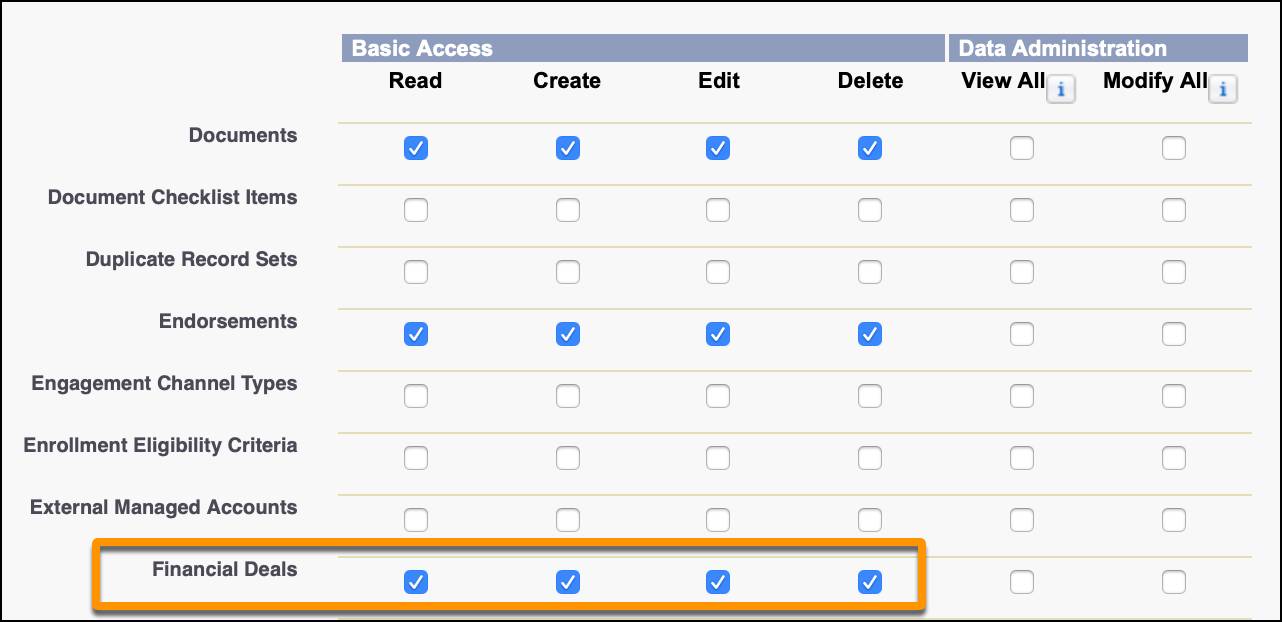
- Find the Standard Object Permissions section and look for Financial Deals.
- If any Read, Create, Edit, or Delete permission isn’t selected, select it.
- Click Save.
Matt repeats the same steps for the profiles assigned to Charlie and Deandra.
Add the Financial Deal Participants Related List to Page Layout
Financial Deal Participants Related List, that’s quite a mouthful! So what is it? It’s a component on the Financial Deal record page that appears in the Related section. This component lets you add users, or participants, to the record you want them to access.
Matt adds the component so that Rob sees it the next time he logs in.
- Click
 , and select Setup.
- Click the Object Manager tab.
- In the Quick Find box, enter
deal, and click the Financial Deal object.
- Click Page Layouts.
- Select the layout for the Financial Deal record type to use. Matt selects Financial Deal Layout.
- In the object palette, click Related Lists.
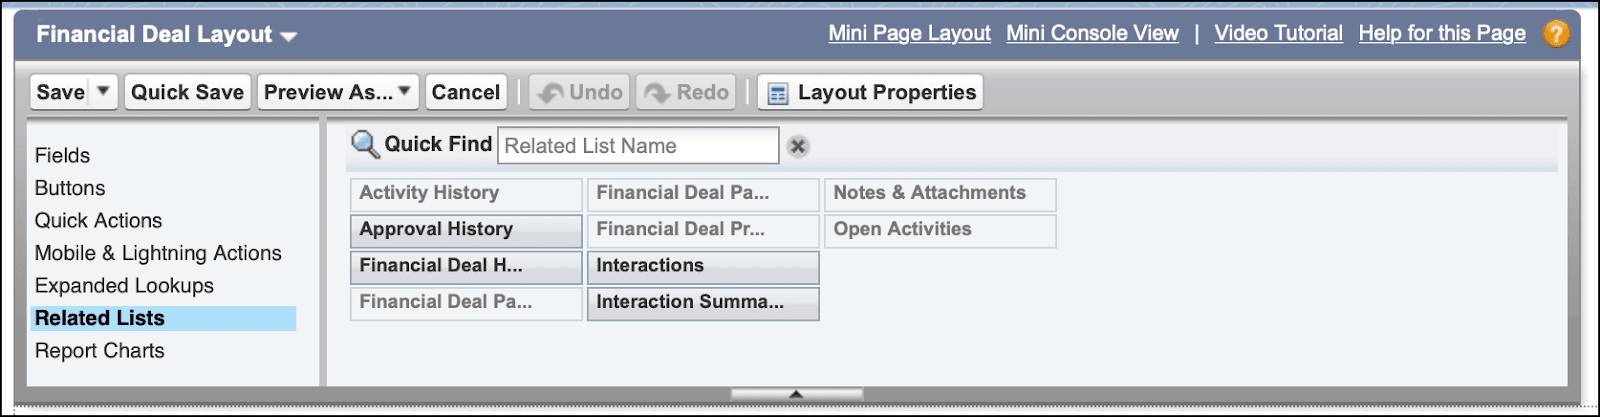
- Drag and drop the Financial Deal Participants field from the object palette to the Related Lists container.

- Click Save.
Great going! You’ve laid the groundwork to get CDS up and running in your org. But users can’t use CDS because they don’t have access…yet. We set that up in the next unit. Onward and upward!
Resources
- Salesforce Help: Set Org-Wide Sharing Defaults for Compliant Data Sharing
- Salesforce Help: Enable Compliant Data Sharing for Objects
- Salesforce Help: Manage Users in Compliant Data Sharing
- Salesforce Help: Configure Page Layouts for Compliant Data Sharing