Configure a Page Designer Page
Learning Objectives
- Explain the difference between the Page Structure and Components views.
- List three important Page Designer configuration settings.
- Note two ways you can control how you display or hide a component.
Explore the Visual Editor
Brandon is eager to scope out Page Designer’s Visual Editor, which is in Business Manager, the Salesforce B2C Commerce configuration and management tool.
In this module, we assume you are a B2C Commerce merchandiser with the proper permissions to perform these tasks. If you’re not a B2C Commerce merchandiser, that’s OK. Read along to learn how your merchandiser would take these steps in a staging instance. Don’t try to follow our steps in your Trailhead Playground because B2C Commerce isn’t available in the Trailhead Playground.
If you have a staging instance of B2C Commerce, you can try out these steps in your instance. If you don’t have a staging instance, ask your manager if there is one that you can use.
Brandon uses the page and component types that come with the Storefront Reference Architecture (SFRA) to create a page with two components: a banner and a carousel.
Create a Page
Here’s how he creates and configures his page.
- Open Business Manager.
- Select your site, or if you are reviewing what comes in the reference code, select RefArch.
- Click Merchant Tools > Content > Page Designer.
 You see the Page Designer landing page with a list of the pages created.
 - Click New.
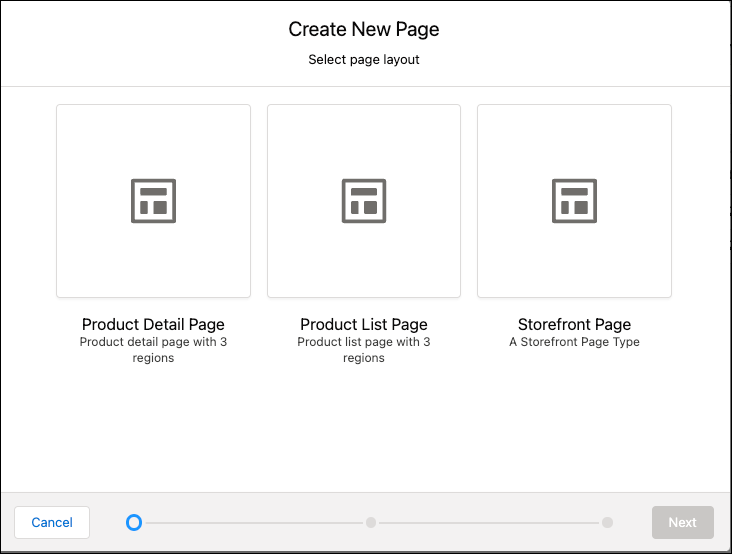
- Select a page type: Product Detail Page
If your developer created customized page and component types, you see other page types. - Click Next.
- Assign one or more categories to the page and click Next.
- Assign one or more products to the page and click Next.
- Select the page language: default (already selected).
- Enter a name:
Cloud Kicks Homepage. Page Designer creates the ID as you type the name. - Enter an optional description:
Cloud Kicks Homepage - Click Next.

- Click Save & Create.
Configure General Settings
Now that Brandon created his page, he can configure the general settings.
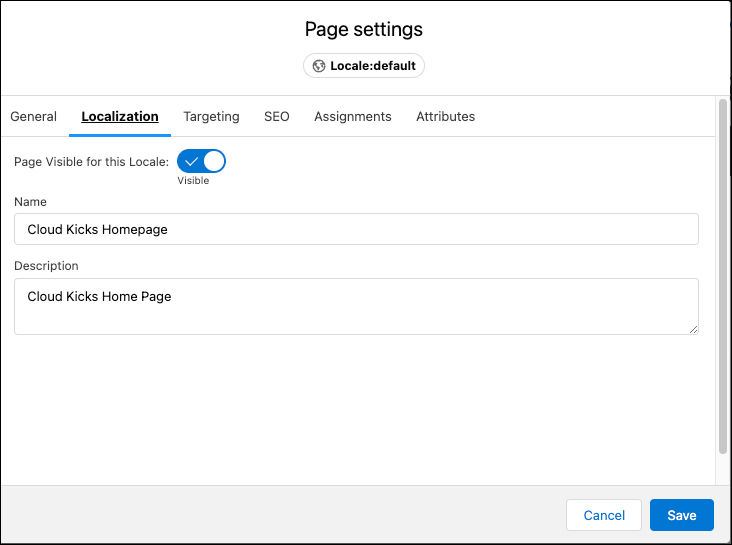
- Click the Page Settings icon.

- The Page settings dialog opens.

- Click the Localization tab and select that the page is visible for this locale. The locale is default. You can use this setting to test new locales. We get into more details about locales soon.
- Click the Targeting tab.
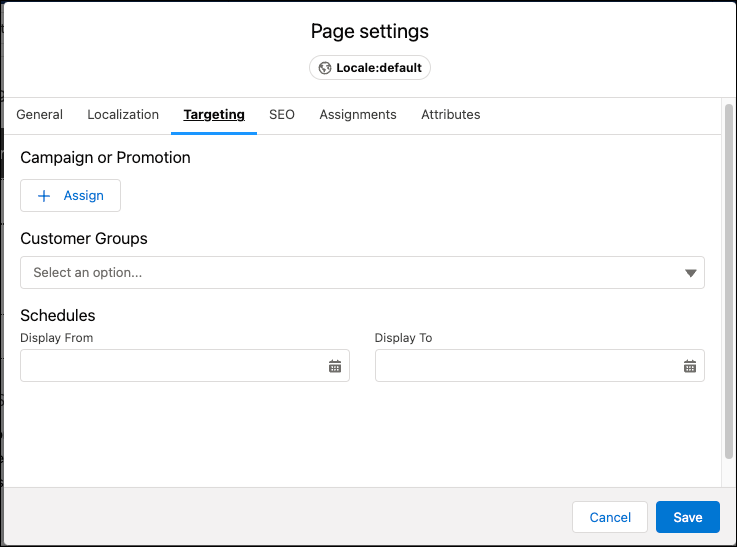
- Assign a campaign or promotion and see the assigned qualifiers.
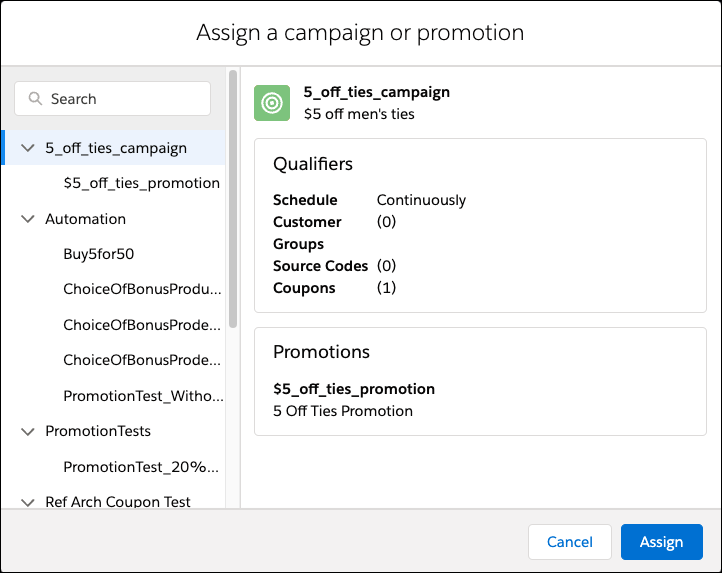
- Click Assign or Cancel.
- Select a Customer Group: Big Spenders
- Select the Display to and from dates. The times correspond to the shopper’s browser time, and not the storefront’s instance time.
- Assign a campaign or promotion and see the assigned qualifiers.
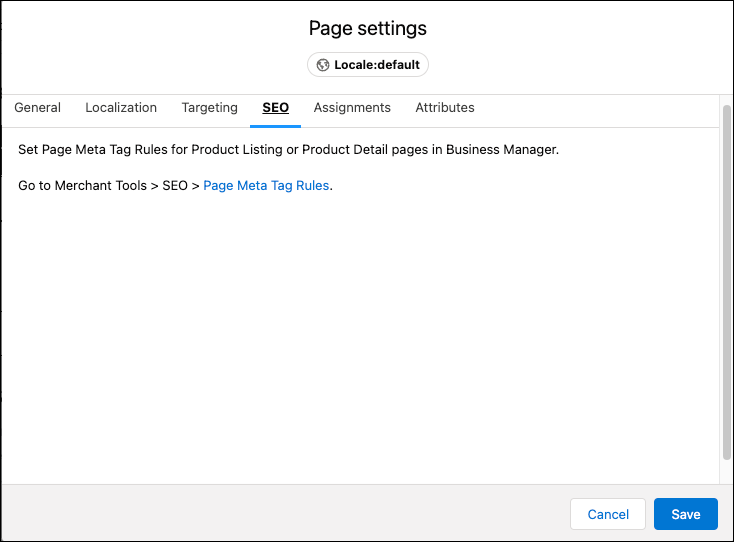
- Click the SEO tab. This is how you can make sure external search engines find your awesome new pages. Configure pages for search engine optimization (SEO) by specifying the Page Address (URL), page title, page description, and up to 10 metadata keywords.
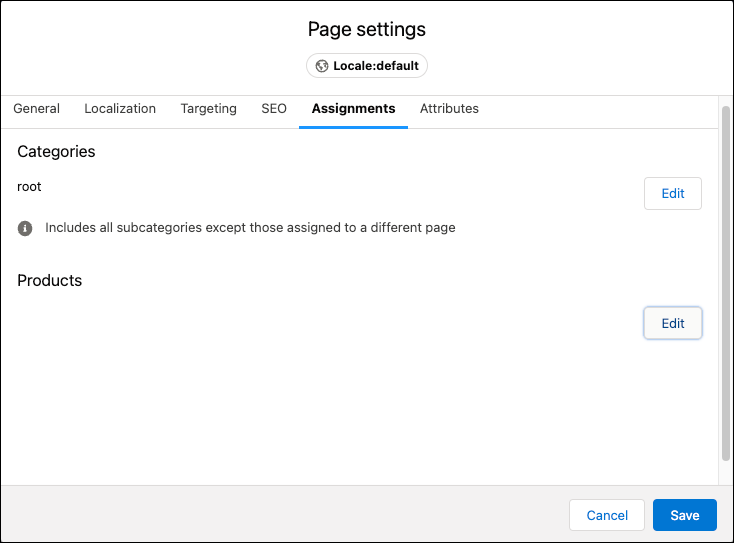
- Click the Assignments tab to edit and view category and product assignments.
- Click Save.
Add a Component
Brandon adds a component to his new page. As you follow along with him in Business Manager, some of the component types you see can be similar to those that your developer created. Brandon uses the SFRA sample component types for now.
Here are the steps he takes.
- Open Business Manager and Page Designer.
- Select the Home Page Cloud Kicks page.
- Click the Components
 icon.
icon. - Select the component Main Banner, and drag it into a region on the page.
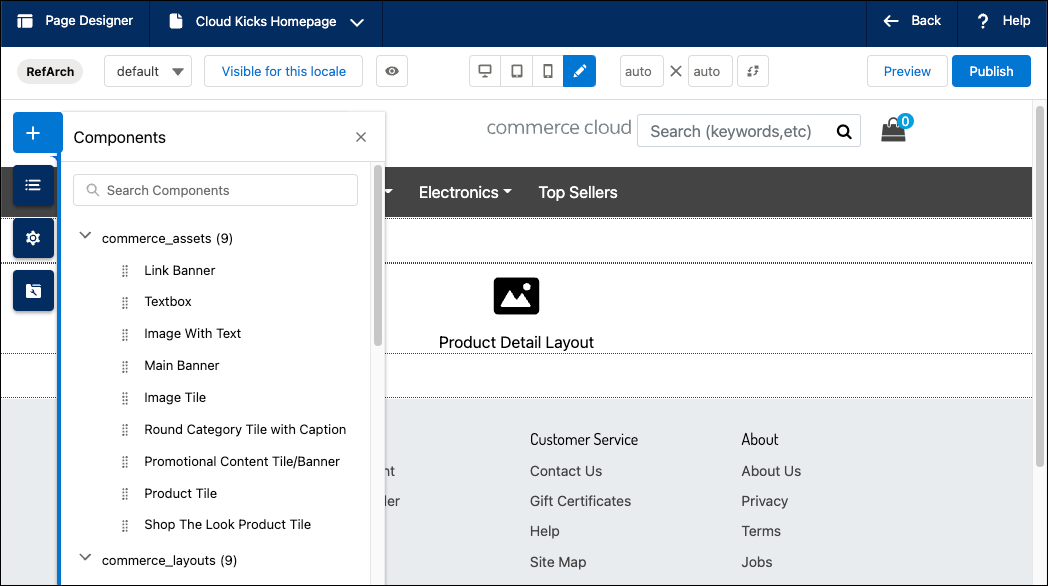
- In the right pane, configure the attributes.
- Click the folder icon and add an Image.

- Scroll down and add the overlay text.
You can format the text using Heading1, Heading2, Heading3, Heading4, and Paragraph tags. When the browser displays the page in the storefront, it formats the text specified by the styles in the CSS files. - Add a category.
- Click the plus sign beside the Category Link field to select a category.
- Drill down to find the category.
- Click the plus sign beside the one you want. The check mark indicates success.
- Click Save. The new page displays in the center pane. This is what appears on the storefront.

You can see how excited Brandon is to use this capability.
Notice the little circle on the graphic in the right pane. You can move the circle to change the focus.
What About Locales?
Cloud Kicks is expanding internationally, and that means reaching shoppers in their own language. B2C Commerce is designed for localization, and Page Designer uses this capability. Brandon starts by defining a fallback hierarchy in Business Manager. For example, he configures this hierarchy.
fr_CA (French Canadian) > fr (French) > default
It’s a best practice to create text in your base language, and name it default. Then, when you create a page, B2C Commerce adds a variant of the page to its database for each locale in the fallback hierarchy as configured in Business Manager. You can use these page variants to localize components for each locale.
Brandon creates his content in his base language, which is English, and leaves localization to the experts. When he creates a Page Designer page in the default locale, B2C Commerce also creates page variants for fr_CA and fr. He can localize content for each page variant at the component level, or show the content for a component according to the fallback hierarchy.
Until he receives the localized French Canadian text and images for a component on the French Canadian (fr_CA) page from his translator, B2C Commerce displays French (fr) content on that page. If he doesn’t have the French (fr) content, B2C Commerce automatically shows the default content.
Brandon finds it easy to check what's happening with his locales in Page Designer as he takes the next steps.
- Open Business Manager and Page Designer.
- Select the Home Page Cloud Kicks page.
- Select the fr-CA locale.
- Select the Page Structure component and the Product Detail Layout that you just created.

- Click in the right pane to access the text overlay.
- Move your mouse over each component on the page.
- A pink box encloses components with no localized content, and labels them Fallback, which means that the content displays according to the fallback hierarchy.
- A blue box indicates localized components.
- Select the component that you want to localize.
- In the right pane, change the text or images.
- Click Save. A blue box encloses the localized component